From Bright Pattern Documentation
< 5.3:Tutorials-for-admins | Chat
Revision as of 04:10, 29 May 2024 by BpDeeplTranslateMaintenance (talk | contribs) (Updated via BpDeleteTranslateTags script)
How to Remove the Call Option from Service Chat Sessions
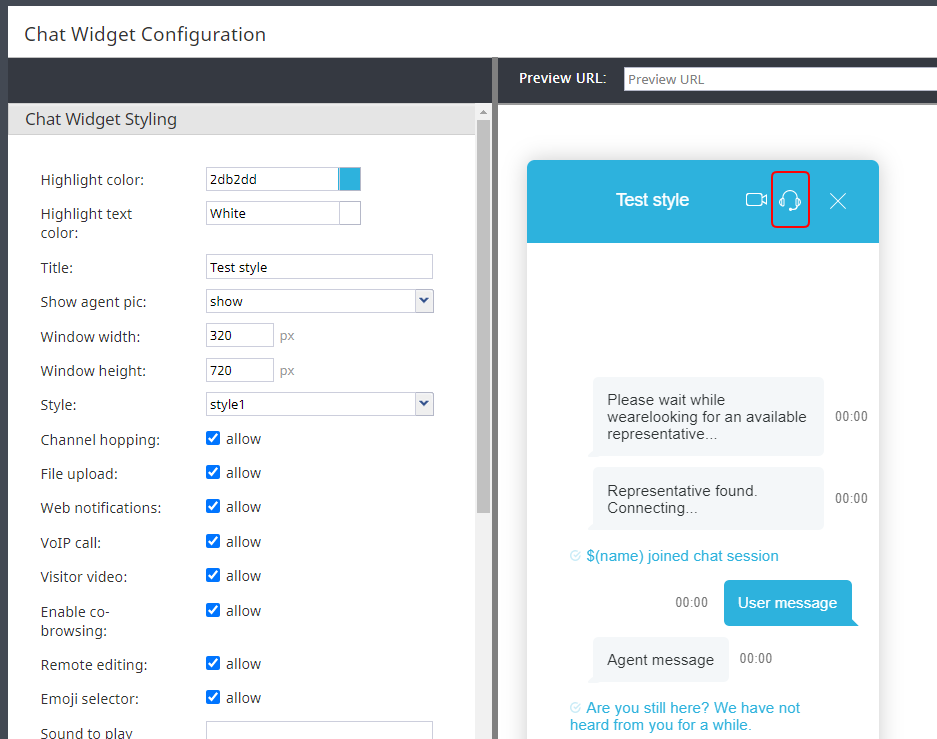
During active chat sessions, agents and customers have the ability to initiate VoIP calls (i.e., audio only) by simply clicking the headset button. The option to have audio-only calls via chat is enabled and disabled during chat widget configuration.
This article will show you how to remove the headset button from service chat sessions, so that neither agents nor customers have the option to have a voice call during a chat.
Procedure
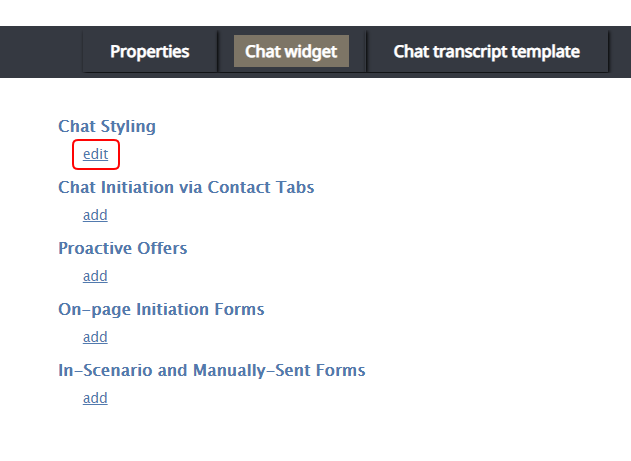
- In the Contact Center Administrator application, section Configuration > Scenario Entries > Messaging/Chat, select the chat scenario entry you wish to edit, and click the Chat Widget tab.
- Beneath Chat Styling, click edit to edit the chat widget's style properties.
- In the Chat Widget Configuration editor that opens, notice that the preview widget shows the headset button. This is the button that will be removed.
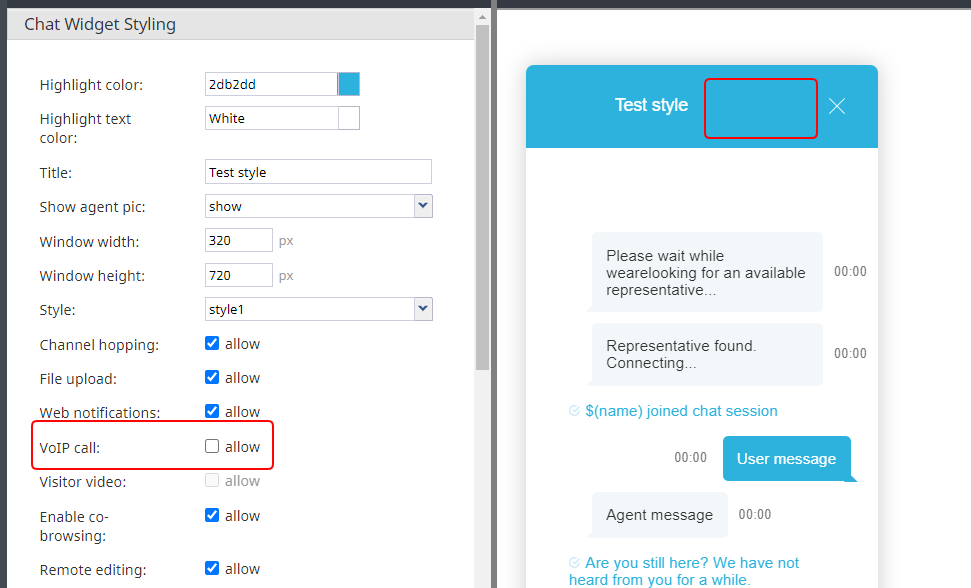
- In Chat Widget Styling properties, deselect the allow checkbox for VoIP call. Note that this action removes the both headset button and the visitor video button from the chat widget (because video chat uses VoIP for the audio portion of the video call).
- At the bottom of the page, click Save to save your changes.
< Previous | Next >


