How to Solicit Post-Transactional Surveys via Email
Survey forms are designed to be emailed your customers after interactions are completed. Email interactions are not dictated by scenario, so while it is not possible to utilize the interactive survey features associated with chat or voice scenarios, survey forms provide you an opportunity to request satisfaction input.
Survey forms are created and edited in the Survey Form Editor application and can be distributed by post-transaction workflows. Additionally, a single survey form may be configured in any number of required languages. Note that survey forms are associated with the quality management features of Bright Pattern Contact Center software and are different from the forms configured in the Form Builder application.
Note: Although this article outlines how to solicit surveys based on email interactions, the process may be applied for voice or chat interactions, too.
Prerequisites
This example requires you to have a configured email service with dispositions, an email scenario entry, as well as a working SMTP configuration.
Additionally, if you wish to map custom fields to questions on your form, you will need to configure them first in the Contact Center Administrator application, section Custom Survey Fields.
Procedure
The following sequence of actions illustrates the steps necessary to take in the various Bright Pattern Contact Center applications in order to send post-transactional surveys via email.
Step 1: Define a Form in Contact Center Administrator
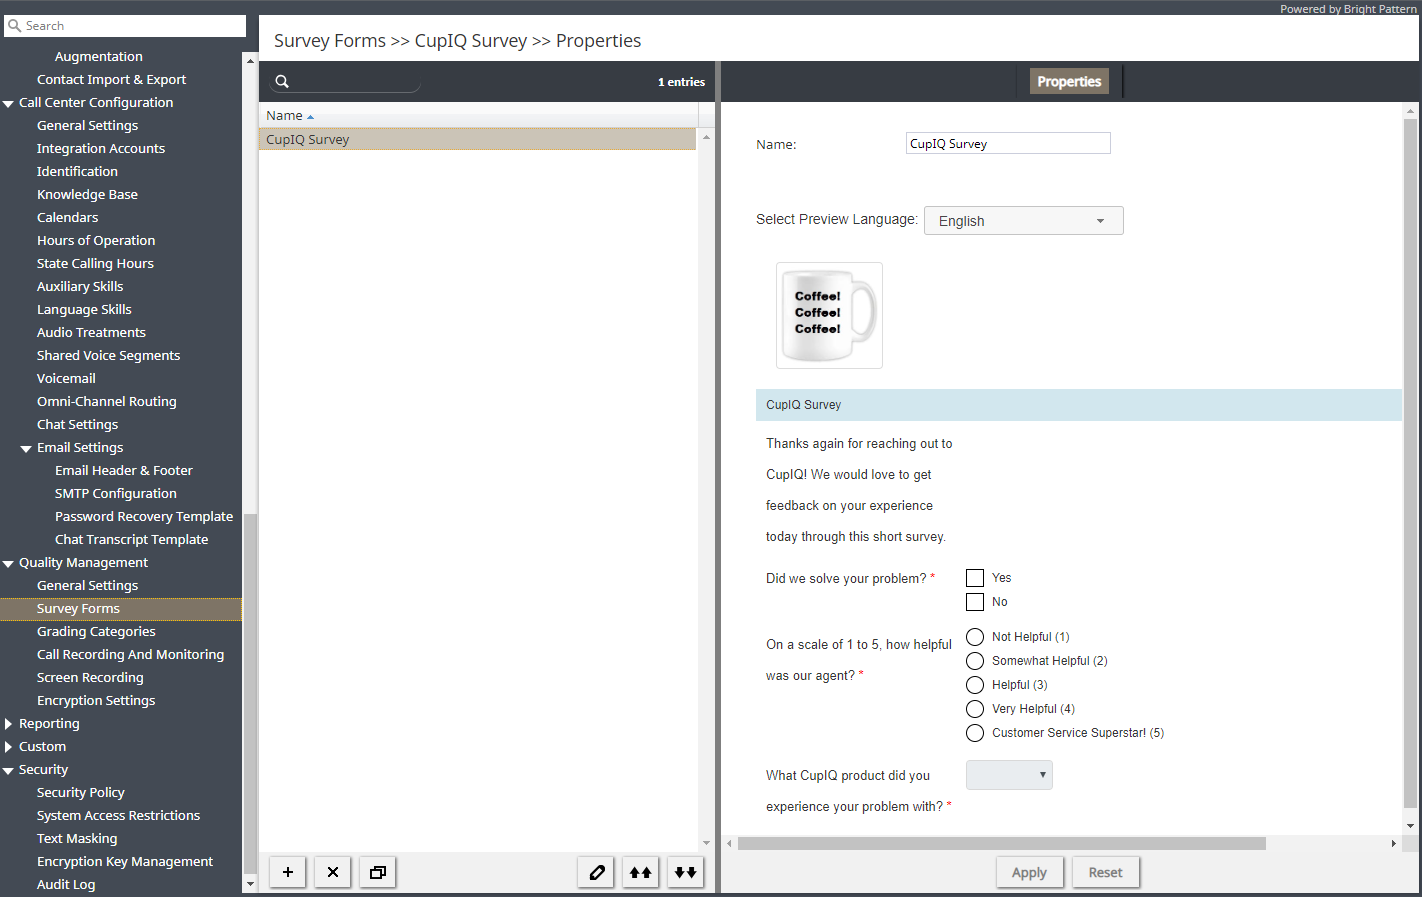
In the Contact Center Administrator application, section Quality Management > Survey Forms, click the Add new form button; this will launch the Survey Form Editor application.
Step 2: Create Your Form in Survey Form Editor
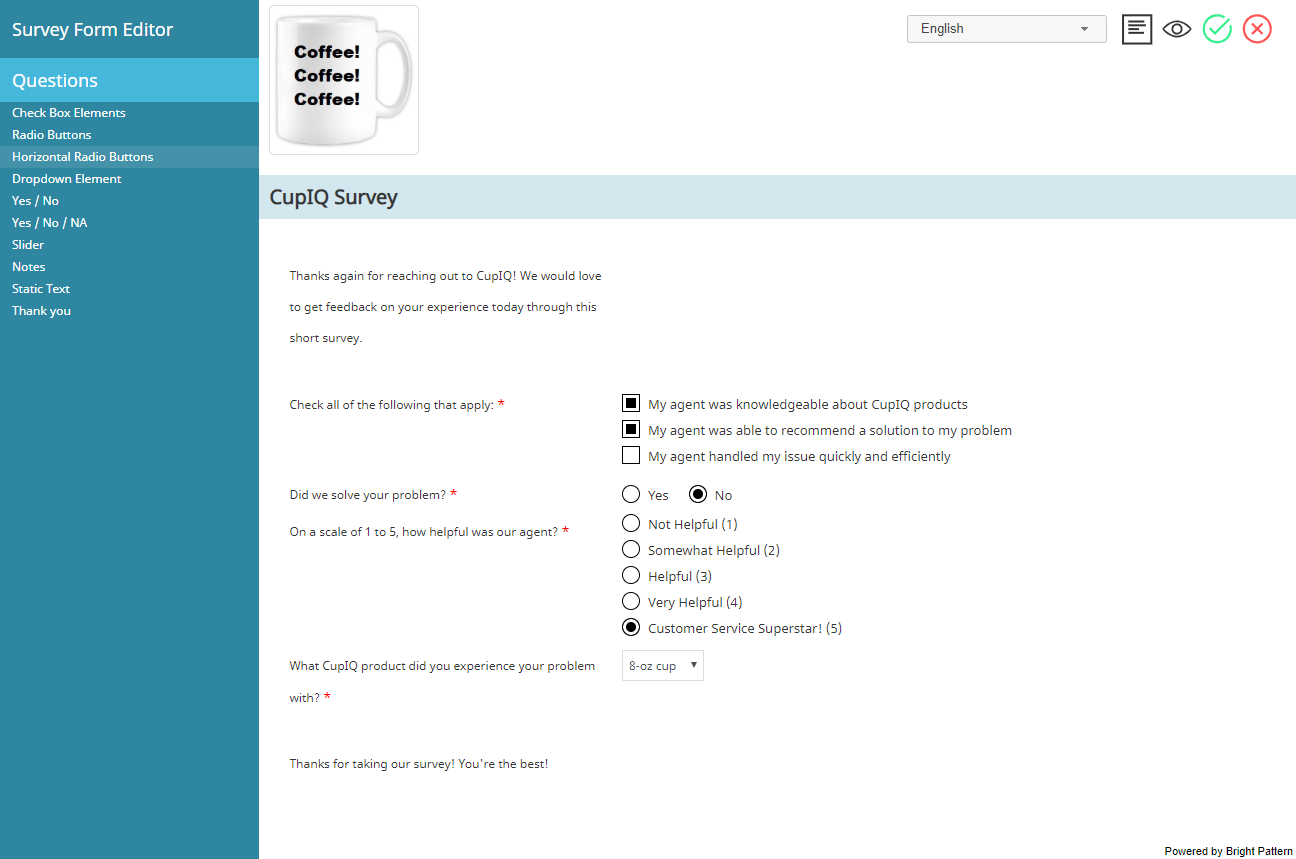
In the Survey Form Editor application, you will configure how your form looks, what questions it will have, and what languages it will be available in; this is accomplished by using the form controls and settings. Note that certain questions can have reporting metrics or fields mapped to them; these values will then appear on reports.
Step 2a: Understanding Basic Form Controls
To define a new question for your form, select the corresponding control from the control palette, drag it to the desired location on the canvas, and specify its settings in the properties editor.
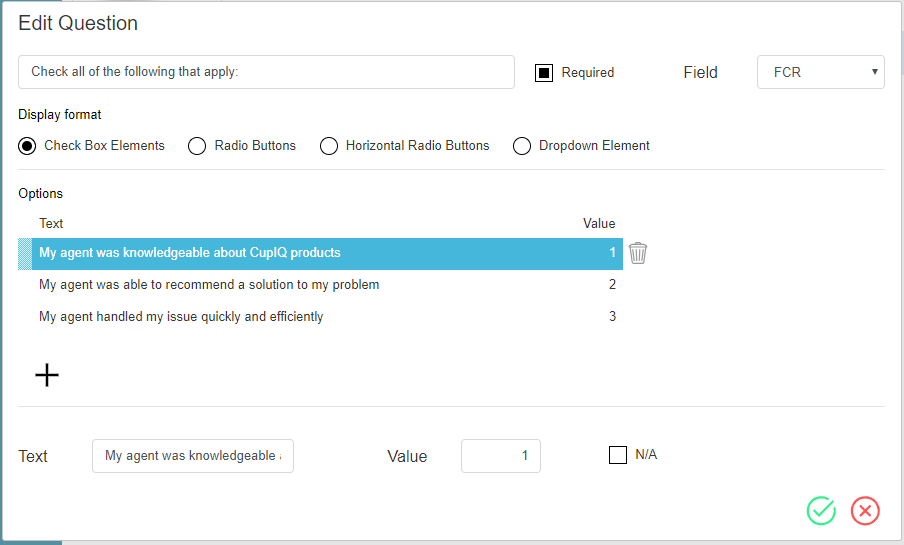
Notice these form controls and elements:
- Text is the field where you add the text of your option/answer.
- Value is the field where you may enter a number or unique value that will be associated with this option; values can be passed to reports.
- N/A checkbox, when selected, prevents any value being associated with the option.
- Field drop-down menu allows you to select reporting metrics/fields to map to a given question. The following field options are available:
- CSAT
- FCR
- NPS
- Any custom fields created in the Contact Center Administrator application, section Custom Survey Fields
When you are finished configuring your form, click Save . If you are saving a form for the first time, you will be prompted to name your form in a pop-out window.
Step 2b: (Optional) Configure Your Form in Different Languages
When creating your form, the default language is the language of your contact center. To create a new version of your current form in a different language, do the following:
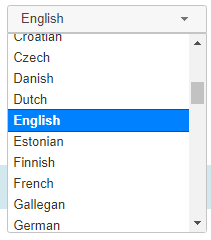
- After having saved your form in the original language, select a new language from the drop-down language selector.
- Begin changing the language of the current questions to the new language; also, you may add new questions.
- Click the Save
icon; your form will be configured in two languages.
- Repeat this process for as many languages as you require. Note that you may preview forms in the Properties pane in section Survey Forms.
Step 2c: (Optional) Customize the Look of Your Form with Custom CSS
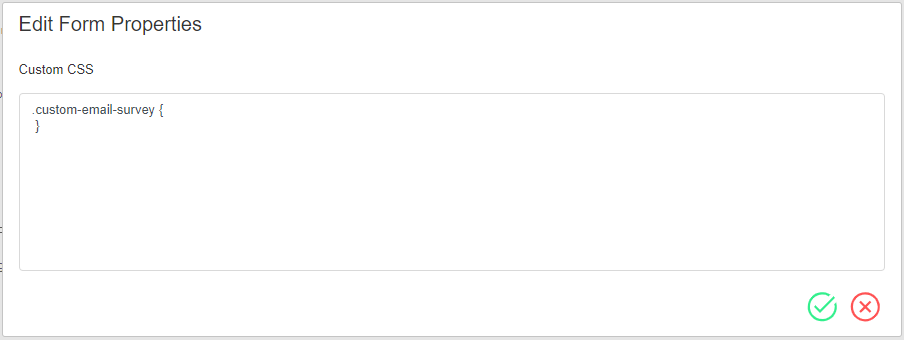
Note that it is possible to edit the look of your form by using custom CSS. To launch the CSS editor, click the Edit form properties icon. To preview your form, select the Preview
icon.
Step 3: Configure a Workflow
When your survey form is complete, you will need a way to distribute it via email that happens post-interaction; this can be accomplished with a workflow.
Configuring a workflow to send a survey form requires an EMail block. It is recommended that you add a Wait block as well (see Wait Block Settings, below).
EMail Block Settings
When configuring the settings for this block note the following:
- In order for the survey to be sent to the correct customer's email address, enter the $(item.from) variable in the To: Address(es) field; this variable pulls in the email address of the customer whose email has been assigned the correct disposition.
- In the Template language field, you should enter the ISO language code associated with the selected language (e.g., "en" for English, "ja" for Japanese, etc.).
- When composing the message body, click the Survey link button, and select the appropriate form from the drop-down menu; selecting the form inserts the survey URL into the body of your message.
Wait Block Settings
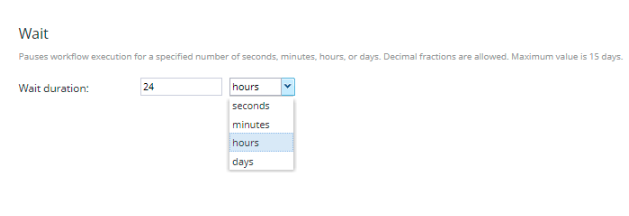
Note that for surveys sent via workflows, the survey arrives faster than email. When soliciting post-transactional surveys via email, we recommend adding a Wait block to the workflow and specifying a Wait duration of 24 hours, as shown. Doing so will delay the workflow for 24 hours before sending the survey, ensuring that the survey is available for the customer to read when they answer the email.
Step 3b: (Optional) Send a survey form in a different language
If you configured your survey form in a different language (from step 2b of this procedure), follow these steps to configure an EMail block in that specific language and insert the survey form link associated with it. In this example, we will be sending a survey in Japanese.
- Create a Japanese version of your survey form (from Step 2b above).
- Configure a workflow with an EMail block (from Step 3 above).
- In the EMail block settings, make sure that the Template language field contains the correct language value (e.g., "ja"), or that it refers to a variable containing the correct language.
- Create a Japanese version of the email body and insert survey link (from Step 3 above). The link will look like this:
https://<tenant>.brightpattern.com/clientweb/survey/$(item.globalInteractionId)/$(item.interactionId)/<survey_name>?lang=ja&tenantId=xxxxxxxx-xxxx-xxxx-xxxx-xxxxxxxxxxxx - Save the workflow with a new name (e.g., "CupIQ Survey - Japanese") so you can differentiate this survey from others in different languages.
Step 4: Add a Workflow Entry to your Workflow
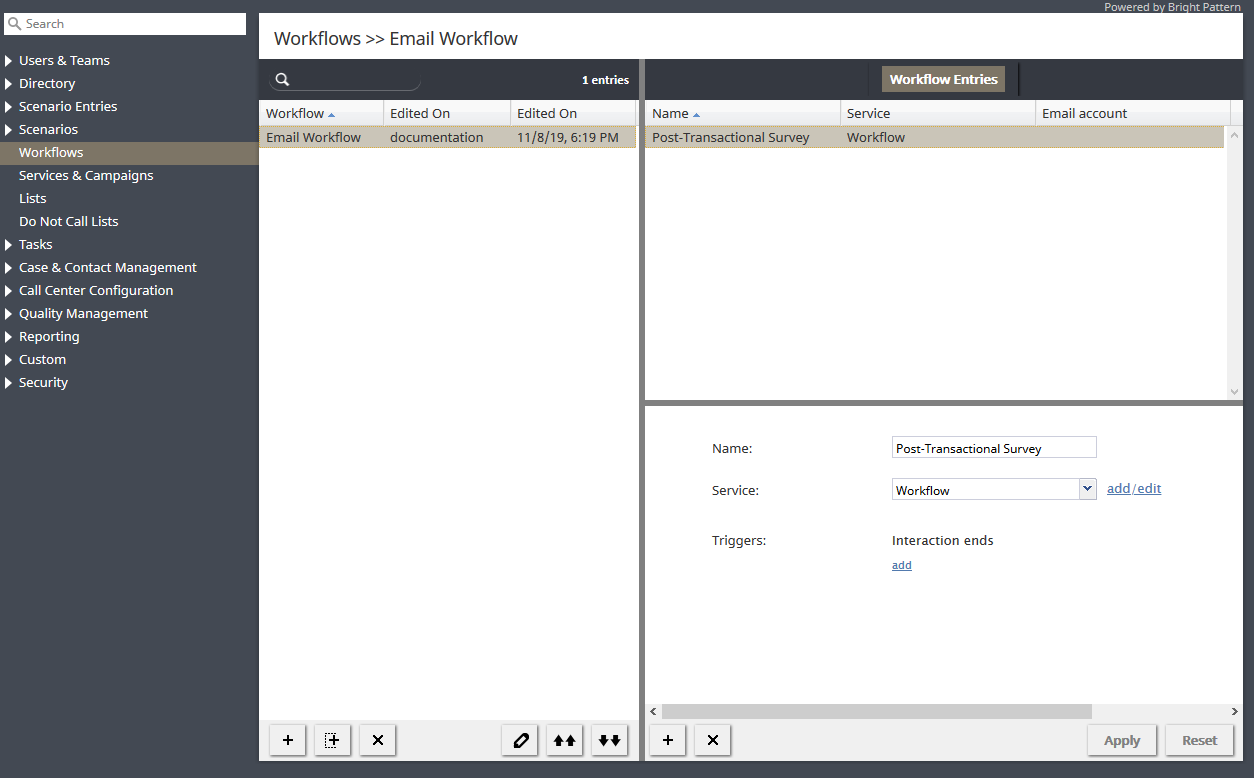
When you are finished configuring your workflow, you will need to create a workflow entry; this associates the workflow with your configured service. To send the email post-transaction, do the following:
- Select the service from the drop-down menu
- Configure what triggers (i.e., dispositions) will launch the workflow.
Troubleshooting
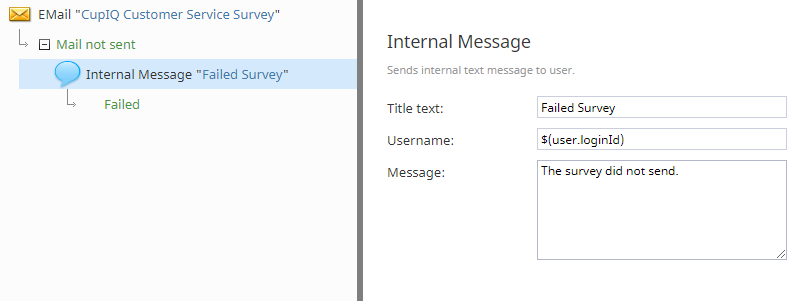
If your workflow is giving you trouble, you can configure the EMail block's Mail not sent conditional exit with the Internal Message block; this sends a message to a specific Agent Desktop user if the email was not sent.

