From Bright Pattern Documentation
m |
|||
| Line 3: | Line 3: | ||
In the Contact Center Administrator application, | In the Contact Center Administrator application, | ||
| − | # Navigate to [[contact-center-administrator-guide/ReportTemplates|Report Templates]]. | + | # Navigate to [[contact-center-administrator-guide/ReportTemplates|Report Templates]].<br /><br /> |
| − | # Click '''+''' to add a new report template. | + | # Click '''+''' to add a new report template.<br /><br /> |
| − | # Specify the report name and category, and click '''upload'''. | + | # Specify the report name and category, and click '''upload'''.<br /><br /> |
| − | # Select the template you saved previously. | + | # Select the template you saved previously.<br /><br /> |
# Click the '''Upload''' button. | # Click the '''Upload''' button. | ||
| − | [[File:reporting-db-spec-image9.png|thumb| | + | [[File:reporting-db-spec-image9.png|thumb|800px|center|]] |
| − | |||
</translate> | </translate> | ||
Revision as of 17:05, 29 August 2018
Uploading Modified Report Templates
Once you have finished customizing your report template, you can upload it to the Contact Center Administrator application and put it to use. Revised report templates are available for use as soon as they are uploaded.
In the Contact Center Administrator application,
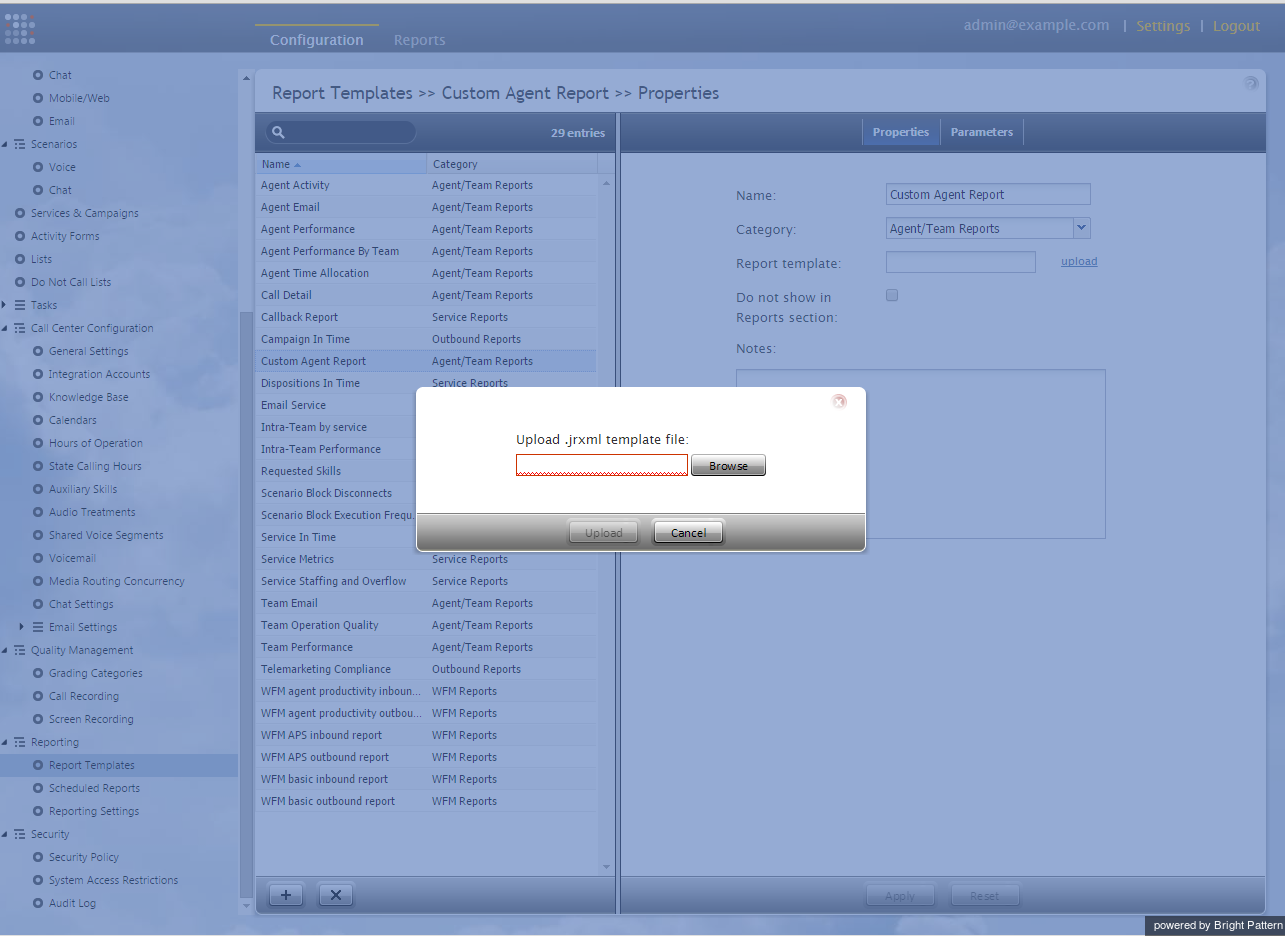
- Navigate to Report Templates.
- Click + to add a new report template.
- Specify the report name and category, and click upload.
- Select the template you saved previously.
- Click the Upload button.

