From Bright Pattern Documentation
• 5.19
Configure the Dialing Restrictions Default Class
Contact Center Administrator > Dialing Restrictions > Default Class > Destinations Tab
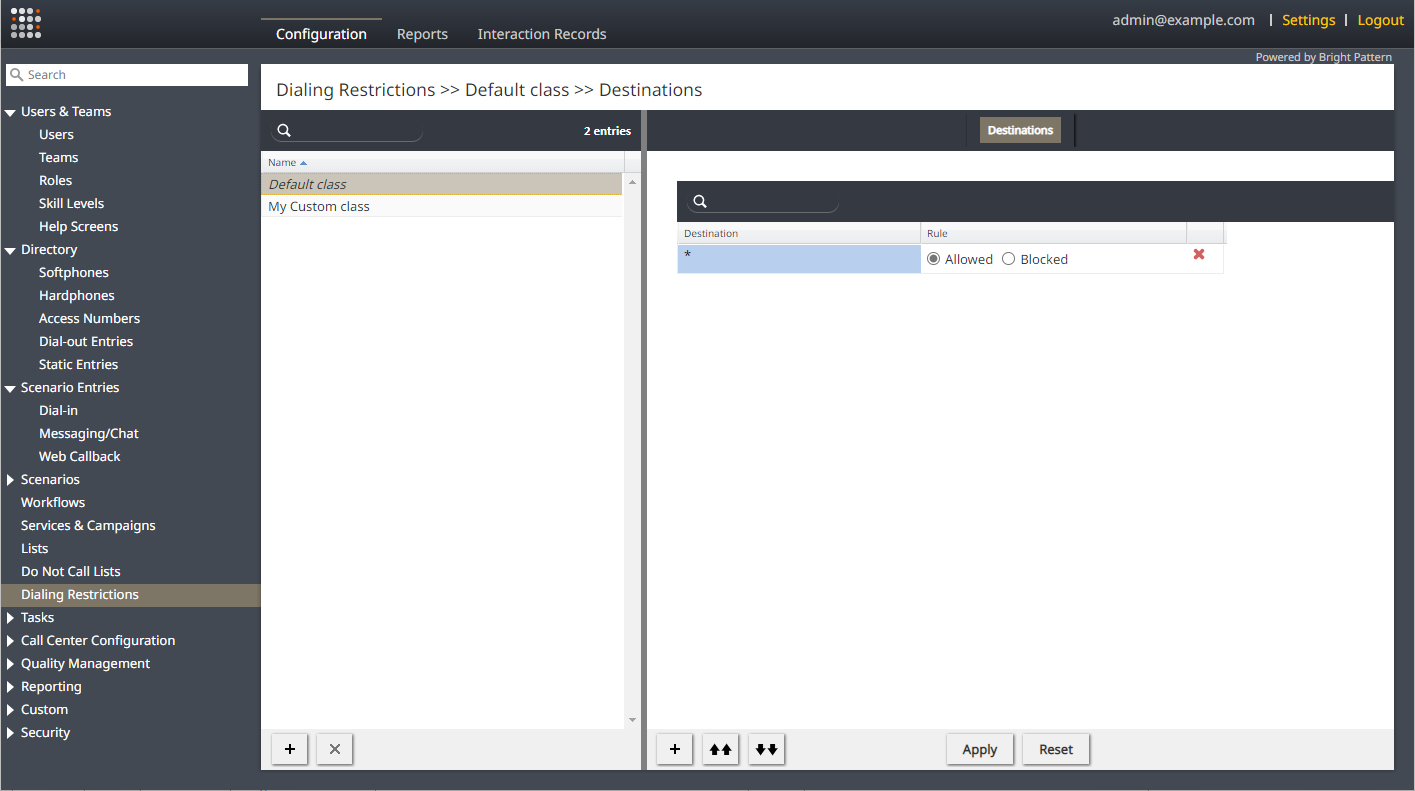
The Dialing Restrictions feature comes with a default class that allows all outbound calls. This default class has a single Destination, which is an asterisk (*). The asterisk (*) represents all destinations. The Rule for the default class is set to Allowed, which means all outbound calls are allowed unless a custom class overrides a destination in the default class.
The default class can be modified to allow or block specific destinations. To do this, you add or remove destinations from the default class and set each to Allowed or Blocked.
| Deleting all Destinations and Rules from the default class prevents all outbound dialing unless a custom class at the team or service level overrides the default class. | ||
To configure the default class:
- Log in to Contact Center Administrator.
- Navigate to the menu item Dialing Restrictions.
- Click on Default class.
Add a Destination
- In the Destinations tab, click the + icon. A pop-up dialogue appears.
- Choose the status of Allowed or Blocked.
- Click OK.
- Click Apply to save the changes.
Remove a Destination
- In the Destinations tab, locate the destination.
- Click the red X attached to the destination.
- Click Apply to save the changes.
Change a Destination Rule
- In the Destinations tab, locate the destination.
- Click either Allowed or Blocked.
- Click Apply to save the changes.
See also:

