Configure WhatsApp Messenger for Integration with Bright Pattern Contact Center
Integrating WhatsApp Messenger with Bright Pattern Contact Center requires a Bright Pattern Contact Center integration account. The connection parameters page in Bright Pattern Contact Center administrator requires an API URL, a phone number ID, a business account ID, an access token, and an account ID.
For more information about the Bright Pattern Contact Center integration connection parameters page, see Integrate WhatsApp Messenger with Bright Pattern Contact Center.
These instructions describe how to set up your WhatsApp Business settings to get the required values to fill in the Bright Pattern Contact Center integration account connection parameters page.
Configuring the App
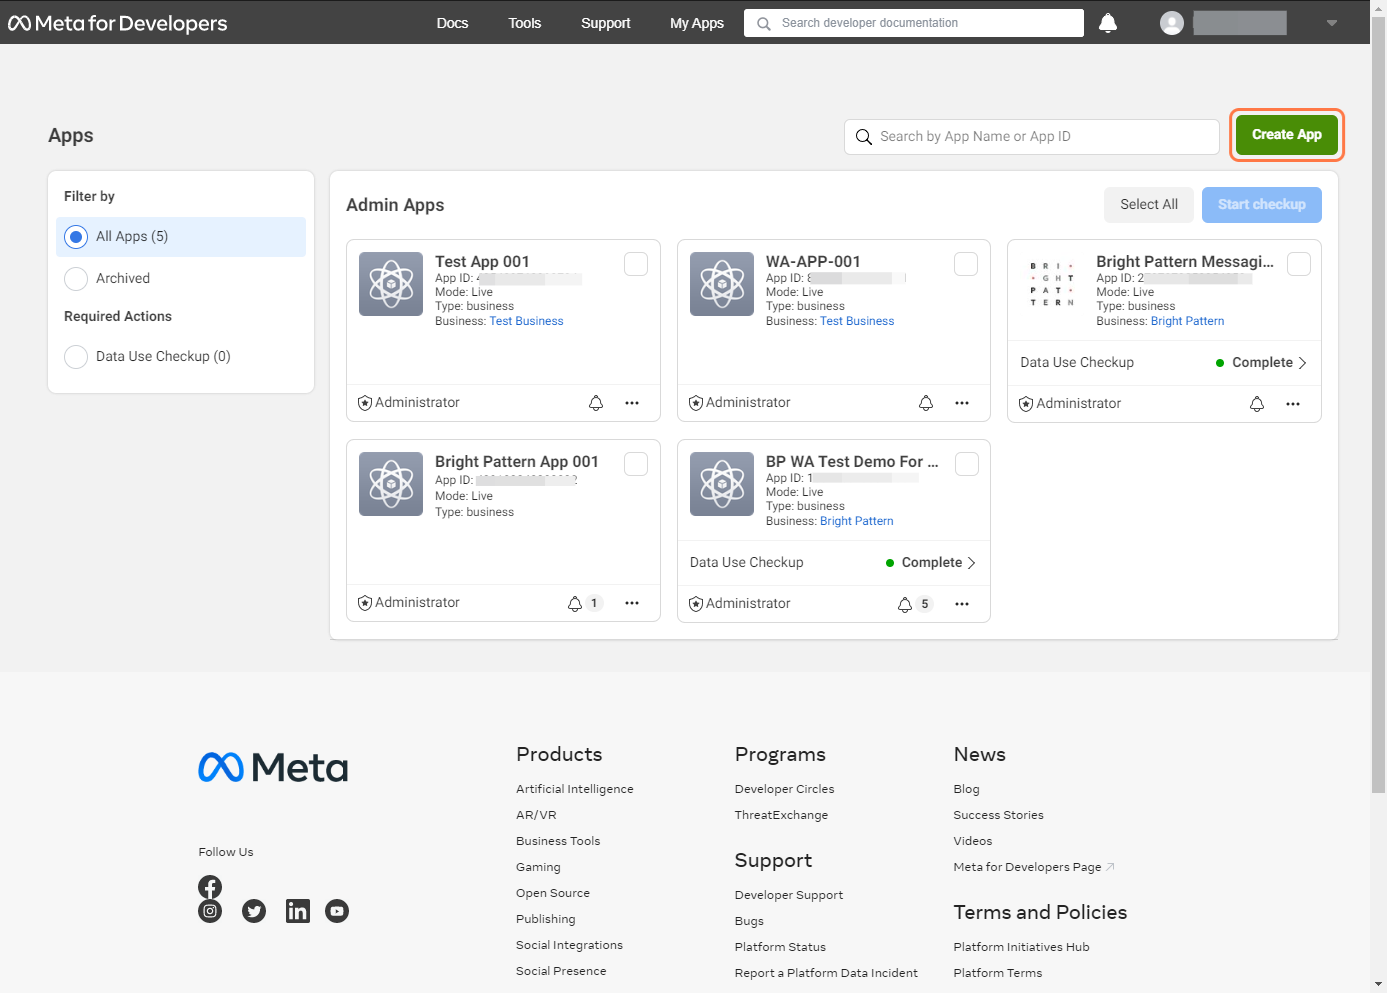
1. Go to [developers.facebook.com].
2. Click Create App.
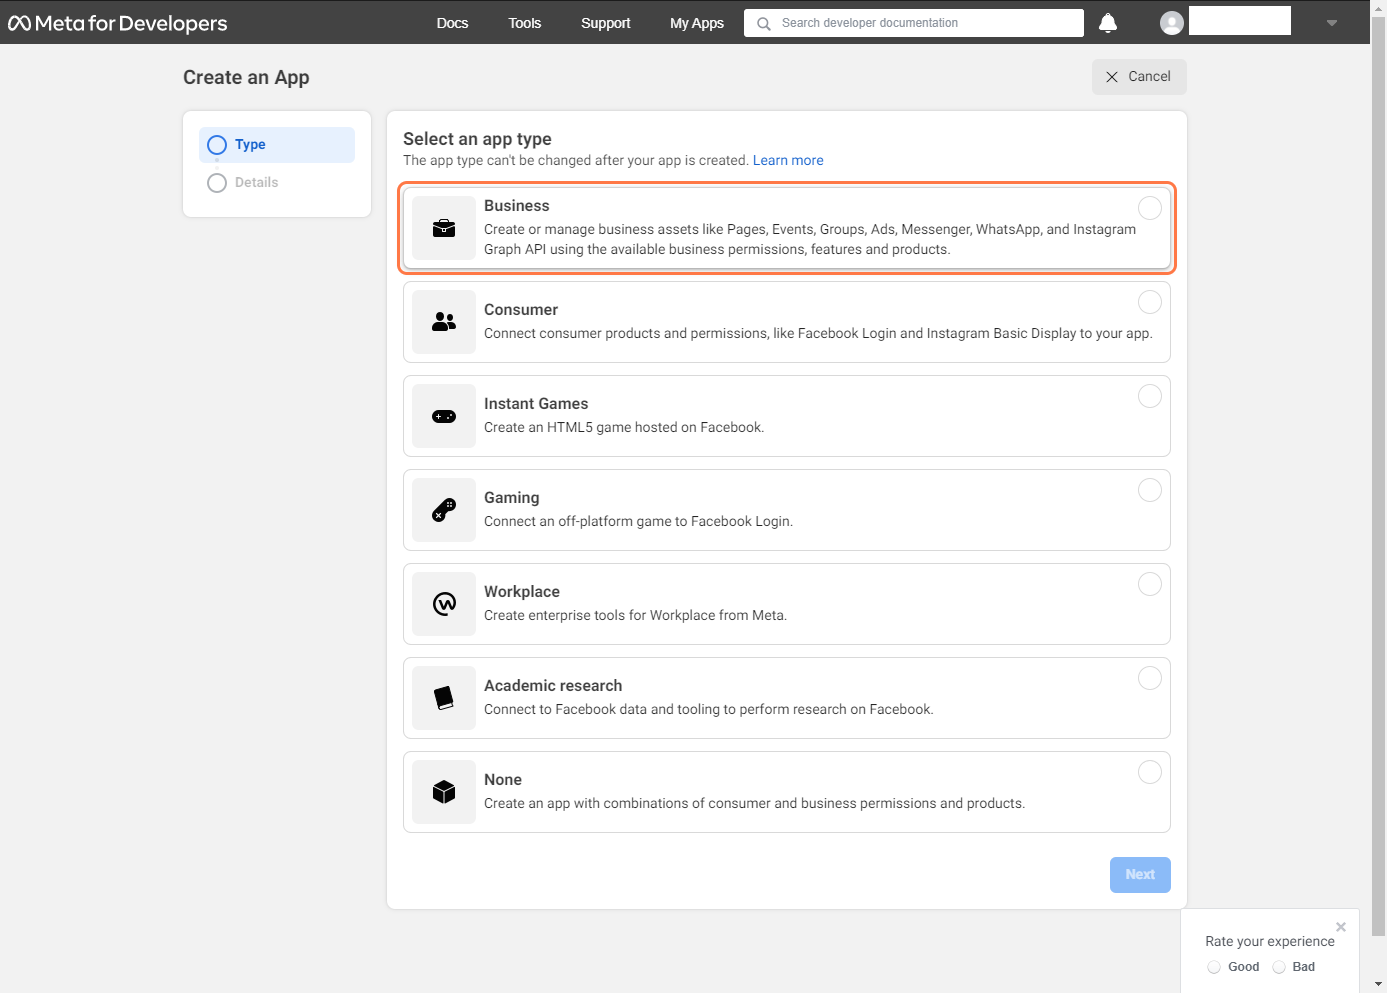
3. Select Other, then click the Next button.
4. Select Business as the app type, then click Next.
5. Enter values for your app name and app contact email, then click Create app.
6. Find the WhatsApp tile, then click Set up.
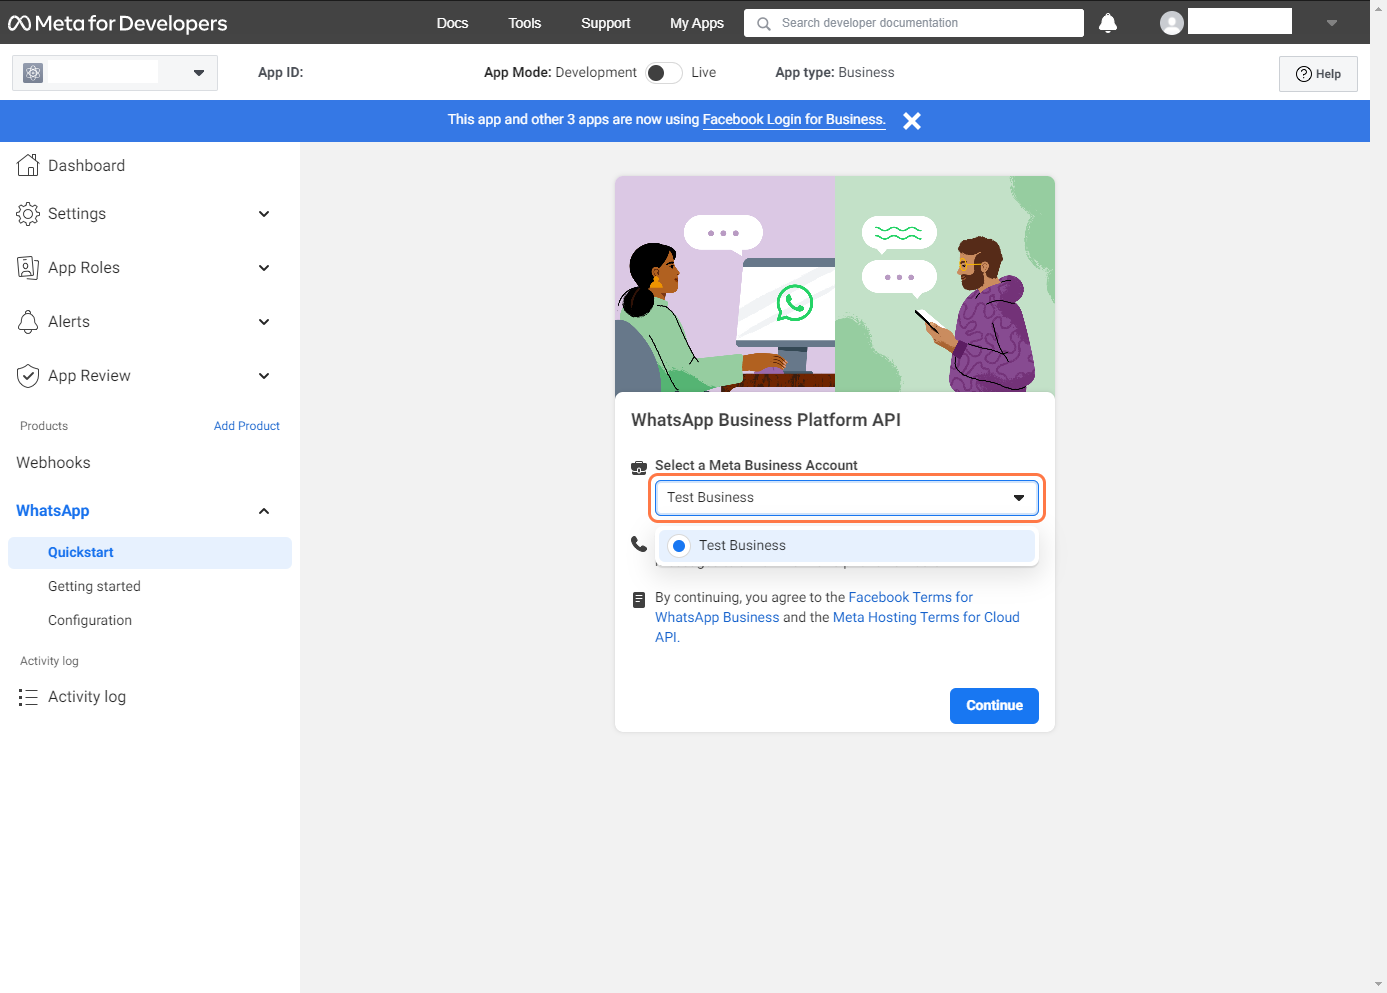
7. Select your Meta Business account, then click Continue.
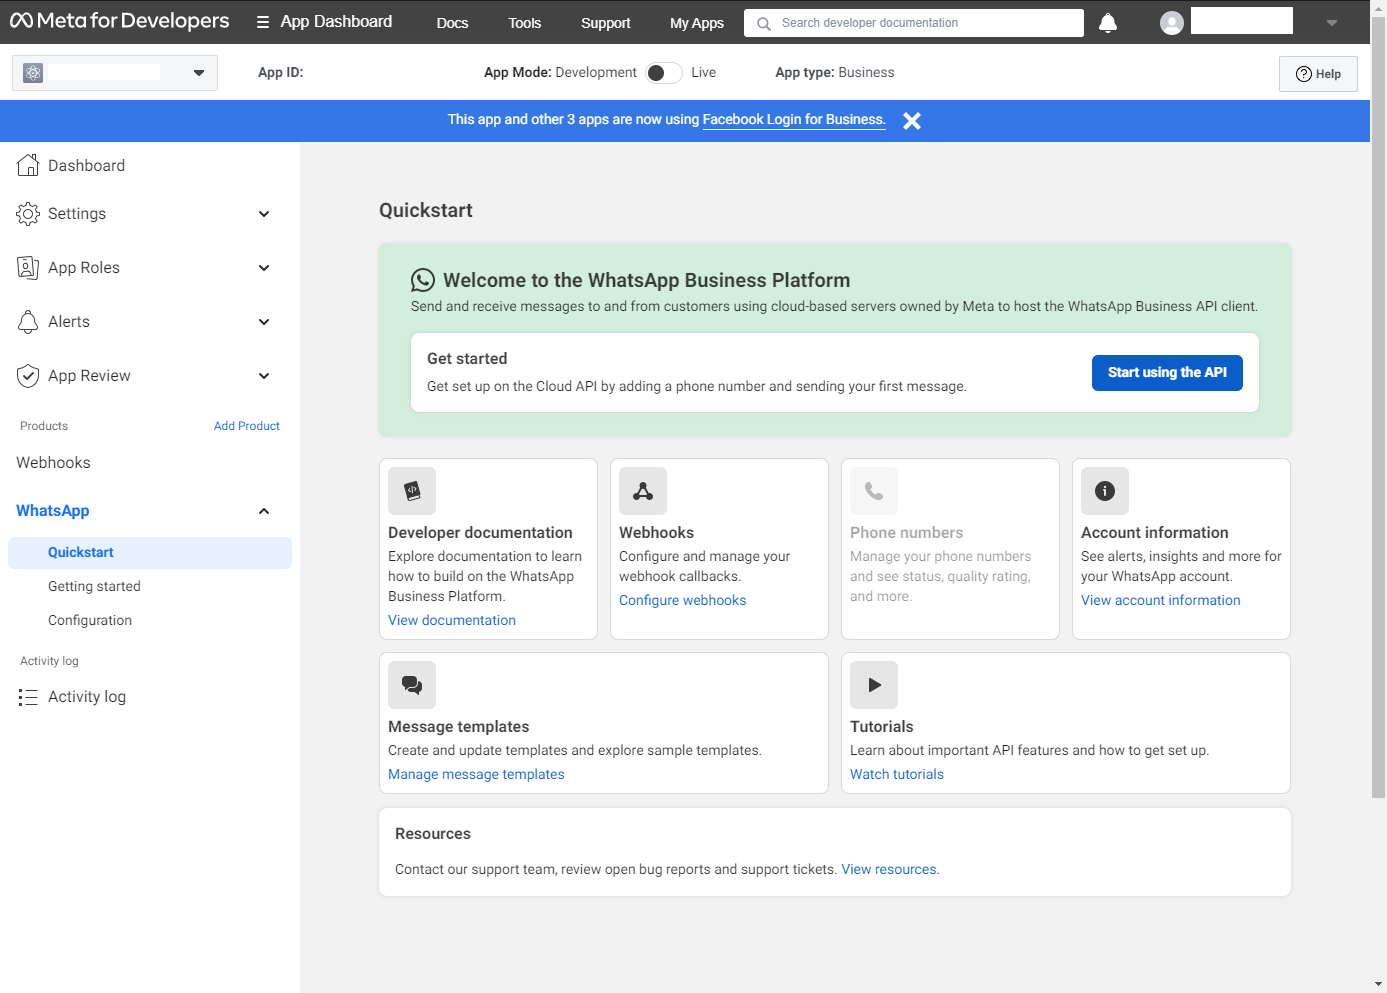
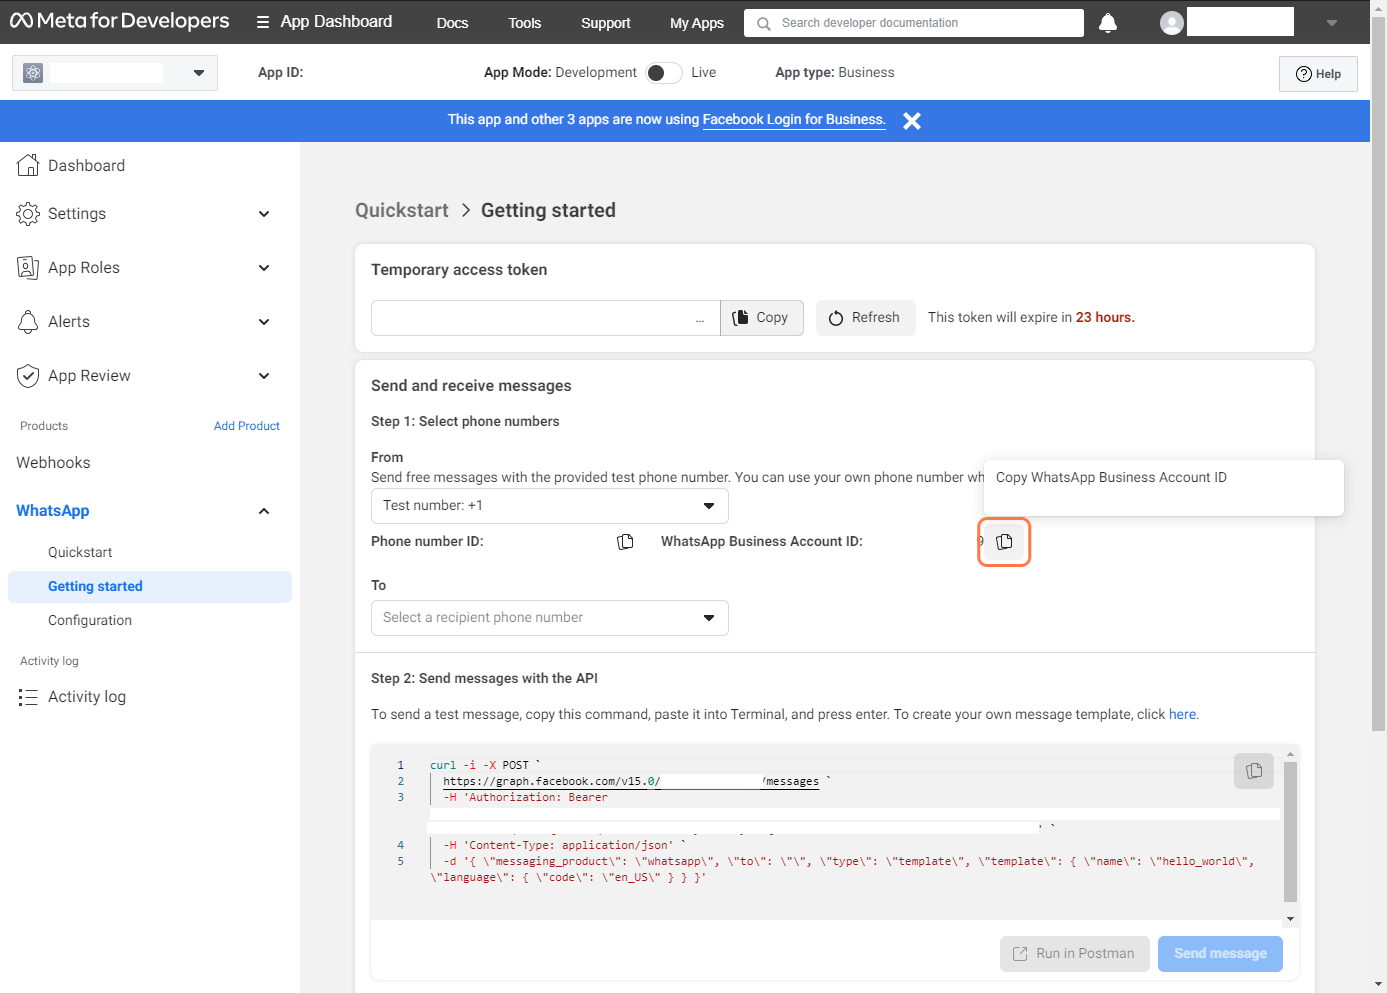
8. Click on Start using the API.
9. The parameters displayed will be the temporary credentials needed in your Bright Pattern Contact Center integration. Such as: Phone ID, Access Token, Business Account ID. For production-ready parameters, see the sections below.
Adding a Phone Number
10. After setting up your app, scroll down to step 5 and click the Add a phone number button - you may add any phone number you own, as long as it's not associated with Whatsapp already, e.g. Whatsapp or Whatsapp Business mobile apps. You will be asked to confirm number ownership by SMS or a voice call. We recommend using an access phone number in your Bright Pattern account so you could handle voice calls and text messages on the same number as Whatsapp.
You'll be asked to fill in details about your business:
Then prompted to enter the phone number:
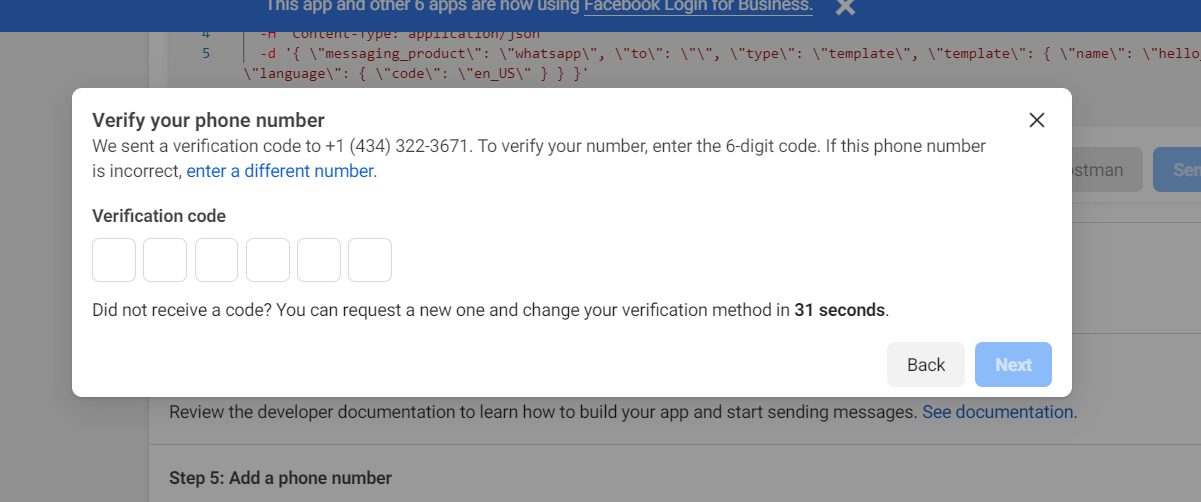
11. When you are ready, verify your phone number.
12. Use (copy/paste) the Phone ID given on the previous step in Bright Pattern Integration account settings.
Create a Permanent Token
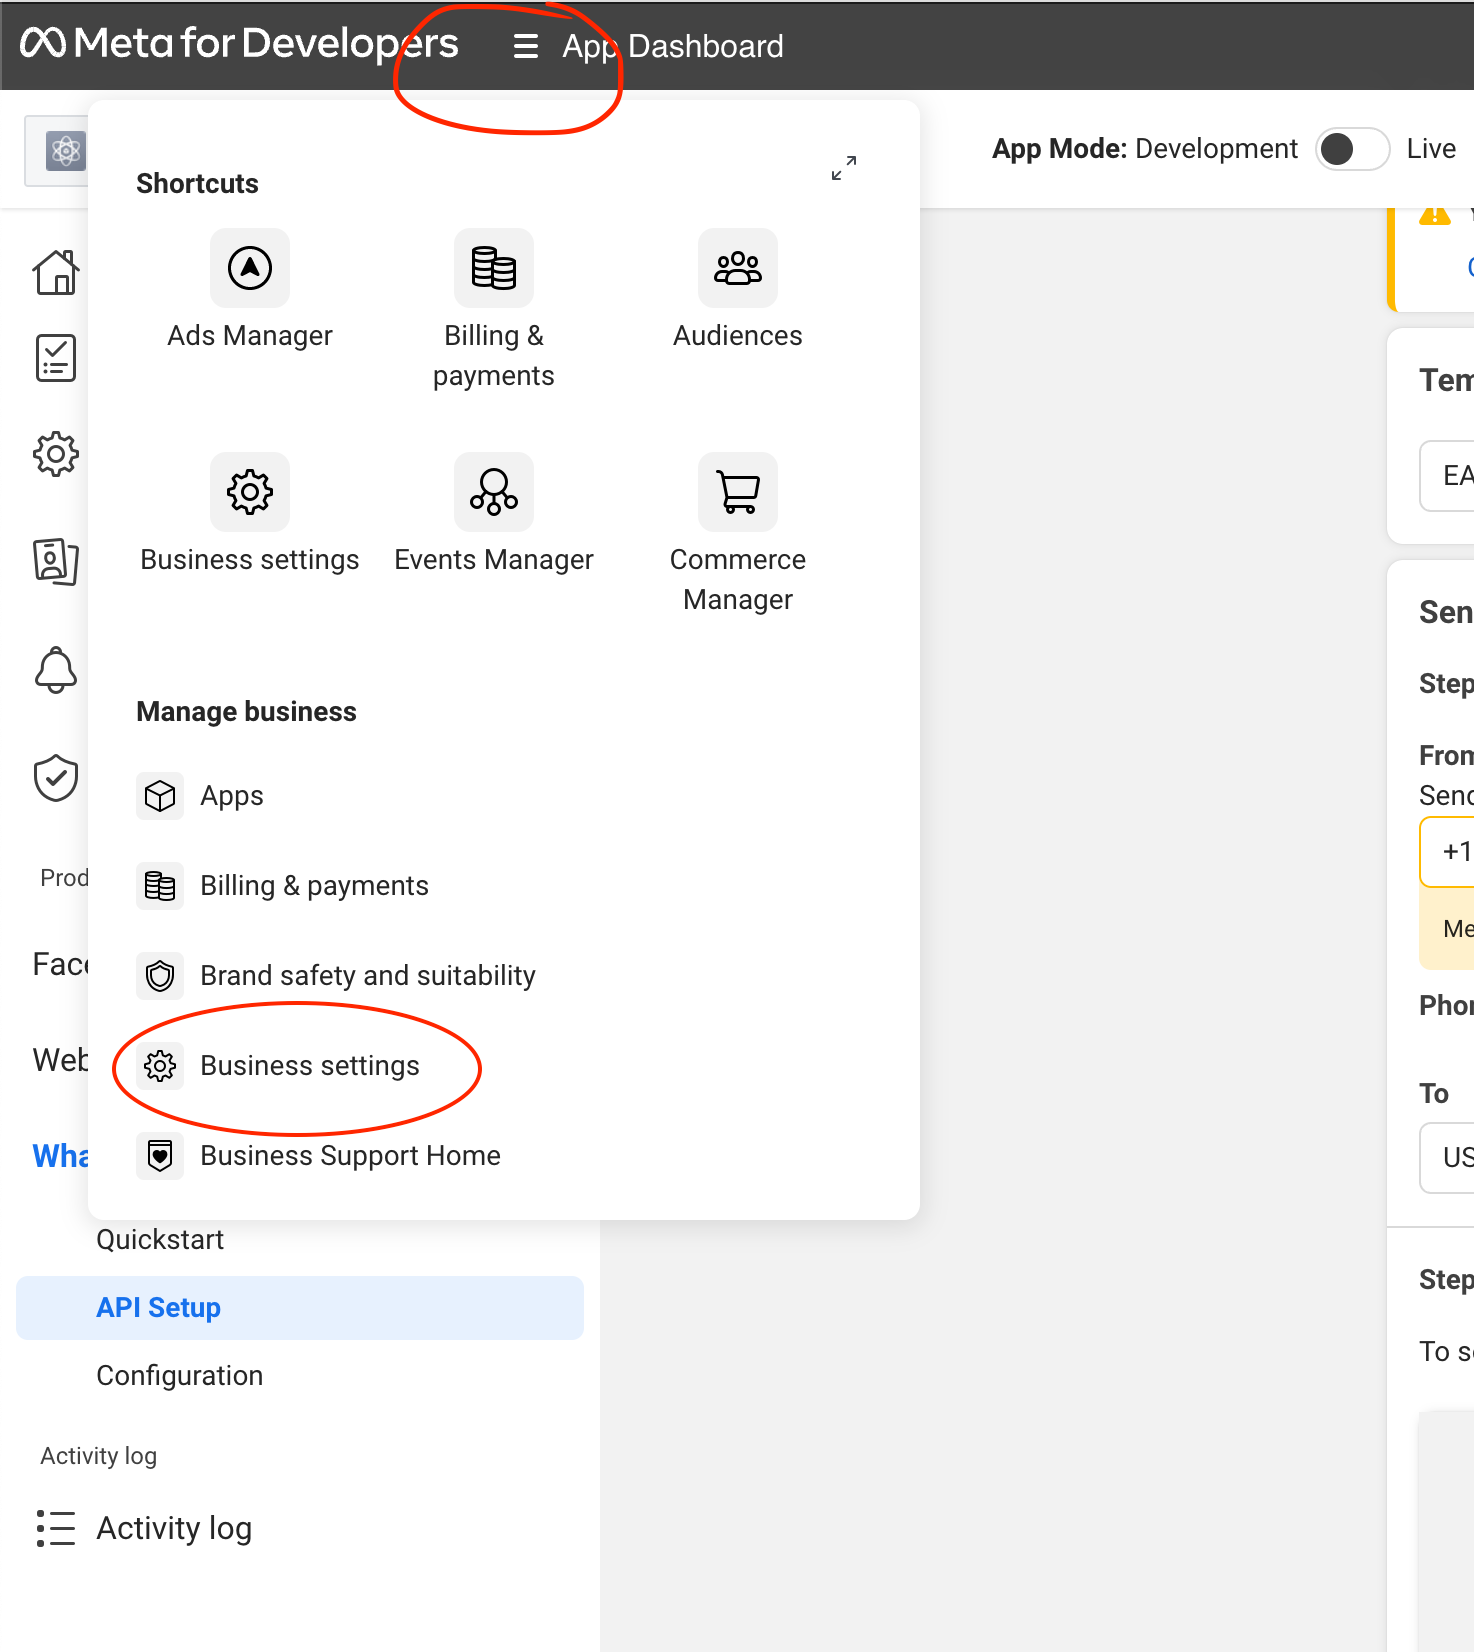
13. Navigate to the Business Settings from the menu at the top.
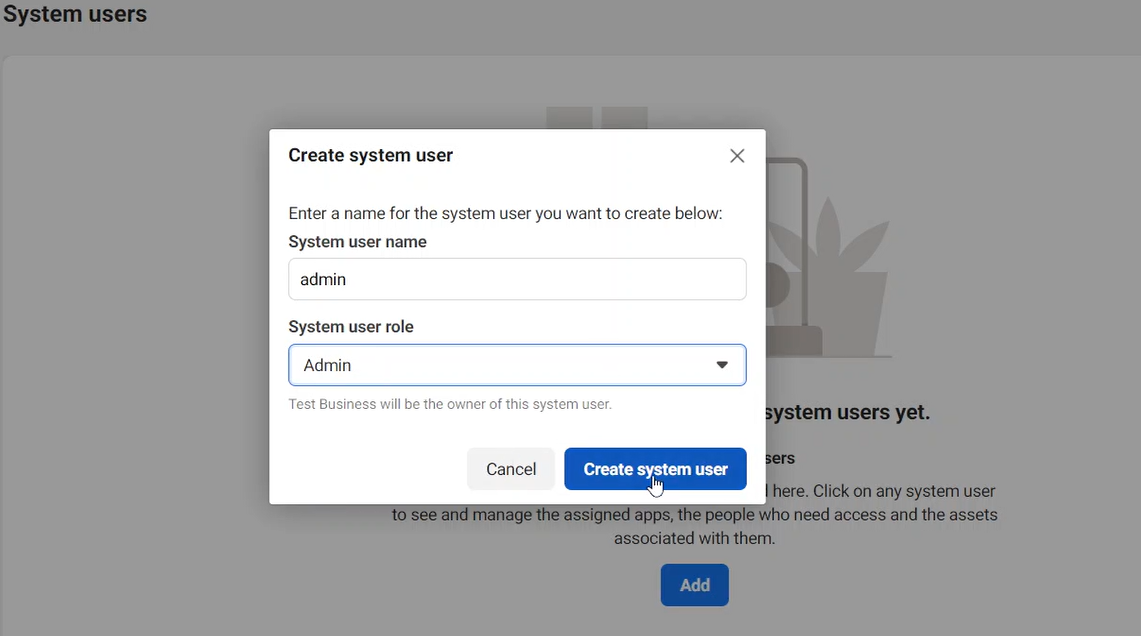
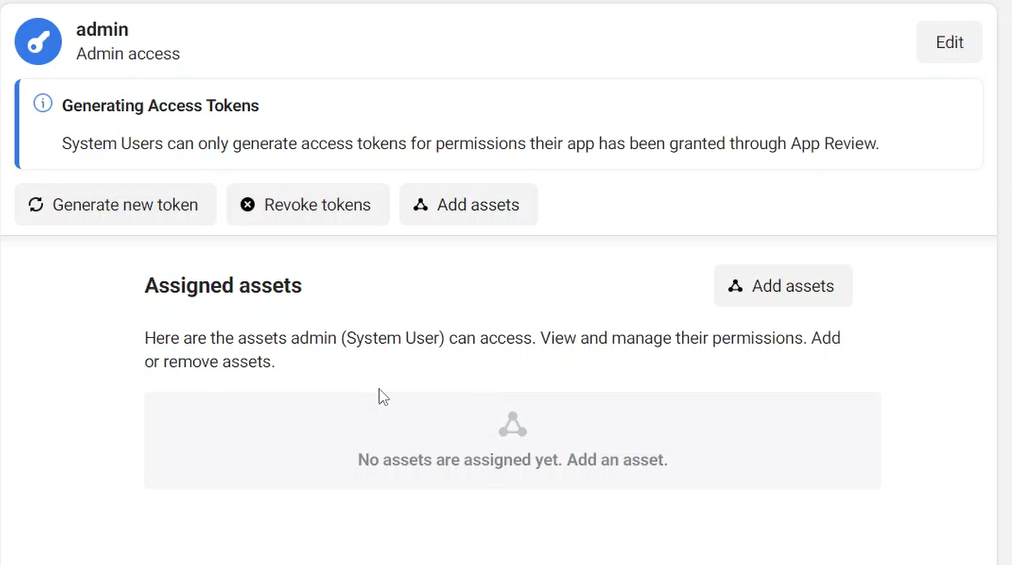
14. Navigate to the System Users section from the left menu. Add a new user.
15. After accepting the policies, you'll be prompted to make a new system user. The system user's role should be Admin.
16. After accepting more policies, you'll be able to generate the token and add assets. First, click the Add assets button.
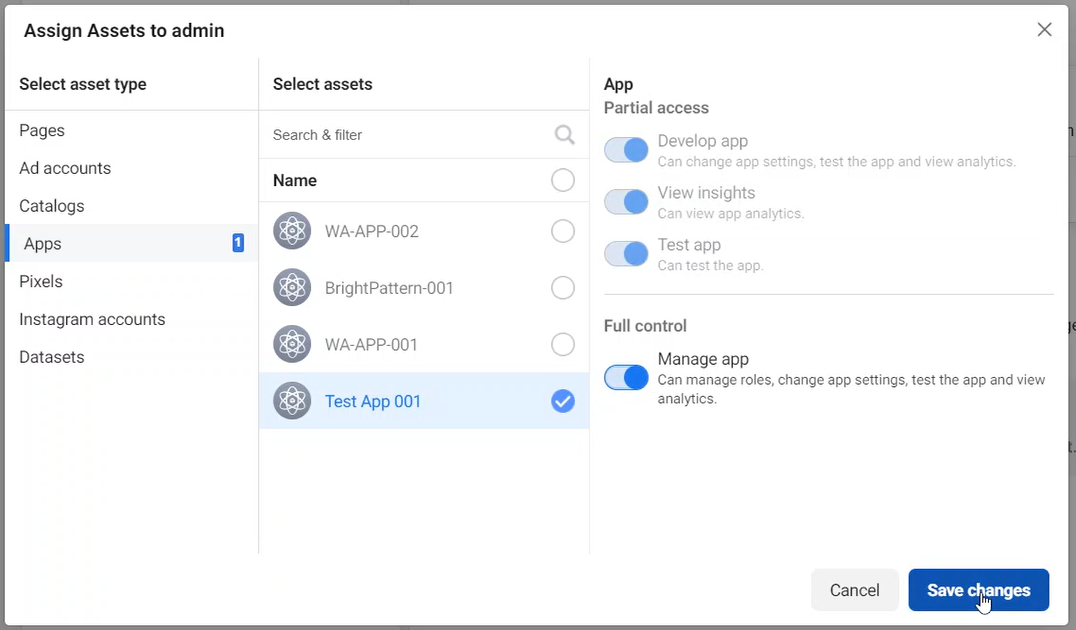
17. Choose the app you've made and switch Full control on.
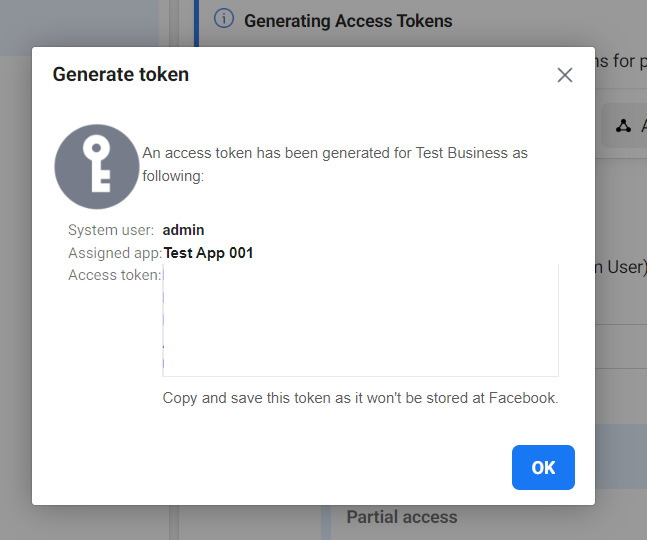
18. Now you can generate a token. Make sure the expiration is set to Never. You will also need to check the boxes for the following permissions:
- business_management
- read_insights
- catalog_management
- whatsapp_business_messaging
- whatsapp_business_management
19. After you save the settings, you will be shown the permanent Access Token. Make sure you save the token because you will not be able to view it again. Use this Access Token in place of the temporary one given in step 9.
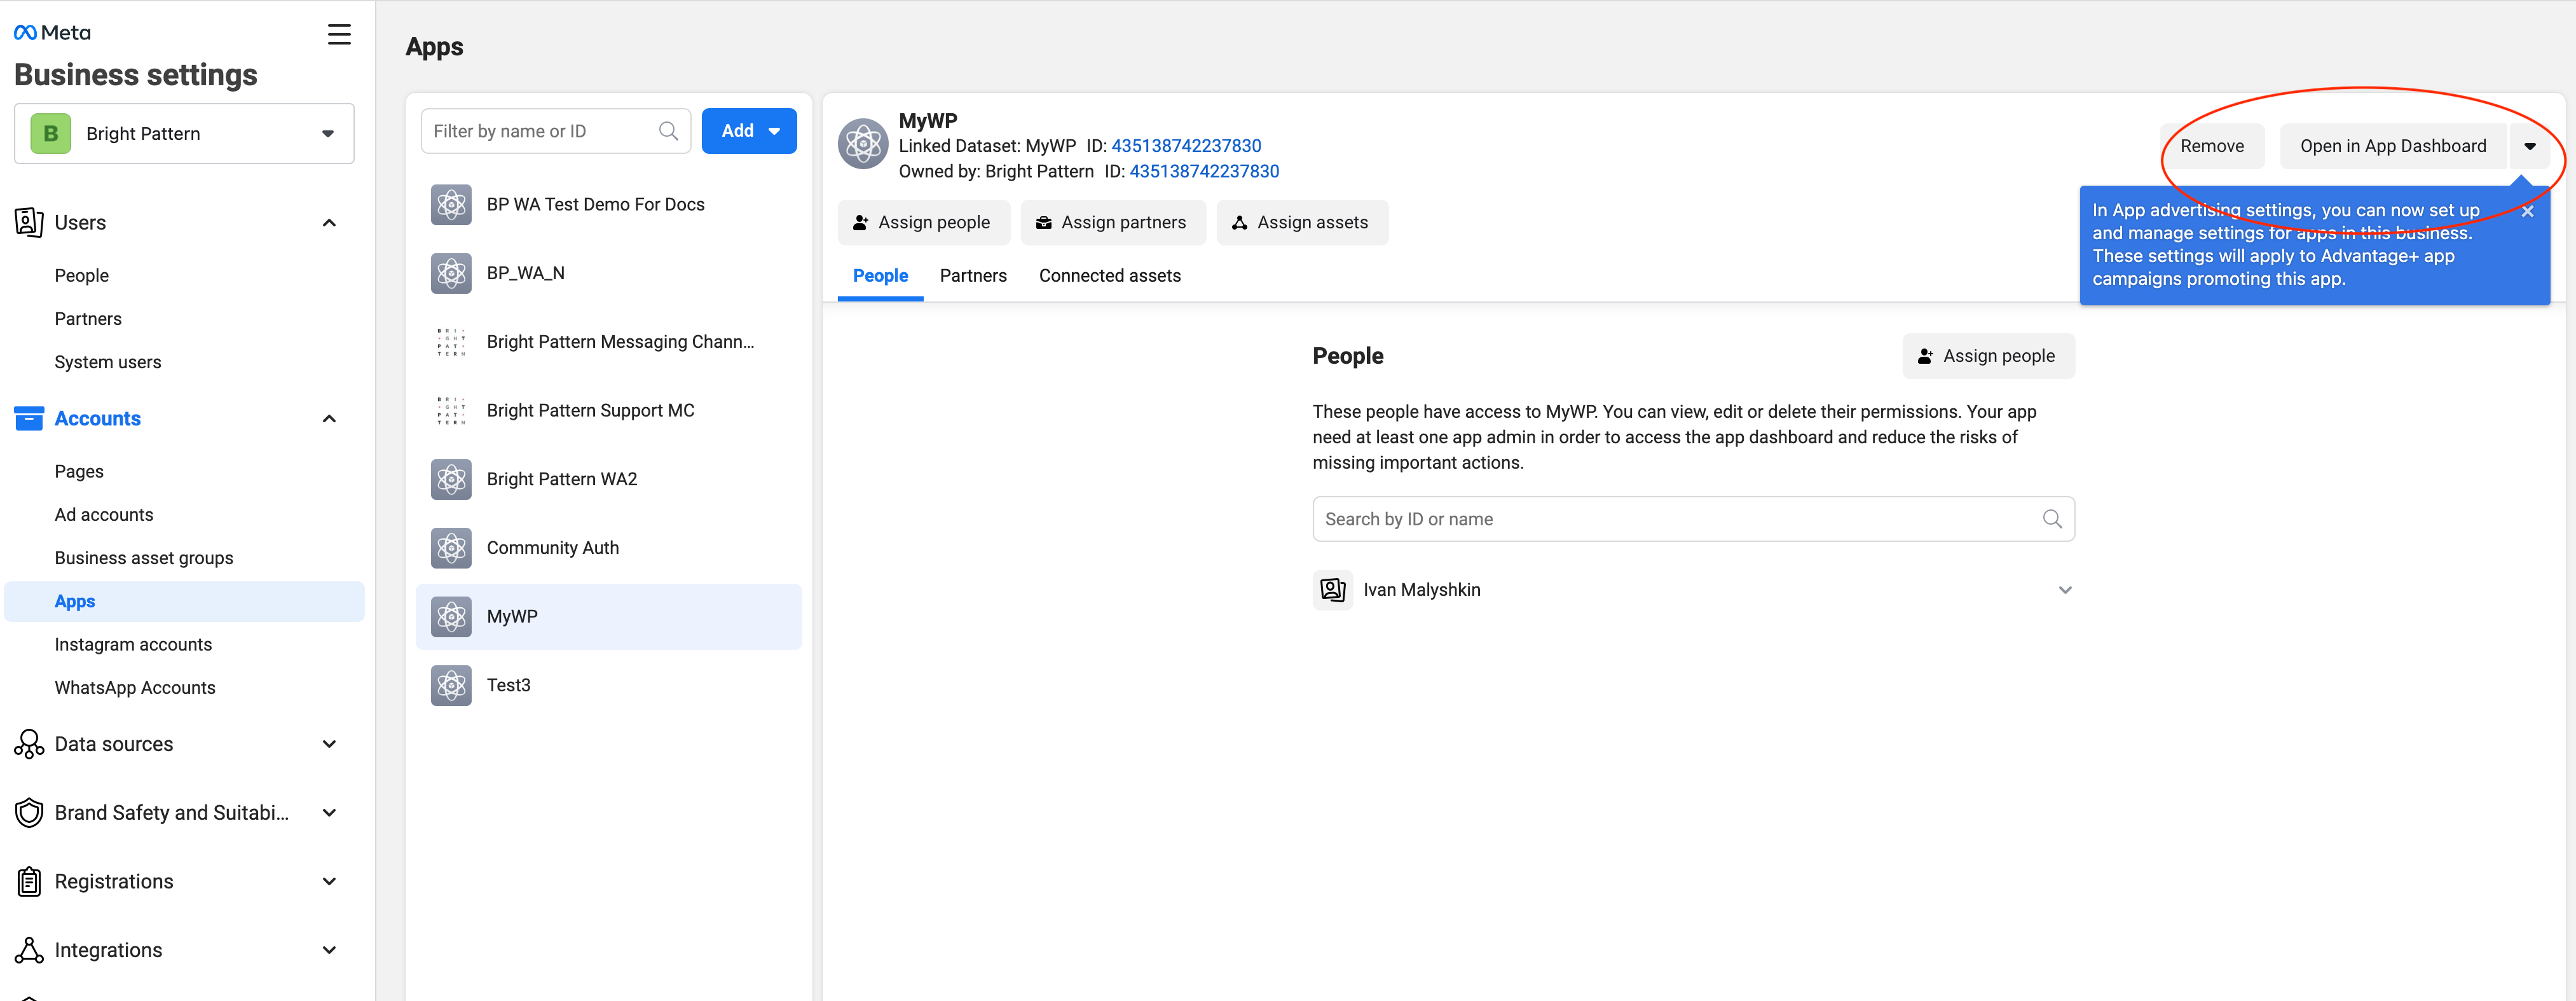
20. Get back to the App and click Open in App Dashboard, Go into the Configuration
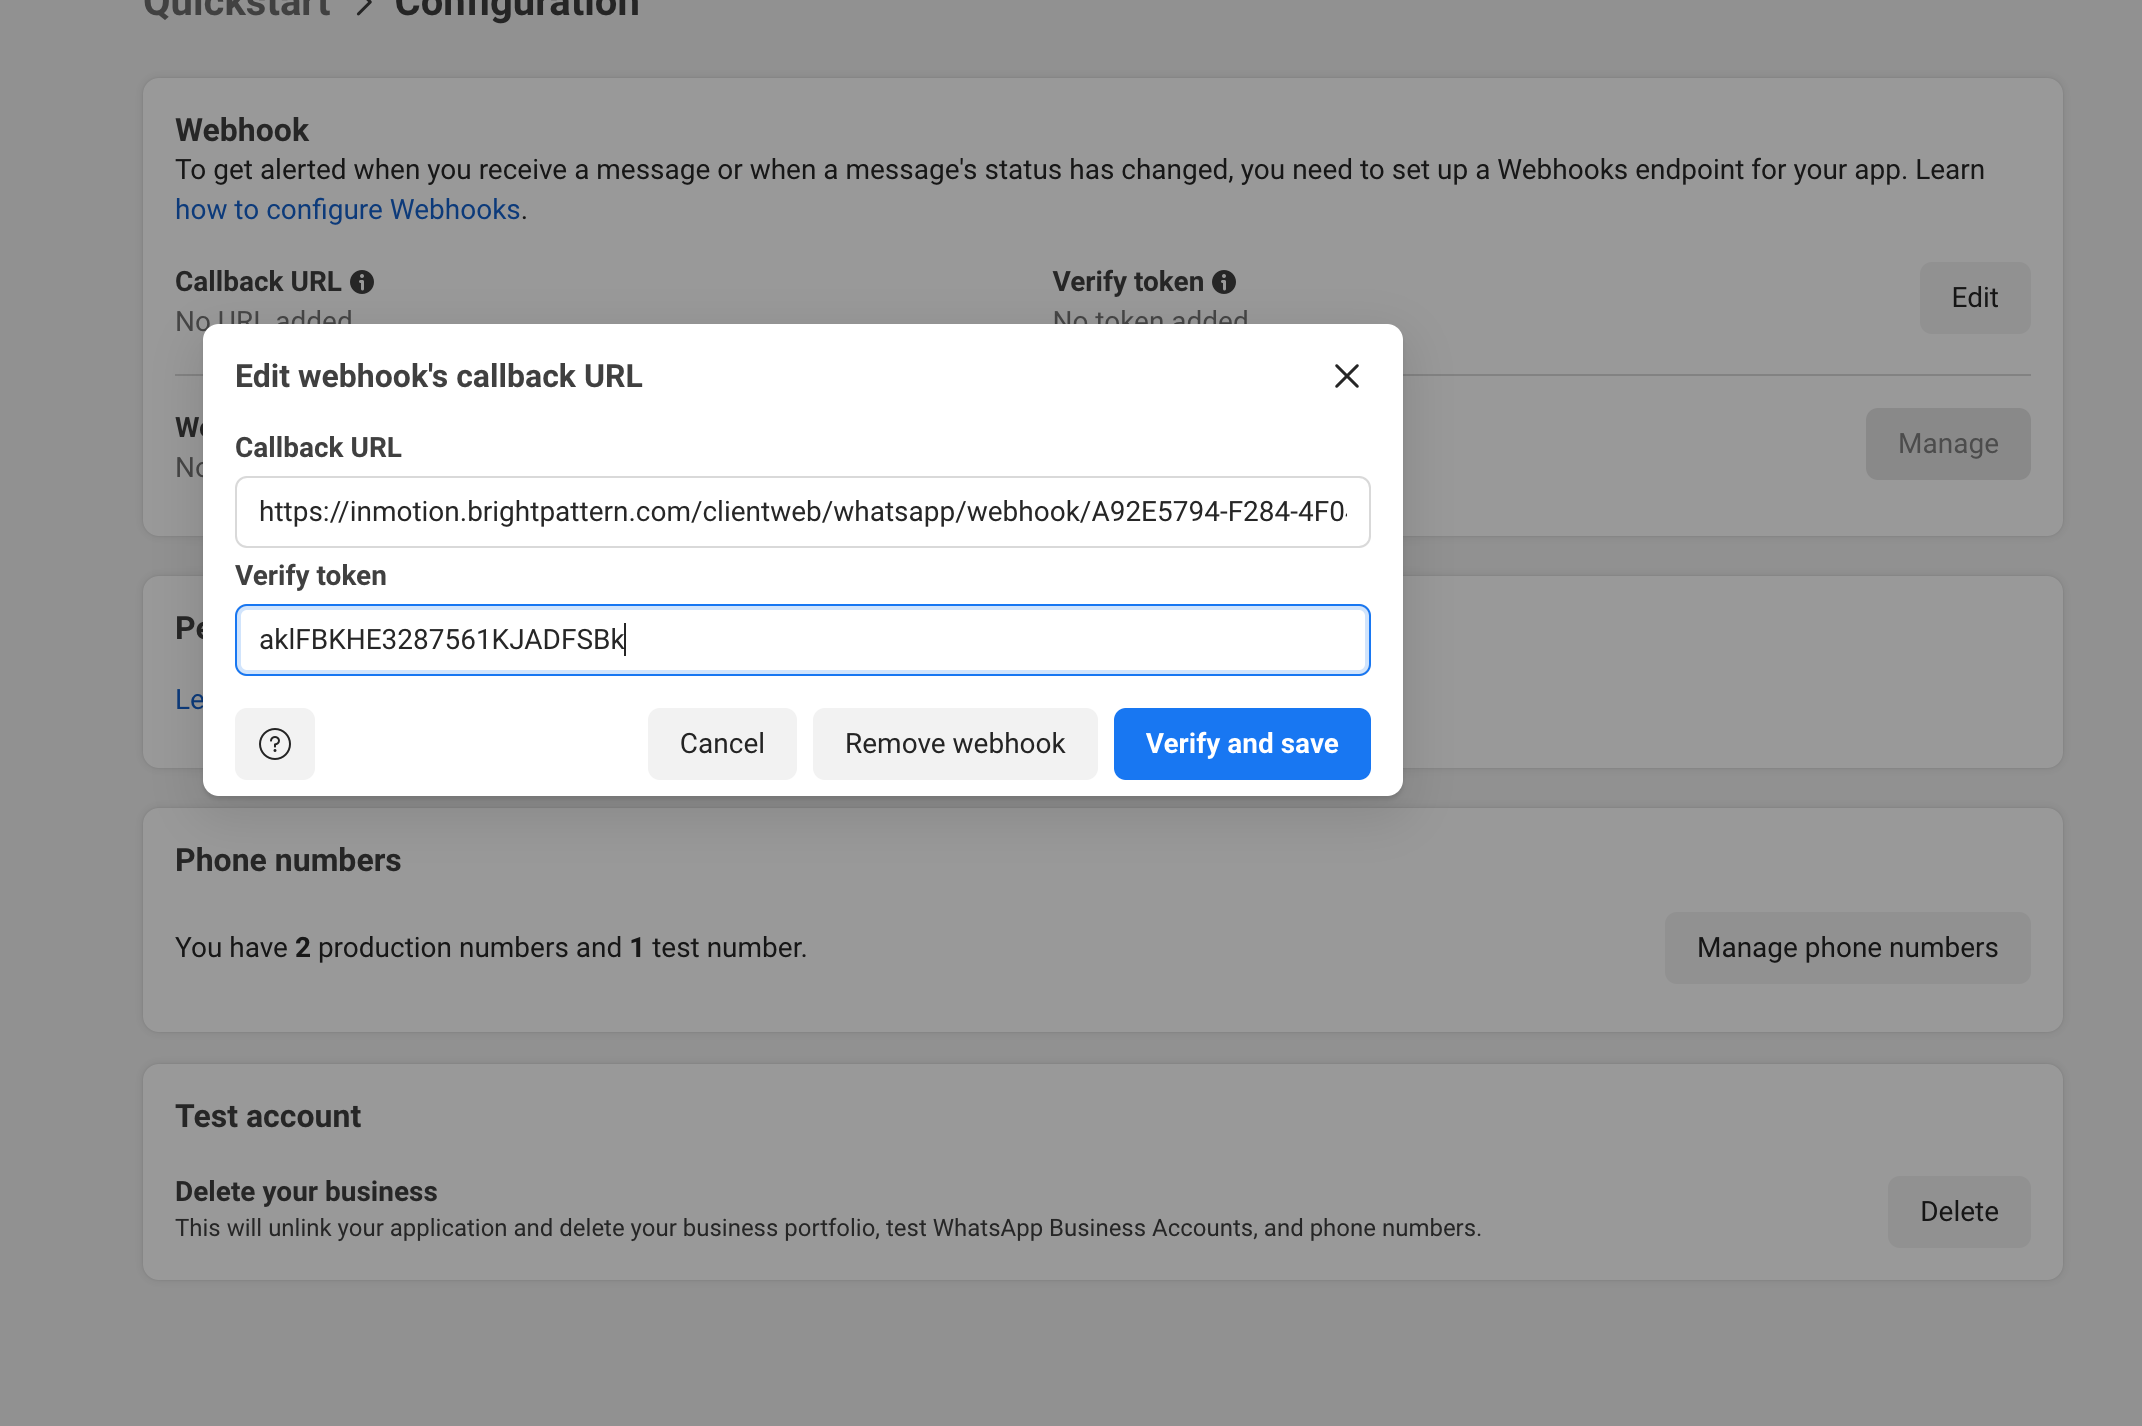
21. Edit the Webhook parameters. Get those parameters from Bright Pattern Integration account Setting Whatsapp Account In Bright Pattern
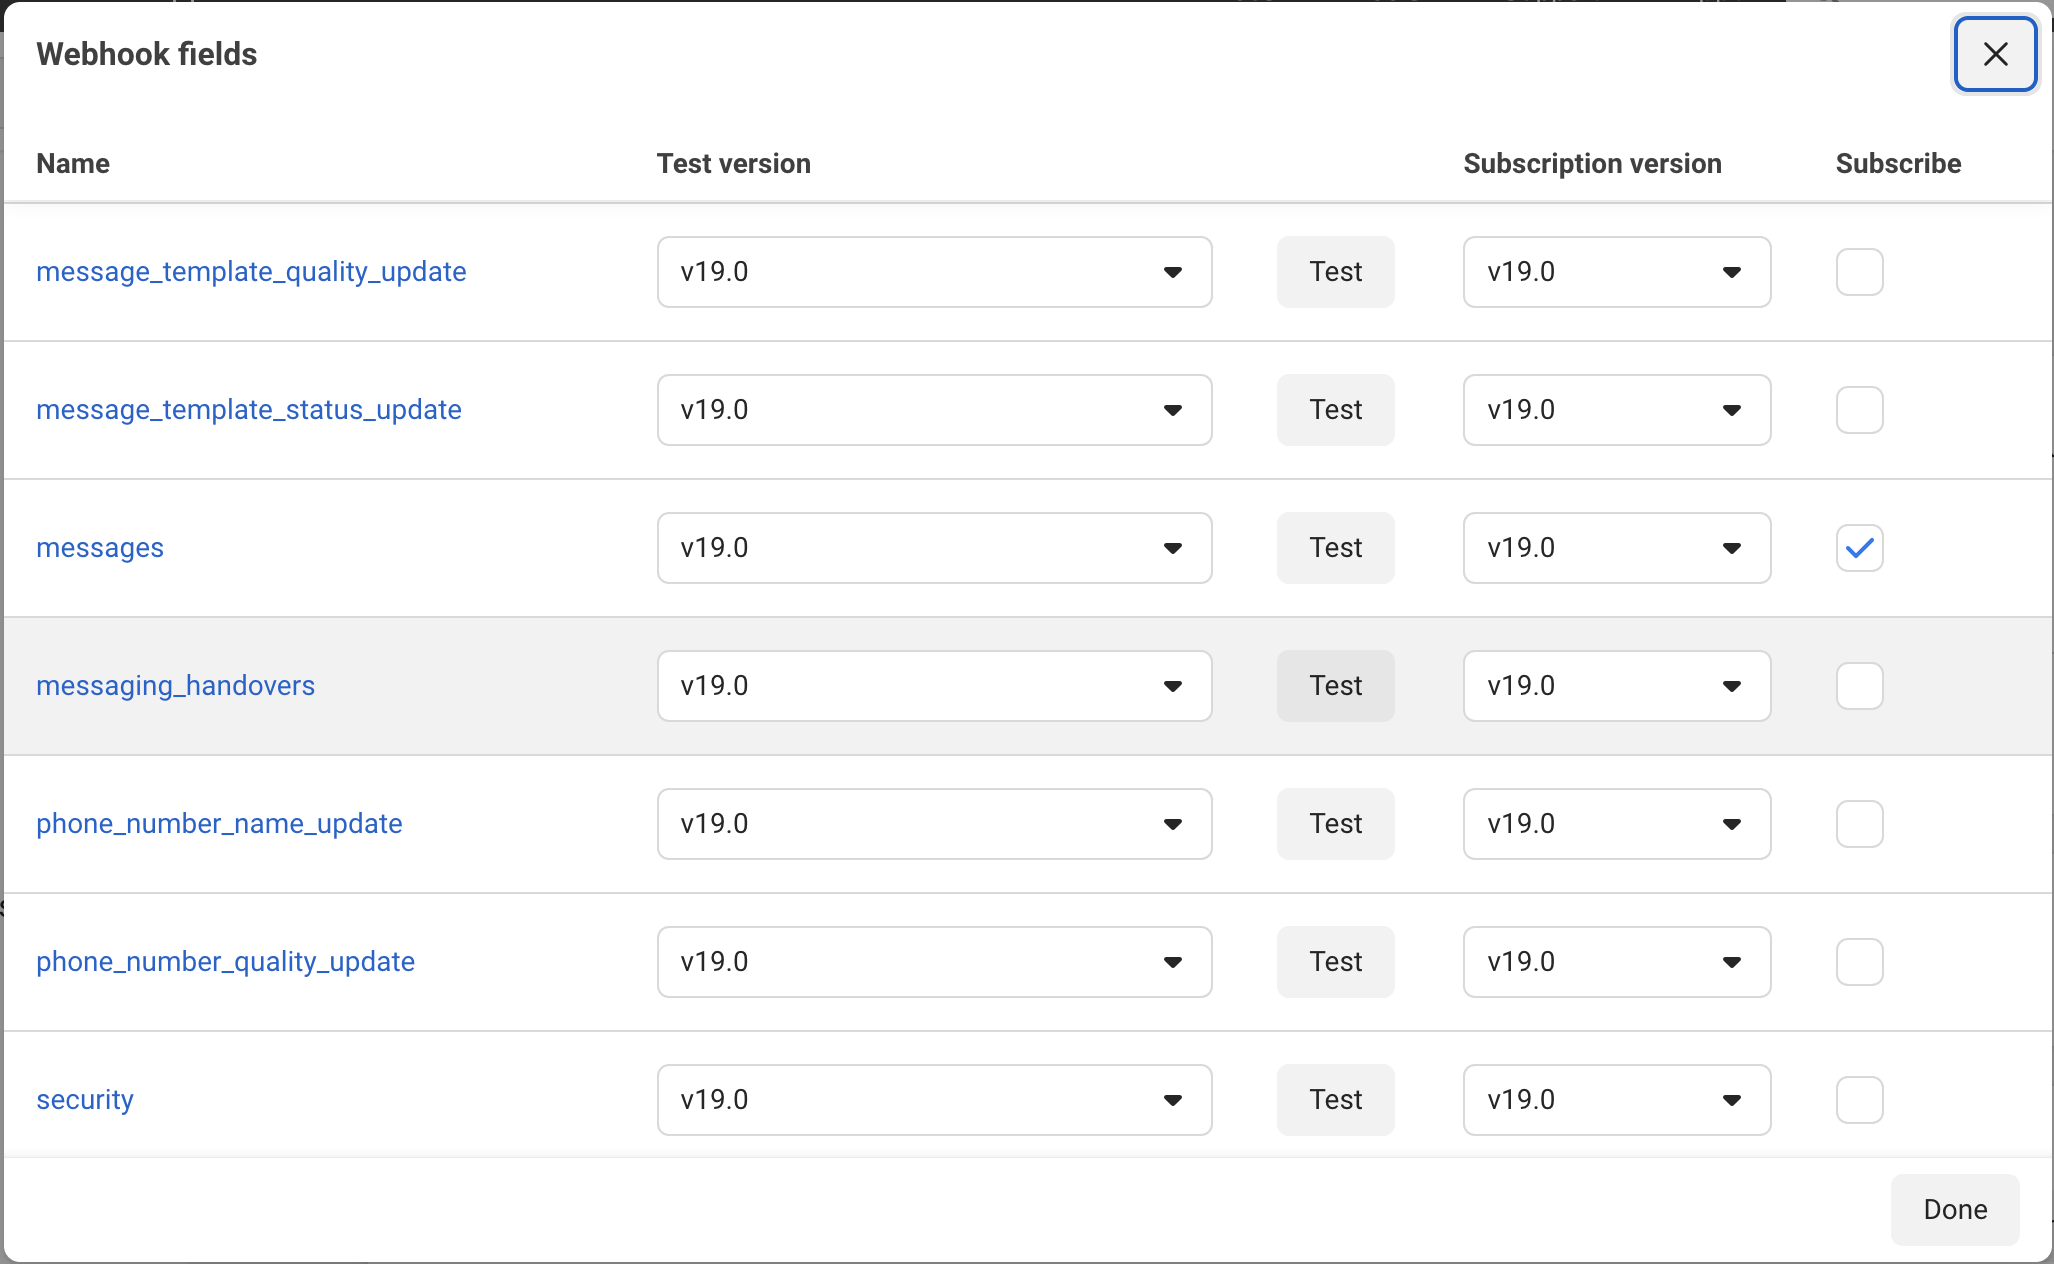
22. After Verify and Save click Manage and select messages and Done
So this is it.

