From Bright Pattern Documentation
• 日本語
Create a Lightning App
After configuring your call center, you will need to create a Lightning App. This app is where the CTI softphone is enabled, allowing the Agent Desktop widget to appear. The following instructions are valid for either Lightning or Service view.
Creating the App
Step 1: Add new Lightning app
- If your users will be working in Lightning and you want Agent Desktop to be embedded in Lightning, you'll need to start in Lightning view and then click Setup. Likewise, if your users will be working in Service and you want Agent Desktop to be embedded in the Service app, you'll need to start in the App Launcher, click Service, and then click Setup.
- In Setup, use Quick Find to get to App Manager. Click New Lightning App and the New Lightning App configuration wizard will open.
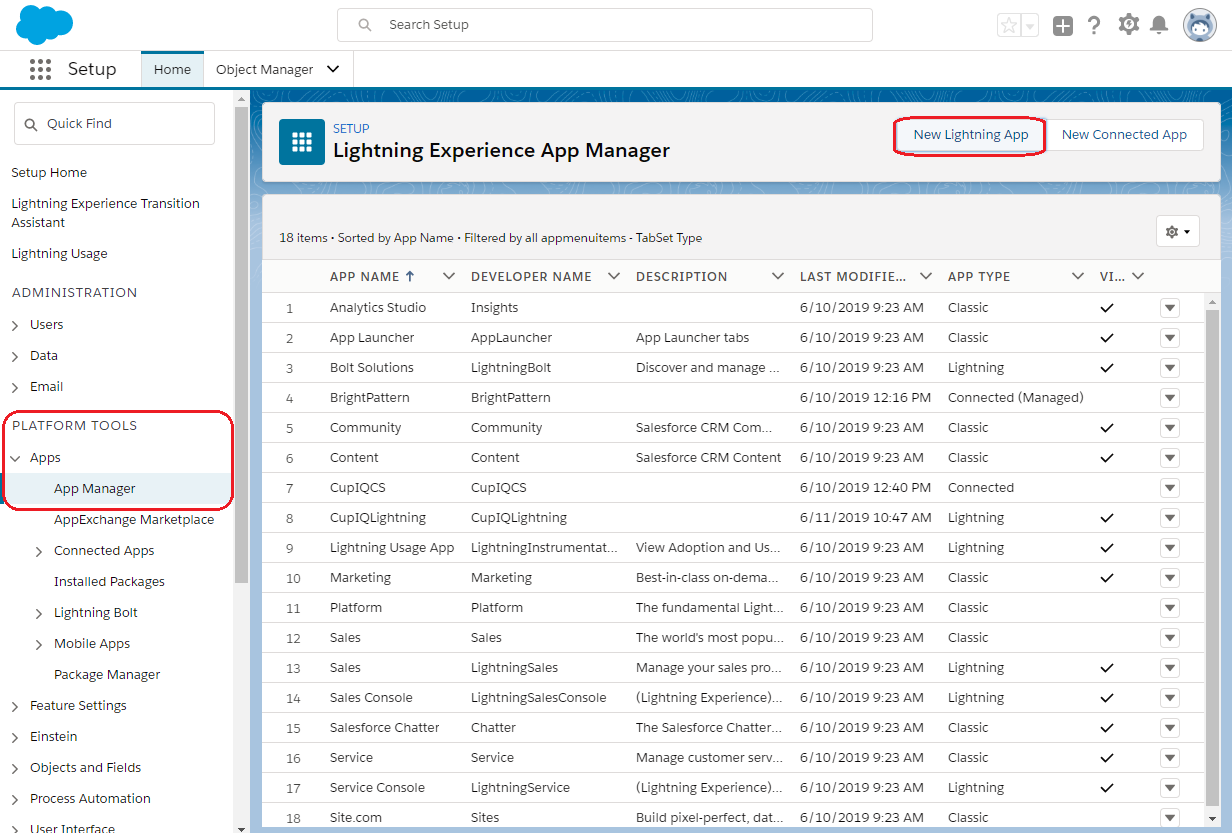
App Manager

Step 2: Set app details
- In the App Details & Branding screen, section App Details, fill out the App Name field; when finished, the App Name will auto-populate the Developer Name field.
- Optional: Fill out the Description field.
- When finished, click Next.
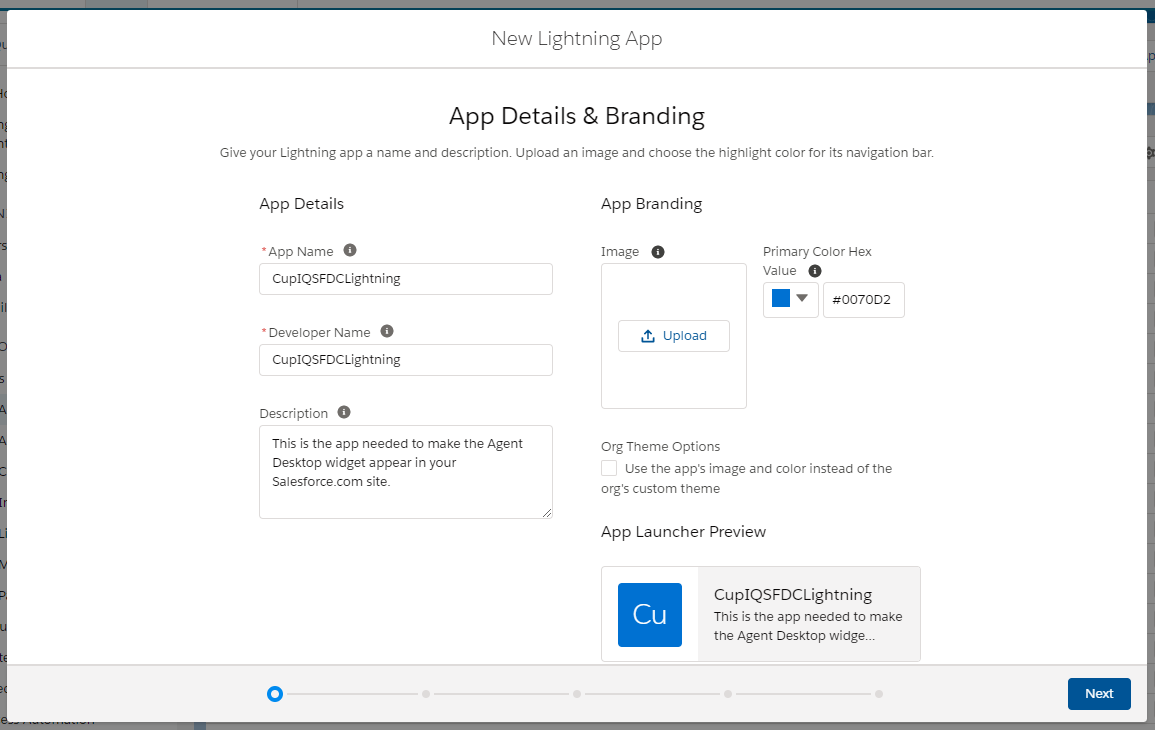
App Details & Branding

Step 3: Set app options
In this step, you will set standard navigation for the app. Note that you can choose either the full set of Setup options for Lightning view, or the Service Setup option for Service view. This is the only configuration step where the instructions differ for Lightning versus Service cloud.
- In the App Options screen, set the following:
- Navigation Style - Select "Standard navigation"
- Setup Experience -
For Lightning view, select "Setup (full set of Setup options)"
For Service view, select "Service Setup" - App Personalization Settings - Optional
- Navigation Style - Select "Standard navigation"
- When finished, click Next.
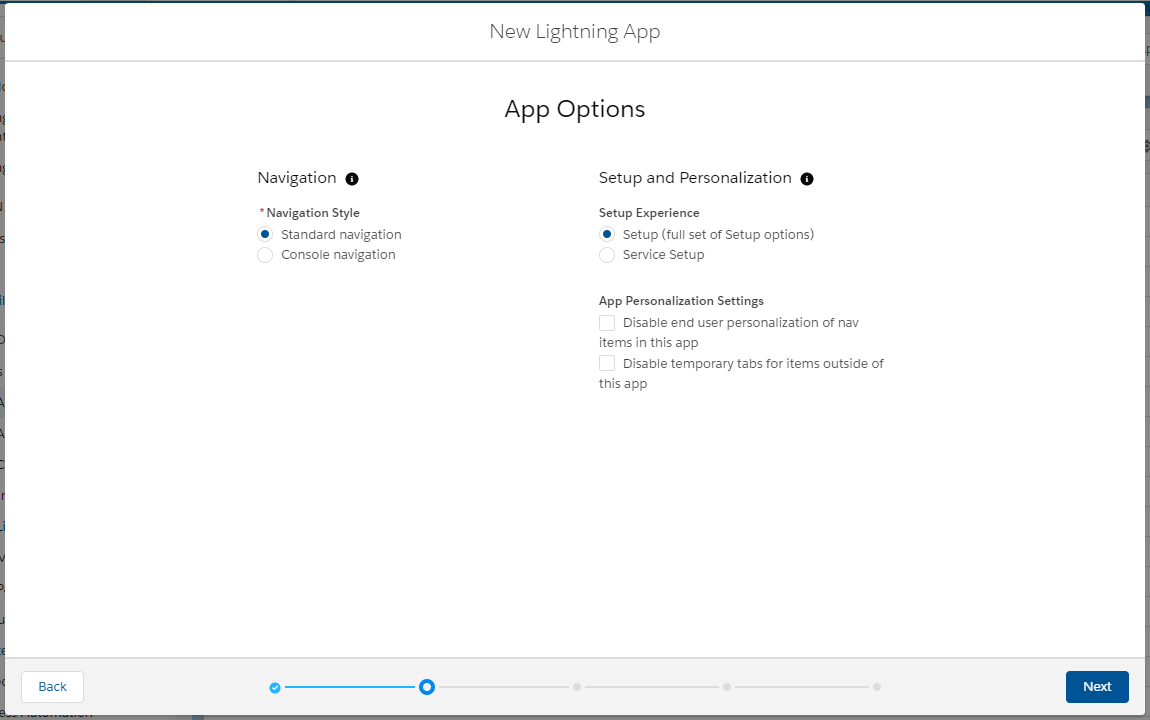
App Options

Step 4: Add CTI softphone
- In the Utility Items screen, click Add Utility Item.
- Search for and select Open CTI Softphone.
- Ensure the checkbox Start automatically is enabled.
- When finished, click Next.
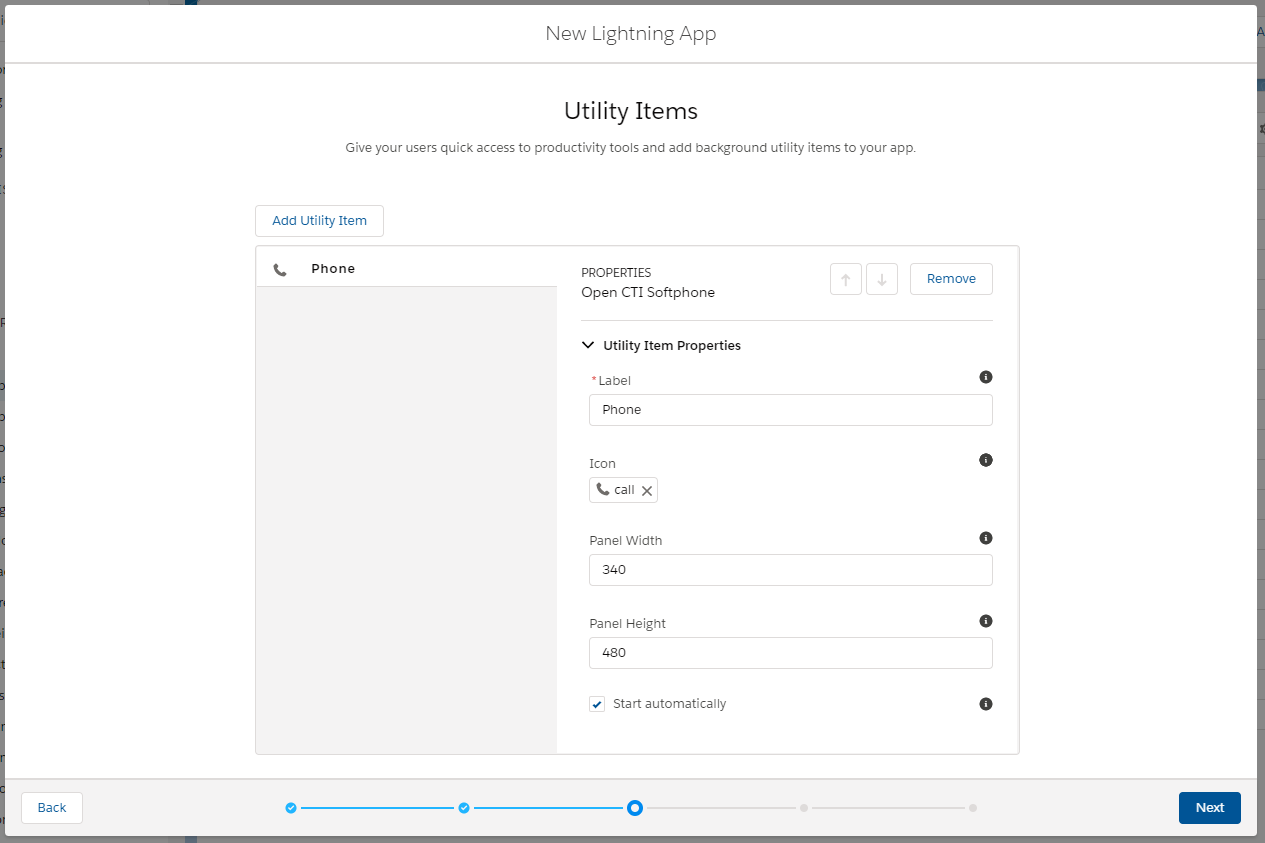
Utility Items

Step 5: Add extras
- In the Navigation Items screen, add any Available Items you wish to have appear in your app.
- When finished, click Next.
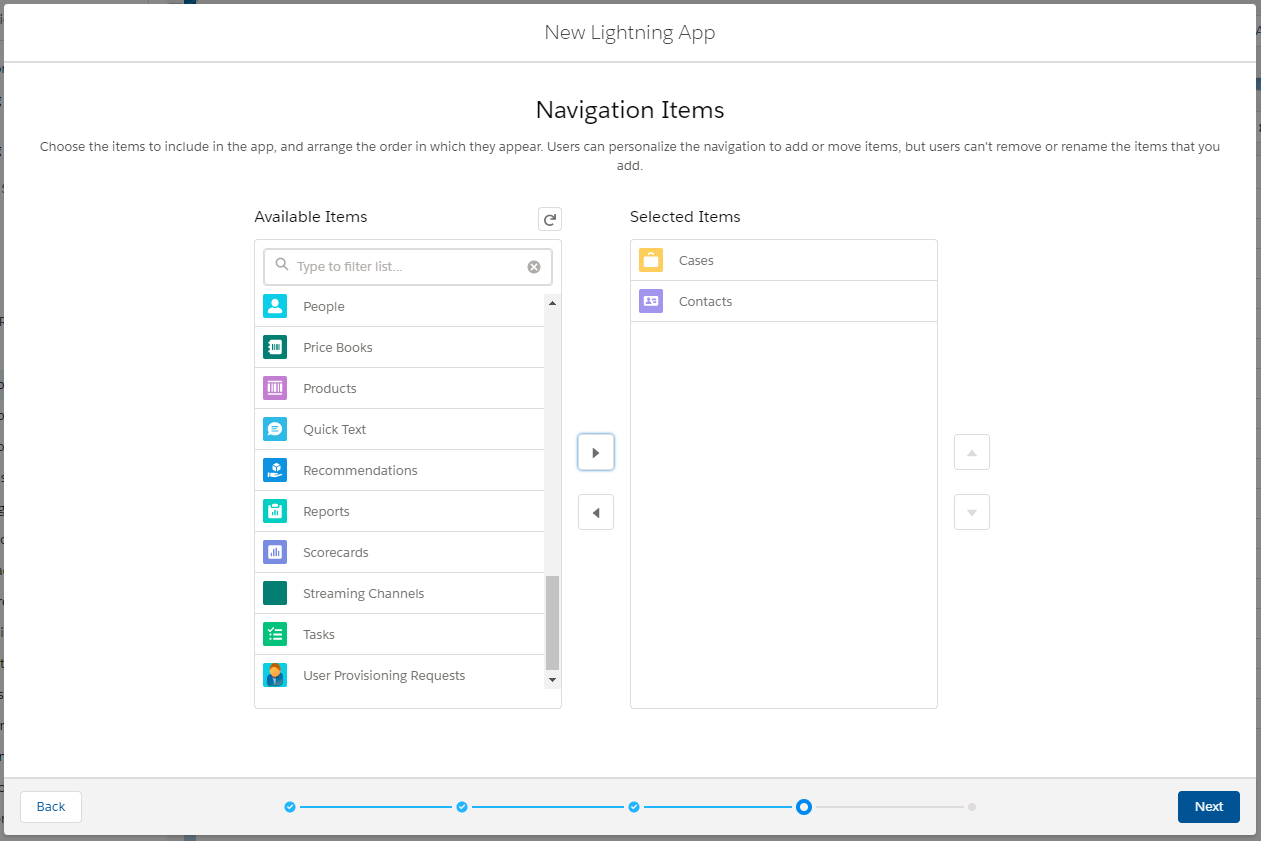
Navigation Items

Step 6: Grant user access
- In the User Profiles screen, add the user profiles you want to be able to access the app to Selected Profiles.
- Click Save & Finish.
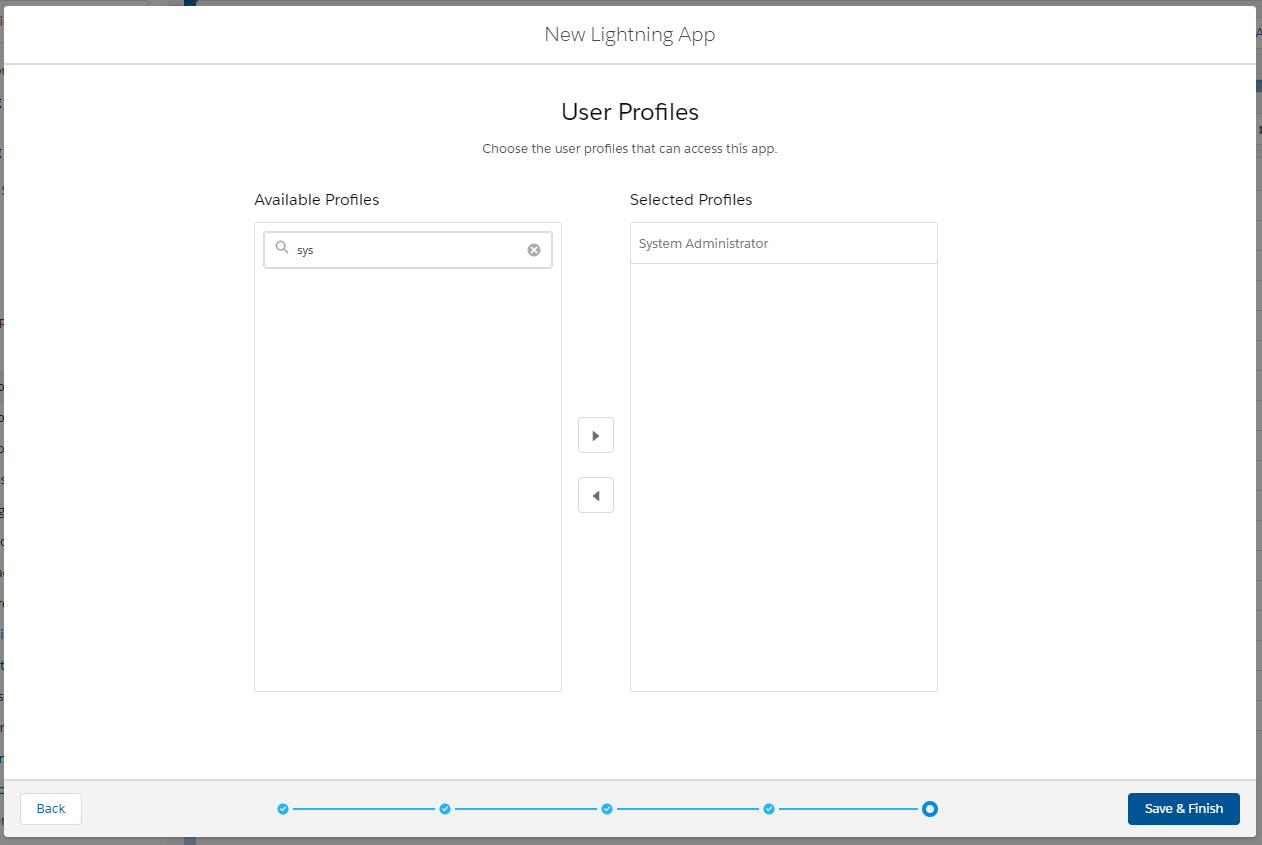
User Profiles

Launch the app
- In order to verify your app is successfully working, click the App Launcher
 icon, located in the upper left corner of the screen. In the App Launcher, select the new Lightning app or Service app you created, which will launch in a new tab.
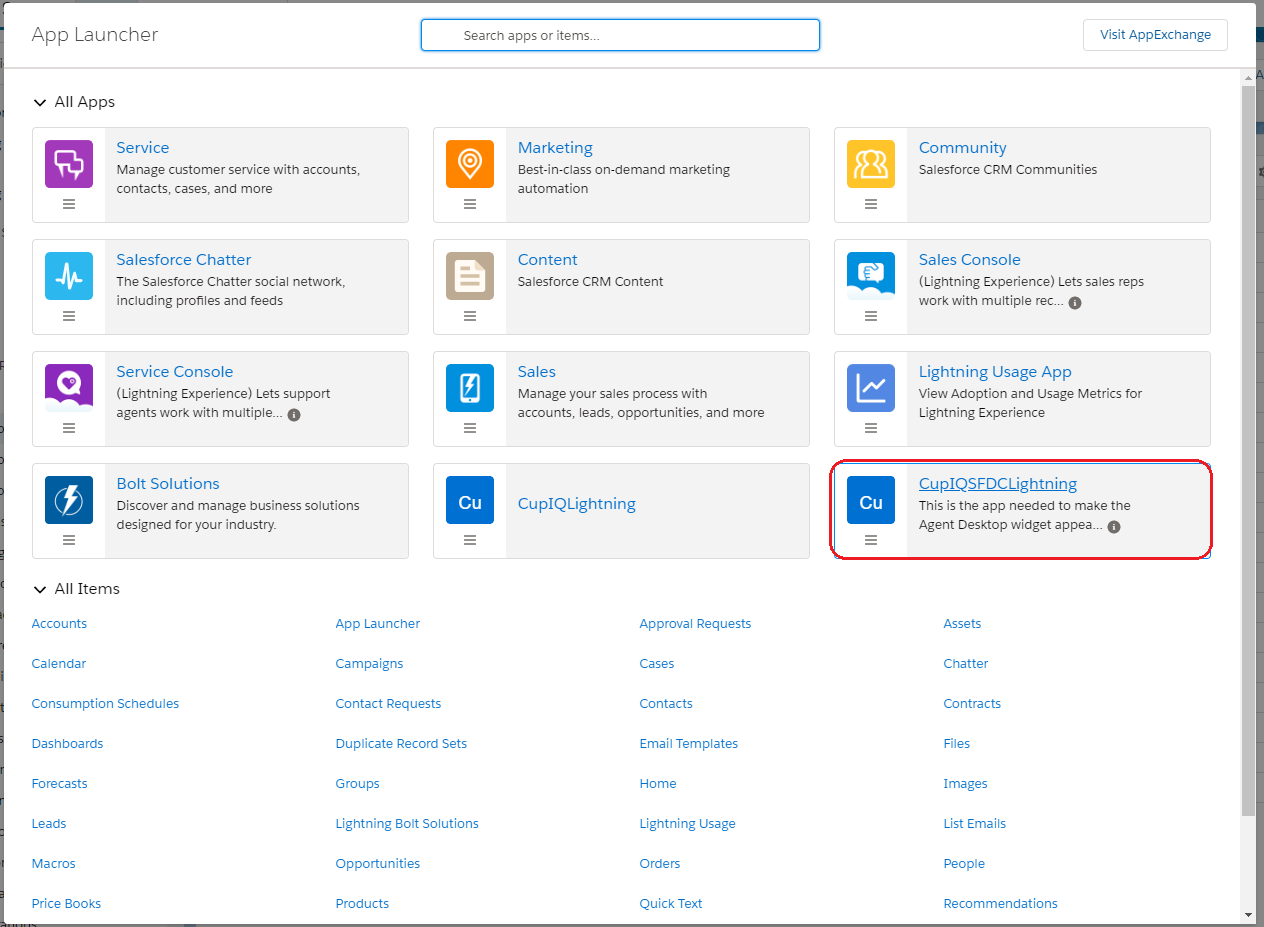
App Launcher - In your launched Lightning or Service app, the Agent Desktop widget will be located along the bottom of the screen and may be accessed by clicking on the Phone
 icon.
icon.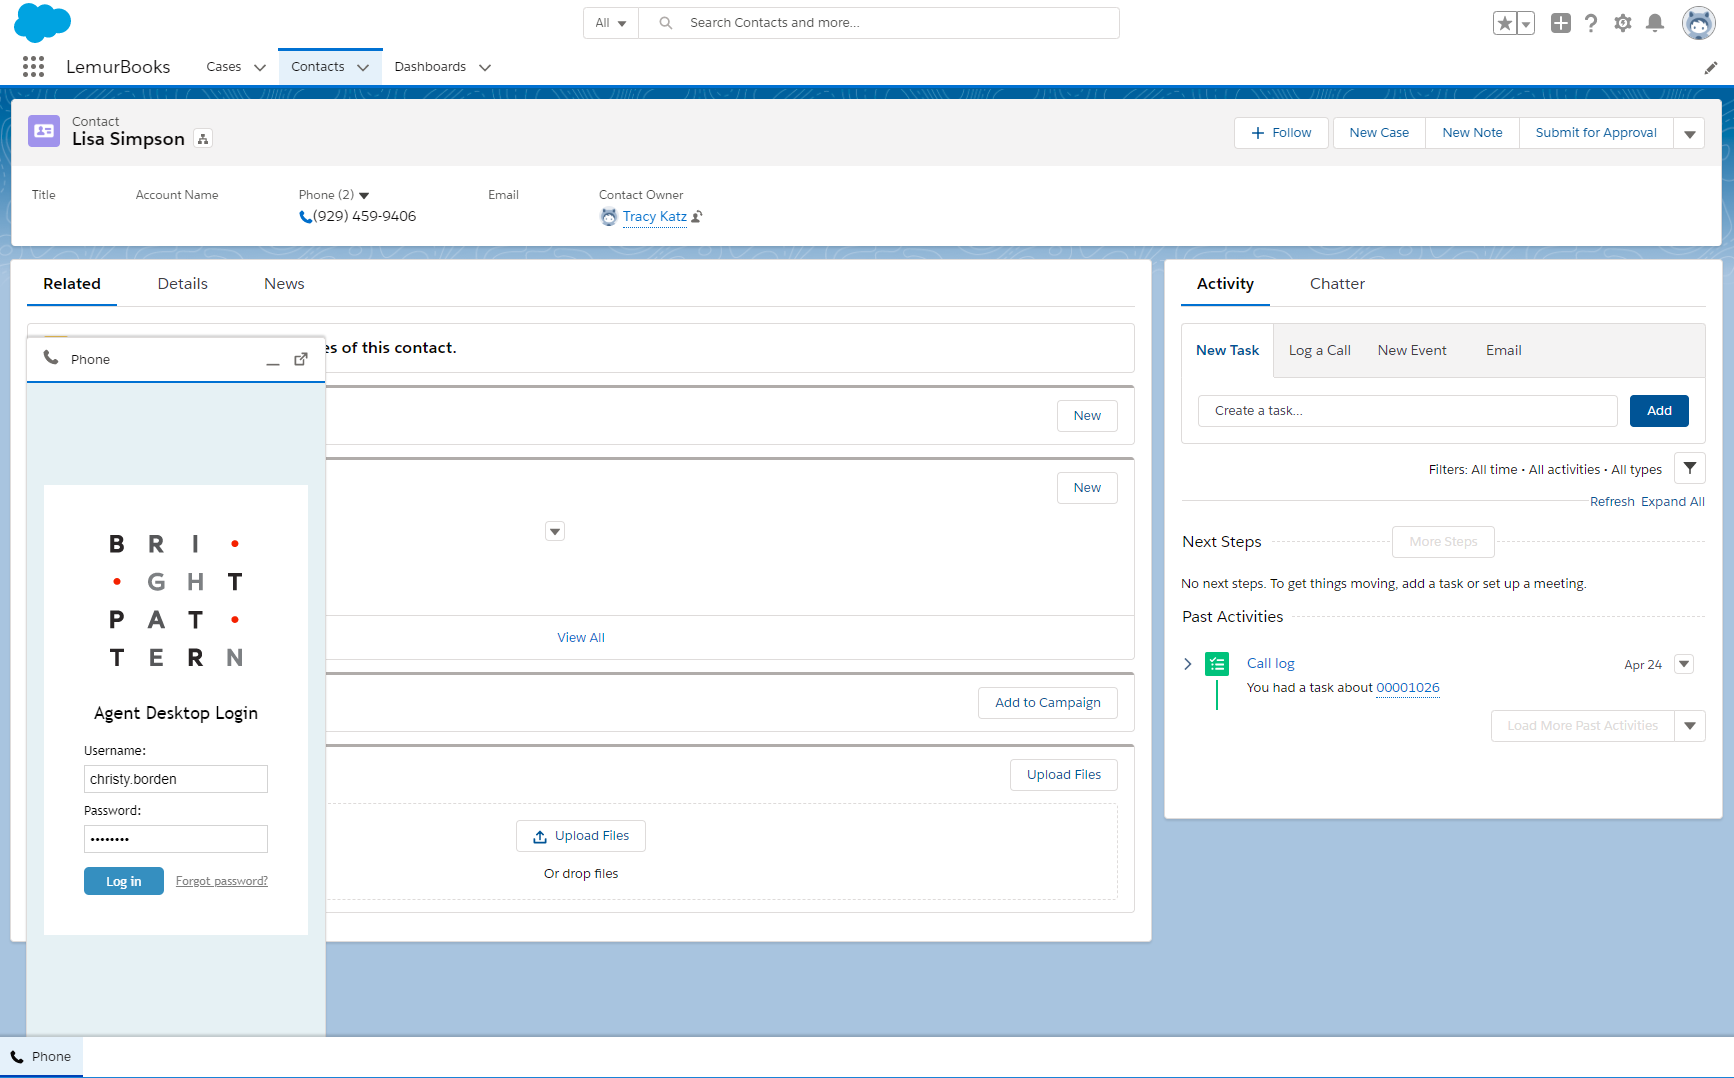
The Agent Desktop widget in a Lightning app < Previous | Next >

