Zendesk Integration Setup
When the Bright Pattern Contact Center is integrated with Zendesk, your Bright Pattern Agent Desktop is essentially embedded into the Zendesk environment. From one integrated Agent Desktop interface, you have direct access to Zendesk application features such as the phone, live chat, SMS, mobile messenger apps, customer and agent records, interaction details, and more.
How to Set Up the Integrated Agent Desktop
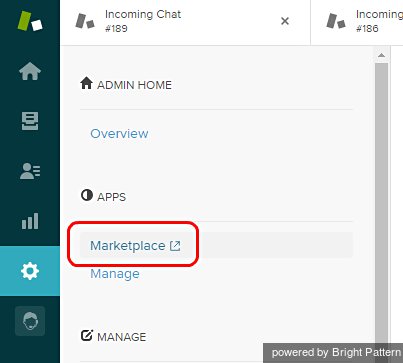
Step 2: Begin application installation
- Select the Bright Pattern Cloud Contact Center application (also known as Omni-channel Cloud Contact Center for Zendesk).
- Click Install.
If you cannot find this application in Zendesk Marketplace, you can request it from Bright Pattern Support. You will receive a .zip file. Upload this file via Apps > Manage > Upload App and click Install App.
Step 3: Link the app to your Agent Desktop
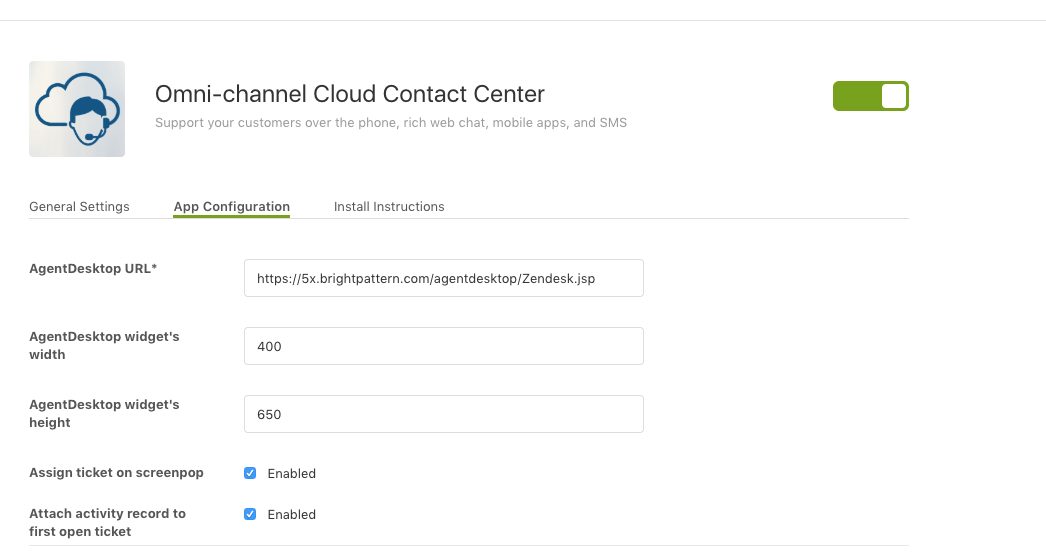
- In the form that appears, specify the URL that you normally use to open your Bright Pattern Contact Center Agent Desktop application.
- Use the following format for the URL: http://<tenant_name>/agentdesktop/Zendesk.jsp
Step 4: Review ticket assignments and adjust if needed
- By default, current ticket assignments are not affected by customer interaction delivery (i.e., routing or transferring) to specific agents.
- Select the Assign tickets on screen-pop checkbox if you want the system to automatically assign screen-pop tickets to the agents receiving corresponding interactions.
Step 5: Set roles to determine who can access the integrated desktop
- Leave the Enable role restrictions checkbox unchecked if you intend to provide an integrated desktop to all internal Zendesk users regardless of their roles.
- Alternatively, select the Enable role restrictions checkbox and choose the roles of users who will have access to the integrated desktop. (Hold your keyboard's Ctrl button to select multiple roles.)
Step 6: Customize the size of the Agent Desktop widget
- Notice the the Bright Pattern Contact Center Agent Desktop widget shown in the top-right section of the integrated desktop, and adjust its size if needed. The default size is optimized to make the interaction handling controls clearly visible to the agent while taking up as little Zendesk application screen space as possible. It is a good idea to try it with the default size setting before applying any changes.
- If you do need to adjust the widget size, do so by changing the Agent Desktop widget’s width and height parameters.
Step 7: Confirm that you set up the app correctly
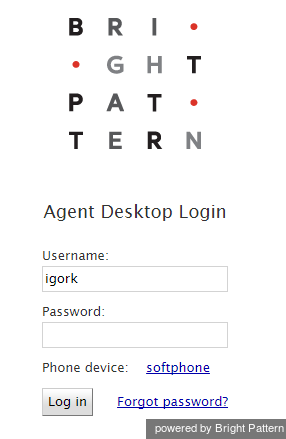
Click Update. You should now be able to see the Bright Pattern Contact Center Agent Desktop widget with a login dialog. If you do not, then go back and try reinstalling the app.
Step 8: Log in with your Bright Pattern Contact Center credentials
By default, you log in with a softphone. To choose another device, click the current Phone device setting and select the desired type of device. For more information about the available device options, see section Selecting a Phone Device of the Agent Guide.
Note that if this is your first login into the Bright Pattern Contact Center on the given computer, you will be prompted to install the Agent Desktop Helper Application.
The Bright Pattern Contact Center Agent Desktop widget will now show a standard set of telephony controls available to a contact center agent. For more information about these controls see the Agent Guide. Note that the appearance of these controls has been modified to match the overall look and feel of Zendesk.
To minimize the Bright Pattern Contact Center Agent Desktop Window, click the icon directly above it. When you are logged on, this icon reflects your agent state (or your presence state if you are not an agent). For example, when you are in the Ready state, the icon will look like this: ![]() . Agent states and corresponding icons are explained in section How to Interpret Your Current State Information of the Agent Guide.
. Agent states and corresponding icons are explained in section How to Interpret Your Current State Information of the Agent Guide.
If you receive a new interaction, you will see the same interaction alert window that you would normally see in the Bright Pattern Contact Center Agent Desktop. You will be able to accept an interaction even if your Bright Pattern Contact Center Agent Desktop window is minimized.


