Static Entries
Static entries describe names and contacts of people/organizations that are external to your contact center. These entries appear in the directory of the Agent Desktop application. Usually these are the people/organizations that the agents of your contact center may need to call (e.g., for consultation purposes).
For convenience, related static entries are arranged in folders. By default, agents are able to see static entries in all folders that are defined here. You can select specific folders that the agents of a particular team will be able to see via the Team properties.
Note that caller IDs of inbound calls can be checked against the telephone numbers of configured static entries, and the corresponding static entry names can be displayed to agents instead of the caller ID numbers. For more information, see section Search Directory of the Scenario Builder Reference Guide.
To configure a static entry, select the Static Entries option from the Directory menu.
Static Entries Screen Properties
The Static Entries screen properties are described as follows.
Name
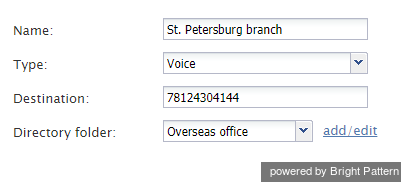
Name is the name of the static entry as it shall appear in the Agent Desktop directory. This field is mandatory.
Type
Type is the destination type. For phone contacts, select Voice. For email contacts, select Email.
Destination
For entry of the Voice type, Destination is the destination’s phone number. For entry of the Email type, Destination is the destination’s email address.
Note that if the destination is an IVR, the phone number can include pauses and digits required to get to the desired contact or self-service option. Comma symbols are used for pauses; each comma will delay dialing of the next digit by one second (e.g., 18005552222,,,5,,245). For more information, see the Agent Guide, section How to Speed-Dial Through External IVRs.
Directory folder
Directory folder is the folder of the Agent Desktop directory where this static entry will appear. You can select an existing folder or create a new one.
Limiting Static Entries
Teams can view either all static entries in the directory or selected static entries only. By limiting Directory Static Entries, you control who can view particular static entries (i.e., the names and contacts of people/organizations that are external to your contact center) that appear in the directory of the Agent Desktop application. As noted in the Static Entries section, these entries are usually the people/organizations that the agents of your contact center may need to call (e.g., for consultation purposes).
Static entries are limited at the team level, not the user level. You can limit the static entries visible to a Team that contains one or more users, but you cannot limit the static entries visible to a single user.
Step 1: Update team information.
- Go to the Configuration panel on the left-hand side of the Agent Desktop application.
- Navigate to Users & Teams and click Teams.
- Select a Team Name from the list shown.
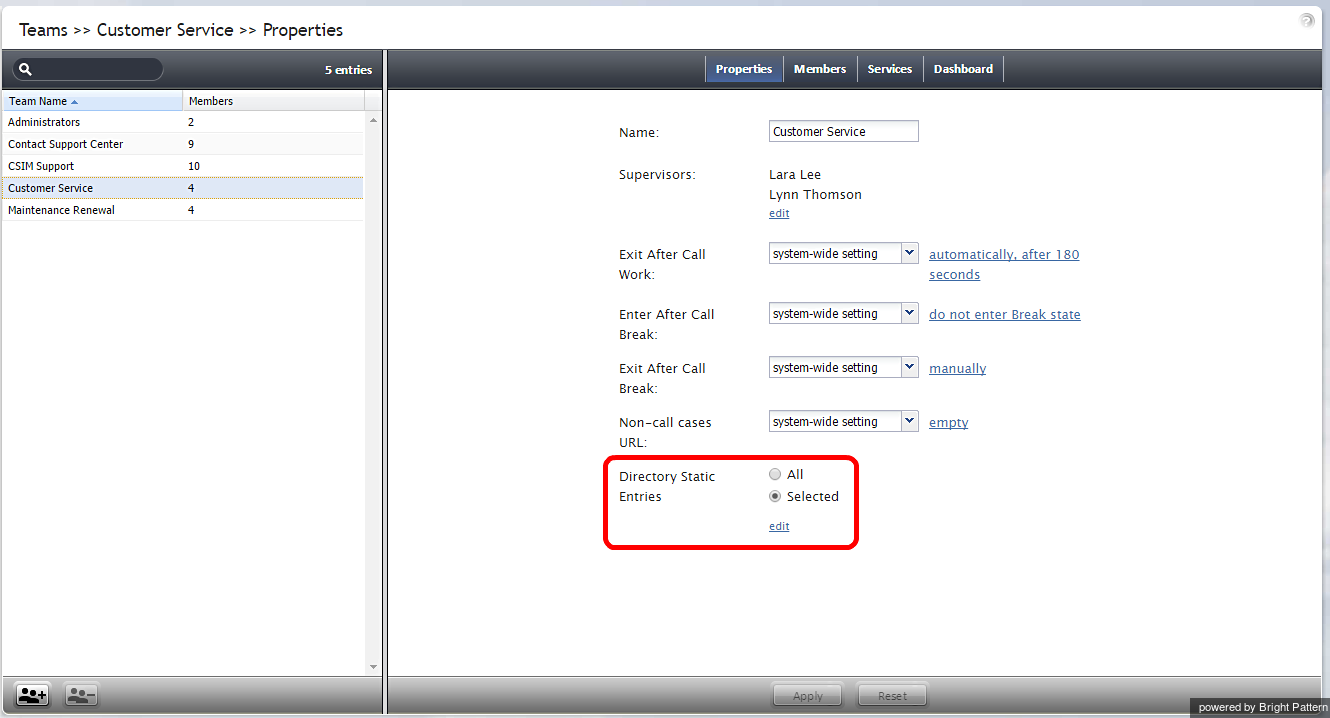
- From the Properties tab, locate the property Directory Static Entries. There are two options: All or Selected. This is where you limit the directory static entries visible to a team. All allows the team users to view all static entries in the directory. Selected sets the specific static entries that are visible to the team.
Step 2: Edit selected static entries.
- To limit which static entries are visible to the team, choose Selected and click edit.
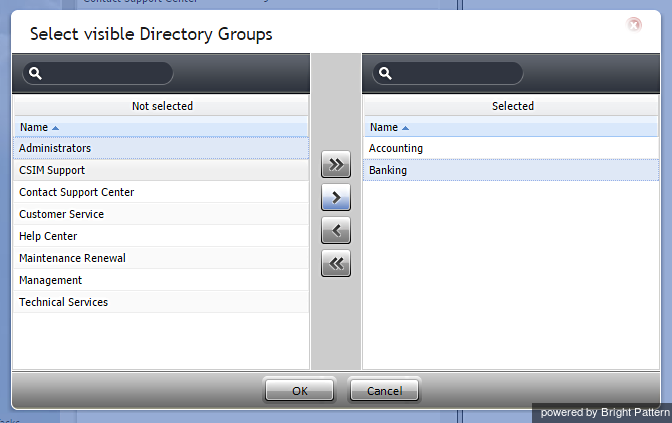
- On the left-hand panel, Not Selected, click a Directory Group to highlight it, and use the arrow controls to move the desired directory group to the right-hand panel, Selected.
The >> and << controls move all items left or right, whereas the > and < controls move a single item left or right.
In the example image shown, the properties for a team called Maintenance Renewal are being modified. Two directory groups, Accounting and Banking, have been moved to Selected. After hitting OK, the members of that team will be able to see only Accounting and Banking static entries when they browse the directory on their Agent Desktop application.
As shown, the Maintenance Renewal team's properties now indicates the directory static entries that are visible to the team. From the Agent Desktop application, members of the Maintenance Renewal team can view only Accounting and Banking groups in the directory.


