From Bright Pattern Documentation
< 5.8:Tutorials-for-admins | Lists
Revision as of 04:14, 29 May 2024 by BpDeeplTranslateMaintenance (talk | contribs) (Updated via BpDeleteTranslateTags script)
• 5.19 • 5.8
Create a New .CSV List
The following tutorial describes how to create a new .CSV calling list with spreadsheet software.
The spreadsheet will contain the information you wish to pass to the agents at the end of this tutorial. It does require specific fields, but additional fields can be added (or not) to fit your needs. There are two ways to upload a .CSV list to the system - defining a completely new list or by populating an already existing list.
Procedure
- Create a .CSV list in Excel, Google Sheets, Numbers, or your spreadsheet software of choice.
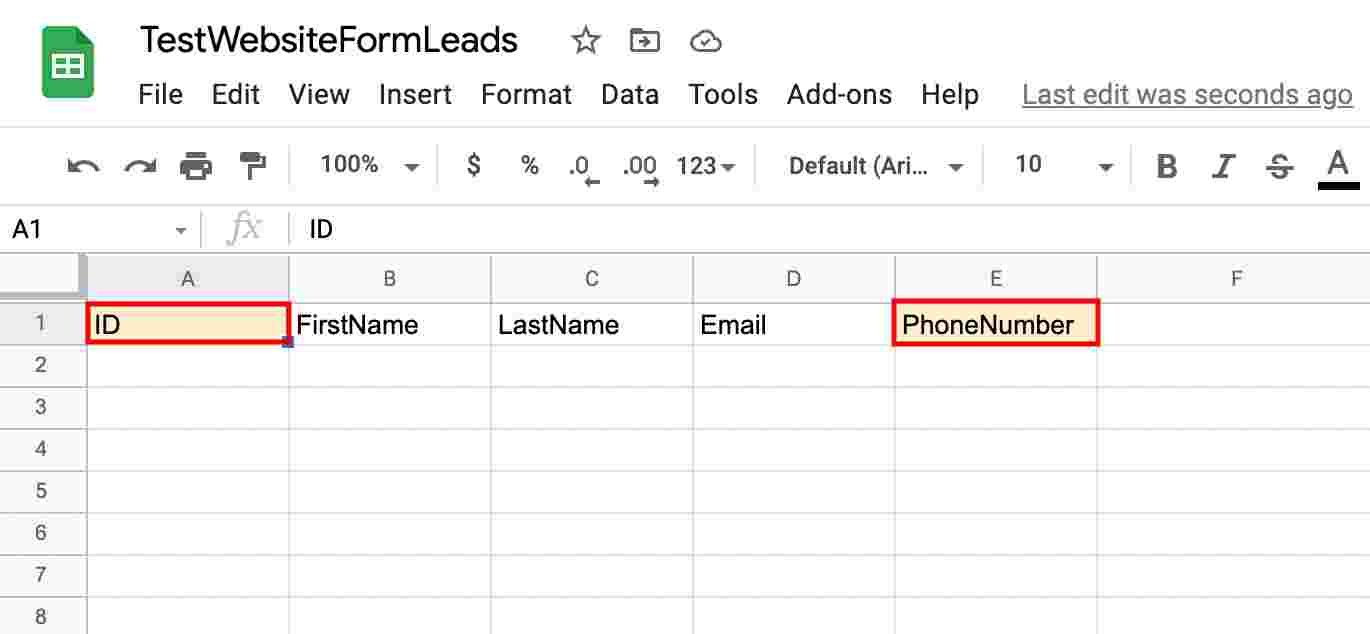
- Use the first row for labeling the required fields.
- Note: When naming fields DO NOT INCLUDE SPACES. (e.g., “FirstName” is an appropriate label but “First Name” is not.)
- Note: When naming fields DO NOT INCLUDE SPACES. (e.g., “FirstName” is an appropriate label but “First Name” is not.)
- The required fields include:
- ID - This must be a non-repeating identifier.
- FirstName - The customer’s first name that will pass in from the web form.
- LastName - The customer’s last name that will pass in from the web form.
- Email - The email address that will pass in from the web form.
- PhoneNumber - An eleven-digit phone number that will pass in from the form. Note: Eleven digits are required.
- Save the spreadsheet as a .CSV file. It must be comma-separated.
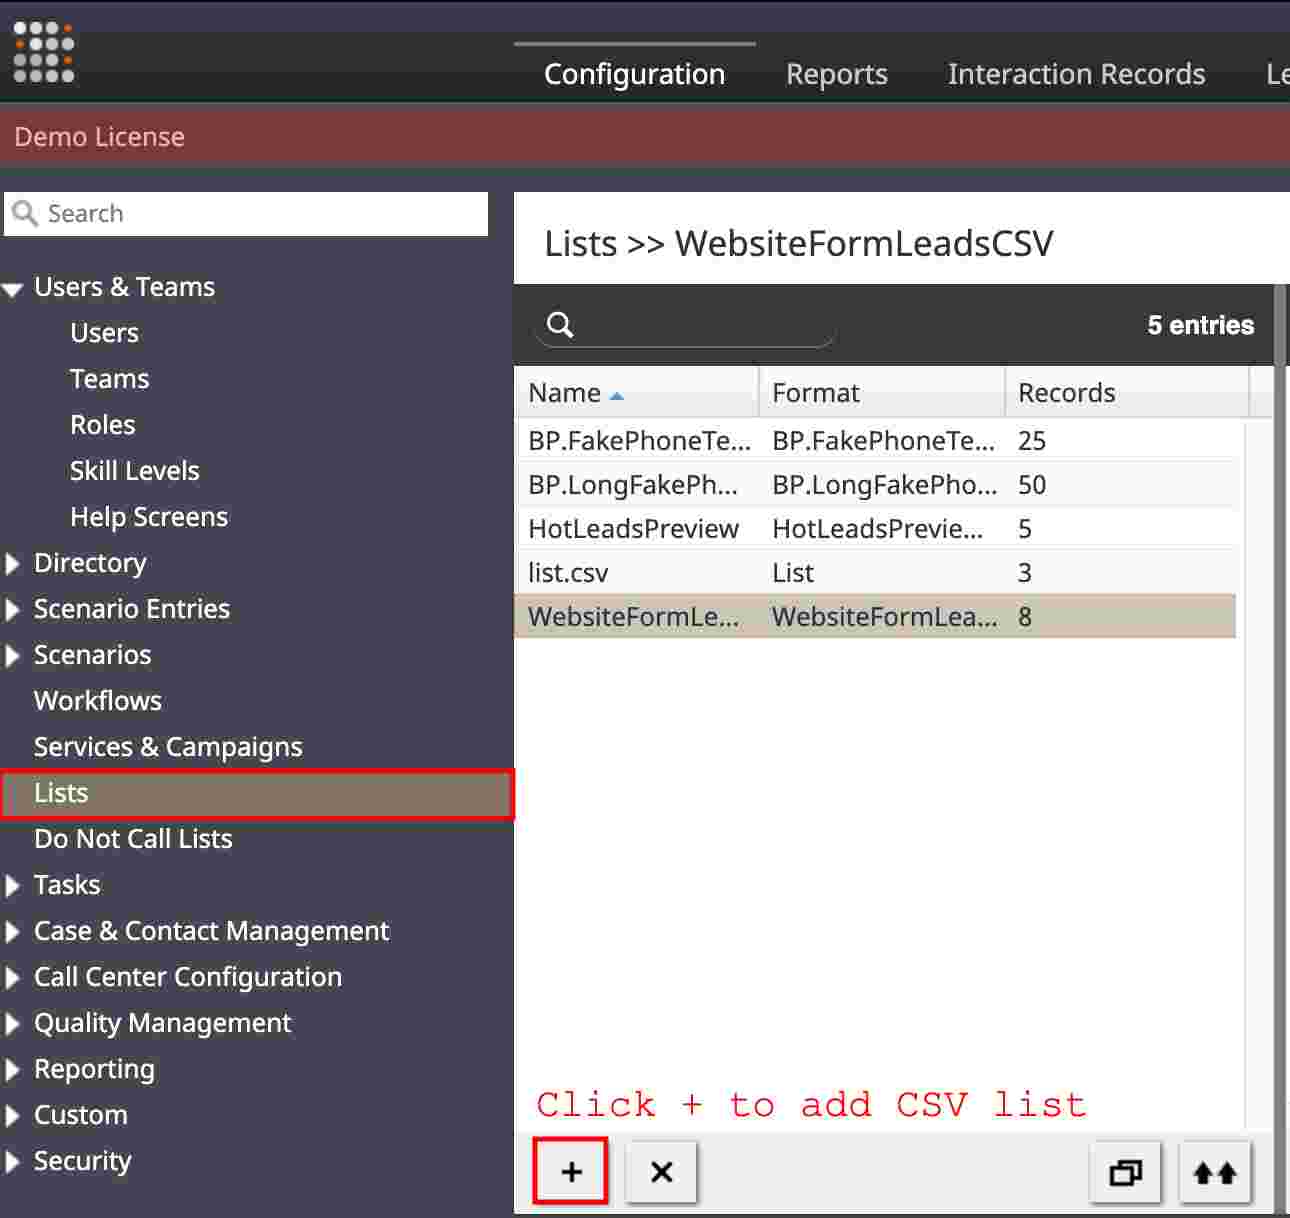
- This is the Lists feature. Clicking the “ + “ button in this system always adds.


