From Bright Pattern Documentation
How to Upload a List
Before you can launch a campaign, you will need to either upload a preconfigured list or import and create a new list. In this article, you will learn how to upload a list in the Contact Center Administrator application.
Procedure
- In Contact Center Administrator > Configuration > Lists, click the + Import Lists button to add a new list.
- A list import wizard will open.
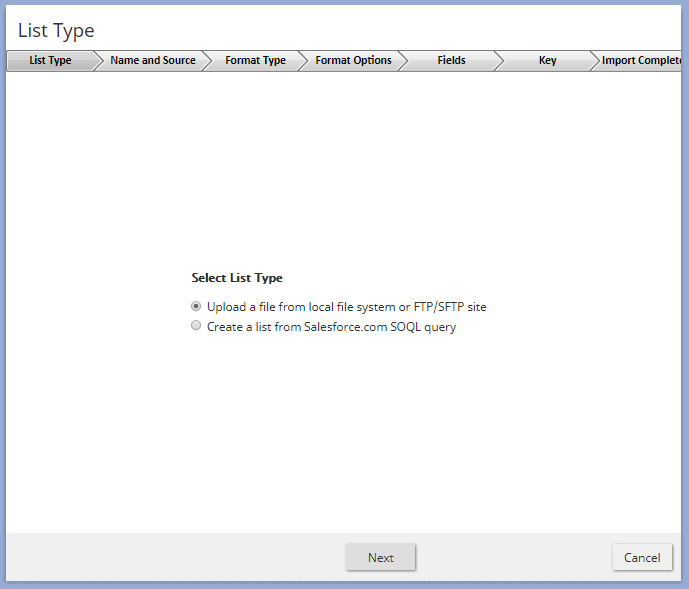
- In List Type, you can choose whether you will upload a list from file or create a list from scratch.
- You will have to pick between two radio buttons:
- Upload a file from the local file system or FTP or SFTP site.
- Create a list from Salesforce.com SOQL query.
- You will have to pick between two radio buttons:
- Select Upload a file from local file system or FTP/SFTP site, and click Next
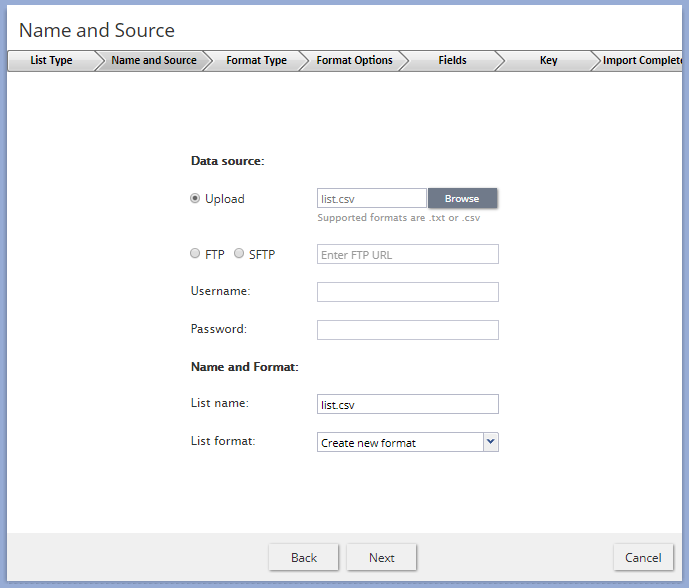
List Type dialog for selecting a list from file or creating a list from SOQL - In Name and Source, you will specify where the list is coming from and the list name.
- Note: If you do not already have a list file, it’s time to create one.
- Under Data Source on the List section, you will have three radio buttons: Upload, FTP, and SFTP.
- Choose “Upload.”
- Click “Browse.”
- Locate where you saved and downloaded the .CSV file you created.
- Note that you can only upload .CSV or .TXT files.
- Click “Open.”
Name and Source dialog is where you name the list and specify its source
- Under the Name and Format section you will have a text field called “List name” and a drop-down list named “List format”.
- In List Name rename your spreadsheet file without the .CSV extension.
- It should look something like this: “TestListWebFormLeads”
- Not "TestListWebFormLeads.csv" or "Test List Web Form Leads".
- Leave the drop down box in List format on the default “Create new format.”
- Click “Next.”
- In List Name rename your spreadsheet file without the .CSV extension.
- In Format Type, you will set the options so that you will know how the data will be displayed in the list. There are several choices:
- Two radio buttons: Delimited and Fixed width.
- Choose Delimited.
- A checkbox marked “First line contains field names.”
- Make certain that this box is checked.
- A drop-down box labeled “Input file encoding.”
- Leave this as the default “UTF-8.”
- Two radio buttons: Delimited and Fixed width.
- Click “Next.”
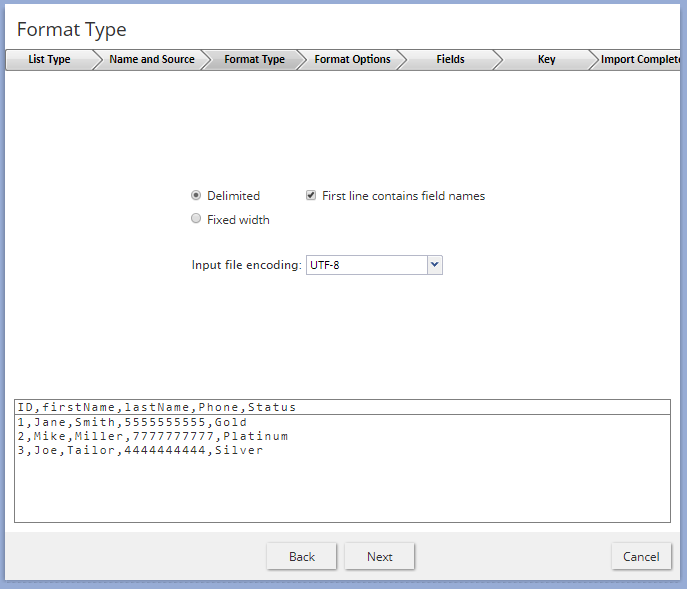
Format Type is where you set formatting options for the list - The next page, Format Options, you choose how the data values will be separated in the file.
- There are four radio buttons: Comma, Tab, Semicolon, and Custom.
- As the .CSV list must be comma-separated, choose “Comma.”
- Click “Next.”
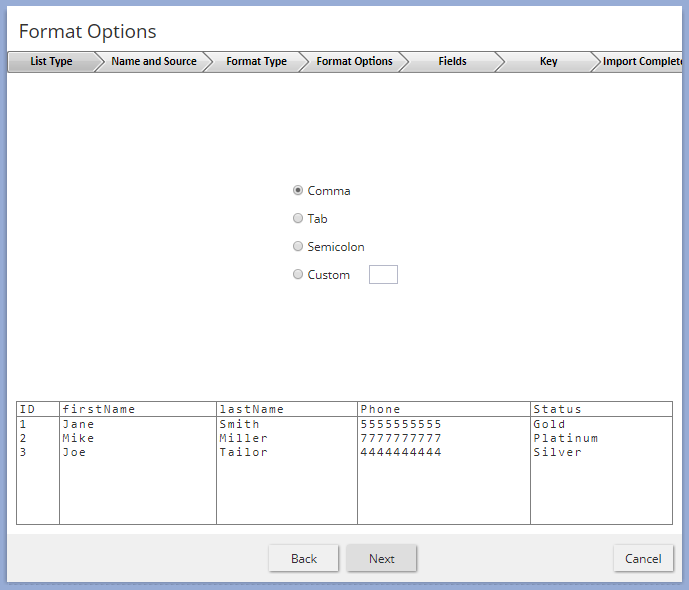
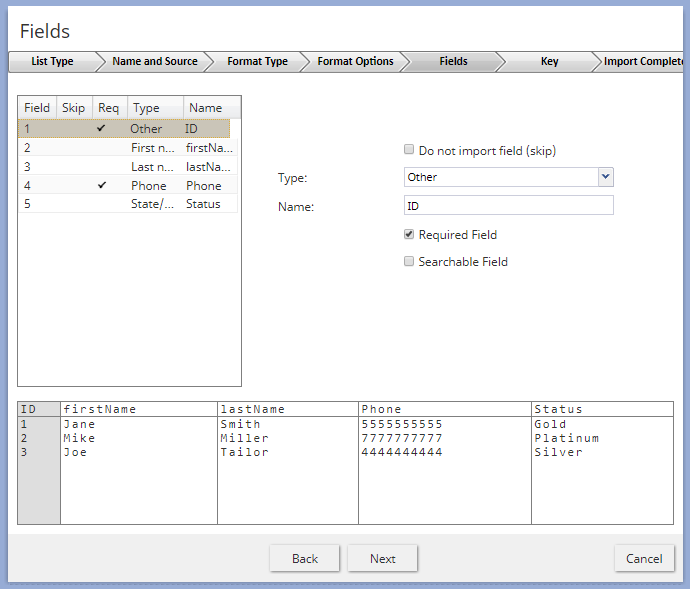
In Format Options, choose Comma, Tab, Semicolon, or Custom - On the Fields page you can see the various fields you will be importing.
- These fields can be seen on the left side of the screen.
- One at a time, choose each of the fields on the left side and choose the detailed options for that field on the right hand side.
- There are five items for each imported left side row:
- A checkbox labeled “Do not import field (skip).”
- Check this if you do not wish this field to be imported.
- Note: This may NOT be chosen for the ID or Phone fields.
- A non-repeating identification number and phone number are the bare minimum fields for passing information to an agent.
- Check this if you do not wish this field to be imported.
- A Type drop down.
- This drop down includes a variety of choices: Agent, Agent Login ID, Caller ID, Company, Date/Time, Date/Time - schedule call at, Encrypted data, First Name, Integer, Last Name, Other, Phone, Postal Code, Priority, and State/Providence.
- Choose an appropriate type for the field in question.
- A Name textbox.
- Type in the names of each field.
- A Required Field checkbox.
- This MUST be checked for the ID and Phone fields.
- Checking this box for other fields is at your discretion.
- A Searchable Field checkbox.
- This field is not required for any of the rows.
- Checking this box is at your discretion.
- For the Phone row, note that there are extra phone options on the lower right side.
- As you will be passing in an already-formatted eleven-digit phone number in full international format (i.e., with the country codes included and without any separation such as commas, dashes, or parentheses from your website form) these options should be ignored.
- Note: A country code must be specified for campaigns with any calling hour restrictions and for campaigns where numbers are checked against DNC lists of the following types: Area Code, Geographic (Postal), and Geographic (State/Province).
- A checkbox labeled “Do not import field (skip).”
- For this tutorial, leave the “Phone options” untouched.
- Verify that the ID and Phone checkboxes are both checked.
- Verify that each field type has been appropriately chosen.
- Click “Next.”
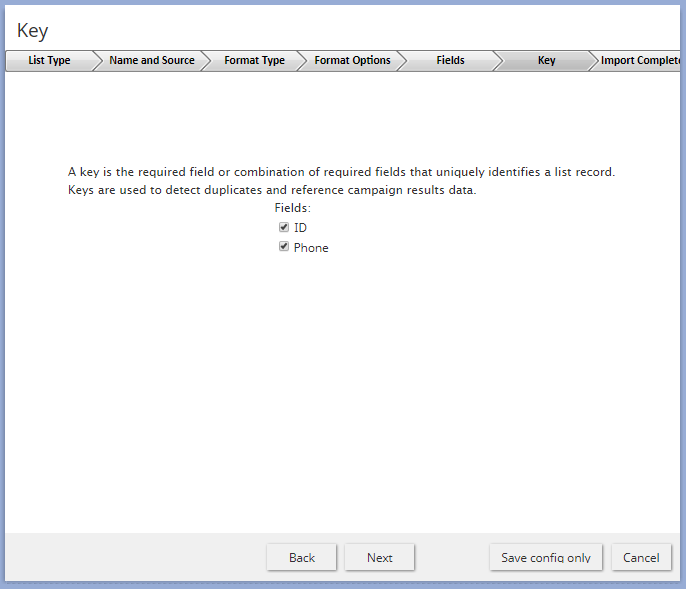
Fields is where you set options for list fields - The next page, Key, has checkboxes that reflect the required field choices you made on the previous screen.
- During this tutorial, the only required fields you chose were ID and Phone.
- As a result, the only checkboxes on the Key page are “ID” and “Phone.”
- Choose “ID”, as this option uniquely identifies the record.
- If there are multiple records uploaded with the same identification number, subsequent records will update the first.
- Click “Next.”
In Key, specify required fields - You will now be on the “Save new list format as” window.
- There is a text field labeled Name.
- Note that the wizard has added the word “format” at the end of the name.
- As with the .CSV labels, you must name the list without spaces except for the space between the name and the word “format”.
- The name should look like this: “AnAwesomeListName format”.
- Not like this: “Not An Awesome List Nameformat”.
- Note: We are choosing this option in order to create a new format specifically using the layout of the imported list.
- This setting is specified for list type File only.
- Click “OK.”
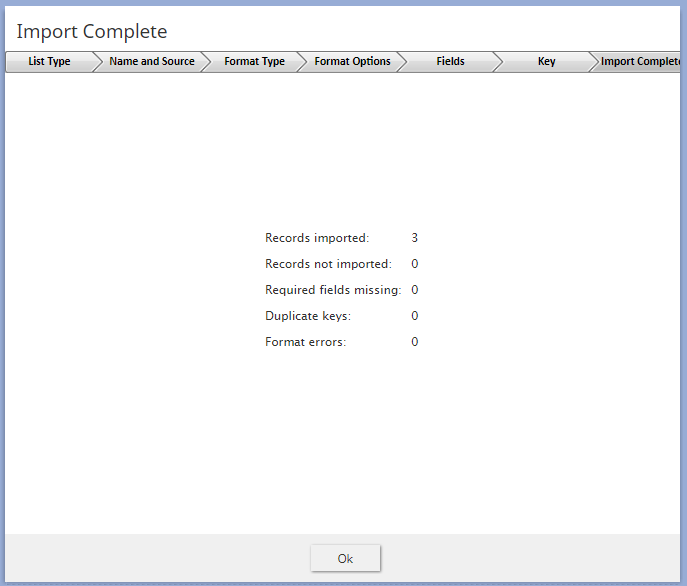
- You will be on the Import Complete page.
- Review the information given and correct any errors.
- If your imported spreadsheet .CSV file was entirely blank except for the labeled fields, the page should have zeroes on the right hand column.
- If your imported spreadsheet .CSV file was not entirely blank, the available records will be numbered on the right hand column.
- Click “OK.”
- Go back to Bright Pattern’s Contact Center Administrator.
- Go to Lists on the left menu.
- Verify that the list has uploaded.
Import Complete is where you review the list import


You are now done uploading a list. For more information, see the Contact Center Administrator Guide, section Lists.