(No difference)
| |
Revision as of 19:46, 15 March 2019
How to Create a Voice Scenario That Blocks Specific Incoming Phone Numbers
In your call center's operations, you and your agents may have to deal with spam or other unwanted incoming calls. While these calls can be frustrating, it is possible to use the internal logic of the Scenario Builder application to block the phone numbers of these unwanted calls from reaching your agents.
The following article explains how to create this type of scenario and includes an example for you to download and import into your Contact Center Administrator application.
Scenario Example
Click the following link to download an annotated version of this voice scenario example.
File:App How to Block Incoming Calls from Specific Numbers.zip
For instructions on how to import this file into your contact center, see the Contact Center Administrator Guide, section Scenarios Overview > How to Export and Import Scenarios.
For general information about scenarios, refer to section Scenario Builder Overview.
Scenario Flow
What follows is a simple sequence of actions that allows you to block specific incoming phone numbers in a voice scenario.
Please note this is an example scenario only and not intended for production use. All conditional exits should be defined with actions for production use.
Scenario Overview
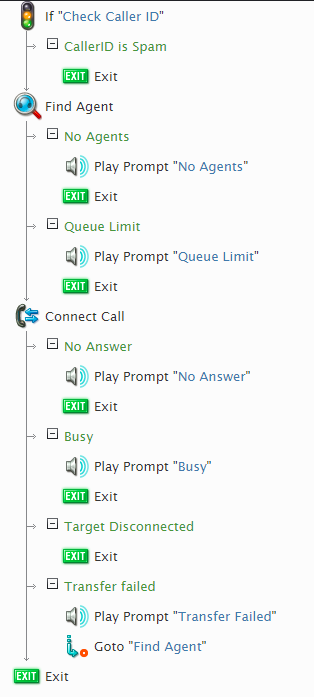
The diagram shown illustrates what the complete scenario looks like when designed in the Scenario Builder application.
Action 1: Configure an If block with the phone numbers you want to block
Using the If block, it is possible to block individual incoming phone numbers. To do this, take the following steps:
- Drag an If block into your scenario; place it before the Find Agent/Connect Call blocks.
- In the If block settings, add a branch.
- Give the branch an exit label. In this scenario, we will call it CallerID is Spam.
- Next, select add condition; this will pop a configuration window.
- In the configuration window, from the first drop-down menu, select Caller's number.
- From the second drop-down menu, select is.
- From the third drop-down menu, select contains.
- In the last field, enter the phone number.
Note that you can have multiple add condition instances, each with a different phone number.
Action 2: Define how you want your scenario to deal with the phone numbers
After your If branch exit is configured, you can have the branch exit take the action of your choice (e.g., send the customer directly to voicemail, play a prompt then hangup, etc.) In this example, our branch exit CallerID is Spam simply hangs up on the caller(s) using the Exit block.
Action 3: Configure the rest of the scenario
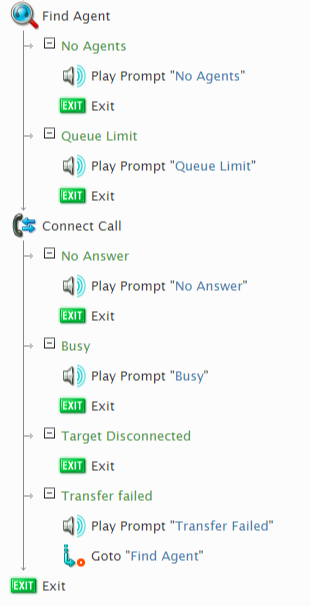
After configuring the If block, you can configure your scenario however you would like. Note that, at a minimum, your voice scenario should contain the Find Agent and Connect Call blocks; these are meant to work together and should be arranged in your scenario with no other blocks between them.
As a reminder, all conditional exits should be defined. In this example, we have configured each conditional exit with a Play Prompt block; the purpose of this is to notify the customer of what is currently happening or is about to happen.
After each prompt, with the exception of the Transfer Failed exit, we place an Exit block to end the scenario. For the Transfer Failed conditional exit, a prompt plays then a Goto block redirects the scenario back to the Find Agent block.


