How to Merge Contacts
Merging contacts is a way to consolidate contact information and case associations from duplicate contacts into a single master record.
| In order to merge contacts, your agent account must have permission to both Edit and Delete contacts. | ||
Initiating a Merge
To begin a merge, open the Details Tab of one of the contacts which you would like to merge and click the Merge ![]() button.
button.
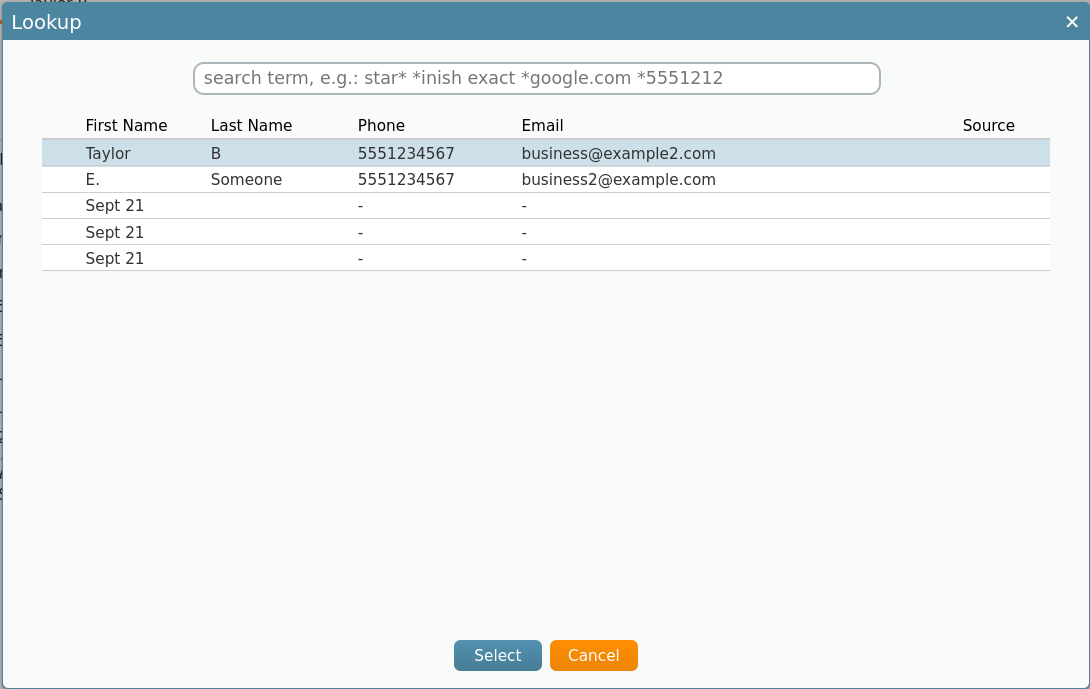
This opens a window where you can choose another contact with which to perform the merge. Choose a duplicate contact and click Select ![]() .
.
Once you have selected a contact to merge, the Merge Contacts tab opens.
Resolving the Merge
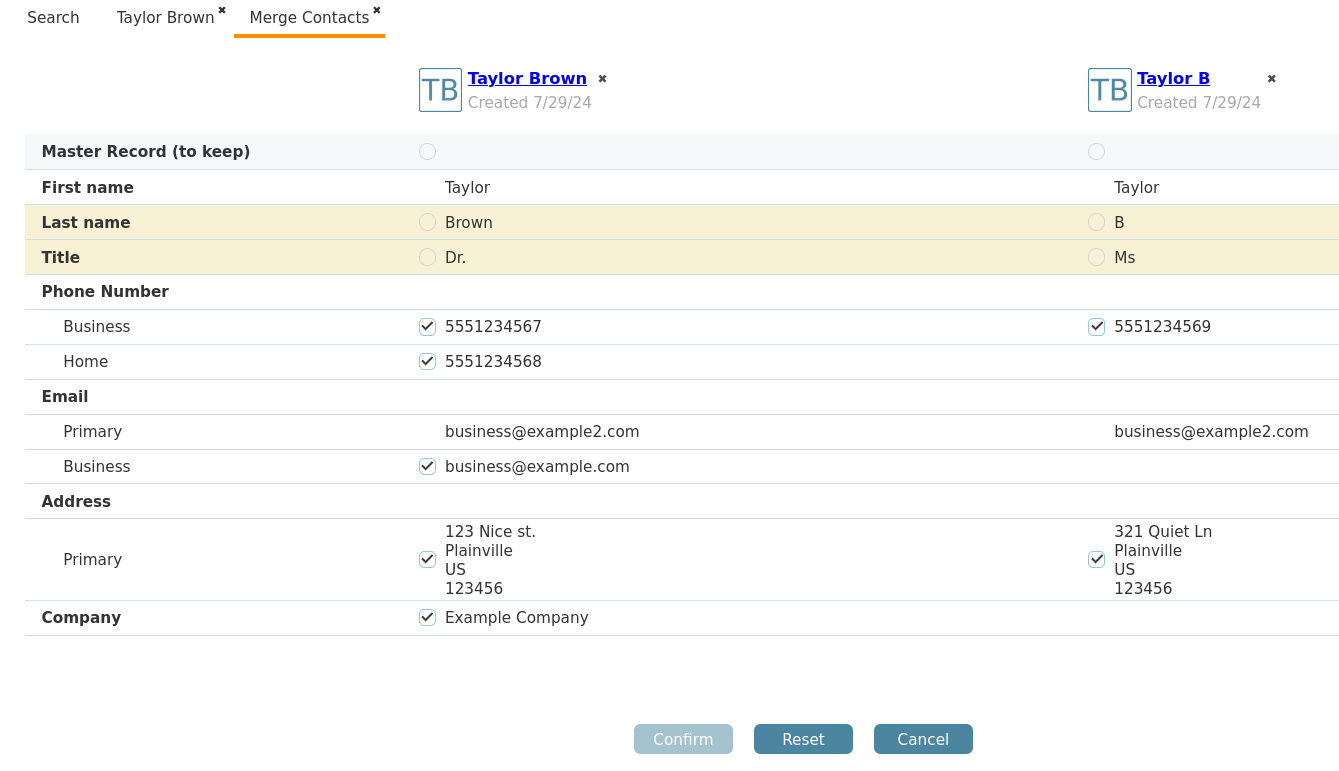
From the Merge Contacts tab, choose which contact will be the master record and which field values to retain.
Choose a Master Record
This row in the Merge Contacts tab allows you to select a single contact to be preserved as the master record. The other contact will be deleted.
Choose a single value in highlighted fields
Highlighted fields indicate data conflicts between the two contacts. In order to complete the merge you must select which data to keep in the master record. In this example, one contact has a last name "Brown" and title "Dr.", while the other contact has a last name "B" and title "Ms". Once a value is selected, the row will stop being highlighted.
Select which field values to merge
The phone number, email, and address fields, among others, allow for multiple values to be saved to a single contact. In this example, each contact has a different Business Phone Number, but the row is not highlighted since either or both numbers can be saved to the contact. Selecting neither number will result in the field being removed from the contact.
Fields with identical values are automatically merged
Fields with an identical value for both records do not have the option to be selected or discarded. In this example, the Business Email "business@example2.com" is common to both contacts, so there is no option to choose between records.
Confirm merge
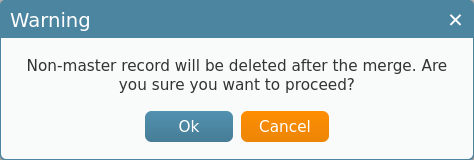
Once all merge conflicts have been resolved, and a master record has been chosen, click the Confirm ![]() button to update the master contact with the chosen records, and delete the other contact. You will be presented with a confirmation dialog warning you that the non-master record will be deleted.
button to update the master contact with the chosen records, and delete the other contact. You will be presented with a confirmation dialog warning you that the non-master record will be deleted.
Viewing Merge History
After the merge is completed, the master record is be displayed with updated fields. Merge activities listed in the Activities ![]() tab of a contact will be marked with a two-tailed arrow
tab of a contact will be marked with a two-tailed arrow ![]() icon.
icon.


