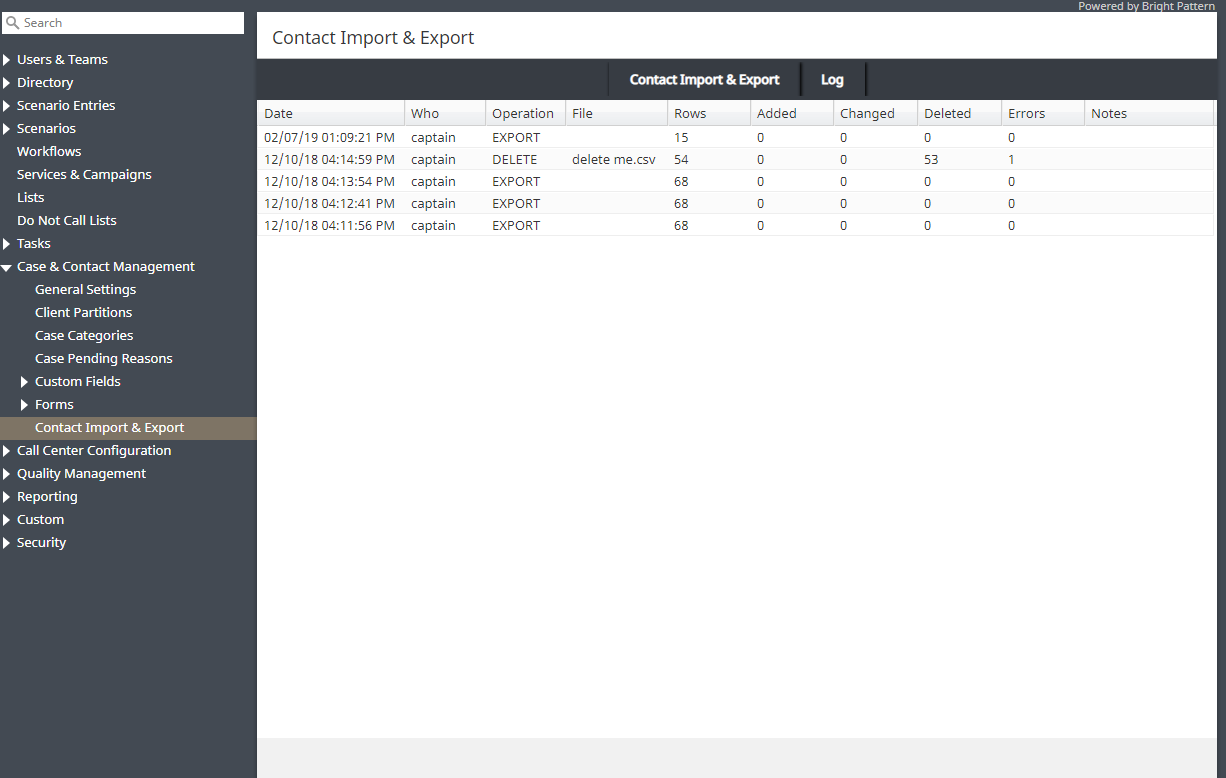
Contact Import & Export
Contact Import & Export is where you are able to import, export, and delete bulk contacts for use in Agent Desktop. Note that this section replaces and removes the Bulk Export/Import Contacts feature from the Agent Desktop Search & Preview Records screen. Note that contact information may be retrieved via the Scenario Builder's application's Bright Pattern Search Object block.
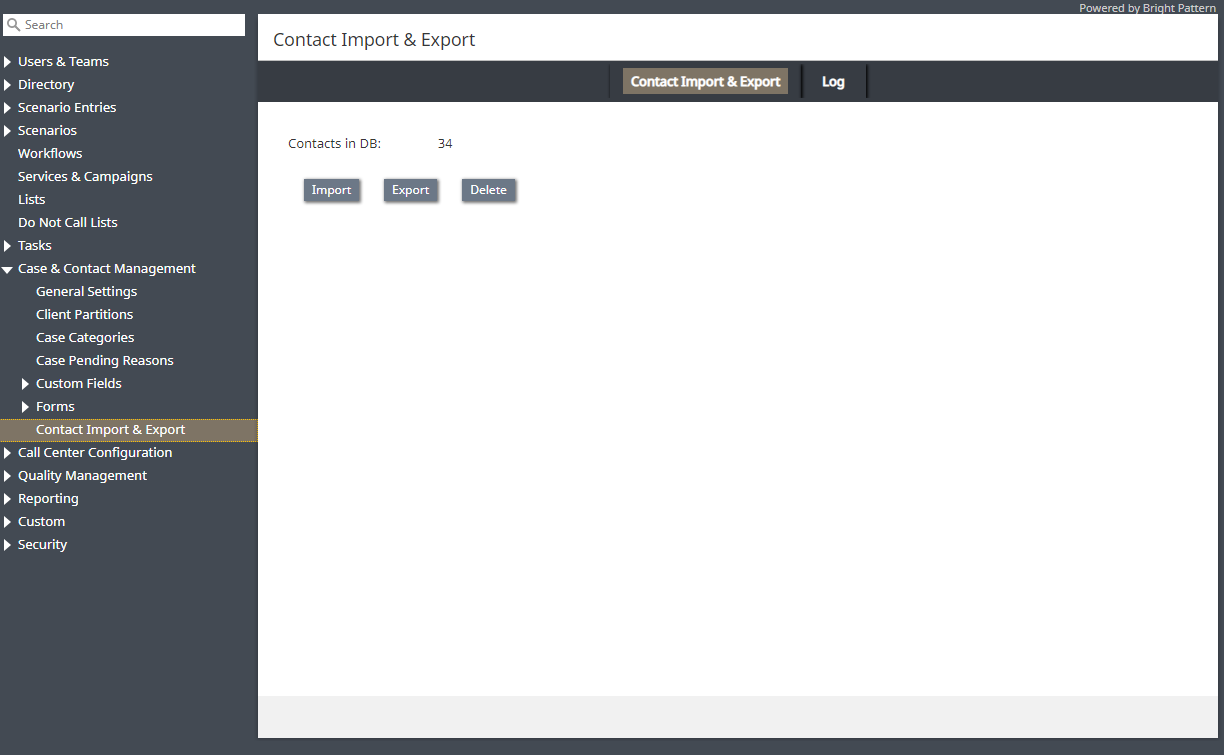
Contact Import & Export Tab
The Contact Import & Export tab is where you may initiate import, export, and deletion of bulk contacts. Additionally, the total number of contacts currently in your database is listed here.
Import
The Import option allows you to upload bulk contacts through an import dialog window.
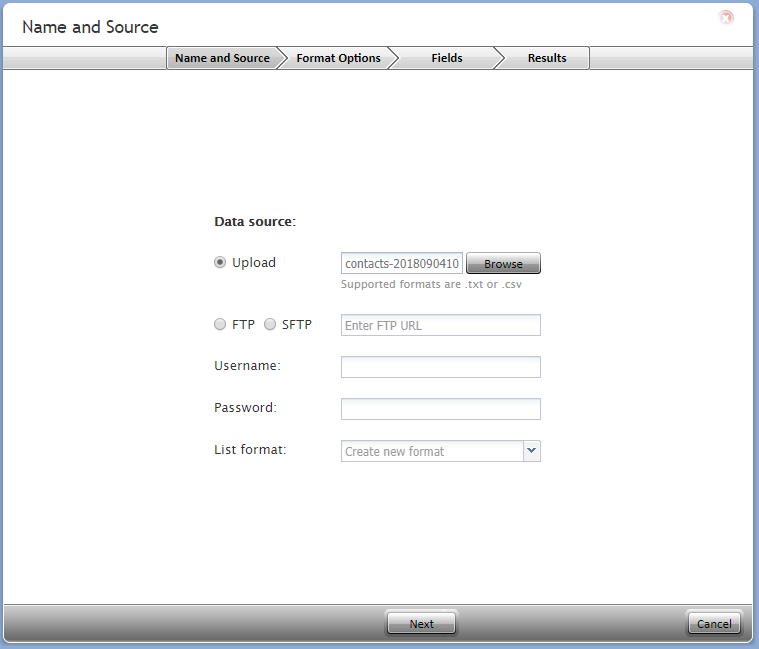
Name and Source Tab
Data Source
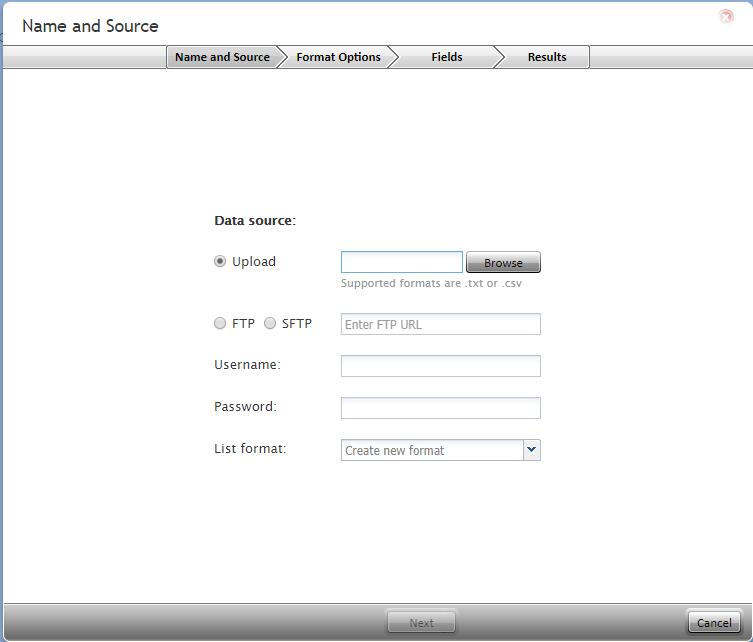
Data Source allows you to select from the following options.
Upload
This option allows you to upload a .TXT or .CSV file.
FTP or SFTP
This option allows you to select either FTP or SFTP and then enter the access URL.
Username
This is the username of the FTP or SFTP site.
Password
This is the password of the FTP or SFTP site.
List format
If you previously saved a list format, you may choose to import your contacts in this format.
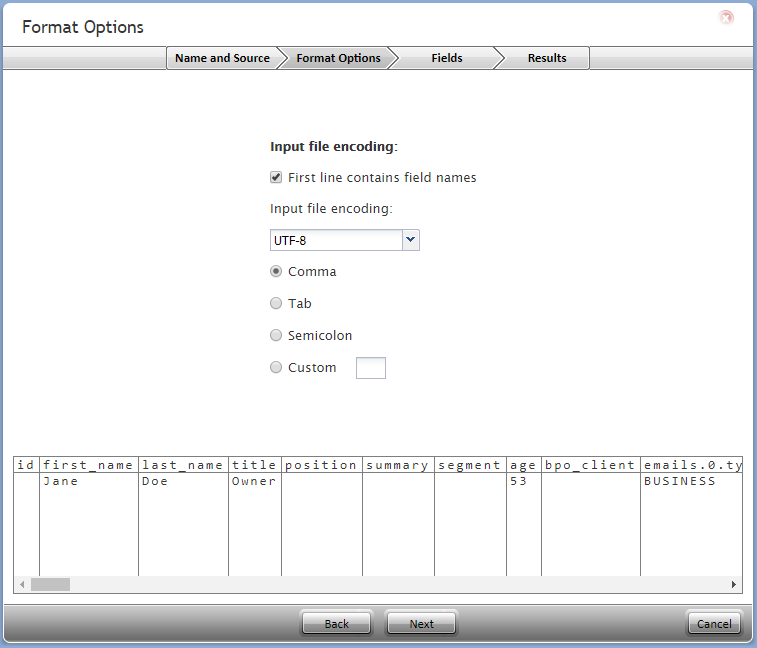
Format Options Tab
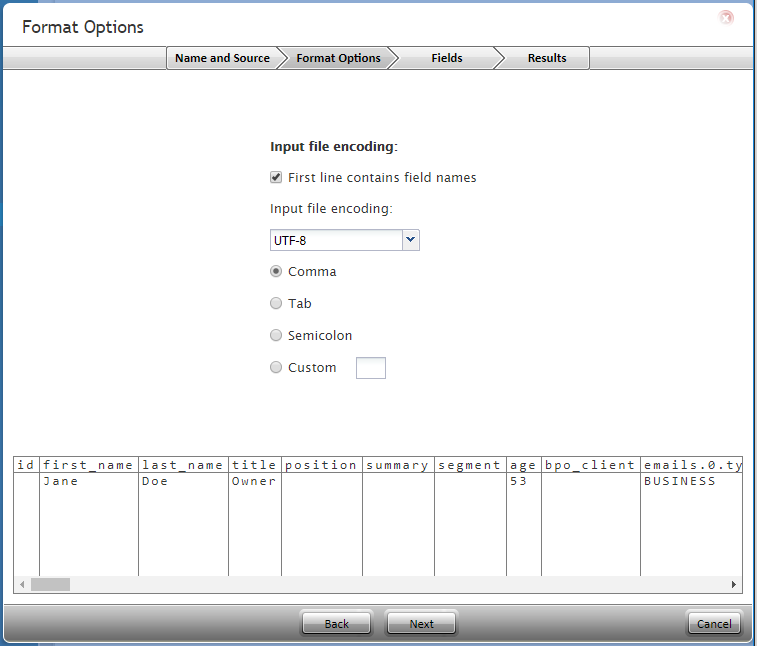
The Format Options tab allows you to customize the format of your import records.
File Input Encoding
First line contains field names
When enabled, this checkbox will recognize the first line or row of your upload as the names of the contacts fields.
Input file encoding
This option allows you to select the encoding for your import file; select the encoding type from the drop-down menu.
Field separator options
The field separator options are as follows: Comma, Tab, Semicolon, and Custom.
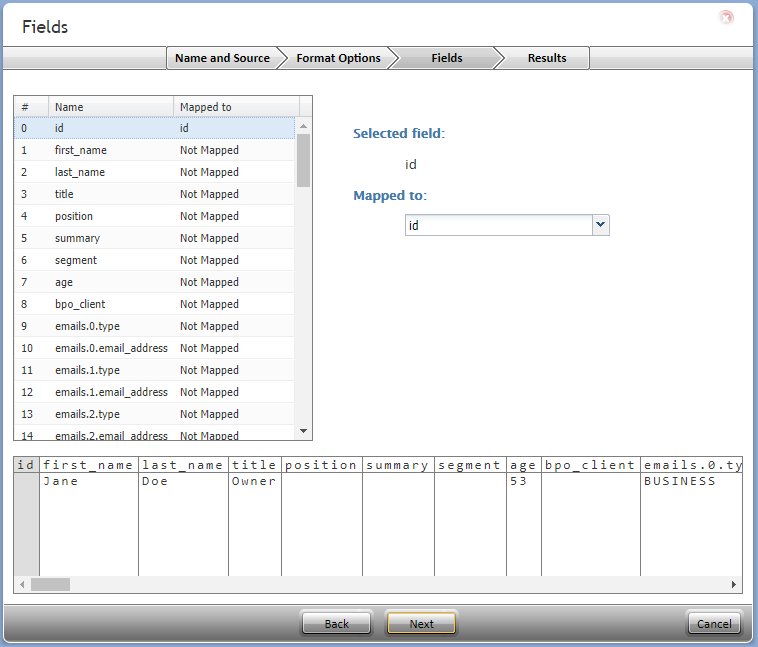
Fields Tab
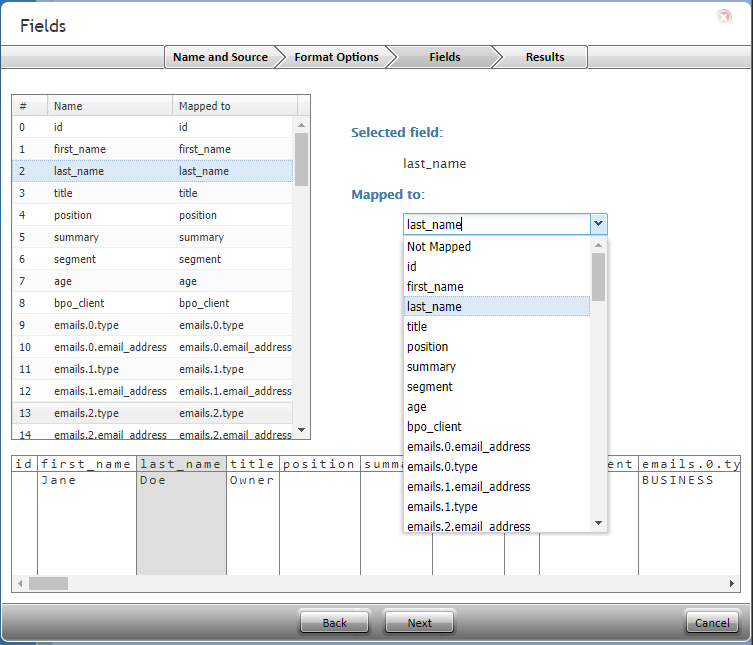
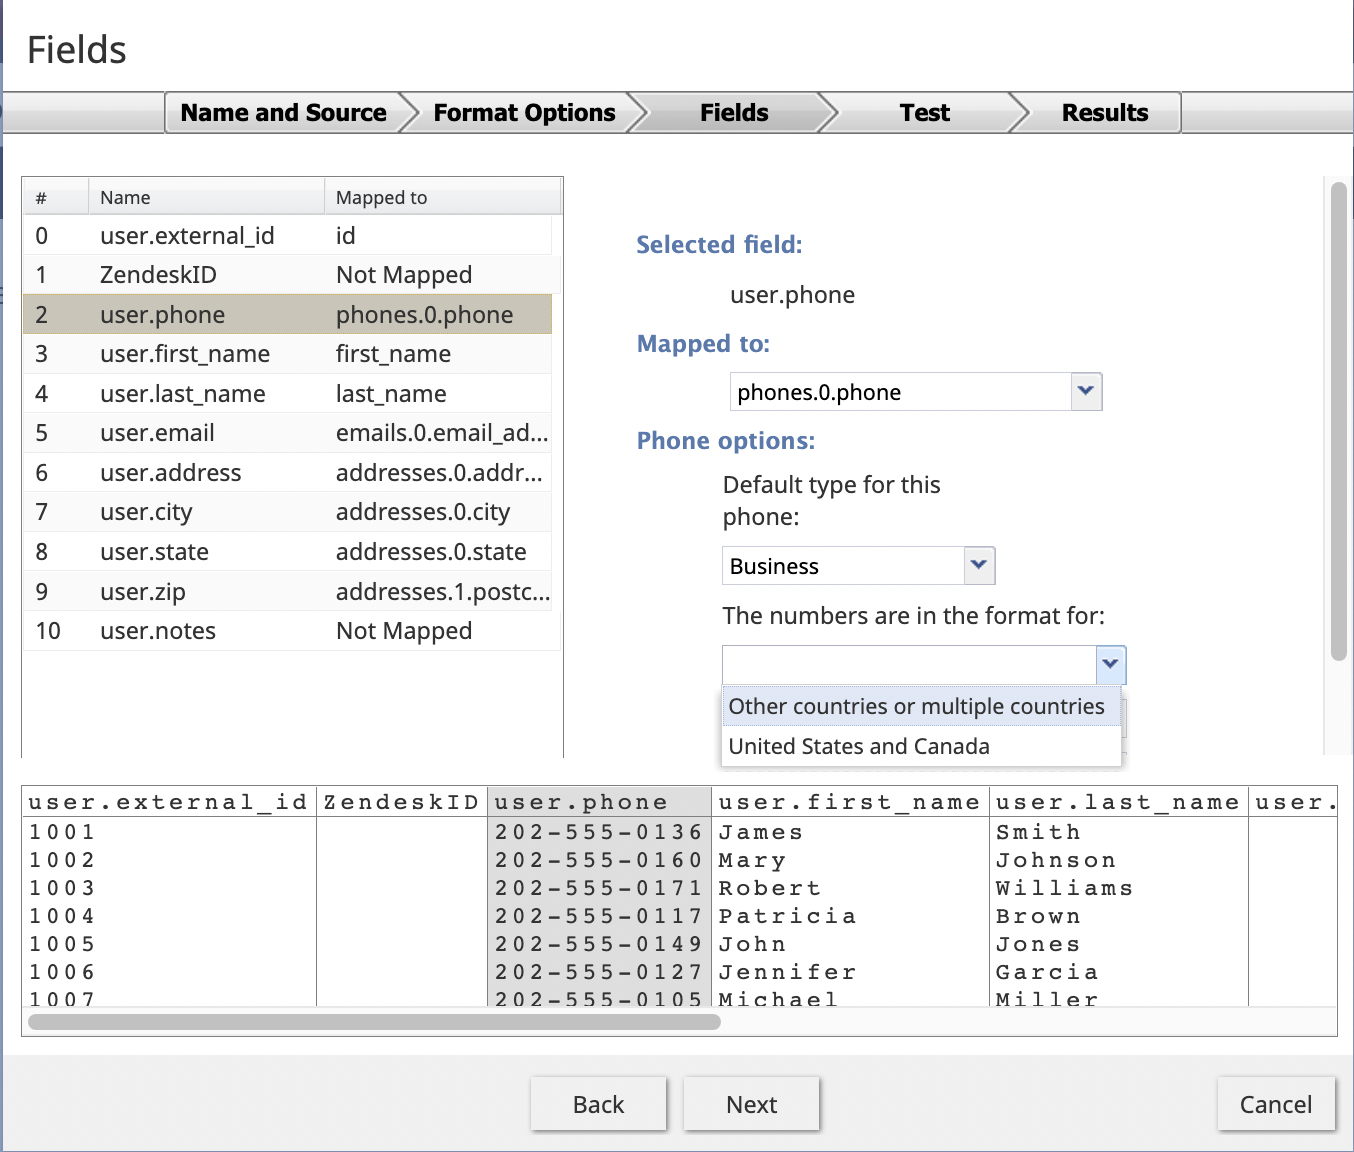
The fields selector maps the fields from the import source to fields of contact and company objects. If your import source does not contain fields currently recognized in the database, this selector allows you to map them as needed. When you select a field in the field map, the following information will display.
Selected field
This is the field you have selected.
Mapped to
The Mapped to menu displays where the selected field is currently mapped to. To change where the field is mapped to, select a new field from the menu.
Note: When mapping the phone number field, please note that the number format may be different depending upon which country you are configuring the phone number for. Under Phone Options, there is a drop-down option labeled The numbers are in the format for: with the choice of Other countries or multiple countries or United States and Canada.
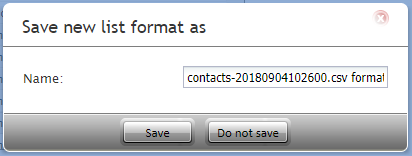
Save new list format as
After mapping your import fields, the Save new list format as dialog window will pop up. From here, you will have the option to save this import as a new format list. Note your import will not be affected if you choose not to save a new list format.
Import Format
The Contact Center Administrator application allows you to import contacts, including their addresses, email addresses, external IDs, and other properties in bulk, by uploading a specially formatted spreadsheet.
If creating a spreadsheet from scratch isn’t optional, you may export your existing contacts list, change it, and upload it back. Opening the exported contact list spreadsheet will provide you with the list of named fields. This allows you to identify the precise information to be found within the individual columns.
Import and export operations are activated by the Import and Export buttons. Both the .TXT and the .CSV file formats are supported for import and export.
Note that third-party messenger services (e.g., Facebook, Telegram, etc.) all follow the same pattern and do not disclose the real user identities. When uploading customer messenger contact information, it is required that both the messengers.<n>.id field and the messengers.<n>.user_id have values. Bright Pattern Contact Center software uses these two values in place of the real user identities.
The Import/Export fields are as follows:
| Field Name | Description |
|---|---|
| id | ID number for the record |
| first_name | Customer’s first name |
| last_name | Customer’s last name |
| title | Customer’s title |
| position | Customer’s position within the company |
| summary | Summary information regarding the client |
| segment | Gold, Silver, Bronze (drop-down selection) |
| dob | Date of birth |
| bpo_client | Name of BPO client. This is a symbolic name, not an ID |
| emails.0.type | Can be primary, business, or private |
| emails.0.email_address | First email address entered |
| emails.1.type | Can be primary, business, or private |
| emails.1.email_address | Second email address entered |
| emails.2.type | Can be primary, business, or private |
| emails.2.email_address | Third email address entered. |
| phones.0.type | Can be business, home, mobile, or fax |
| phones.0.phone | First phone number entered |
| phones.1.type | Can be business, home, mobile, or fax |
| phones.1.phone | Second phone number entered |
| phones.2.type | Can be business, home, mobile, or fax |
| phones.2.phone | Third phone number entered |
| phones.3.type | Can be business, home, mobile, or fax |
| phones.3.phone | Fourth phone number entered |
| phones.4.type | Can be business, home, mobile, or fax |
| phones.4.phone | Fifth phone number entered |
| addresses.0.type | Can be primary, billing, shipping, or other |
| addresses.0.address_line1 | First address line |
| addresses.0.address_line2 | Second address line |
| addresses.0.city | City |
| addresses.0.state | State |
| addresses.0.postcode | ZIP Code or postal code |
| addresses.0.country | Country |
| addresses.1.type | Can be primary, billing, shipping, or other |
| addresses.1.address_line1 | First address line |
| addresses.1.address_line2 | Second address line |
| addresses.1.city | City |
| addresses.1.state | State |
| addresses.1.postcode | ZIP Code or postal code |
| addresses.1.country | Country |
| addresses.2.type | Can be primary, billing, shipping, or other |
| addresses.2.address_line1 | First address line |
| addresses.2.address_line2 | Second address line |
| addresses.2.city | City |
| addresses.2.state | State |
| addresses.2.postcode | ZIP Code or postal code |
| addresses.2.country | Country |
| addresses.3.type | Can be primary, billing, shipping, or other |
| addresses.3.address_line1 | First address line |
| addresses.3.address_line2 | Second address line |
| addresses.3.city | City |
| addresses.3.state | State |
| addresses.3.postcode | ZIP Code or postal code |
| addresses.3.country | Country |
| addresses.4.type | Can be primary, billing, shipping, or other |
| addresses.4.address_line1 | First address line |
| addresses.4.address_line2 | Second address line |
| addresses.4.city | City |
| addresses.4.state | State |
| addresses.4.postcode | ZIP Code or postal code |
| addresses.4.country | Country |
| company.company_name | Name of company |
| company.revenue | Company revenue |
| company.employees | Number of employees employed at the company |
| company.web_url | Company website address |
| external_ids.0.type | Zendesk, Salesforce (Reserved) |
| external_ids.0.id | UUID, for update only (Reserved) |
| external_ids.1.type | Zendesk, Salesforce (Reserved) |
| external_ids.1.id | UUID, for update only (Reserved) |
| external_ids.2.type | Zendesk, Salesforce (Reserved) |
| external_ids.2.id | UUID, for update only (Reserved) |
| external_ids.3.type | Zendesk, Salesforce (Reserved) |
| external_ids.3.id | UUID, for update only (Reserved) |
| messengers.0.type | Messenger name/type (e.g., LINE, Facebook, Telegram, etc.) (Reserved) |
| messengers.0.id | Contact Center’s integration account ID (Reserved) |
| messengers.0.user_id | Contact’s external messenger ID (e.g., Facebook, etc.) (Reserved) |
| messengers.1.type | Messenger name/type (e.g., LINE, Facebook, Telegram, etc.) (Reserved) |
| messengers.1.id | Contact Center’s integration account ID (Reserved) |
| messengers.1.user_id | Contact’s external messenger ID (e.g., Facebook, etc.) (Reserved) |
| messengers.2.type | Messenger name/type (e.g., LINE, Facebook, Telegram, etc.) (Reserved) |
| messengers.2.id | Contact Center’s integration account ID (Reserved) |
| messengers.2.user_id | Contact’s external messenger ID (e.g., Facebook, etc.) (Reserved) |
| messengers.3.type | Messenger name/type (e.g., LINE, Facebook, Telegram, etc.) (Reserved) |
| messengers.3.id | Contact Center’s integration account ID (Reserved) |
| messengers.3.user_id | Contact’s external messenger ID (e.g., Facebook, etc.) (Reserved) |
| created_time | Time the contact was created |
| modified_time | Time the contact was modified |
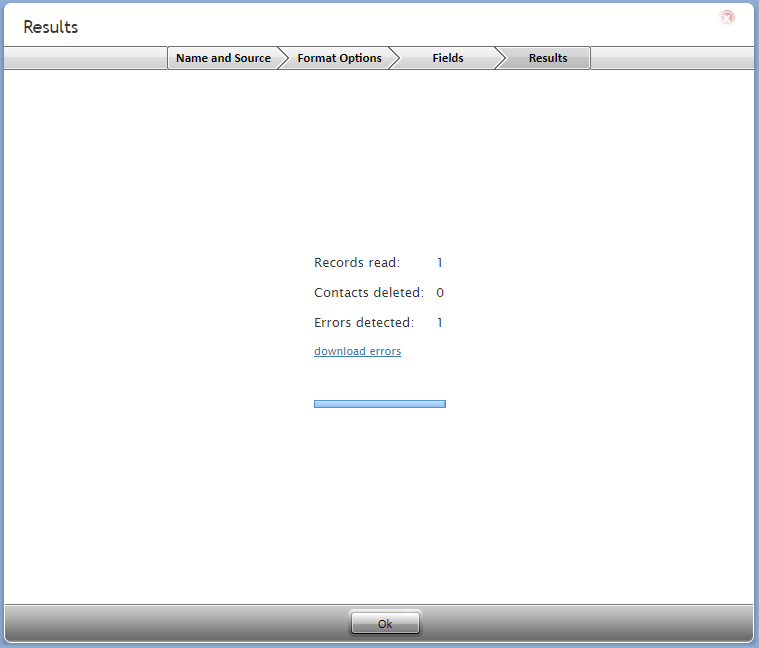
Results Tab
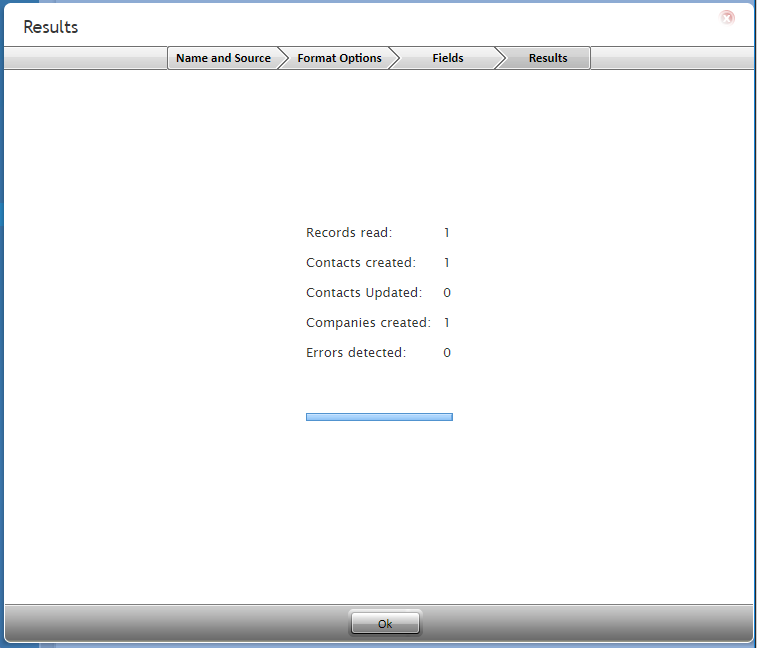
The Results tab displays the results from the attempted import as the following.
- Records read - The number of records read
- Contacts created - The number of contacts created
- Contacts updated - The number of contacts with updated information
- Companies created - The number of companies created
- Errors detected - The number of errors detected in the attempted import
Note: If your import contains errors, you will be able to download a .CSV file listing the errors.
Export
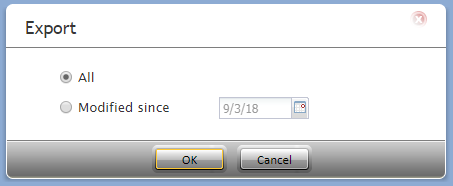
The Export action allows you export contacts from your database in two ways: All Contacts or Modified since.
Note that you may choose the Export action to download a template of what the current contact and company fields are.
All Contacts
The All Contacts option will export all contacts in your database.
Modified since
The Modified since option allows you to export contacts that have been modified from a set date; you may select the date in the calendar.
Delete
The Delete option allows you to remove bulk contacts from your database through a dialog window similar to the one for Import. The Name and Source, Format Options, and Results tabs are the same as those for the import dialog; however, the Fields tab determines how you match contacts in a .CSV file with contacts in the database. Additionally, when you delete contacts, you may delete/update other objects.
Name and Source Tab
Data Source
Data Source allows you to select from the following options.
Upload
This option allows you to upload a .TXT or .CSV file containing the records you wish to delete.
FTP or SFTP
This option allows you to select either FTP or SFTP and then enter the access URL.
Username
This is the username of the FTP or SFTP site.
Password
This is the password of the FTP or SFTP site.
List format
If you previously saved a list format, you may choose to delete your contacts in this format.
Format Options Tab
The Format Options tab allows you to customize the format of your delete records.
File Input Encoding
First line contains field names
When enabled, this checkbox will recognize the first line or row of your upload as the names of the contacts fields.
Input file encoding
This option allows you to select the encoding for your delete file; select the encoding type from the drop-down menu.
Field separator options
The field separator options are as follows: Comma, Tab, Semicolon, and Custom.
Fields Tab
The Fields tab determines how you match contacts marked for deletion in a .CSV file with contacts in the database. Additionally, when you delete contacts, you may delete/update other objects.
Selected field
This is the field you have selected.
Mapped to
The Mapped to menu displays where the selected field is currently mapped to. To change where the field is mapped to, select a new field from the menu.
Results Tab
The Results tab displays the results from the attempted bulk delete as the following.
- Records read - The number of records read
- Contacts deleted - The number of contacts deleted
- Errors detected - The number of errors detected in the attempted delete
Note: If your delete attempt contains errors, you will be able to download a .CSV file listing the errors.
Log Tab
The Log tab displays the following data from bulk imports, exports, and deletes.
Date
Date is the date and time the transaction took place.
Who
Who shows the user who initiated the transaction.
Operation
Operation displays the type of transaction that occurred; the types are Import, Export, and Delete.
File
File displays the name of the Import or Delete file.
Rows
Rows displays the number of rows in the File.
Added
Added displays the number of new contacts added to the database.
Changed
Changed displays the number of contacts already in the database that were altered by the transaction.
Deleted
Deleted displays the number of contacts removed from the database.
Errors
Errors displays the number of records that were not added, changed, or deleted due to missing or incompatible information.
Notes
Notes is where you may enter notes about the transaction.

