How to Configure Remote Assist
During a phone call or chat session with a customer, agents can provide immediate hands-on help with the click of a button using Bright Pattern's Remote Assist (RA) feature. The following procedure describes what a contact center must do to configure their system so that agents can use this licensable feature.
Requirements
Contact centers that wish to implement Remote Assist must have a Remote Assist User license. In order to activate a license or change the number of users, please contact Bright Pattern’s Customer Success and Support.
Procedure
Configuring Remote Assist is a fairly straightforward process, involving:
- Role Creation
- User Creation
- Role Verification
- Connecting the feature to your website or using RA on a voice call
Create Role
As any role can have a variety of privileges assigned, it is not mandatory to create a specific Remote Assist role for your contact center. All that is required is that the role chosen has the ‘’Initiate and conduct remote assist sessions’’ privilege enabled.
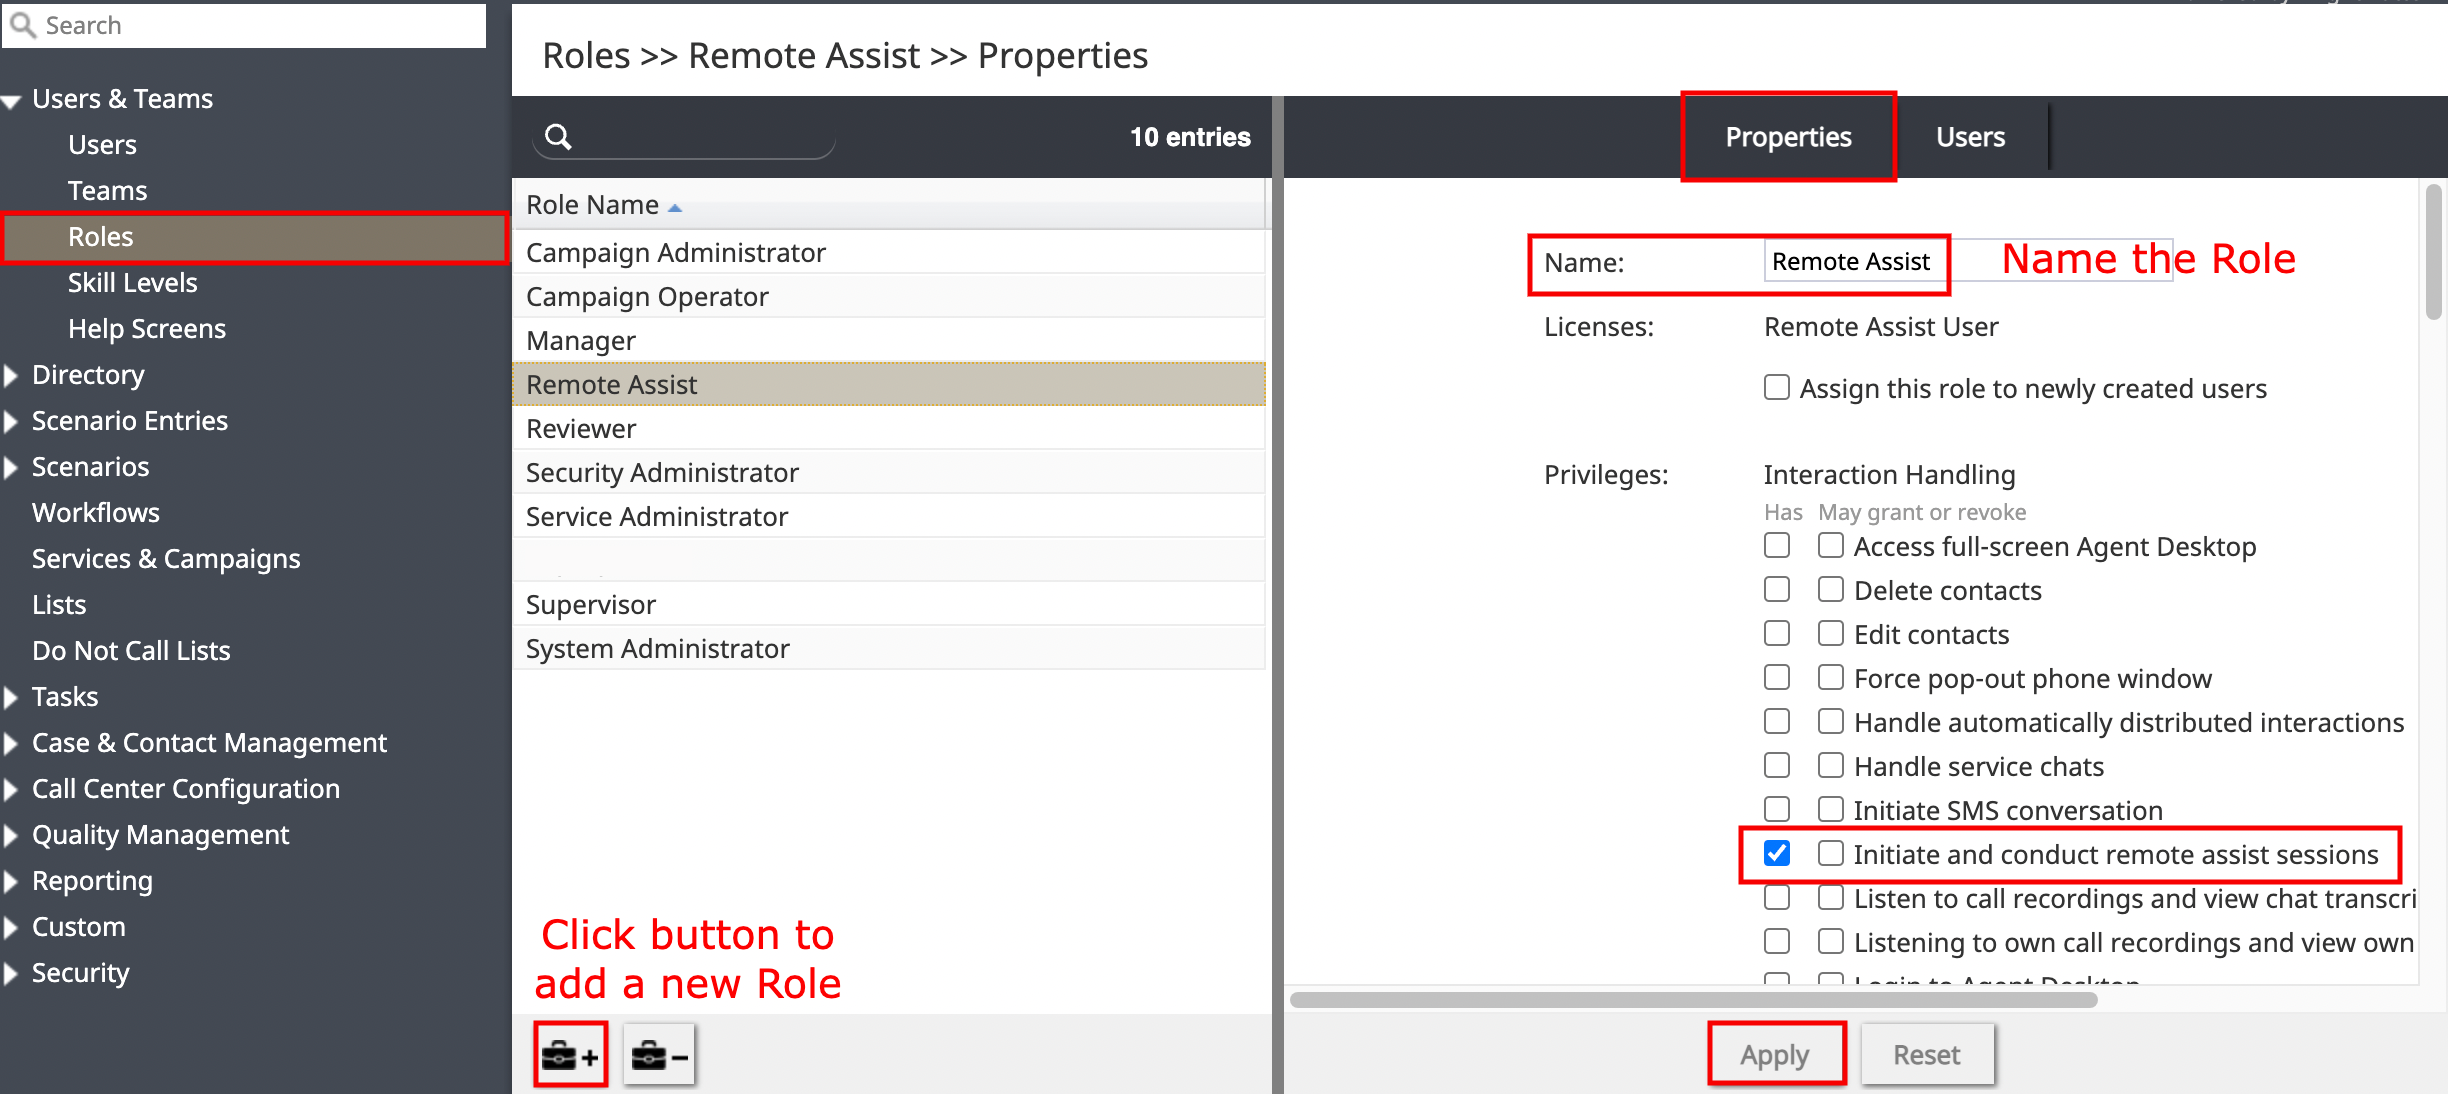
That said, many centers prefer having a fine level of granular control over specific roles. If this is the case for your contact center, you may create a Remote Assist role using these steps:
Sign in to the Contact Center Administrator.- Using the left menu, navigate to the Users & Teams submenu Roles.
- Click the Add role
 button.
 - On the Properties page, name the role.
- Scroll down to the Privileges section on the Properties page.
- Choose the Initiate and conduct remote assist sessions checkbox beneath the Interaction Handling privilege section.
- Click apply.
Create User
Any user can have a variety of roles assigned. In order to use remote assistance, the privilege “Initiate and conduct remote assist sessions” must be assigned.
- Sign in to the Contact Center Administrator.
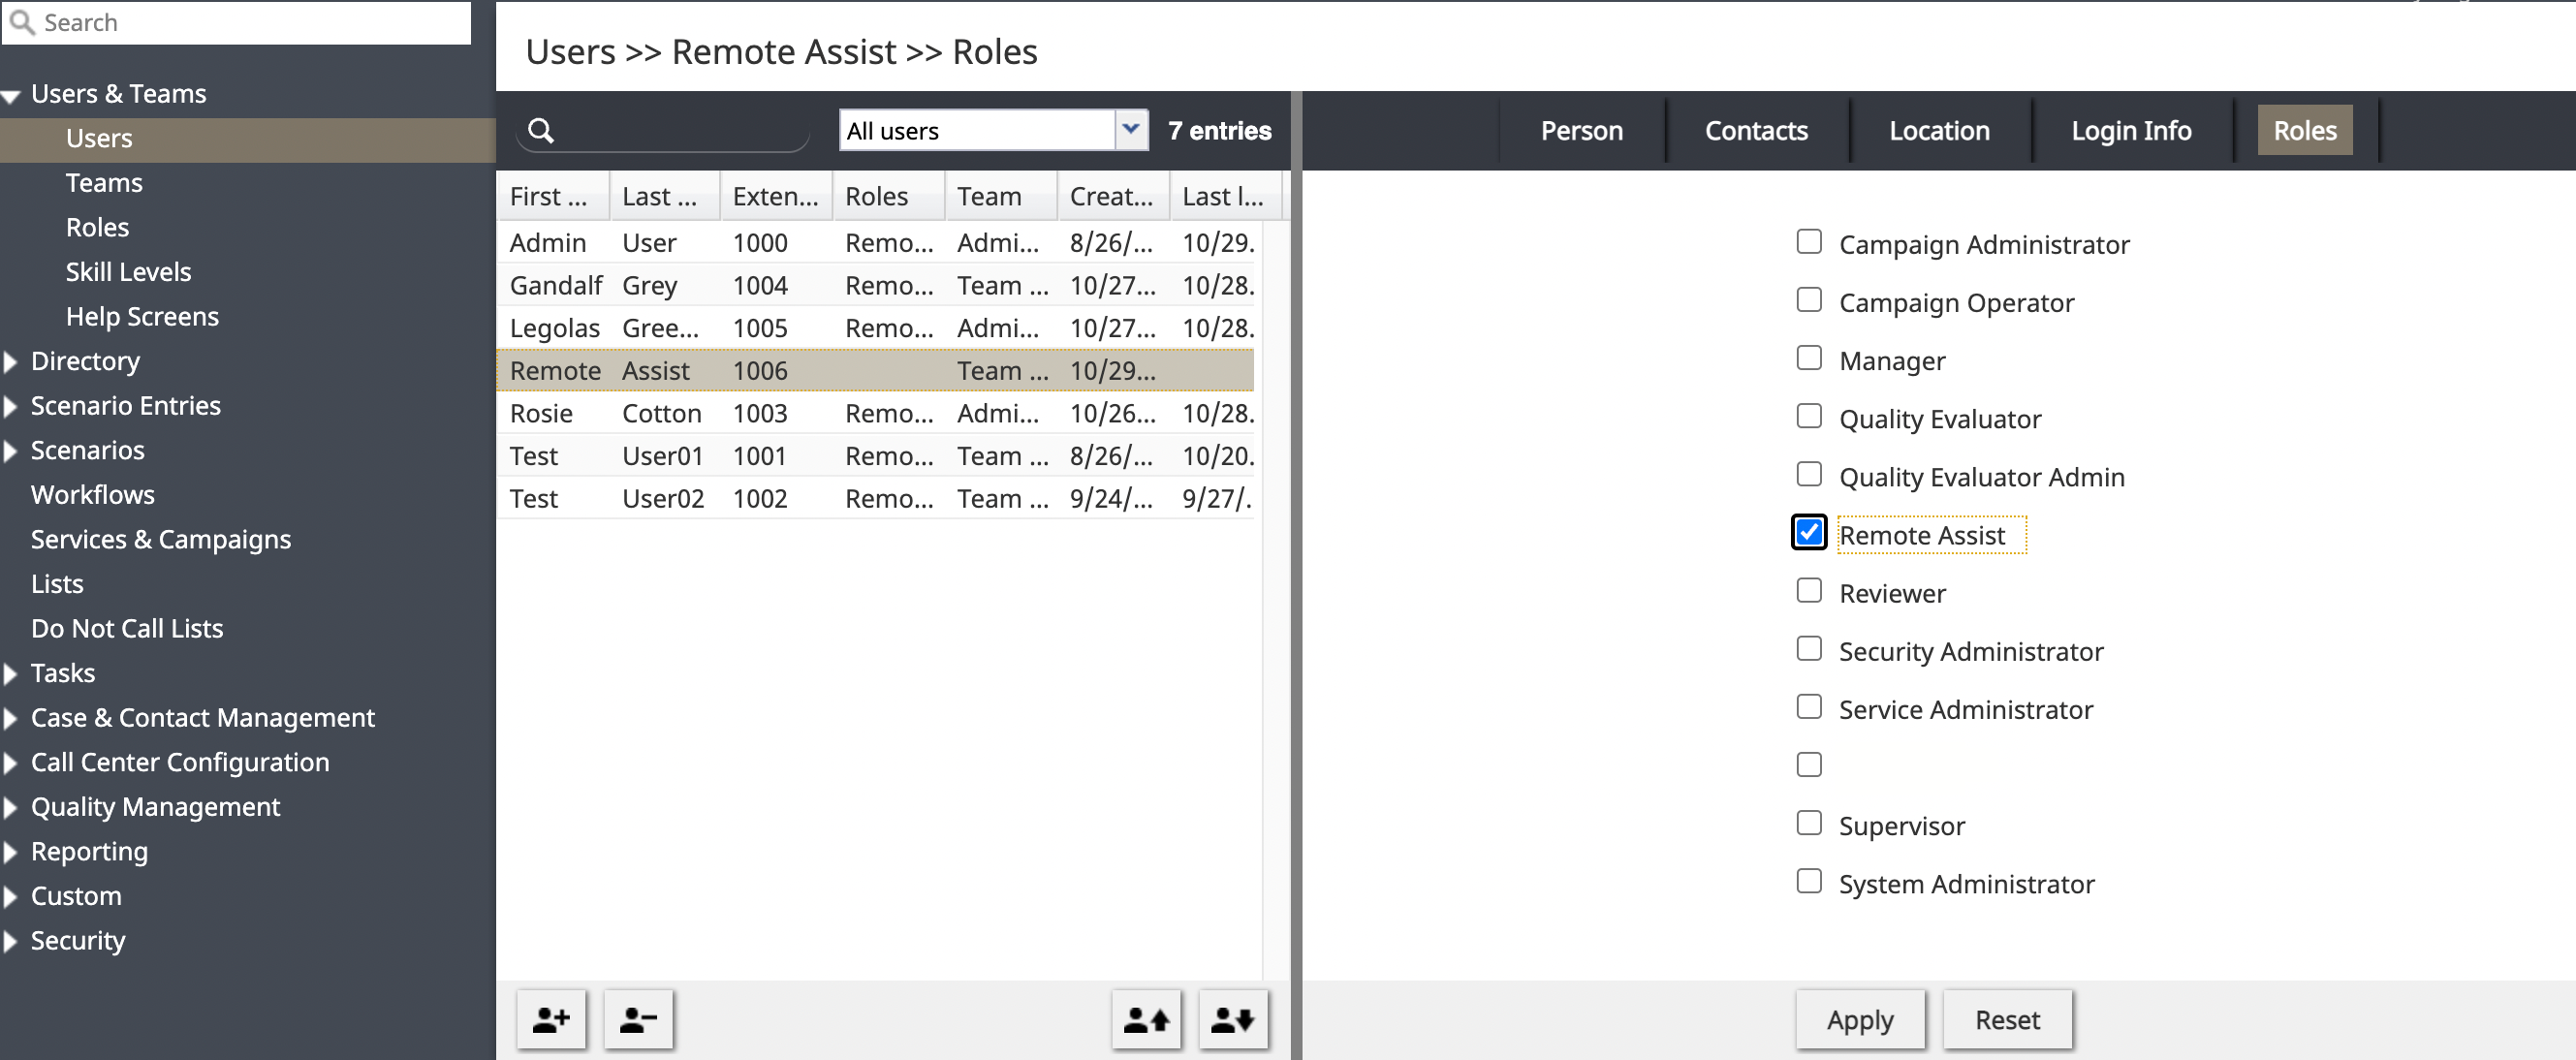
- Using the left menu, navigate to the Users & Teams submenu Users.
- Click the Add user [[File:2021.10.29_AddUserIconButton.png|30px]] button.
- On the Person tab, name the user and fill out the rest of the information.
- Going tab by tab, fill out the User information tabs as needed.
- Click on the Roles tab.
- Click the checkboxes to choose appropriate roles for the user - if your contact center administration has created a Remote Assist role, choose it for any user you wish to have RA capabilities.
- Click Apply.
- Verify that the user has the correct privilege - “Initiate and conduct remote assist sessions” - must be assigned in addition to the corresponding role.
Verify User Roles
When Roles and Users have both been created, it is best to go to the Role section and verify which users are assigned to each role.
- Sign in to the Contact Center Administrator.
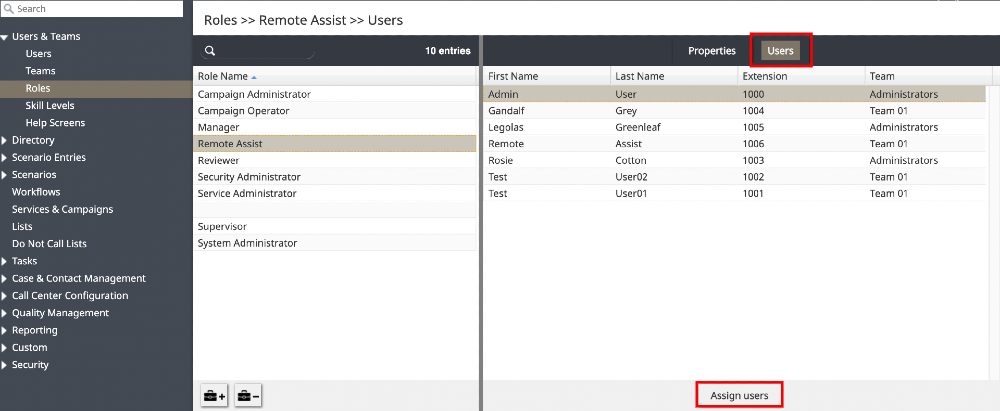
- Using the left menu, navigate to the Users & Teams submenu Roles.
- Choose the ‘’Remote Assist’’ role.
- Choose the Users tab.
- This tab provides a list of which users have been assigned each role.
- Check the list to verify that the users have been assigned appropriately.
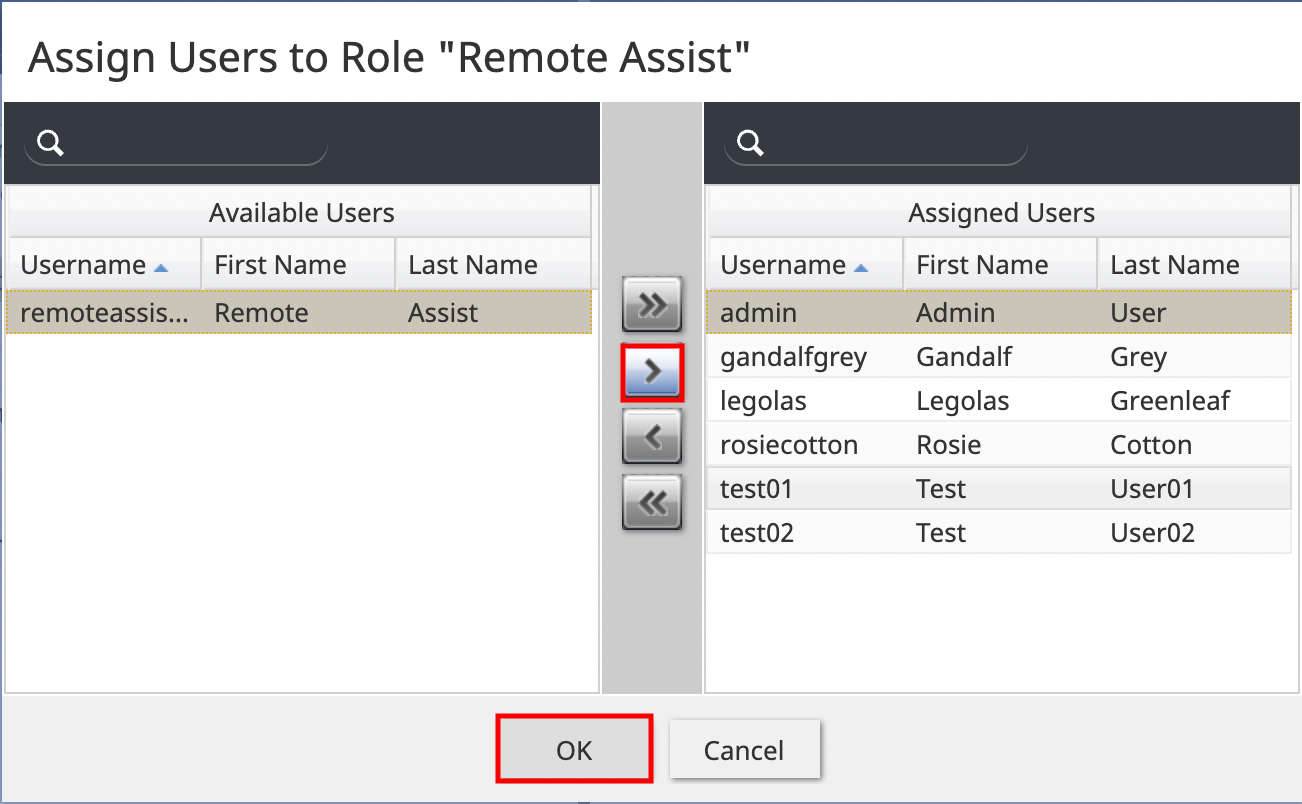
- If a specific agent is not assigned an appropriate role, click the Assign users button.
- Choose users for the role from the list of users on the left.
- Click the > button to transfer the user from the list of users to the chosen role.
- Click Ok.
Connecting to Your Website
Use this tutorial to learn how to connect a chat service to your website. (You can also contact Customer Care for additional assistance.) This tutorial teaches you how to configure an inbound voice service. These guides explain how to connect various CRM widgets to your websites. Remote Assist can be made available to your agents via any of these avenues.


