Create an Azure App to Enable Teams API access for Directory, Chat, and Presence Integration
Microsoft Teams integration uses an Azure Active Directory registered application to represent the Enterprise Messenger Integration (EMI) Server.
The EMI Server uses Microsoft Graph API subscriptions to receive events from Microsoft Teams, such as chat creation, chat changes, new chat messages, and so forth. Additionally, some content from the Microsoft Teams application, such as photos and GPS locations, requires authentication, which is processed by Microsoft Graph API requests via the EMI Server. The EMI Server exposes the webhook to the Internet so that Microsoft servers may call it to send event notifications.
The Graph API limits the specific client application to have only one subscription on each resource, which means that only one instance of the EMI Server may subscribe to notifications from specific Azure Active Directory tenants, and only one EMI Server/Azure application may be used per Azure Active Directory tenant. Please note that all users of the same Azure Active Directory tenant will be served by a single instance of the EMI Server.
This article describes how to do the following:
- Register a new application in the Azure Active Directory to represent the Enterprise Messenger Integration (EMI) Server.
- Set a webhook (i.e., redirect URI).
- Set permissions for the application to use the Microsoft Graph API.
- Set a client secret (i.e., token).
| NOTE: this app is different from MS Teams App to enable MS Teams as a customer chat channel | ||
Prerequisites
- Be the Microsoft Teams administrator for your contact center.
- Have administrator privileges and permissions in the Microsoft Azure portal.
Procedure
1. Register an application in the Azure Active Directory
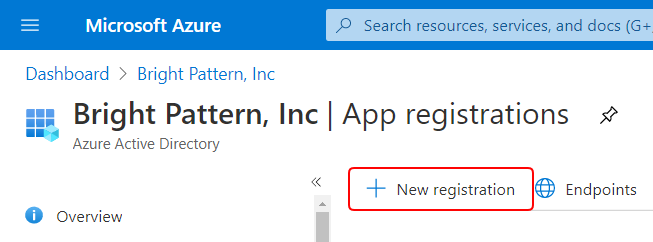
- Log in to the Azure portal. From the Azure Dashboard, navigate to Azure Active Directory > App registrations.
- Click + New registration to register a new application. This application will represent the EMI Server and provide API credentials (tokens) so that the EMI Server may authenticate with the Microsoft Graph API.
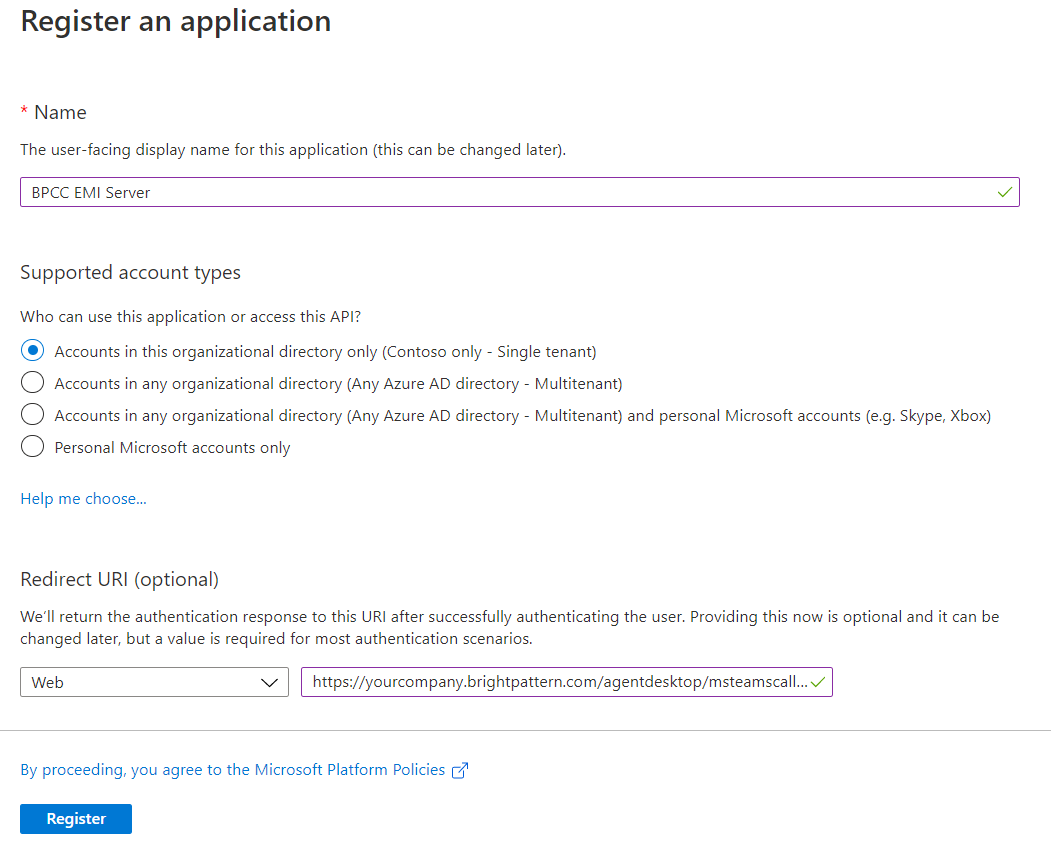
Azure Active Directory > App registrations > + New registration - In Register an application, set the following properties:
- Name - Type a name for the registered application.
- Supported account types - Select “Accounts in this organizational directory only (<your company’s Azure AD directory name> - Single tenant”).
- Redirect URI - Select “Web” and set “https://<tenant_url>/agentdesktop/msteamscallback.html” (e.g., https://yourcompany.brightpattern.com/agentdesktop/msteamscallback.html).
”Register an application” properties
- Name - Type a name for the registered application.
- Click Register. After registration, your new app’s dashboard will display.


2. Add a new client secret for the application
- From the app’s dashboard, go to Manage > Certificates & secrets.
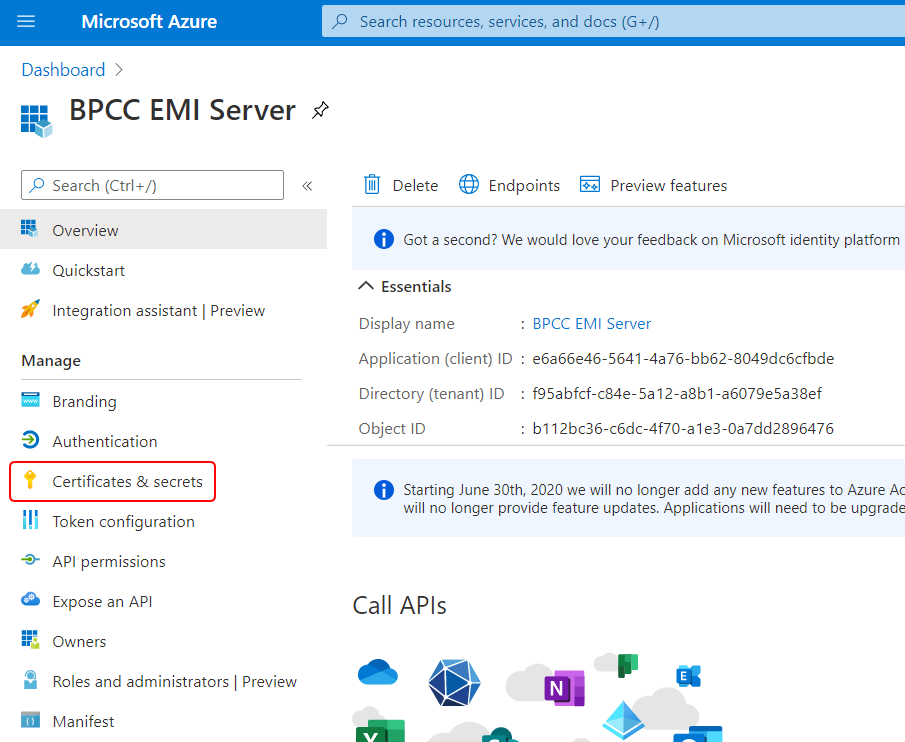
From the app dashboard, “Certificates & secrets” in the side menu - On Certificates & secrets, scroll down to the Client secrets section and click + New client secret. (Note that adding a certificate is optional.)

In Certificates & secrets, go to the Client secrets section to generate a new client secret - In Add a client secret, set the description of what the secret is for, set the expiration to longest option possible or as your contact center's own security policy requires, and then click Add. Note that the Custom option currently allows 10+ years.
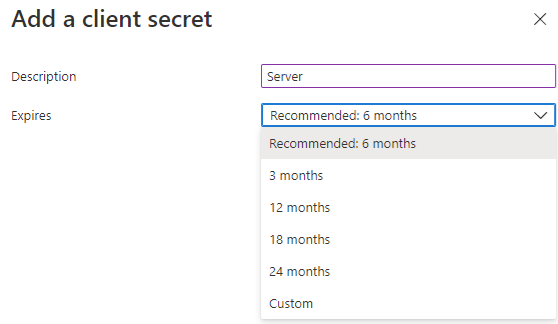
In “Add a client secret,” name it and set the expiration - Copy the client secret value and save it somewhere safe now because it is only shown once. Make sure you copy the value (not the ID).

Copy the client secret value


3. Set required API permissions
- Microsoft Teams integration requires certain delegated permissions and application permissions for the Graph API. Set permissions by going to the app’s API permissions section and clicking + Add a permission.
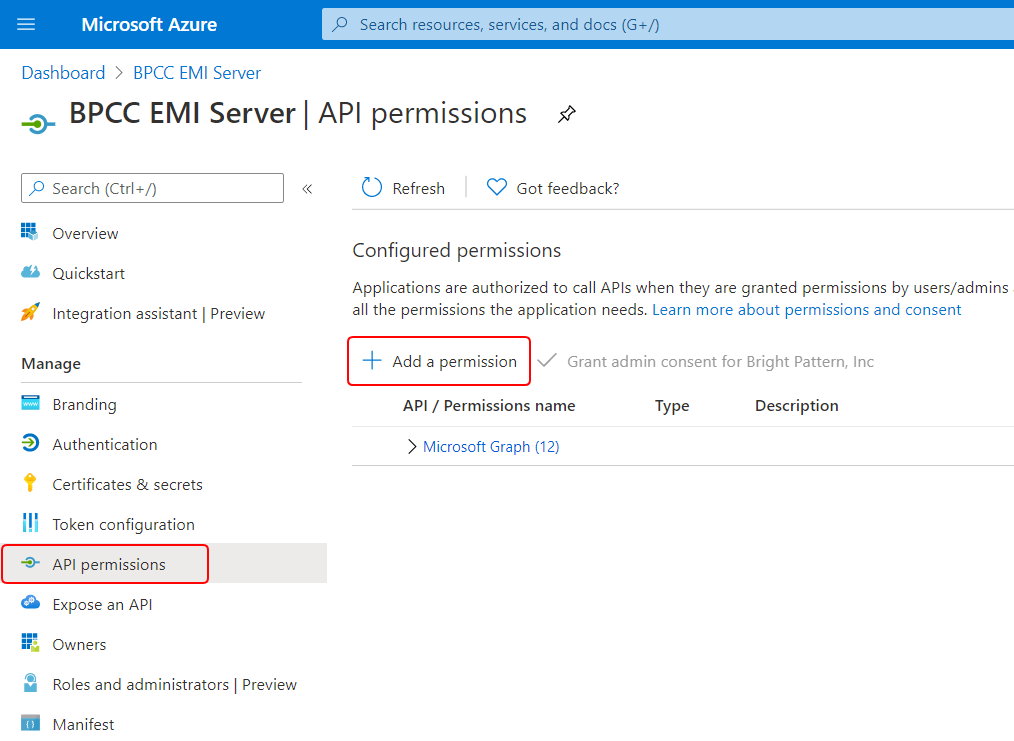
In API permissions, click “+ Add a permission” - From Request API permissions, click the “Microsoft APIs” tab and select Microsoft Graph.
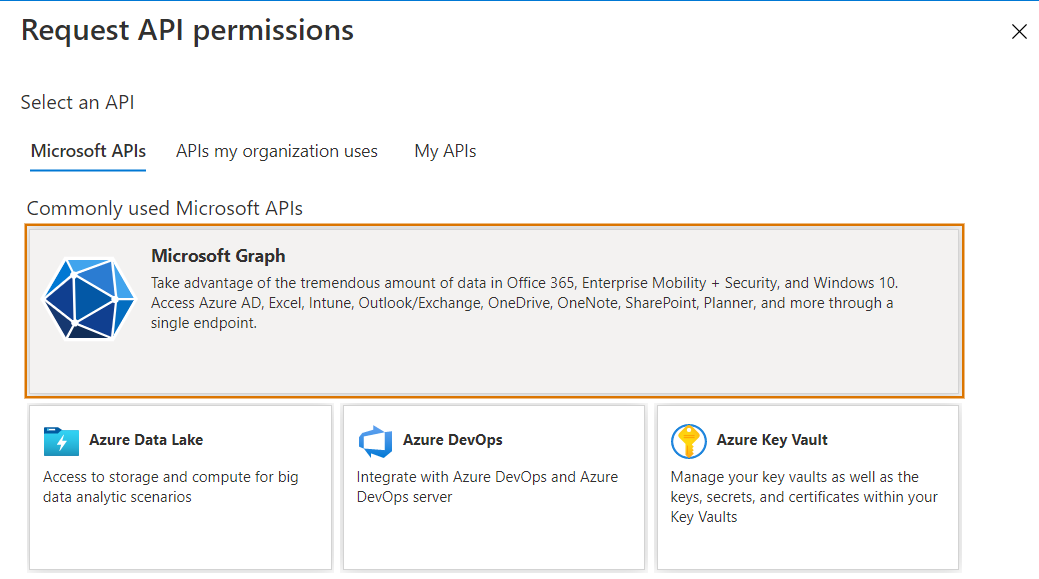
Select Microsoft Graph - Select Delegated permissions.
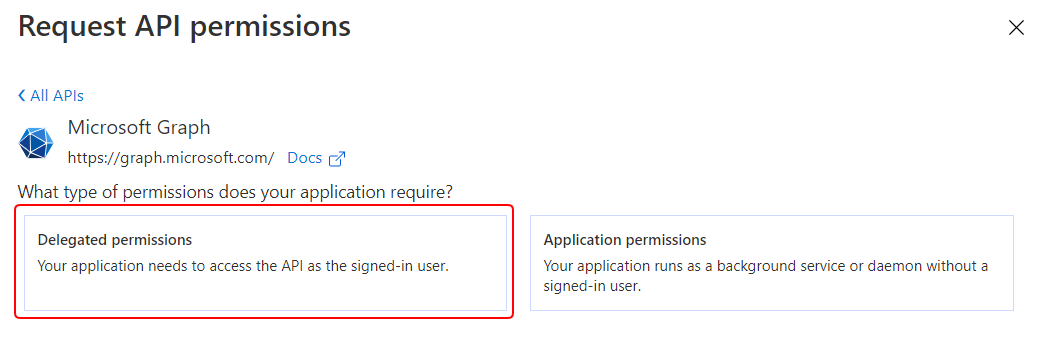
For Microsoft Graph, select “Delegated permissions” - Copy and paste each of the following permission names into the Search field, expand the permission’s options, select the checkbox for it, and click Add permission. Note that most of these permissions require admin consent, and you should add each of them separately.
Add the following delegated permissions:
- Chat.ReadWrite
- Chat.ManageDeletion.All
- ChatMessage.Send
- ChannelMessage.Send
- Directory.Read.All
- Group.Read.All
- Presence.Read.All
- Subscription.Read.All
- User.Read.All
- Chat.ReadWrite
- Go back to Request API permissions > Microsoft Graph API, and this time, select Application permissions.
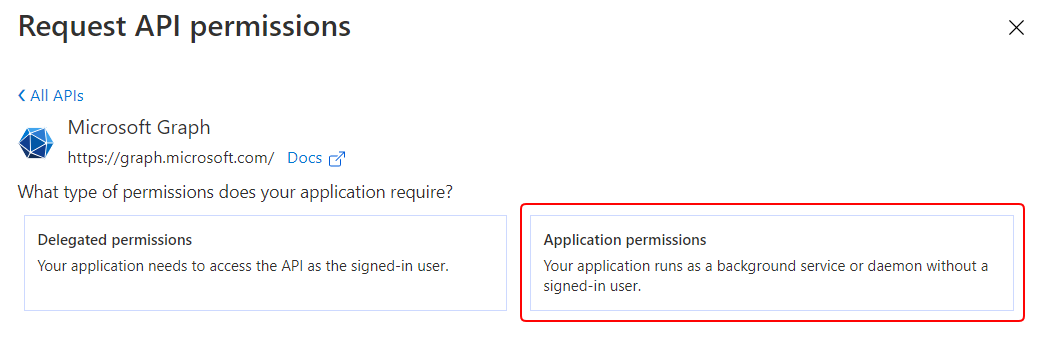
For Microsoft Graph, select “Application permissions” - Copy and paste each of the following permission names into the Search field, expand the permission’s options, select the checkbox for it, and click Add permission. Note that most of these permissions require admin consent, and you should add each of them separately.
Add the following application permissions:
- Chat.ReadWrite.All
- ChannelMessage.Read.All
- User.Read.All
- Presence.ReadWrite.All
- Chat.ReadWrite.All
- After all the permissions are added, click the Grant admin consent for <your organization> button to authorize the Graph API to be used.

Remember to click “Grant admin consent for <your organization>”
If you are successful, the status for each permission should be “Granted.”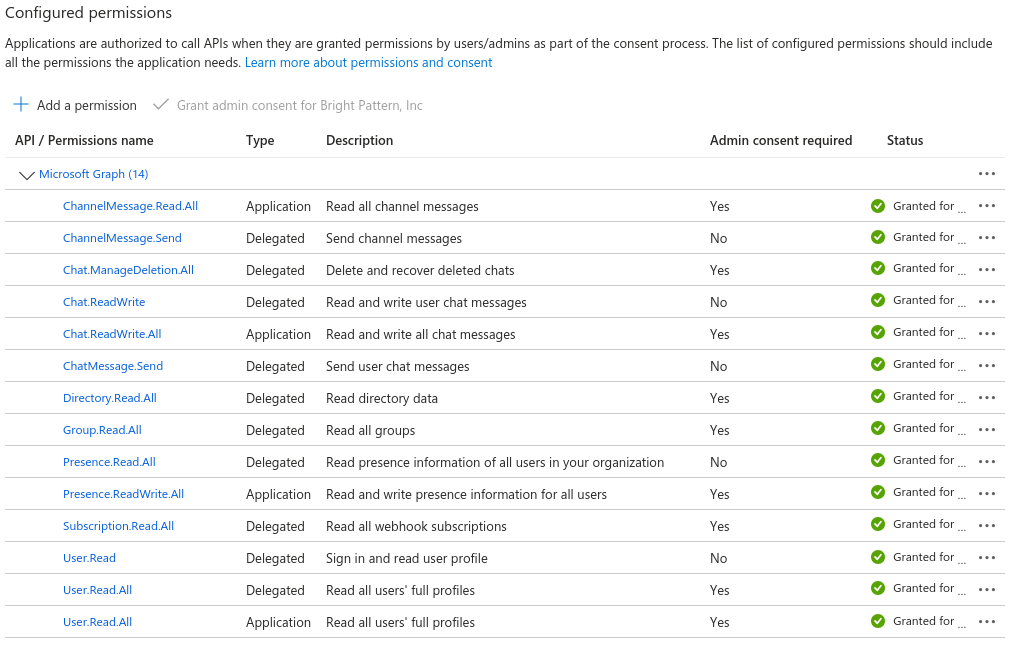
Example list of Microsoft Graph permissions granted


4. Copy your credentials
In order to configure a Microsoft Teams integration account in Bright Pattern Contact Center (see section Microsoft Teams Integration Account) you will need to copy the following items from your Azure Active Directory account and registered app:
- Tenant ID, which is found in Azure Active Directory > Dashboard > Your registered app > Overview.
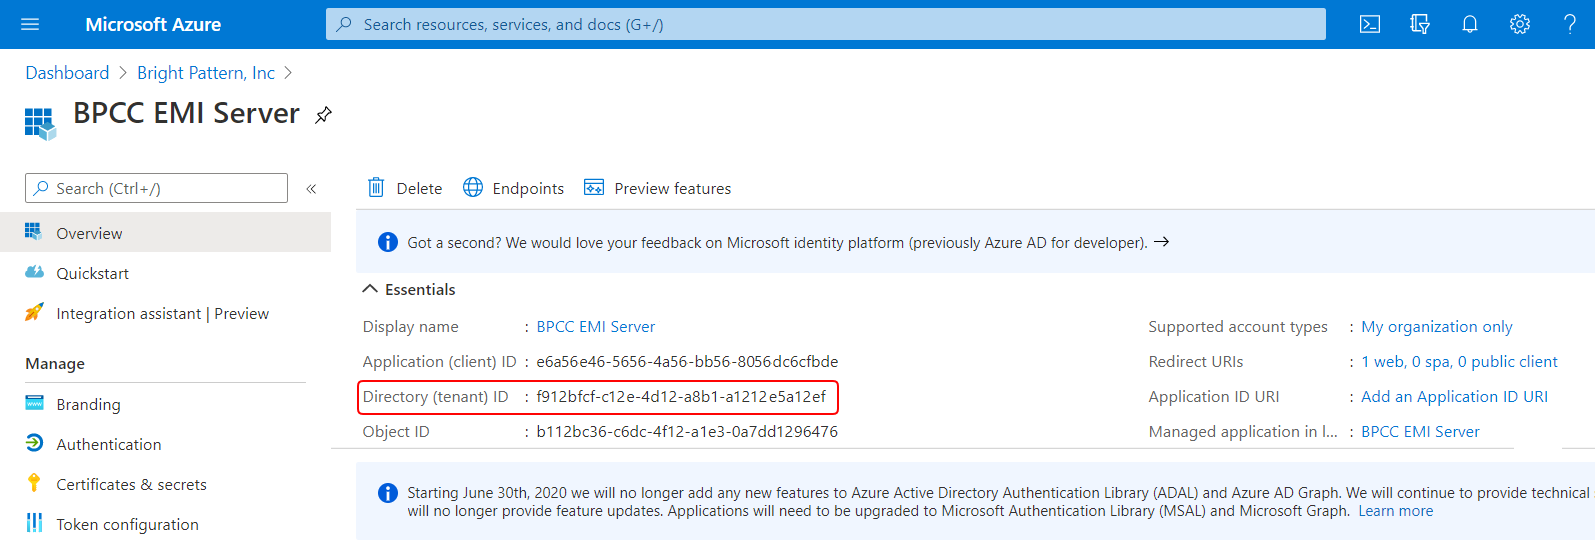
Azure Active Directory > Dashboard > Your registered app > Overview page

- Application (client) ID, which is found in Azure Active Directory > Dashboard > Your registered app > Overview.
Azure Active Directory > Dashboard > Your registered app > Overview page
- Client Secret, which you added to your registered app in Step 2 of this procedure. If you forgot to copy the client secret, you must add a new client secret and copy it now.
The app’s Certificates & secrets section
Azure app configuration is now complete.
Next Step
In Bright Pattern Contact Center’s Contact Center Administrator application, add a Microsoft Teams Integration Account.