How to Configure a Microsoft Azure Web App Bot from a Template
A Web App Bot is a web service that uses a conversational interface and communicates with the Microsoft Azure Bot Framework Service to send and receive messages and events. You can utilize a Web App Bot in Bright Pattern Contact Center to provide self-service options to customers, bot suggestions to agents, and more in chat interactions.
This application note will guide you through the process of creating a template-based Web App Bot in Azure, setting up a Bot Framework Direct Line channel, and configuring a Bright Pattern Contact Center scenario to send and receive chat messages.
Prerequisites
Before you begin, you must have the following:
- Microsoft account
- Active subscription to Azure (free trial OK)
- Admin access to the Bright Pattern Contact Center Administrator application
Procedure
Step 1: Create a Web App Bot in Azure from a Sample Template
- In the Microsoft Azure Portal, in the resources and services blade menu, click + Create a resource.
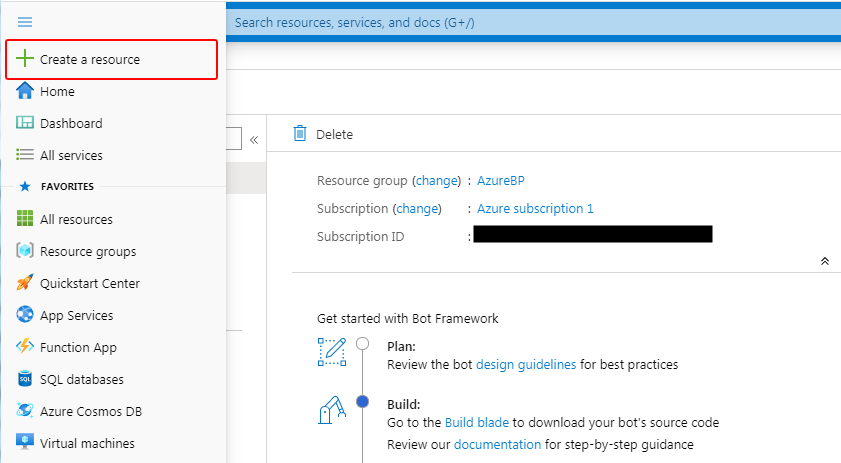
Click "+ Create a resource" to get started - In the Azure Marketplace > AI + Machine Learning section, select Web App Bot.
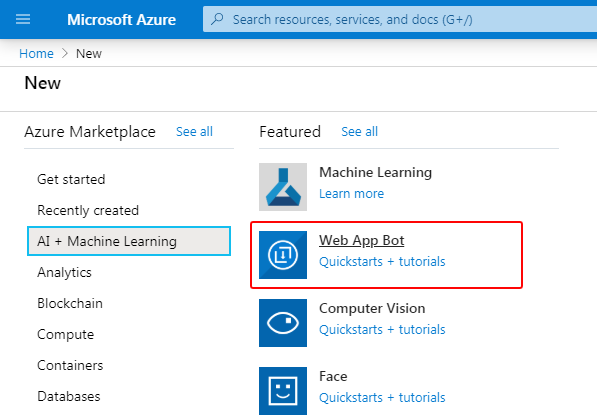
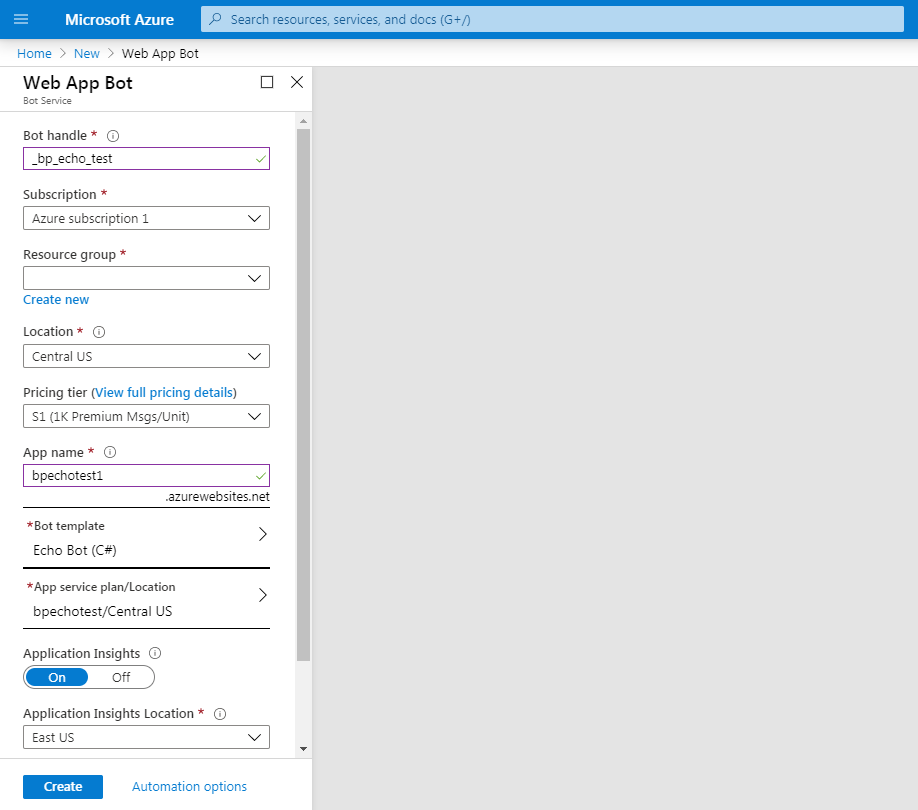
Create a "Web App Bot" bot service - In Web App Bot properties, fill in the required fields:
- Bot handle - The name of your bot, which can be changed later if needed. The name should be unique across Azure; you won’t be able to continue if the name is already taken.
- Subscription - The subscription you want to use to pay for the service; you may also use some of your available credits.
- Resource group - The resource group for the bot to easily manage all resources created in Azure.
- Location - Choose the nearest location for your customers; this option cannot be changed later.
- App name - The name of your app, which also should be unique across Azure because a subdomain will be created to access the Web App Bot.
- Bot template - Choose Echo Bot.
Web App Bot properties
- Bot handle - The name of your bot, which can be changed later if needed. The name should be unique across Azure; you won’t be able to continue if the name is already taken.


Step 2: Configure Direct Line channel
The Bot Framework Direct Line channel lets you integrate your bot into your mobile app, webpage, or other application. In this step, we will set up a Direct Line channel and grab the secret key, which is needed for integration with Bright Pattern.
- Go to Home > Resource groups, and select the group that you created or select for the bot.
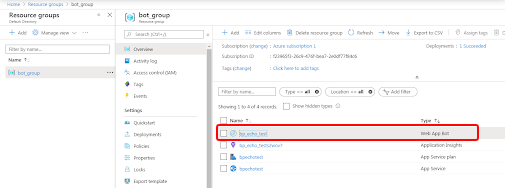
Select your group - Now, within the bot group:
- Select the app service you created.
- Go to Bot management > Channels, and click Configure Direct Line channel.
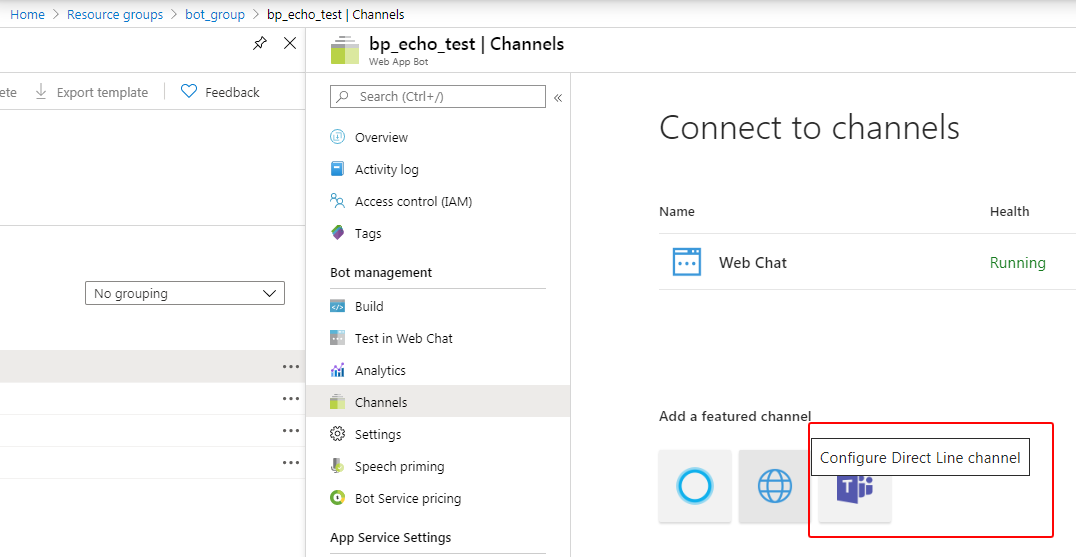
Click "Configure Direct Line channel" - Copy a Secret key. The Bot Framework generates secret keys that your client application can use to authenticate the Direct Line API requests that it issues to communicate with your bot.
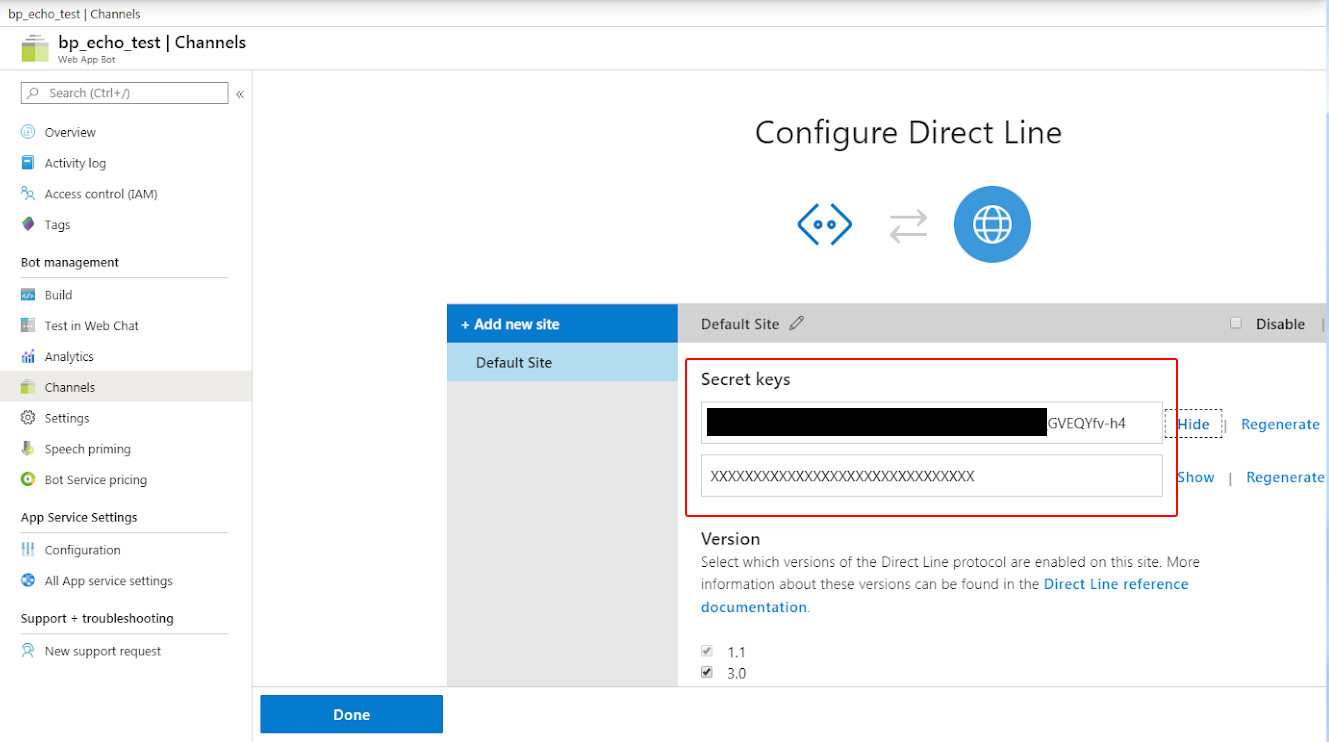
Copy a secret key
- Select the app service you created.


This completes Web App Bot configuration.
Next step: Edit Bright Pattern Contact Center scenario
Now that you have completed your bot configuration, you can use the bot in a Bright Pattern Contact Center chat scenario. See How to Configure a Chat Scenario That Uses a Microsoft Azure Web App Bot for detailed instructions.