Setting up AWS S3 Storage for Screen Recordings
Bright Pattern Contact Center supports automatic export of screen recordings to Amazon Web Services (AWS) S3 for storage and playback. Storing screen recordings on S3 can provide cost savings to your organization, while still allowing you to play back recordings via interaction records on the Bright Pattern Contact Center platform. S3 access credentials are stored in Amazon AWS integration accounts.
This article describes how to set up your contact center for S3 screen recordings storage, including the following:
- Create an S3 bucket and configure it for integration with Bright Pattern
- Create an integration account
- Enable screen recordings in your contact center
- Set up an automatic export job to S3
For information about enabling call recordings to be exported to and stored in S3, see Setting up AWS S3 Storage for Call Recordings.
Note the following:
- Export of recordings is configured for specific services. For more information see Periodic Export of Recordings.
- Recordings exported to Amazon AWS will be accessible via Bright Pattern on demand for the detailed records storage time agreed upon with your service provider.
Prerequisites
- To use Amazon AWS S3 for storing recordings, your service provider must enable this feature for your contact center.
- You must have an existing Amazon AWS account and S3 bucket. For help creating an S3 bucket, see How to Create and Configure an AWS S3 Bucket.
- An Amazon AWS S3 integration account must be configured in your contact center in order to invoke functions. For help with integration account setup, see How to Add Amazon AWS Integration Account in Bright Pattern.
Procedure
Step 1: Add Amazon AWS Integration Account in Bright Pattern
In the Contact Center Administrator application, section Configuration > Call Center Configuration > Integration Accounts, add an Amazon AWS integration account and edit the properties with your Amazon IAM and S3 credentials.
For detailed property descriptions, see the Contact Center Administrator Guide, section Amazon AWS integration account.

Step 2: Enable screen recordings in your contact center
If screen recording is already enabled, you may skip to Step 3. If you have not already enabled screen recordings, do so now.
In the Contact Center Administrator application, section Screen Recording:
- Enable screen recording settings for login sessions, as desired, paying particular attention to the following:
- Storage - Set Amazon AWS.
- Integration account - Select your Amazon AWS integration account from the drop-down list.
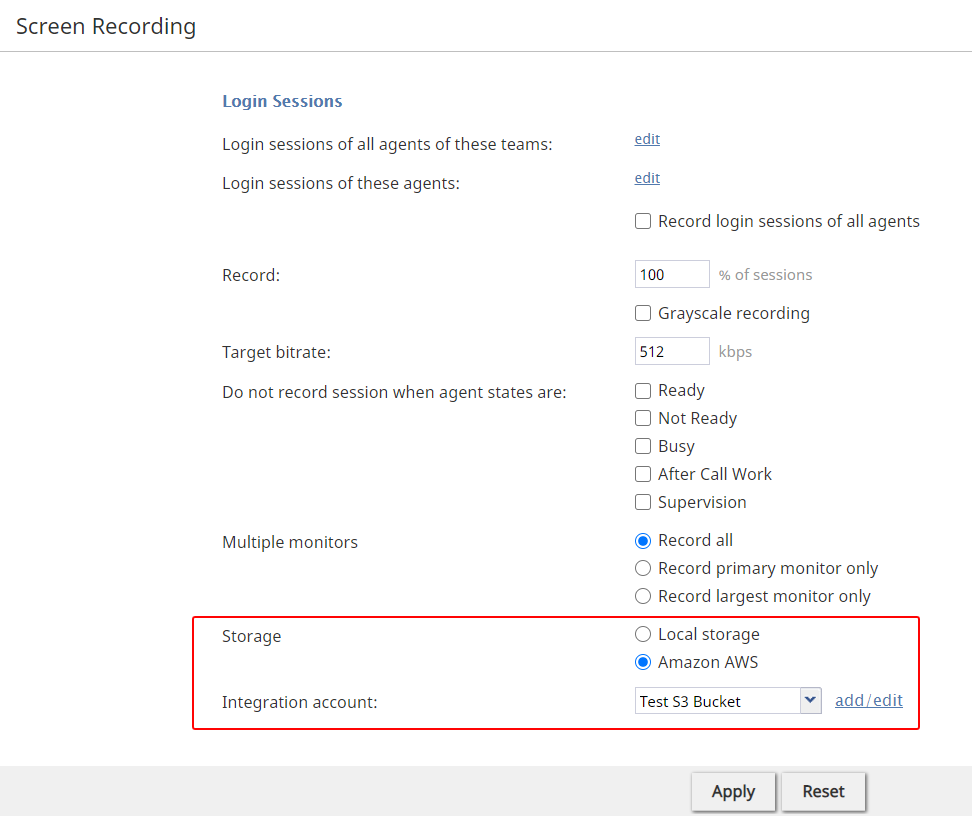
Screen recording settings
- Storage - Set Amazon AWS.

Step 3: For voice services, set up screen recording export to S3
- In section Services & Campaigns, select the desired voice service, click the Results tab, and click add under Periodic Recording Export Jobs.
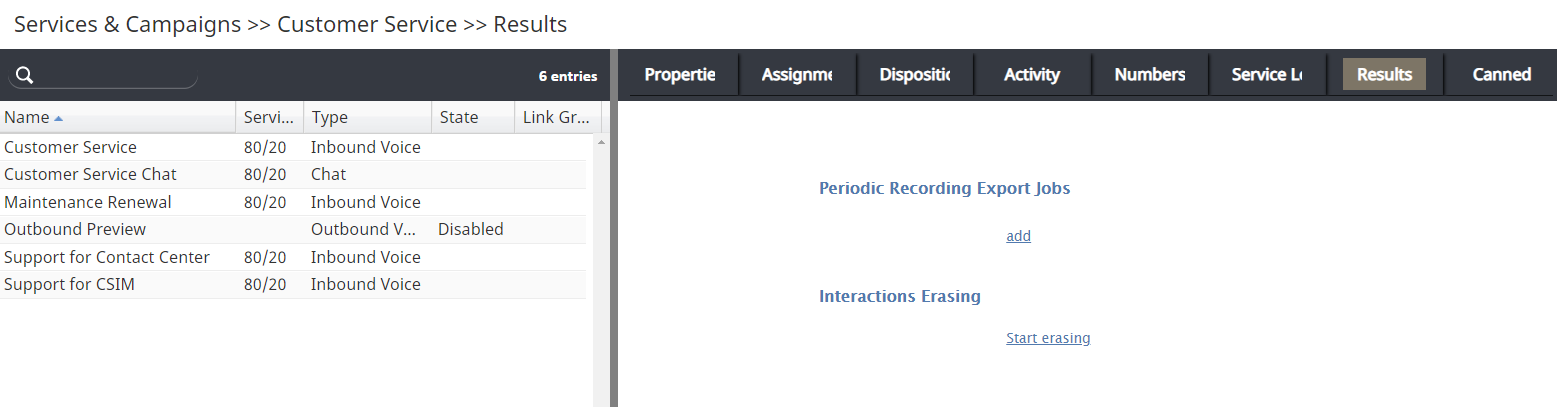
Services & Campaigns > Results tab - In the Periodic Export of Recordings dialog, set all the properties as desired, paying particular attention to the destination options:
- Protocol - Set Amazon AWS
- Integration Account - Set your Amazon AWS integration account.
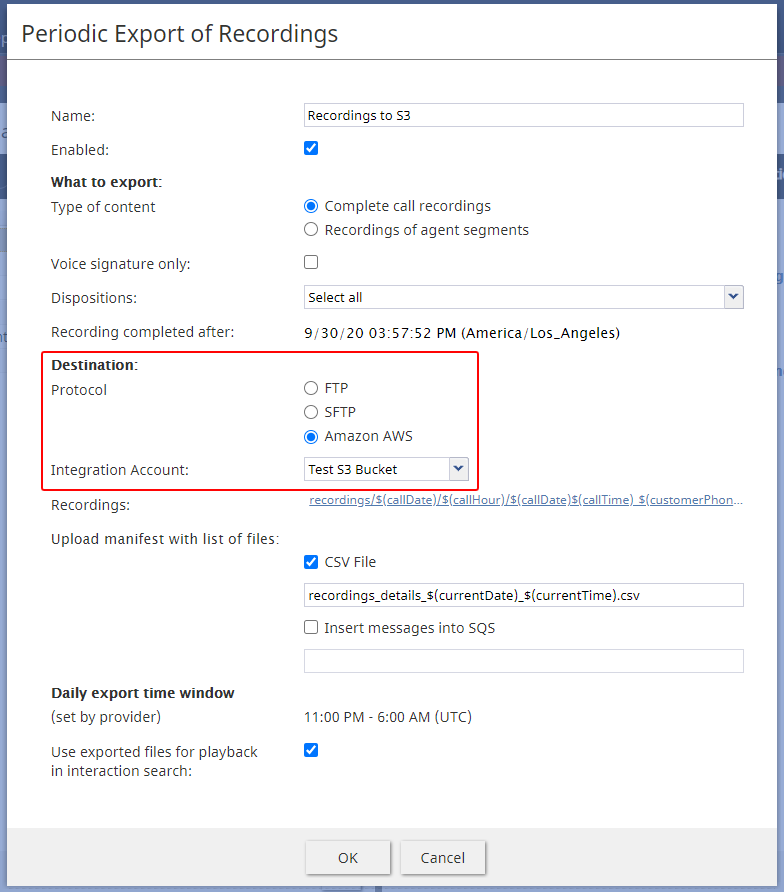
Periodic Export of Recordings settings
- Protocol - Set Amazon AWS
- Click OK to save your changes.


Step 5: Test recording export by accepting a service interaction in Agent Desktop
- In the Agent Desktop application, log in as an agent on the team assigned to the service that has recordings export enabled for it, and make yourself Ready.
- Accept a service call or chat, have a conversation with yourself, and disposition and complete the interaction.
- Wait about 15 minutes for the call or chat to be aggregated and saved into your contact center’s interaction records.
- In the Contact Center Administrator application, section Interaction Records, search for the interaction and view it in the results. You should be able to play back the call recording, screen recording, and/or chat transcript.
- The recording and/or chat transcript will be exported as an object with file data and metadata to your S3 bucket at the daily export time window (as set by your service provider and shown in the Periodic Export of Recordings properties). After the window passes, check the S3 bucket to confirm that the object is present.
This procedure is now complete.