Results Tab
The Results tab provides access to settings related to the export of campaign results as well as the export of call recordings for voice services and chat transcripts for chat services.

Campaign results are stored in the calling list database and can be downloaded manually in .CSV format or exported periodically to designated network locations.
Campaign results are archived into .ZIP files when one of the following events occurs:
- The list is deleted from configuration.
- The list is removed from the campaign.
- The list is updated with new content via periodic import with the update policy set to replace list data.
- When any of the following List API methods are used:
- Lists. Delete All Records
- Lists. Delete Many Records
- Lists. Delete List and Orphaned Format
- Campaigns. Unbind List
Archived campaign results are listed in the Archive tab and are available for manual download only.
Note that campaign results are permanently deleted when the campaign itself is deleted.
Storage of recordings is typically defined by the terms and conditions of your service contract. Expired recordings are deleted automatically.
Before configuring the export of recordings, consider the bandwidth and amount of disk space that may be required to transfer and store all of the exported voice files. As a general guideline, use 5.7 MB per agent per working hour to calculate the necessary disk space. Note that some restrictions may be imposed at the service provider level on the hours during which export may take place (see property Window) and bandwidth allocated for the export tasks.
| Even if your audio files and/or chat transcripts are encrypted at the time of recording according to your encryption settings, any files you choose to export will be exported in an unencrypted format.
| ||
Settings
Results tab configuration settings are organized by export type: Periodic Recording Export Jobs, One-time Campaign Results Download, Periodic Export Jobs, and Periodic Salesforce.com Export Jobs. Settings for each type are described as follows.
One-time Campaign Results Download
This setting allows you to download campaign results locally in the .CSV format. To download, click the Download now button, specify the download settings, and click Export. The following dialog box will pop up.

Lists
Select the lists whose records the downloaded file should contain.
Dispositions
If you would like to download records that were dispositioned in a specific way, select the corresponding disposition(s) here. To download results for all records regardless of their dispositions, select All.
Format
Format is where you indicate whether the downloaded file shall contain only the last result for each completed record (simple), or whether it should include results of all dialing attempts (detailed).
For detailed results, specify whether the downloaded list shall contain all call attempts for the records that were completed within the requested time frame or only the call attempts that were actually made within that time frame.
For specification of campaign result formats, see sections SimpleFormat and Detailed Format of the Reporting Reference Guide.
Between
By default, the downloaded file will contain all records since the last download. Use the Between setting to limit the download to contain only information about the records that were closed within a specific time interval.
Timezone
Set the timezone for the records to be exported.
Compress file
Selecting the Compress file checkbox will download results in a .ZIP file.
Periodic Export Jobs
Periodic Export Jobs allows you to configure multiple jobs for automated export of campaign results via FTP in the .CSV format. Each export job can have its own schedule, destination, and set of filters. Click add to specify a new periodic export job. The following dialog box will pop up. Fields shown in red are required fields.

Name
Name is the name of this export job. This name will appear in the list of periodic tasks.
Enabled
Selecting the Enabled checkbox will activate this export job.
Lists
Select the lists whose records the exported results should contain.
Dispositions
If you would like to export records that were dispositioned in a specific way, select the corresponding disposition(s) here. To export results for all records regardless of their dispositions, select All.
Format
Format is the specified format of the exported file. Indicate whether the exported file should contain only the last result for each completed record (simple), or whether it should include the results of all dialing attempts (detailed).
For detailed results, specify whether the exported list should contain all call attempts for the records that were completed within the requested time frame or only the call attempts that were actually made within that time frame.
For specification of campaign result formats, see sections SimpleFormat and Detailed Format of the Reporting Reference Guide.
Start date and time
This is the specified start date and time of the periodic export.
Export interval
Export interval is the specified frequency for the results to be exported. The minimum update period is
- 1 hour for the simple and detailed (records and all call attempts) export options
- 15 minutes for the detailed (only call attempts performed in timeframe) export option
Protocol
Protocol is the specified transfer protocol (FTP or SFTP).
FTP username
FTP username is the specified FTP username.
FTP password
FTP password is the specified FTP password.
Test connection
The Test connection button is used to test the FTP connection with the supplied credentials.
Periodic Salesforce.com Export Jobs
Periodic Salesforce.com Export Jobs allows you to configure multiple export jobs for automated creation of Salesforce.com objects according to the campaign results. For more information, see section Importing Calling Lists and Exporting Campaign Results of the Salesforce.com Integration Guide.
Each export job can have its own schedule, destination, and a set of filters. Click add to specify a new periodic export job. The following dialog box will pop up. Fields shown in red are required fields.

Name
Name is the name of this export job. This name will appear in the list of periodic tasks.
Enabled
When selected, the Enabled checkbox will activate this export job.
Lists
Select the lists whose records the exported results shall contain.
Dispositions
If you would like to export records that were dispositioned in a specific way, select the corresponding disposition(s) here. To export results for all records regardless of their dispositions, select All.
Format
Format is the specified format of the exported file. Indicate whether the exported file shall contain only the last result for each completed record (simple), or whether it should include results of all dialing attempts (detailed).
For specification of campaign result formats, see sections SimpleFormat and Documentation:ServicePattern:reporting-reference-guide:DetailedFormat|Detailed Format]] of the Reporting Reference Guide.
Start date and time
This is the specified start date and time of the periodic export.
Export interval
Export interval is the specified frequency for the results to be exported. The minimum interval is 15 minutes.
Salesforce.com integration account
Salesforce.com integration account is the integration account that will be used to access the Salesforce.com records to be updated.
Salesforce.com object
This is the Salesforce.com object that will be updated using the results of this campaign.
Map fields
Use the Map fields button to map Bright Pattern Contact Center campaign result fields to the properties of the specified Salesforce.com object.
For specification of campaign result formats, see sections SimpleFormat and Detailed Format of the Reporting Reference Guide.
Test by creating object
Click this button to create a test Salesforce.com object according to the mapping you specified using the Map fields button. Check your Salesforce.com application to make sure the object has been created.
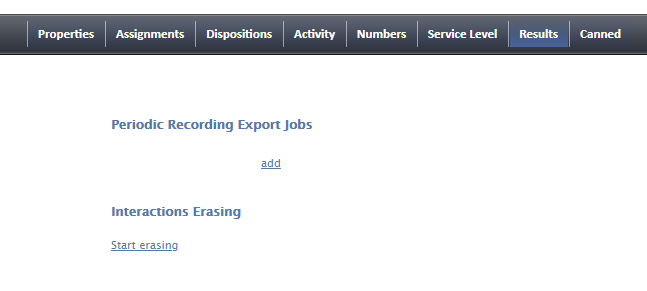
Periodic Recording Export Jobs
Periodic Recording Export Jobs allows you to configure multiple export jobs for call recordings of this service or campaign. Each export job can have its own schedule, destination, file name format, and a set of filters. All call recording files are exported as unencrypted .WAV files with GSM encoding.
Click add to specify a new periodic export job. The following dialog box will pop up.
Note that if your recordings are encrypted while they are stored in the Bright Pattern platform, they will be un-encrypted for export.

Name
Name is the name of this export job. This name will appear in the list of periodic tasks. See section Tasks for more information.
Enabled
Select the Enabled checkbox to activate this export job.
Type of content
This setting allows you to export full call recordings, including call segments when the call is transferred to another agent, or the recordings of agent segments. Select either Complete call recordings or Recordings of agent segments.
Note that when the type of content to export is set to Complete Call Recordings, the recording file name will include the name of the first agent who handled the call; when the type of content to export is set to Recordings of agent segments, the recording file name will include the name of the last agent to handle the call.
Voice signature only
Select the Voice signature only checkbox if the operation shall export only recordings that contain voice signatures. The first agent on the call will be labeled.
Dispositions
Using Dispositions, export recordings of calls that were dispositioned in a specific way, and select the corresponding disposition(s). To export recordings for all calls regardless of their dispositions, select All.
For outbound services, note that recordings for some of the unsuccessful call attempts may not be available unless the Record CPA phase of call attempts option is selected for the given campaign.
Recording completed after
The Recording completed after setting allows you to specify the start time and date from which the recordings will be exported. Upon completion of the initial and each subsequent task export task, this parameter will be updated automatically to show the date and time of the last exported recording. The next export task will begin with the chronological next recording that satisfies the selection criteria (i.e., service, disposition, etc.).
Protocol
Protocol specifies the export method: FTP, SFTP, or Amazon AWS. In all three methods, even if the recordings are stored encrypted in BPCC, the exported files will be un-encrypted.
Note that export to AWS must be explicitly enabled by your service provider and configured via Integration Accounts. For all three methods, the exported recordings will continue to be stored and available for playback via Bright Pattern for the recordings storage time agreed upon with your service provider. After the recordings have been deleted from the local storage:
- Recordings exported via FTP/SFTP will no longer be accessible via Bright Pattern.
- Recordings exported to Amazon AWS will continue to be accessible via Bright Pattern on demand for the detailed records storage time agreed upon with your service provider.
FTP/SFTP Server hostname
This field is where one specifies either the FTP/SFTP site where the recordings should be exported.
Integration Account
If Amazon AWS is set as the destination protocol, you must select an Amazon AWS integration account to use.
Recordings
Recordings is the specified format of the recording file name and subfolder structure. By default, at the designated network location, exported files are arranged in folders corresponding to the date, hour, and time when the calls started.
The default recording file name consists of the call start date/time, phone number of the call party opposite to the agent, username of the last agent to handle this call, and a global unique identifier generated by the system for this recording. For example: recordings/$(callDate)/$(callHour)/$(callDate)$(callTime)_$(customerPhone)_$(agent)_$(uniqueId).wav
To modify the file name and/or folder structure, click the current format. The current format will appear in an editable field. You can delete any of the current file name components or insert new ones. To add a new component to the current format, set the cursor to the desired place in the file name, click the Insert placeholder button, and select the desired component from the drop-down menu.

| You can customize file names using special variables called custom fields: $custom1, $custom2, ..., and $custom25. While all 25 are available for direct use in the file name itself, only $(custom1) and $(custom25) are pre-loaded in the Insert placeholder dropdown list.
For more information about data file fields of exported call recordings, see Recordings Detail Format and Custom Reporting Fields | ||
A file name example corresponding to the currently selected format will be displayed under the editable field.
Upload manifest with list of files
CSV File
Select CSV File to set the specified format of the recording details file name.
For each instance of a periodic recordings export, the system also generates a data file. The file is exported to the same network location in the CSV format and contains details of the corresponding calls, which may facilitate searches for specific recordings once they have been exported out of the system. For more information about the contents of this file, see section latest:reporting-reference-guide/RecordingsDetailsFormat of the ServicePattern Reporting Reference Guide.
The default data file name is recordings_details_$(currentDate)_$(currentTime).csv which includes recordings_details for voice and transcripts_details for chat with the date and time of export added to it (e.g., recordings_details_$(currentDate)_$(currentTime).csv).
Note: The following variables may be included in the file name:
- $(currentDate)
- $(currentTime)
- $(periodEndDate)
If you modify the name of the file to include $(periodEndDate), note that it is the timestamp of the last interaction in the exported batch (e.g., recordings_details_$(periodEndDate)). If there were no interactions in the given export period, the value of $(periodEndDate) will coincide with the end of the export interval itself. If you use this variable in the file name, note that if there are days when your contact center is closed, the names of the data files produced for that day and the following (working) day may have the same date and differ by the time component only.
Insert messages into SQS
This option enables messages to be stored in the specified Amazon Simple Queue Service (SQS) queue. To use this option, select the checkbox and set the URL of the queue that will store the messages (e.g., "https://sqs.us-west-1.amazonaws.com/123456789012/queue2").
Amazon SQS queues are used for storing and moving data between distributed application components and microservices. Queues serve as a buffer for securely storing messages as they travel from Bright Pattern Contact Center to Amazon.
As with a CSV data file, an SQS message includes details about the exported recording. For more information about the data fields in a message, see the Reporting Reference Guide, section Reporting-reference-guide/RecordingsDetailsFormat.
An SQS message has the same format as a CSV file (e.g., "recordings_details_$(currentDate)_$(currentTime).csv").
Note that if within one customer call, the recording has been stopped and restarted, the export will contain multiple messages for the same call. Every time recording is started, a new message is generated. Separate lines for each agent will be written in cases when more than one agent participated in a call (e.g., when there is an internal call between two agents, a conference, or a transfer). These lines may refer to the same call recording message.
Username
Username is the specified FTP username.
Password
Password is the specified FTP password.
Test connection
The Test connection button is used to test the FTP connection with the supplied credentials.
Daily export time window
Daily export time window is the time window during which export of recordings will take place. This parameter is specified at the service provider level and will appear as read-only.
Use exported files for playback in interaction search
When checked, enables the use of Amazon S3 recordings for playback in interaction records even after your contact center's configured retention interval has passed. If multiple exports are made of the same recordings to different S3 locations and all exports have this option enabled, the recordings will be played back from the location of the last export.
Note: Playback in interaction records will work as long as detailed records in the historical database are preserved and S3 recordings are kept.
This setting only appears when the Amazon AWS protocol is selected as the export method (see section Protocol).
Interactions Erasing
To support compliance with various regulations related to data ownership and privacy, such as GDPR, Bright Pattern allows for the manual erasure of data that is stored in interaction records for voice recordings, voice recording transcripts, chat transcripts, email messages, screen recordings, and other such interaction content.
The ability to remove sensitive data from interaction records is enabled for users with the Security Administration privilege “Can edit and erase interaction records.”
System administrators with the privilege to edit and erase interaction records can erase content for specific services and campaigns by using the Interactions Erasing feature in the Services & Campaigns Results tab. Note that to erase any content, you must provide a reason.
How to Erase Interaction Content
- Go to Services & Campaigns and select the desired service or campaign from the list.
- Click the Results tab and click Start erasing.
Results > Interactions erasing - The Erase interaction dialog will appear.
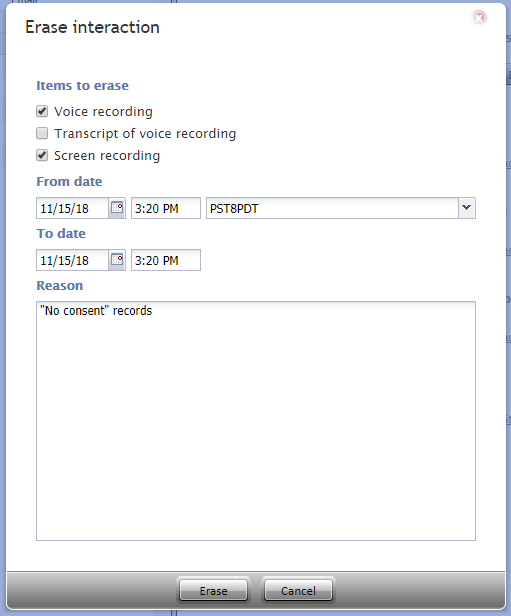
Erase interaction dialog - Select the items to erase, choosing from the following options: Voice recording, Transcript of voice recording, Chat transcript, Email message, and Screen recording.
- In the From date field, specify the date of the interaction to be erased.
- In the Reason field, document the reason for erasing the content. Note that this field is mandatory.
- Click Erase.
- A warning dialog will inform you that The requested operation will irrevocably destroy the [recording/transcript/message body] of selected interaction(s). To proceed, click Erase.
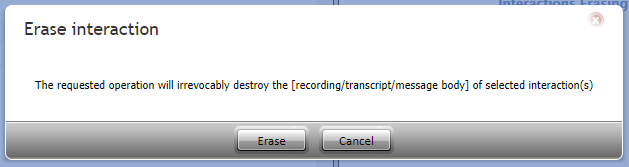
A warning message appears


The erase action will be recorded in your contact center's audit log.