m (Tracy moved page 5.3:Agent-guide/HowtoMaskSensitiveData to 5.3:Agent-guide/Tutorials/Cases/HowtoMaskSensitiveData) |
|||
| Line 1: | Line 1: | ||
| − | <translate>= How to Mask Sensitive Data= | + | <translate>= How to Mask Sensitive Data = |
| − | Depending on the type of services that you contact center provides, incoming emails may contain some sensitive data that people not familiar with Internet security risks can include in their messages. Examples of such data include payment card numbers, access codes, and clients’ personal health information. | + | Depending on the type of services that you contact center provides, incoming emails may contain some sensitive data that people not familiar with Internet security risks can include in their messages. Examples of such data include payment card numbers, access codes, and clients’ personal health information. |
| − | + | Handling of such data may be governed by various laws, industry security standards, as well as internal policies of your organization. Thus, while reviewing incoming mail, you may be expected to identify such data and make sure it is masked before the email is further processed and stored. (''Data masking'' is the process of hiding original data by replacing it with random characters.) | |
| − | [[File: | + | [[File:Masking-Content-1-53.PNG|thumb|800px|center|An email containing content needing masking]] |
| − | + | == Process == | |
| + | To mask a fragment of an email, hover your cursor over the email with the sensitive data. Click the '''Apply mask to original email content''' star [[File:Apply-Mask-Star-53.PNG|26px]] that appears in the tool selection in the email's upper right-hand corner; this pops a window where you will mask the content. | ||
| − | [[File: | + | [[File:Mask-Content-3-53.PNG|800px|thumb|center|Masking content will convert numbers to asterisks]] |
| + | |||
| + | |||
| + | After the window pops, highlight the content you wish to mask and select the '''Mask''' [[File:Mask-Button-53.PNG|80px]] button. When selected the content will be converted from numbers to asterisks. If you selected the wrong content, click the '''Reset''' [[File:Reset-Button-53.PNG|80px]] button to clear the mask. Select the '''Ok''' [[File:OK-Button-53.PNG|80px]] button to accept the mask and close the window or the '''Cancel''' [[File:Cancel-Button-53.PNG|80px]] to cancel the process. | ||
Revision as of 20:11, 5 February 2019
<translate>= How to Mask Sensitive Data = Depending on the type of services that you contact center provides, incoming emails may contain some sensitive data that people not familiar with Internet security risks can include in their messages. Examples of such data include payment card numbers, access codes, and clients’ personal health information.
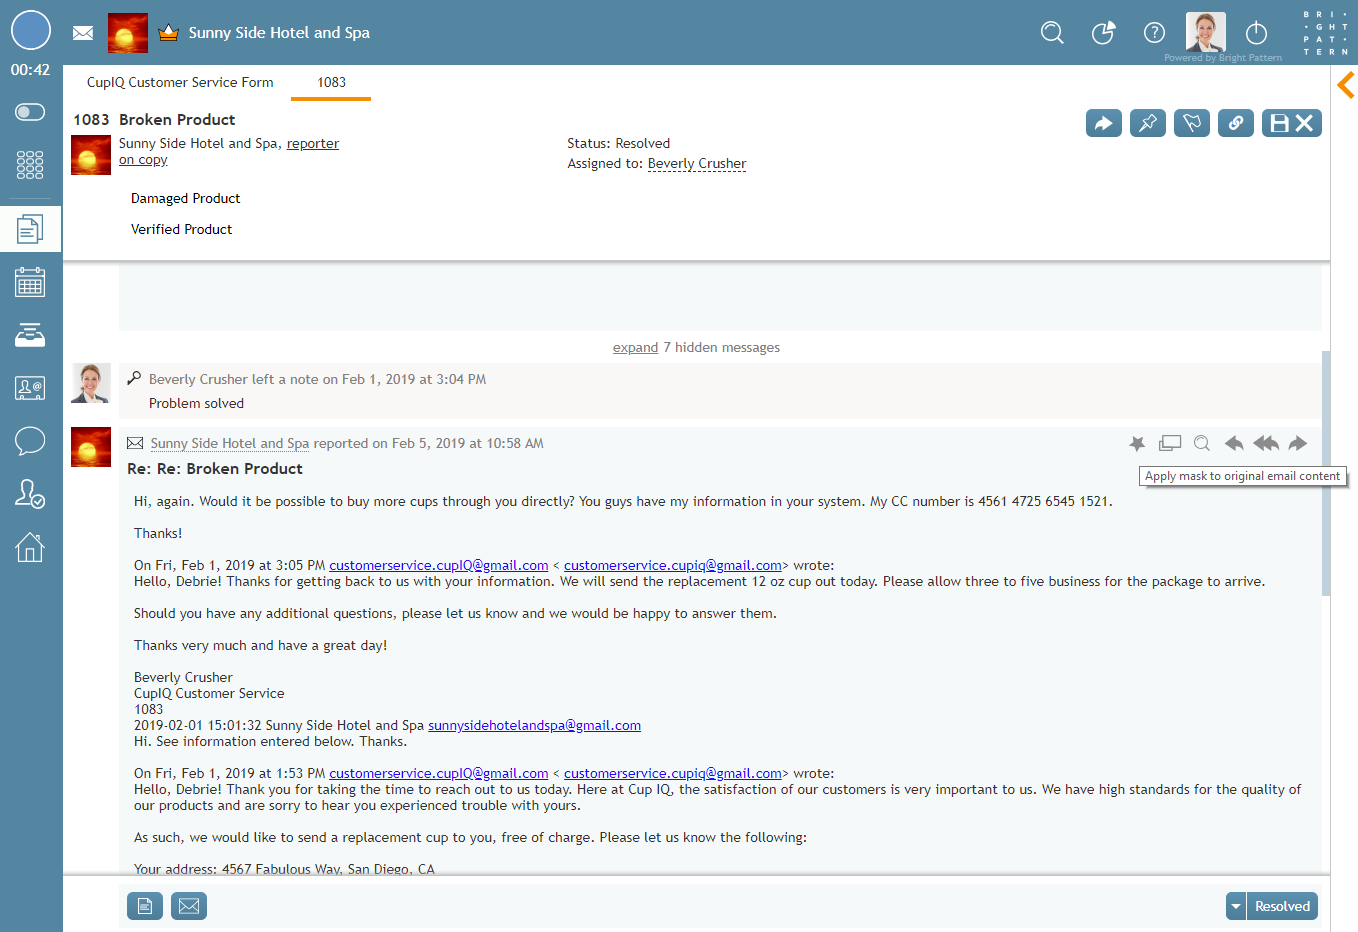
Handling of such data may be governed by various laws, industry security standards, as well as internal policies of your organization. Thus, while reviewing incoming mail, you may be expected to identify such data and make sure it is masked before the email is further processed and stored. (Data masking is the process of hiding original data by replacing it with random characters.)
Process
To mask a fragment of an email, hover your cursor over the email with the sensitive data. Click the Apply mask to original email content star that appears in the tool selection in the email's upper right-hand corner; this pops a window where you will mask the content.
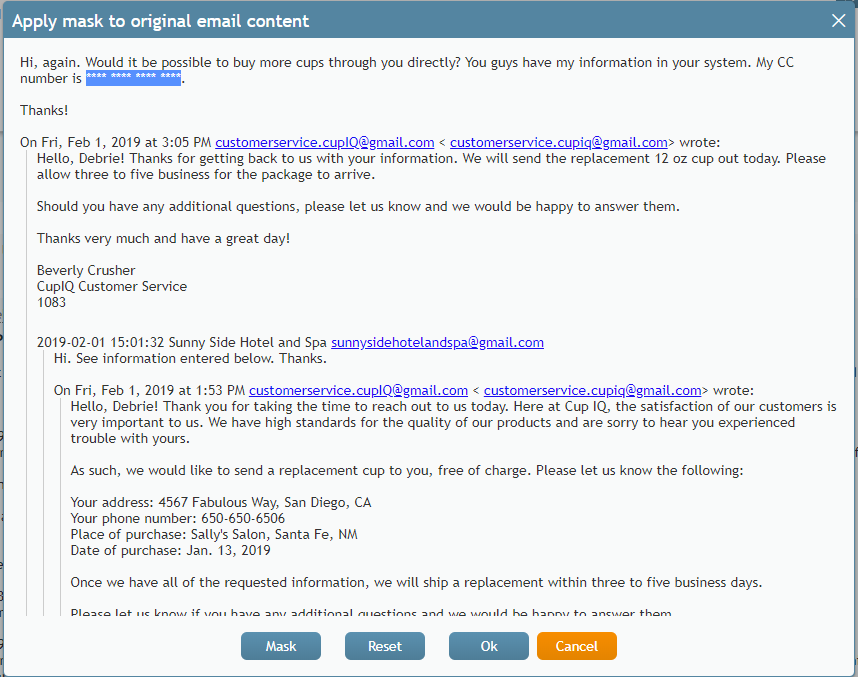
After the window pops, highlight the content you wish to mask and select the Mask button. When selected the content will be converted from numbers to asterisks. If you selected the wrong content, click the Reset
button to clear the mask. Select the Ok
button to accept the mask and close the window or the Cancel
to cancel the process.
</translate>


