提供: Bright Pattern Documentation
(Created page with "== 手順 == #コンタクトセンター管理者アプリケーションの''Contact-center-administrator-guide/UsersandTeams/TrainingClasses | ユーザー & チーム >...") |
|||
| Line 9: | Line 9: | ||
| − | == | + | == 手順 == |
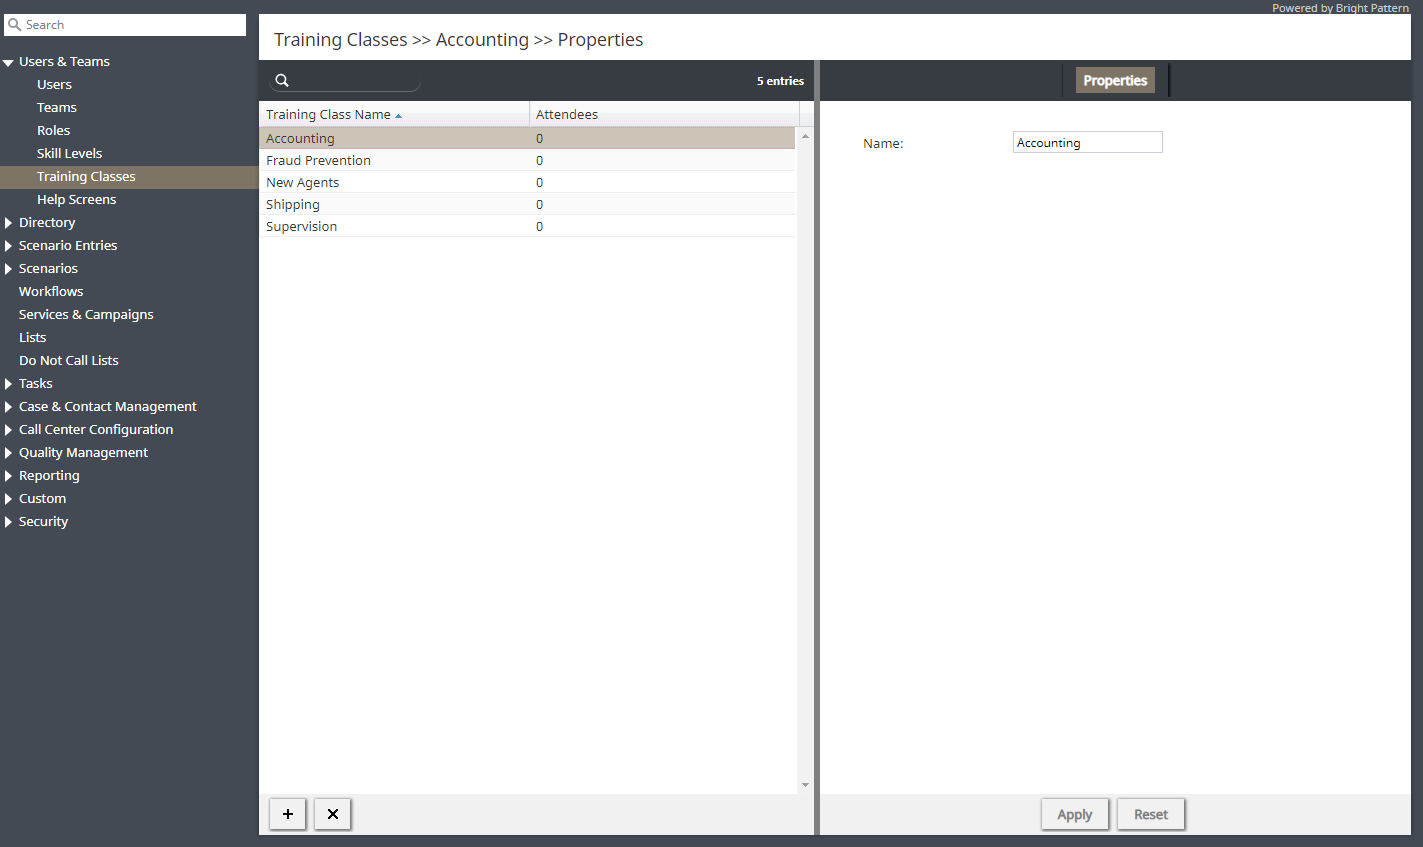
| − | # | + | #コンタクトセンター管理者アプリケーションの''[[Contact-center-administrator-guide/UsersandTeams/TrainingClasses | ユーザー & チーム > トレーニングクラス]]へ移動します。<br /><br />[[File:Training-Classes-Overview-54.PNG|center|thumb|800px|トレーニングクラスのプロパティ]]<br /><br /> |
| − | # | + | # 画面の下にある'''トレーニングクラスのクラス''' (“'''+'''”) ボタンをクリックします。<br /><br /> |
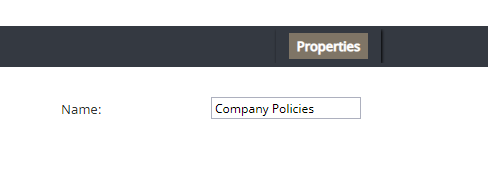
| − | # | + | # クラスに名前を付け、画面の下にある'''適用'''をクリックし、変更を保存します。<br /><br />[[File:Training-Class-Add-5310.PNG|center|thumb|800px|トレーニングクラスに名前を付けます。]]<br /><br /> |
| − | # | + | # 次に、''設定 > ユーザー & チーム > [[Contact-center-administrator-guide/UsersandTeams/Users#Training_Class | ユーザー > 個人タブ]]''へ移動します。リストからエージェントを選択し、'''個人'''タブをクリックし、ユーザープロパティを更新します。<br /><br /> |
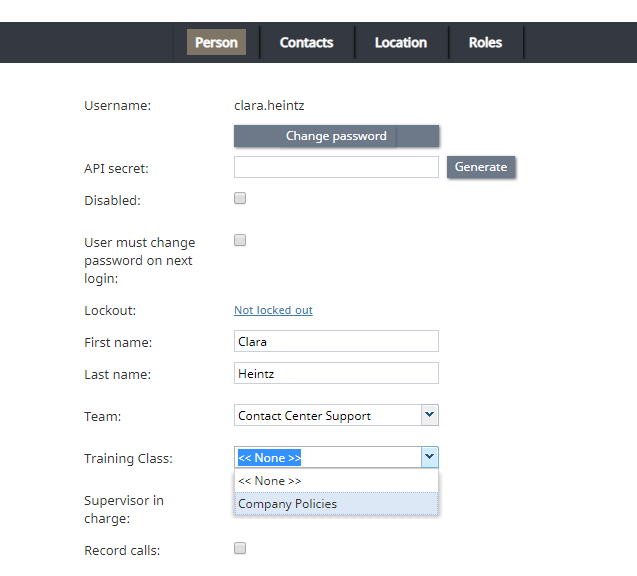
| − | # | + | # '''トレーニングクラス'''プロパティの場合、ドロップダウンメニューを使って、先ほど設定したクラスを選択します。これにより、エージェントが受けた実際のトレーニングまたはエージェントが実際に参加しているクラスを反映するために、エージェントのアカウントにトレーニングクラスが追加されます。<br /><br />[[File:Users-Person-Training-5310.PNG|center|thumb|800px|ユーザープロパティ]]<br /><br /> |
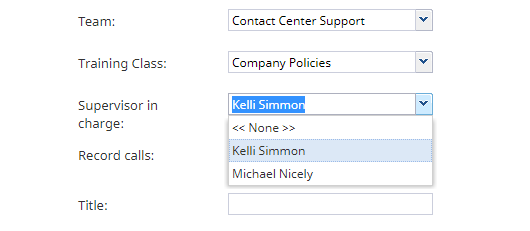
| − | # | + | # '''担当のスーパーバイザ'''プロパティの場合、ドロップダウンメニューを使って、エージェントを担当するスーパーバイザを指定します。<br /><br />[[File:Supervisor-In-Charge-5310.PNG|center|thumb|800px|担当のスーパーバイザを選択します。]]<br /><br /> |
| − | # | + | # '''適用'''をクリックし、変更を保存します。<br /><br /> |
Latest revision as of 12:23, 19 February 2020
• English
トレーニングクラスおよび担当のスーパーバイザの設定
トレーニングクラス と 担当のスーパーバイザは、オムニQMのオプション機能です。トレーニングクラスでは、エージェントが実際に受けたトレーニングまたはエージェントが実際に参加しているクラスを反映するトレーニングクラス (名前のみ) を作成できます。 担当のスーパーバイザでは、特定のユーザーを担当するスーパーバイザを指定できます。
トレーニングクラスは、コンタクトセンター管理者アプリケーションの ユーザー & チーム > トレーニングクラスで作成されます。トレーニングクラス プロパティと 担当のスーパーバイザプロパティは、 ユーザー> 個人タブでユーザーごとに設定されます。これらは 、選択された QMレポートにてオプショナル検索パラメータとして使用されます。
レポートパラメーターとして、トレーニングクラスと担当のスーパーバイザーを使用すると、これらのメトリックを他のレポートデータと比較して分析できます。特定のクラスまたは特定のスーパーバイザーの下でパフォーマンスが不足している場合、品質評価者は必要に応じてトレーニングを調整できます。
ここでは、トレーニングクラス と 担当のスーパーバイザの設定方法について説明します。
手順
- コンタクトセンター管理者アプリケーションの ユーザー & チーム > トレーニングクラスへ移動します。
- 画面の下にあるトレーニングクラスのクラス (“+”) ボタンをクリックします。
- クラスに名前を付け、画面の下にある適用をクリックし、変更を保存します。
- 次に、設定 > ユーザー & チーム > ユーザー > 個人タブへ移動します。リストからエージェントを選択し、個人タブをクリックし、ユーザープロパティを更新します。
- トレーニングクラスプロパティの場合、ドロップダウンメニューを使って、先ほど設定したクラスを選択します。これにより、エージェントが受けた実際のトレーニングまたはエージェントが実際に参加しているクラスを反映するために、エージェントのアカウントにトレーニングクラスが追加されます。
- 担当のスーパーバイザプロパティの場合、ドロップダウンメニューを使って、エージェントを担当するスーパーバイザを指定します。
- 適用をクリックし、変更を保存します。
< 前へ


