(Created page with "<translate> = Associating a Service with a DID Number = In order to associate an Omni DID number with a service or campaign, take the following steps. == Procedure == 1. In t...") |
(Updated via BpDeleteTranslateTags script) |
||
| Line 1: | Line 1: | ||
| − | + | ||
= Associating a Service with a DID Number = | = Associating a Service with a DID Number = | ||
In order to associate an Omni DID number with a service or campaign, take the following steps. | In order to associate an Omni DID number with a service or campaign, take the following steps. | ||
| Line 22: | Line 22: | ||
[[File:2021.10.18_NewAD_OmniDID.ScenearioBuilder.png|300px|border|center|thumb|Scenario Builder]] | [[File:2021.10.18_NewAD_OmniDID.ScenearioBuilder.png|300px|border|center|thumb|Scenario Builder]] | ||
| − | |||
Latest revision as of 04:04, 29 May 2024
Associating a Service with a DID Number
In order to associate an Omni DID number with a service or campaign, take the following steps.
Procedure
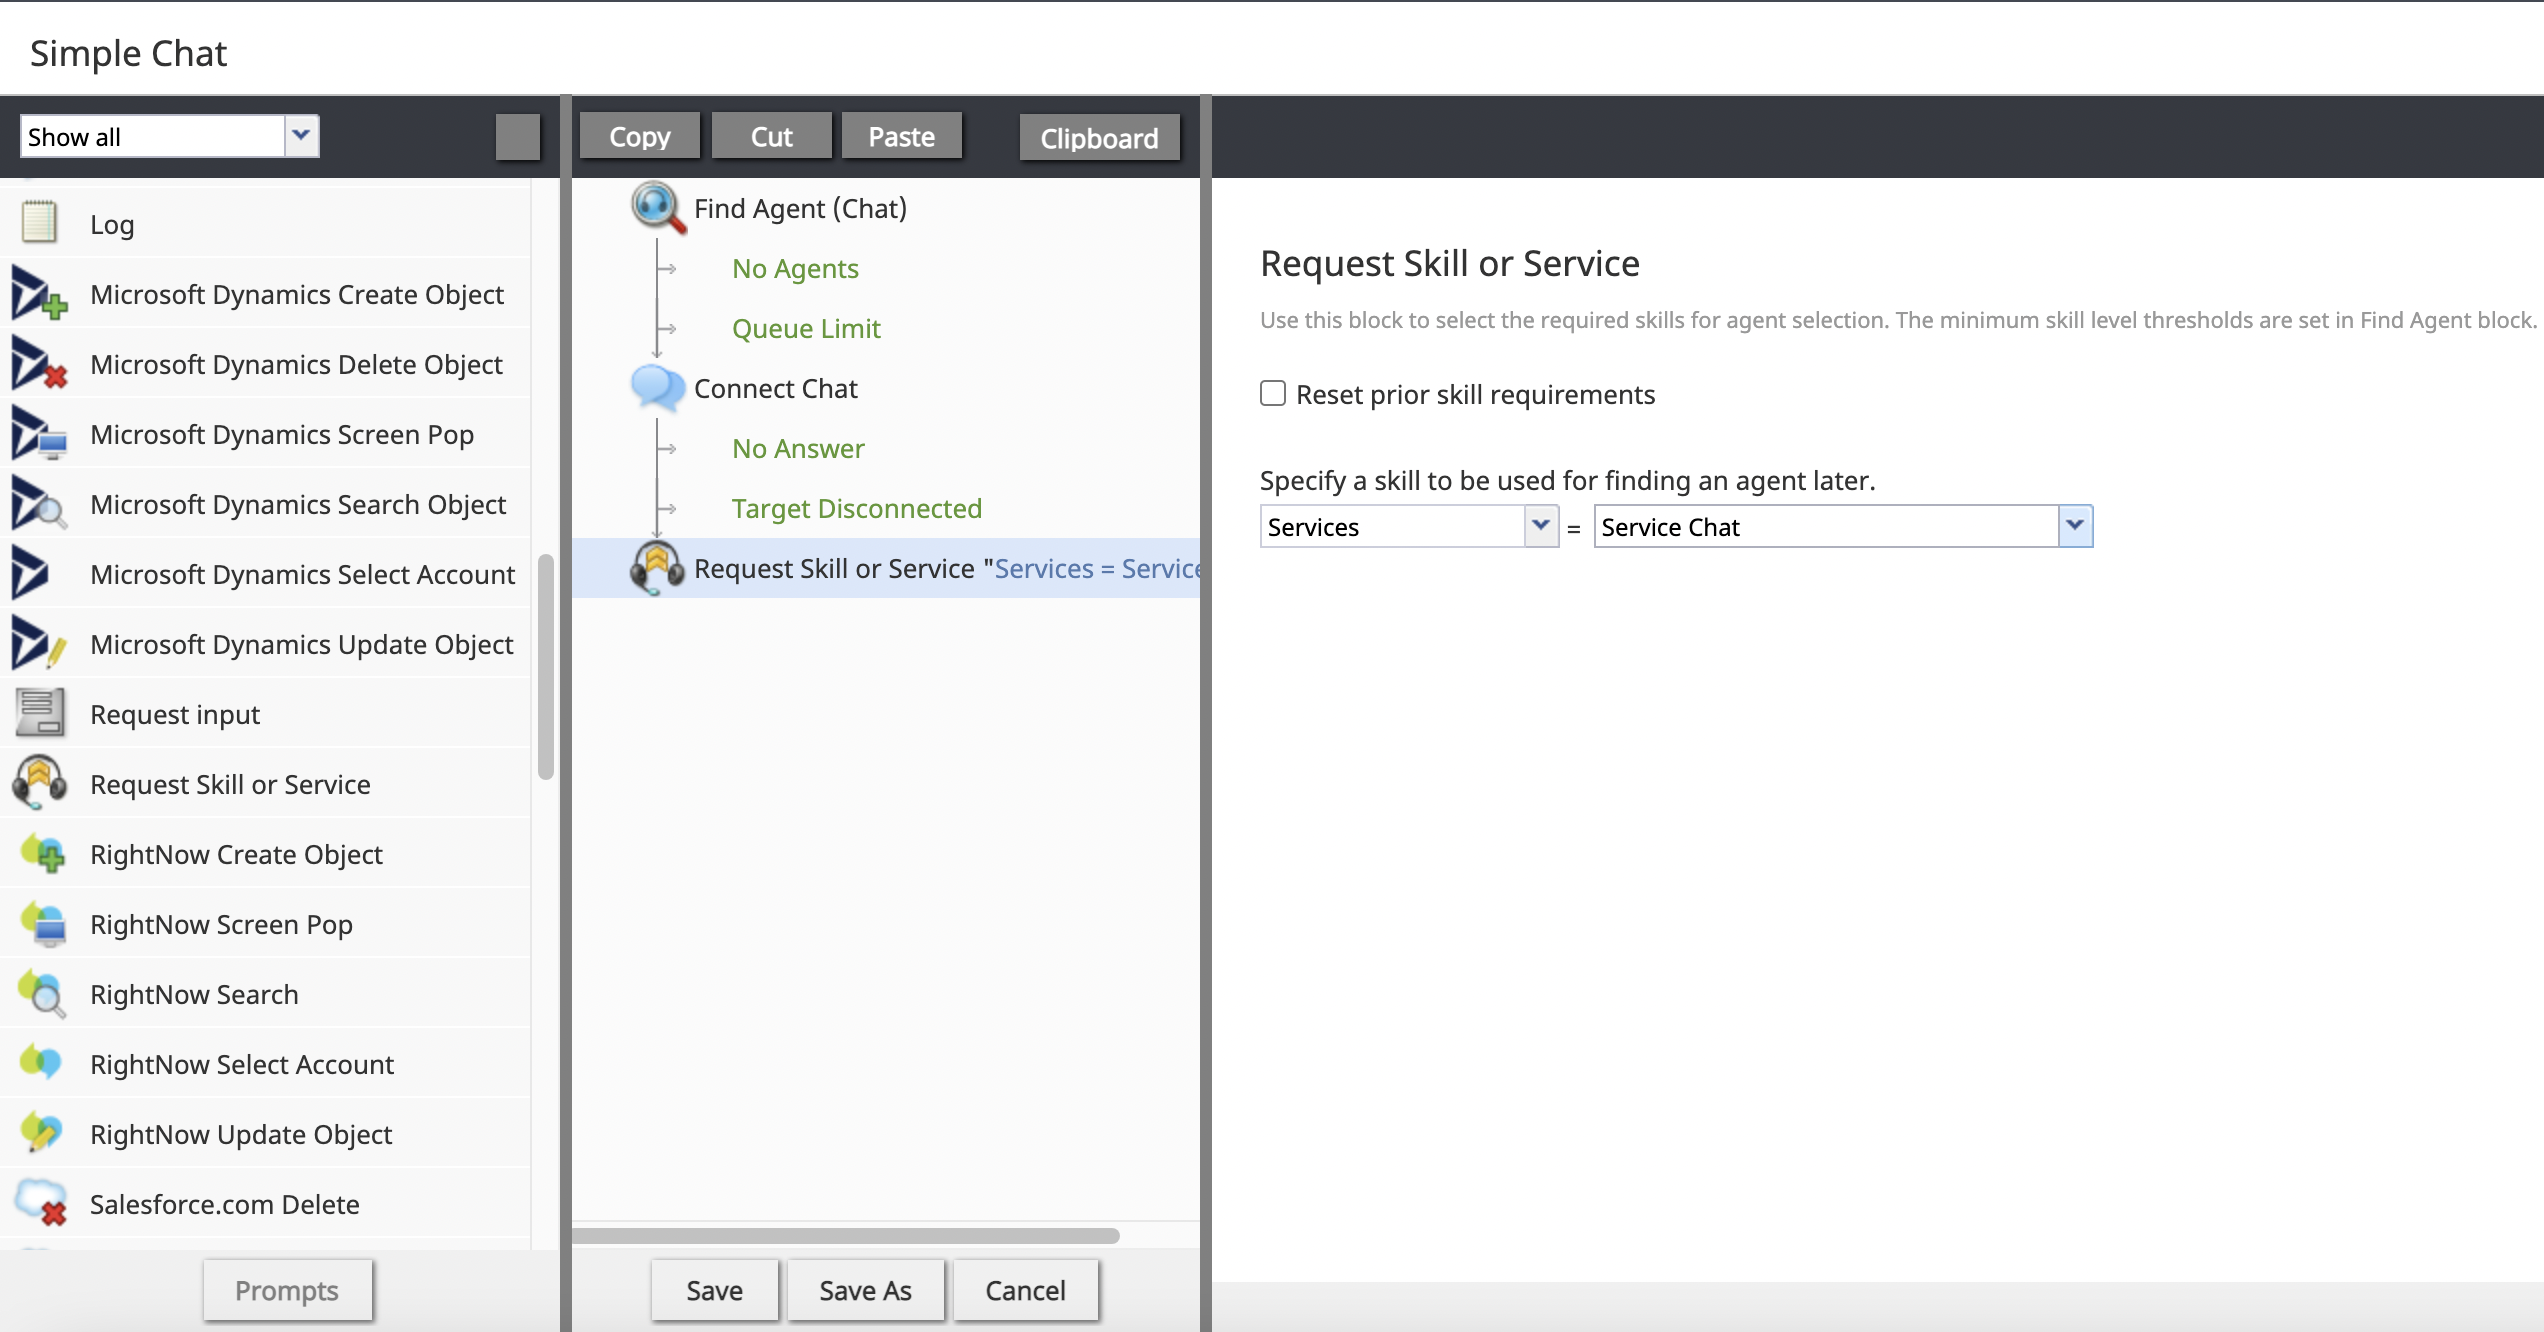
1. In the Contact Center Administrator application, section Scenarios, create a new scenario; the Scenario Builder application will launch.
2. In the new scenario, add a Request Skill or Service block.
3. Select “Services” from the first drop-down menu, then select the appropriate service from the second drop-down menu.
4. Next, add and configure a Connect Call or Connect Chat block (found in the chat portion of the scenario).
5. Name and save your scenario by clicking Save.
Note:
Scenarios normally require the Find Agent block in order to determine the appropriate place to route the interaction. With Omni DID access numbers, the destination of the interaction is predetermined, therefore Find Agent is not required.

