From Bright Pattern Documentation
WeChat Integration Configuration
Procedure
Step 1: Create an account or log in
Go to the WeChat Official Accounts Platform and either log in to or register for a Service Account.
To register a new account:
- Click Register Now and verify your email address. Note that the email address will be used to log in to the platform and must not have been previously used to register or bind a personal WeChat account, Subscription Account, Service Account, Mini Program, Enterprise Account, or Open Platform account.
- Select your company or organization's current region (e.g., “United States”).
- Select Service Account as the type of WeChat Work official account. A Service Account is for businesses and organizations offering online services and interacting with users. This type of account is not available for individuals. A Service Account includes four broadcast messages per month, and messages displayed on followers' Chats list. This type of account does not support the Basic Messaging API, Advanced APIs, or WeChat Pay. Learn more at http://kf.qq.com/faq/120911VrYVrA130805byM32u.html.
- Provide all registration information for your business or organization, including a valid business license number (i.e., the enterprise registration number on the enterprise registration certificate or business registration certificate and other enterprise certificates issued by the local government; according to WeChat, after successful review of information, the enterprise name can not be modified), the mobile phone number and ID number (e.g., ID card number, passport number, or driver's license number) of the person who will be the admin of the account. If you do not have this information, please contact the appropriate person at your company.
- Wait for WeChat to review and approve your registration. Upon successful review, you should receive a WeChat account for managing messaging configuration.
Step 2: Configure the WeChat sandbox account for integration
Please note: This step and the following steps of this procedure describe integration configuration in a WeChat sandbox environment.
- Install the WeChat app on your mobile phone (Android/iOS).
- Log in to your WeChat account to bring up the QR code.
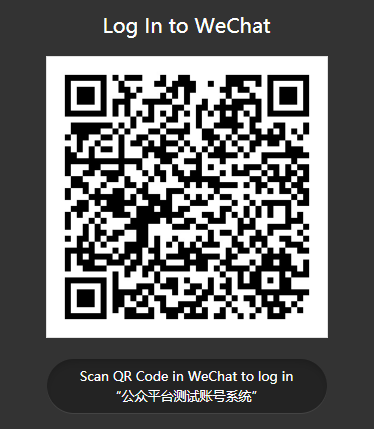
WeChat QR code for login - Open the WeChat app on your mobile phone. Go to Contacts > Add Contacts.

WeChat Contacts on mobile app - Tap Scan QR Code and use your phone to scan the QR code on the WeChat sandbox page.
- Tap Agree to use your personal information to log in.
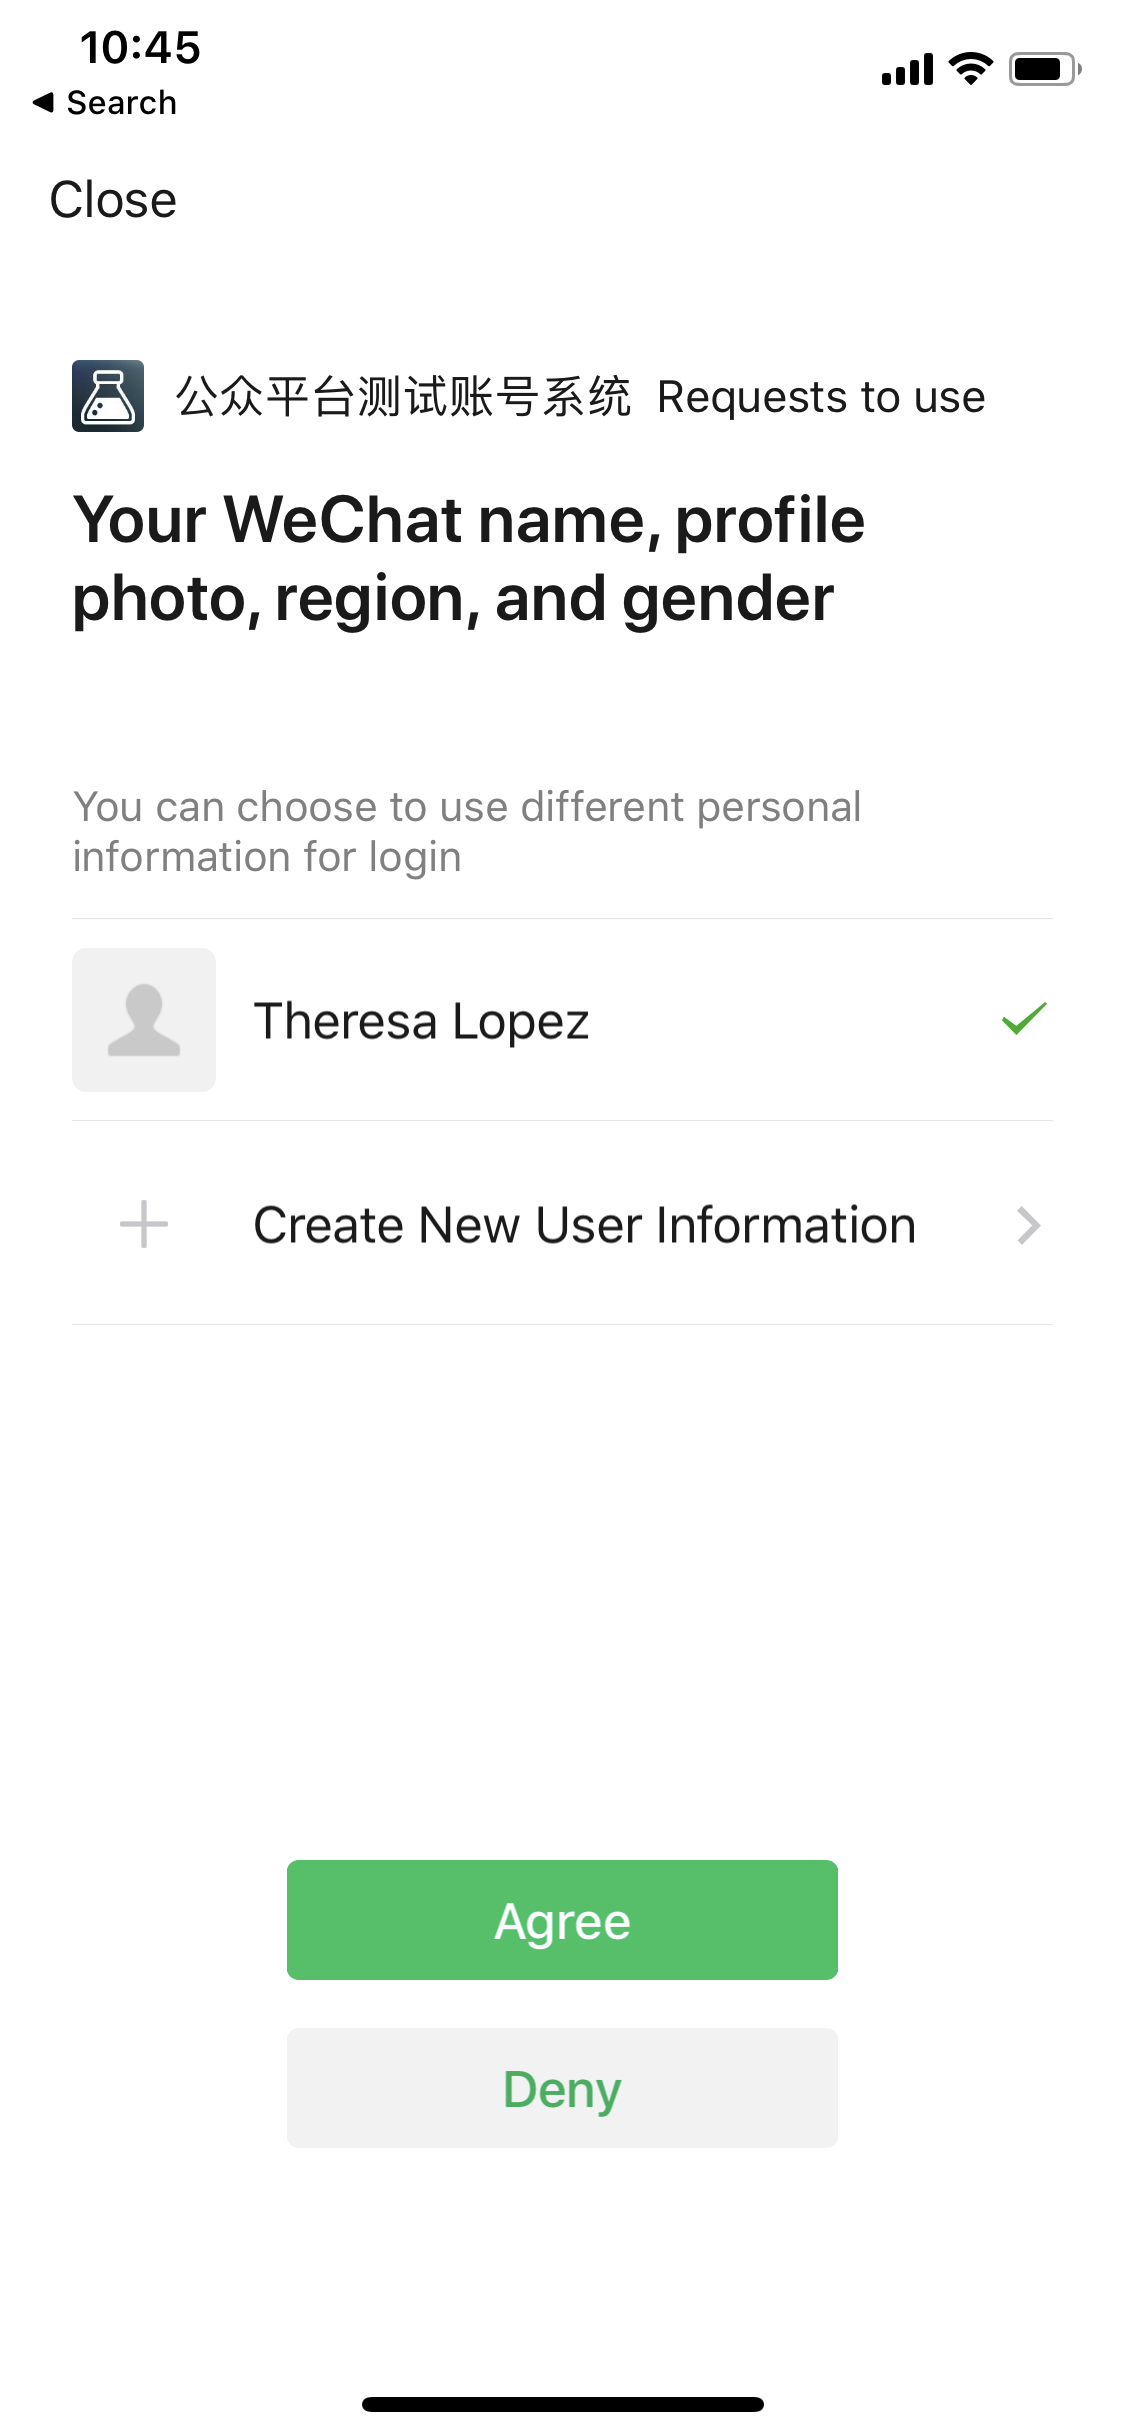
Agree if you want to log in
A test account will be created in the WeChat sandbox, and the Test number management page will open. - From Test number information, copy the following (you will need them for configuring an integration account later):
- WeChat ID - The identifying string for your WeChat account
- appID - The identifying string for your WeChat sandbox application
- appsecret - The secret for your WeChat sandbox application
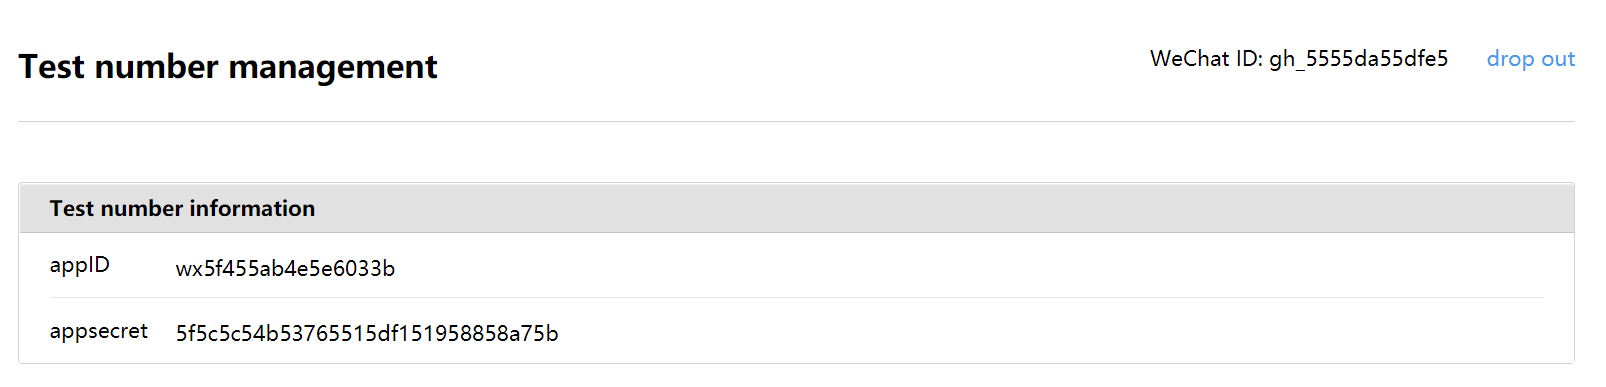
WeChat Test number Management
- WeChat ID - The identifying string for your WeChat account
- In Integration configuration information, set the following:
- URL - The endpoint URL that Bright Pattern Contact Center uses for receiving webhook messages from the WeChat Open API. This URL must be set in WeChat in the format https://<tenant_url>/clientweb/wechat/webhook (e.g., “https://yourcompany.brightpattern.com/clientweb/wechat/webhook”).
- Token - Set any string (e.g., “ABC123DEF456”).
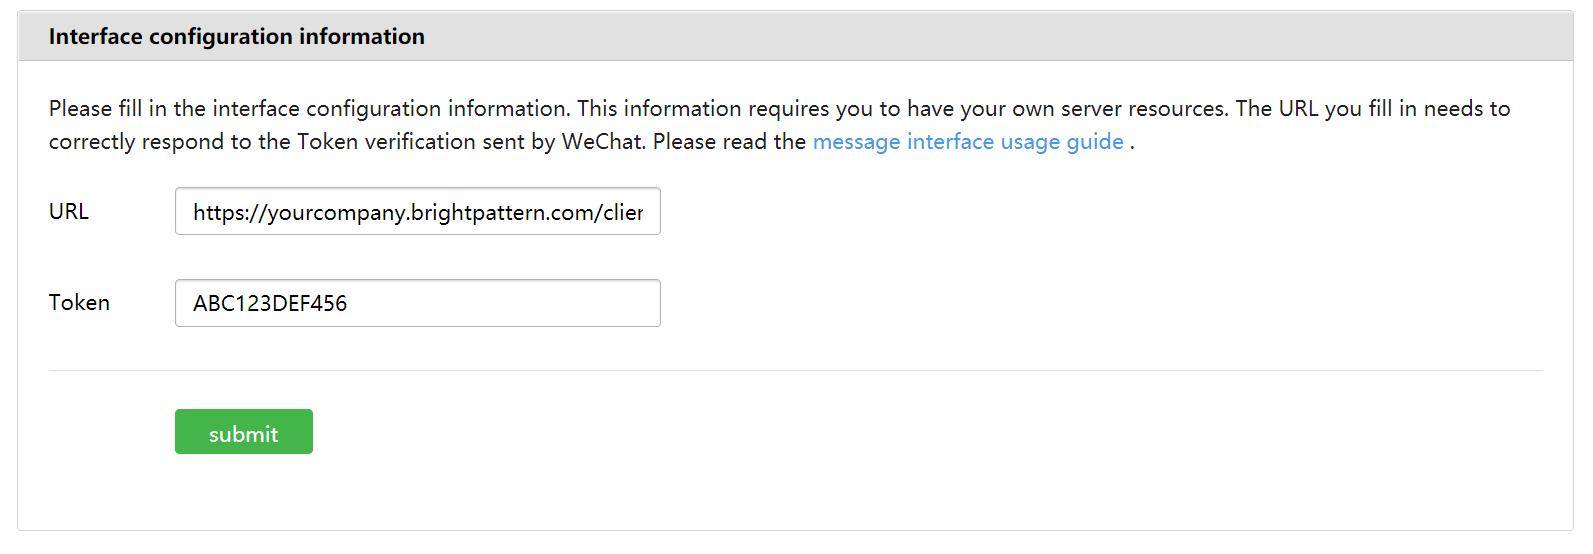
Interface configuration information
- URL - The endpoint URL that Bright Pattern Contact Center uses for receiving webhook messages from the WeChat Open API. This URL must be set in WeChat in the format https://<tenant_url>/clientweb/wechat/webhook (e.g., “https://yourcompany.brightpattern.com/clientweb/wechat/webhook”).
- Do not click Submit yet. Keep this page open in your browser because you will be referencing it in the next step.


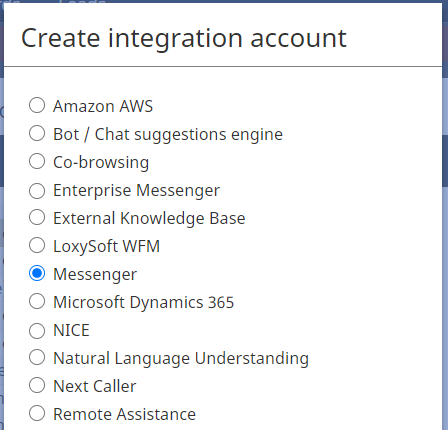
Step 3: Create a new integration account in Contact Center Administrator
- In the Contact Center Administrator application, section Configuration > Call Center Configuration > Integration Accounts, click the Add + button to add a new Messenger integration account.
Create a new Messenger integration account - Select WeChat as the messenger type.
- In the integration account properties, set the following.
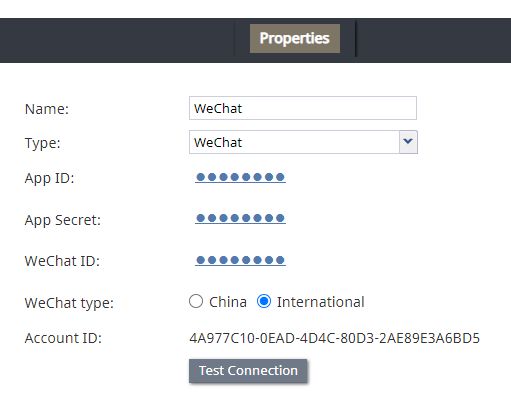
WeChat integration account properties
- Name - The name of this account (any name)
- Type - WeChat
- App ID - The appId of your WeChat sandbox, which is found on the Test number management page
- App Secret - The app secret of your WeChat sandbox, which is found on the Test number management page
- WeChat ID - The identifying string for your WeChat account, which is found in the top right corner of your WeChat sandbox Test number management page
- WeChat type - The type of WeChat official account. Set “China” if the region of your WeChat official account is China; set “International” if the region of your WeChat official account is not China.
- Account ID - The unique identifier of this integration account, which is filled in for you upon clicking Apply
- Test Connection - Tests the credentials and confirms whether the connection is valid.
- Name - The name of this account (any name)
- Click Apply to save your changes.


Step 4: Connect the integration account to the WeChat application
- Open the WeChat app on your mobile phone. Go to Contacts > Add Contacts and tap Scan QR Code.
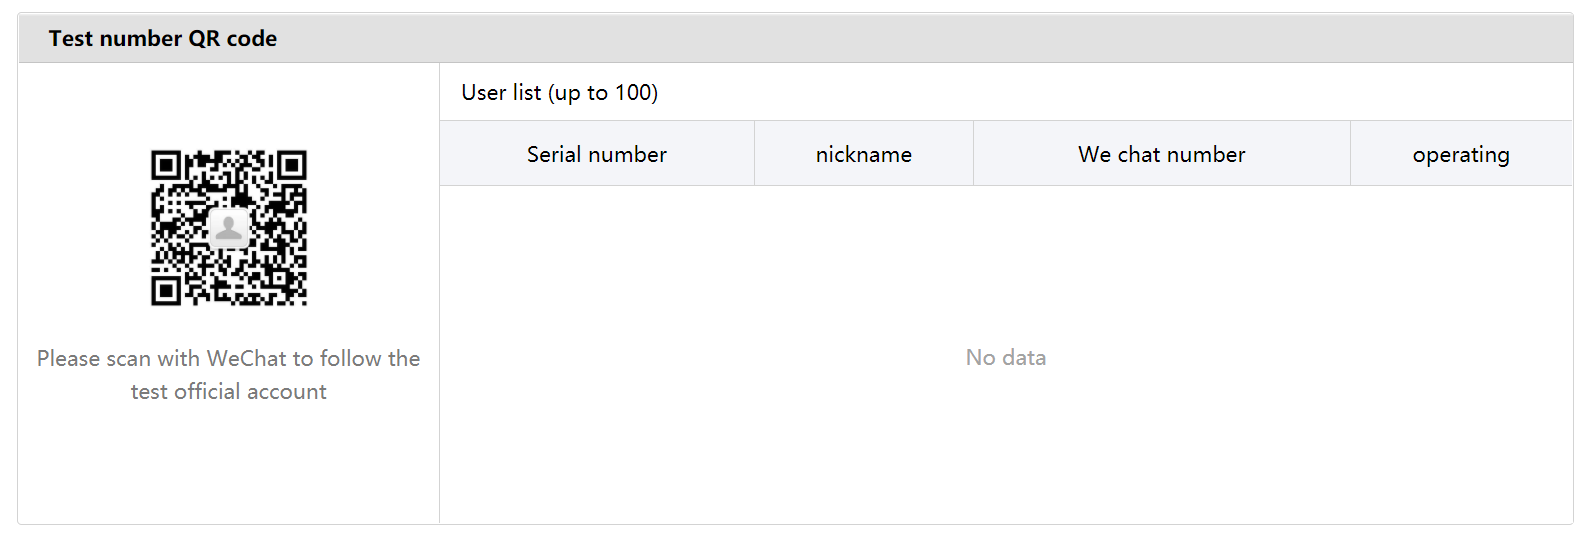
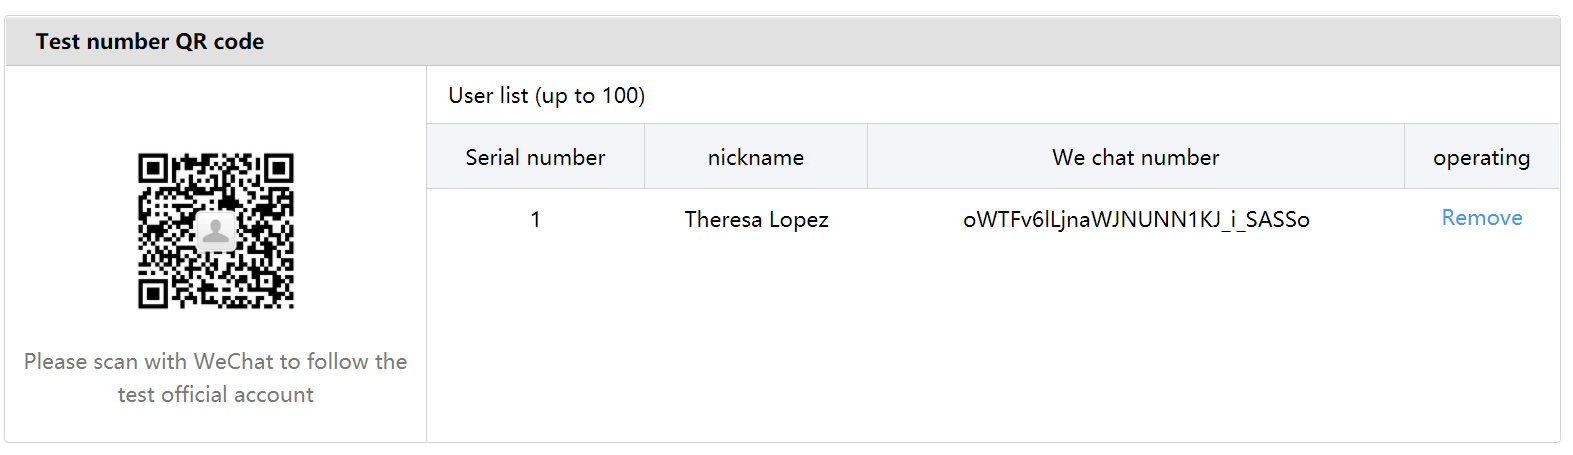
- Now revisit the Test number management page of your WeChat sandbox. Point your phone at the Test number QR code to scan it.
WeChat sandbox Test number management page - On the mobile app, tap Follow to establish a messaging session with the sandbox account.
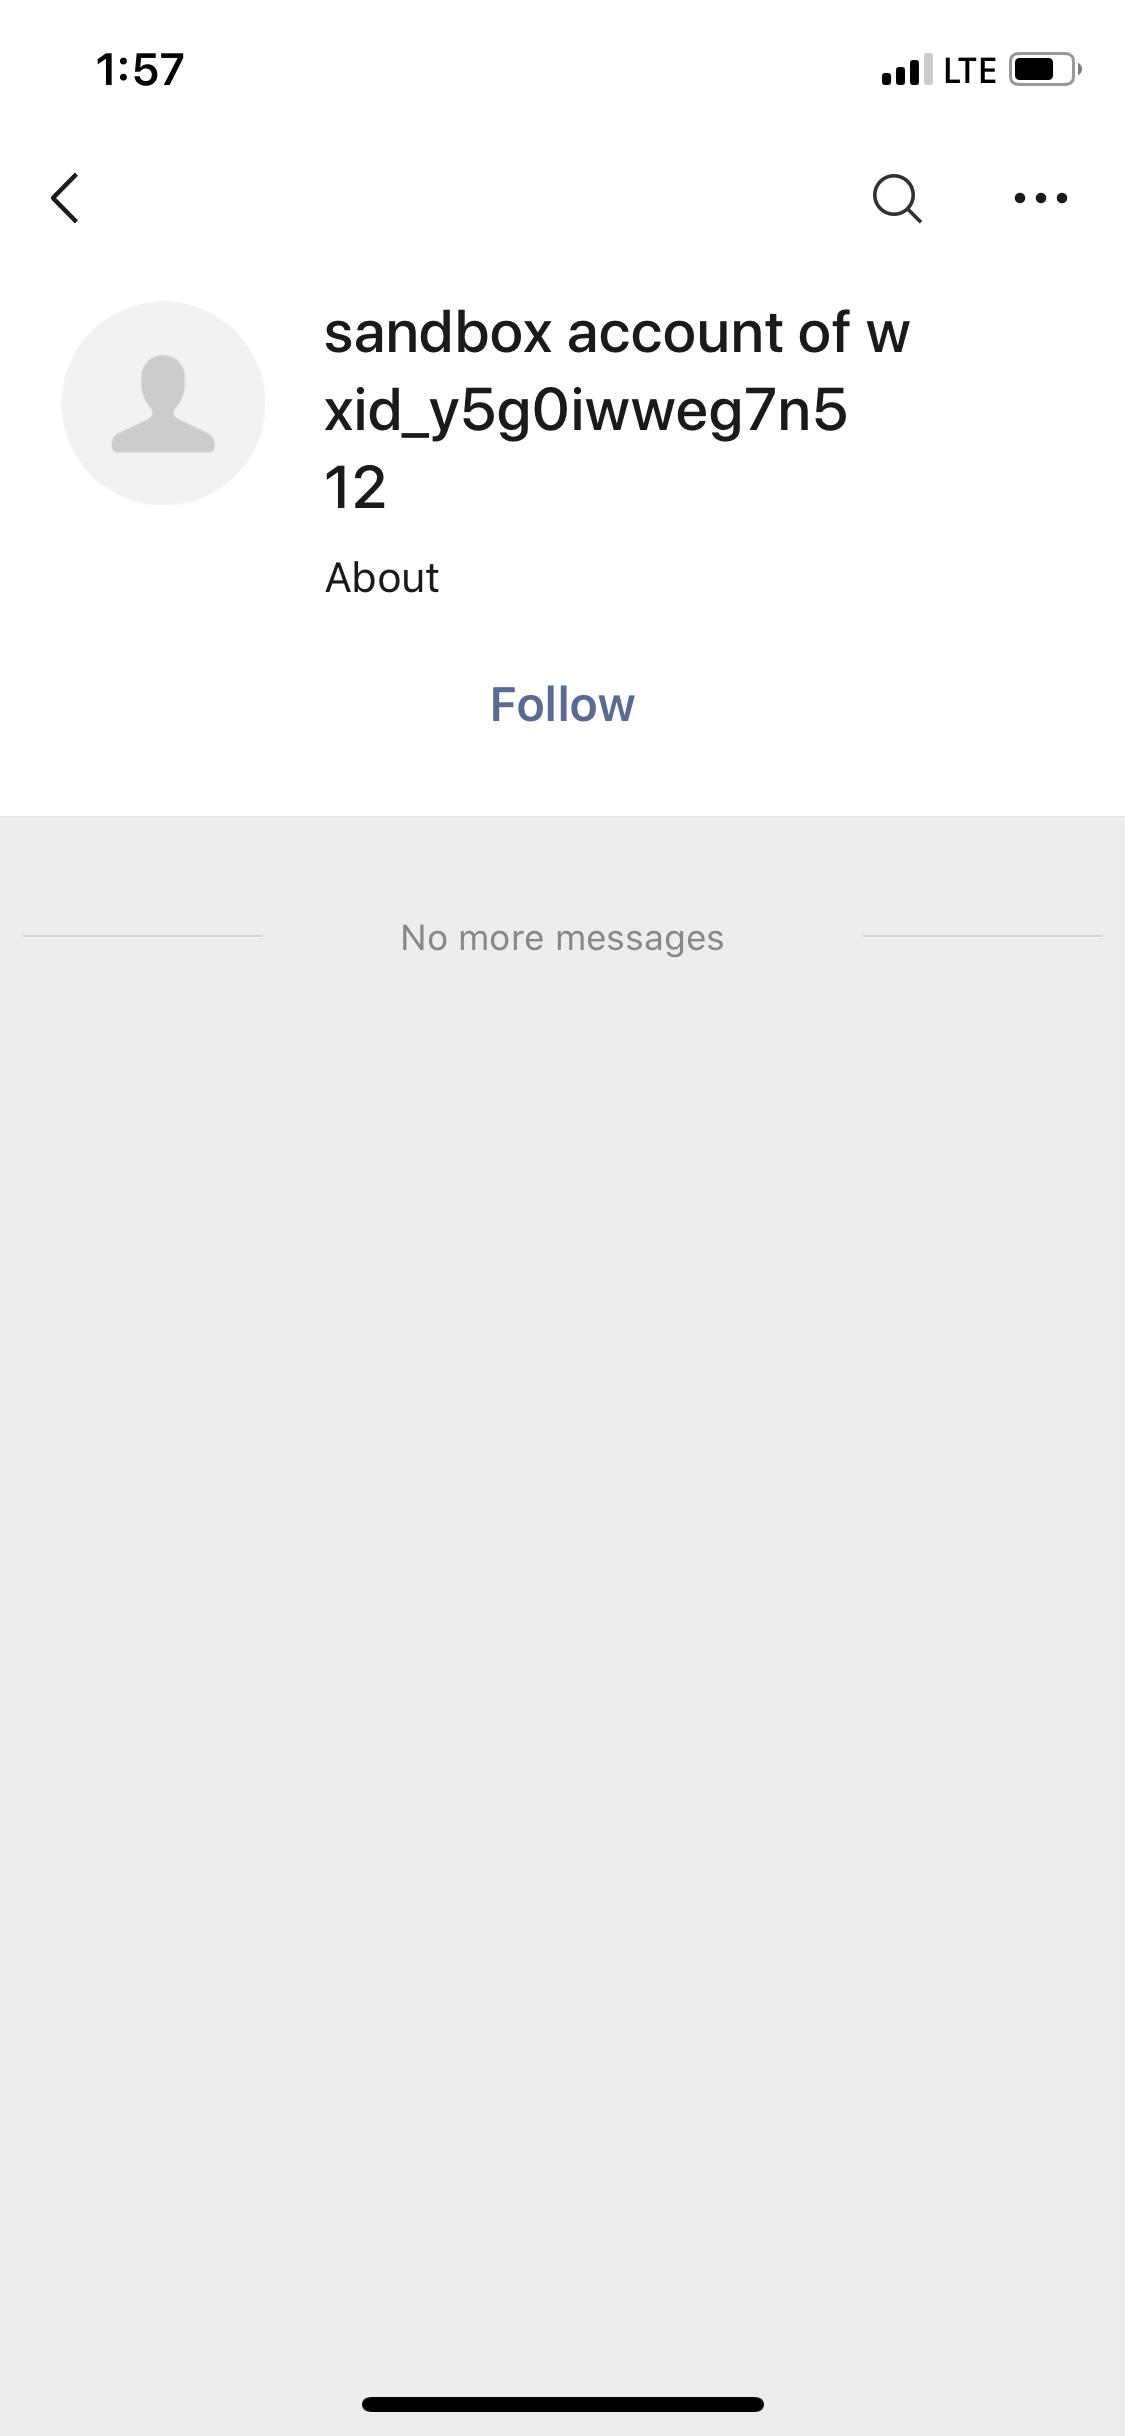
Tap Follow to start a messaging session on the WeChat mobile app - The messaging session is now open, but do not send a message just yet. You will do that after the rest of integration configuration is completed.
WeChat mobile app messaging session screen - On the Test number management page of your WeChat sandbox, you will see that you have been added as a user to the User list.
WeChat sandbox > Test number management > Test number QR code - Go back to the Integration configuration information section and click submit to confirm that configuration was successful.
WeChat sandbox > Test number management > Integration configuration information


Your WeChat integration configuration is now complete, and you can continue sending messages to the sandbox.
Next, you will:
- Test incoming WeChat Messages by responding to chat interactions from within the Agent Desktop application
< Previous | Next >