Using Activity Forms and Activity History Forms to Manage the University Enrollment Pipeline
Let’s say you are a for-profit university working on increasing the amount of students who sign up for classes semester over semester. In order to do this, you need to reach out to the specific students who don’t have enough credits for the graduation requirements.
How would you know which students you’re calling, how many credits those students need, if your enrollment agent sold a course, and what course they sold? Bright Pattern Contact Center software includes dynamic activity and activity history forms that capture standardized data across all students and interactions. Specifically, this tutorial will explain how an agent uses these forms to manage and optimize student enrollment via an outbound campaign.
Prerequisites
- If you wish to use custom activity history fields in your form, you must configure them first. For more information, see the Contact Center Administrator Guide, section Custom Fields > Activity History.
- For information about connecting activity forms to activity history, please see the Contact Center Administrator Guide, section Form Building Exercises > How to Configure Activity History Forms.
- This tutorial uses an outbound voice campaign to proactively contact students; outbound campaigns require calling lists. For more information about configuring calling lists, see Tutorials for Admins, section Lists.
Process
This tutorial explains how to do the following:
- Create an outbound campaign
- Create an activity form
- Connect the activity form to the campaign
- Create an activity history form and connect it to the campaign
- Test the activity and activity history forms
- Export and analyze outbound campaign data
- Create a report with campaign metrics
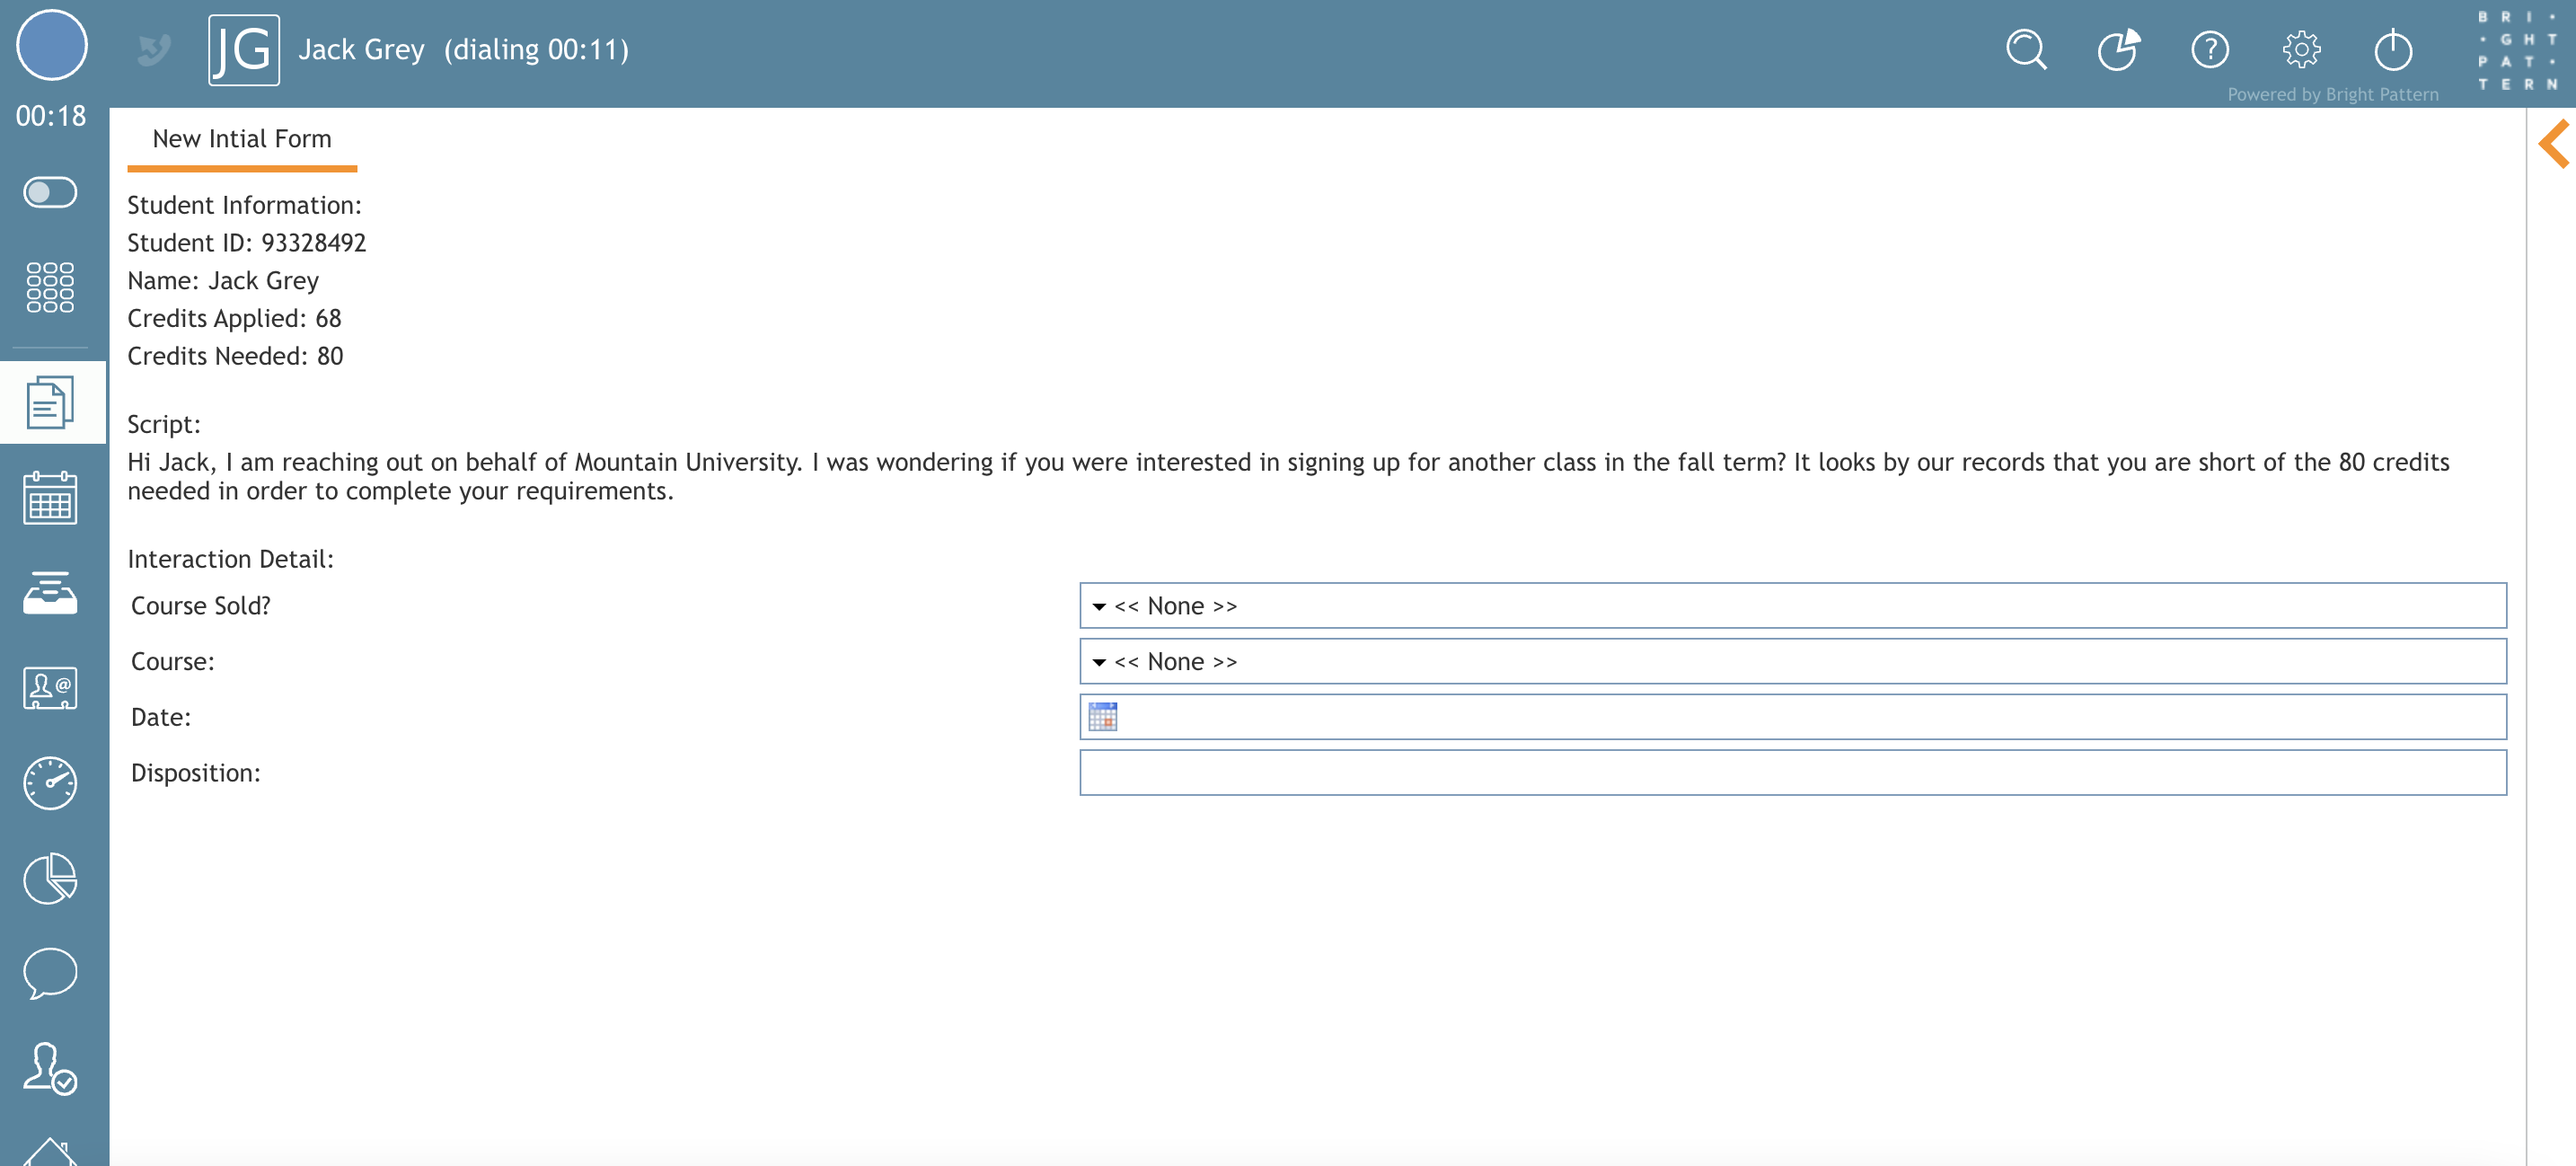
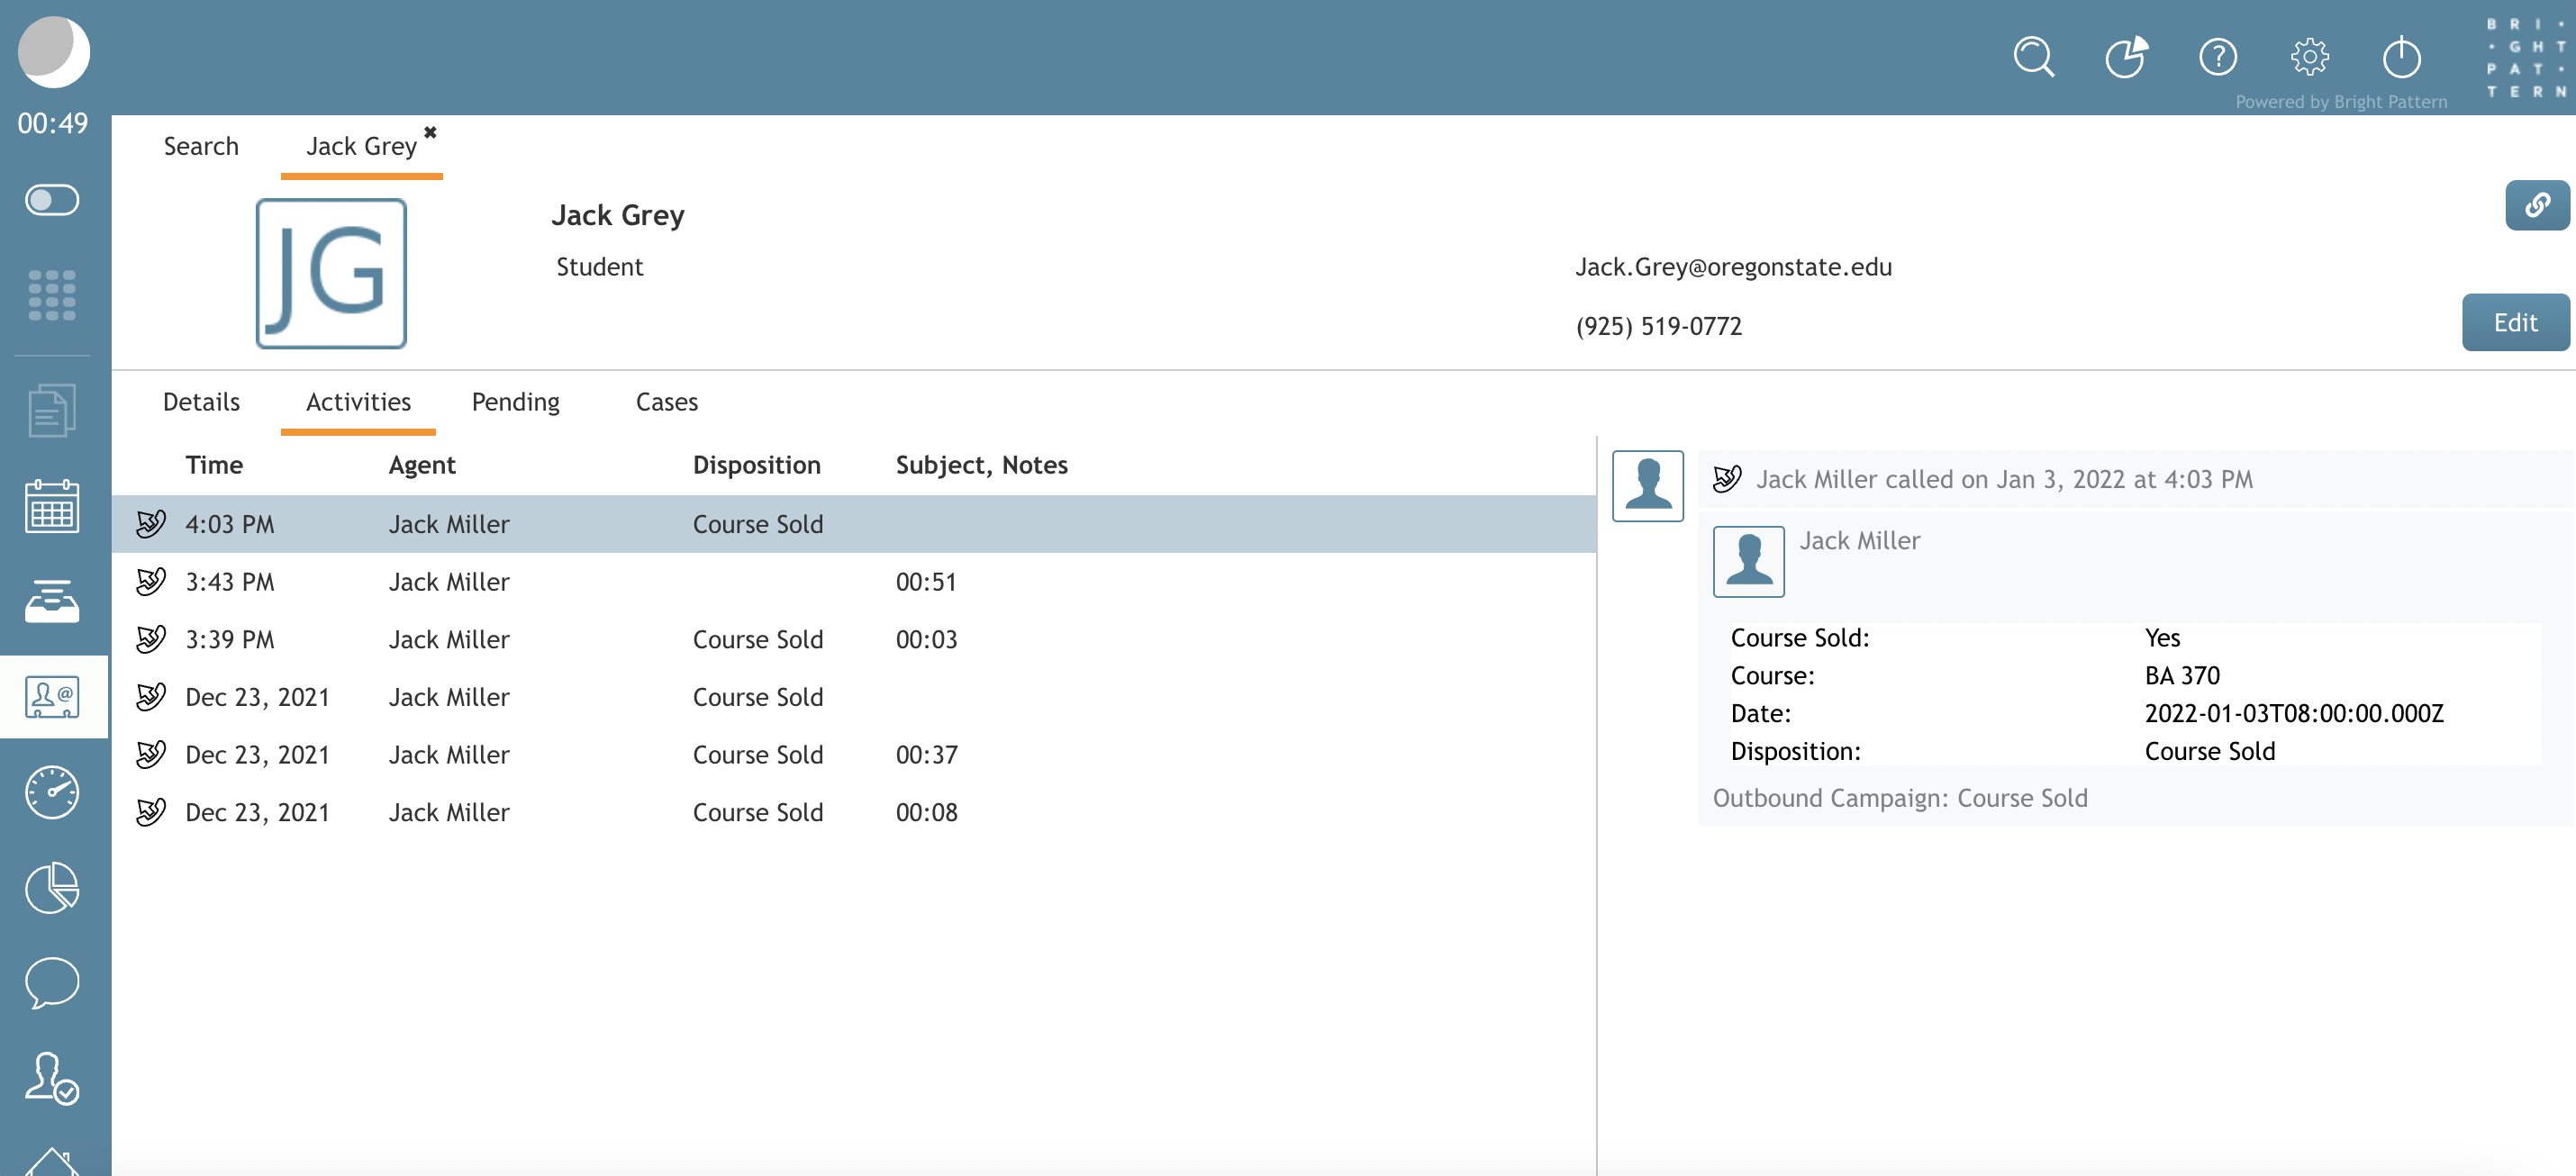
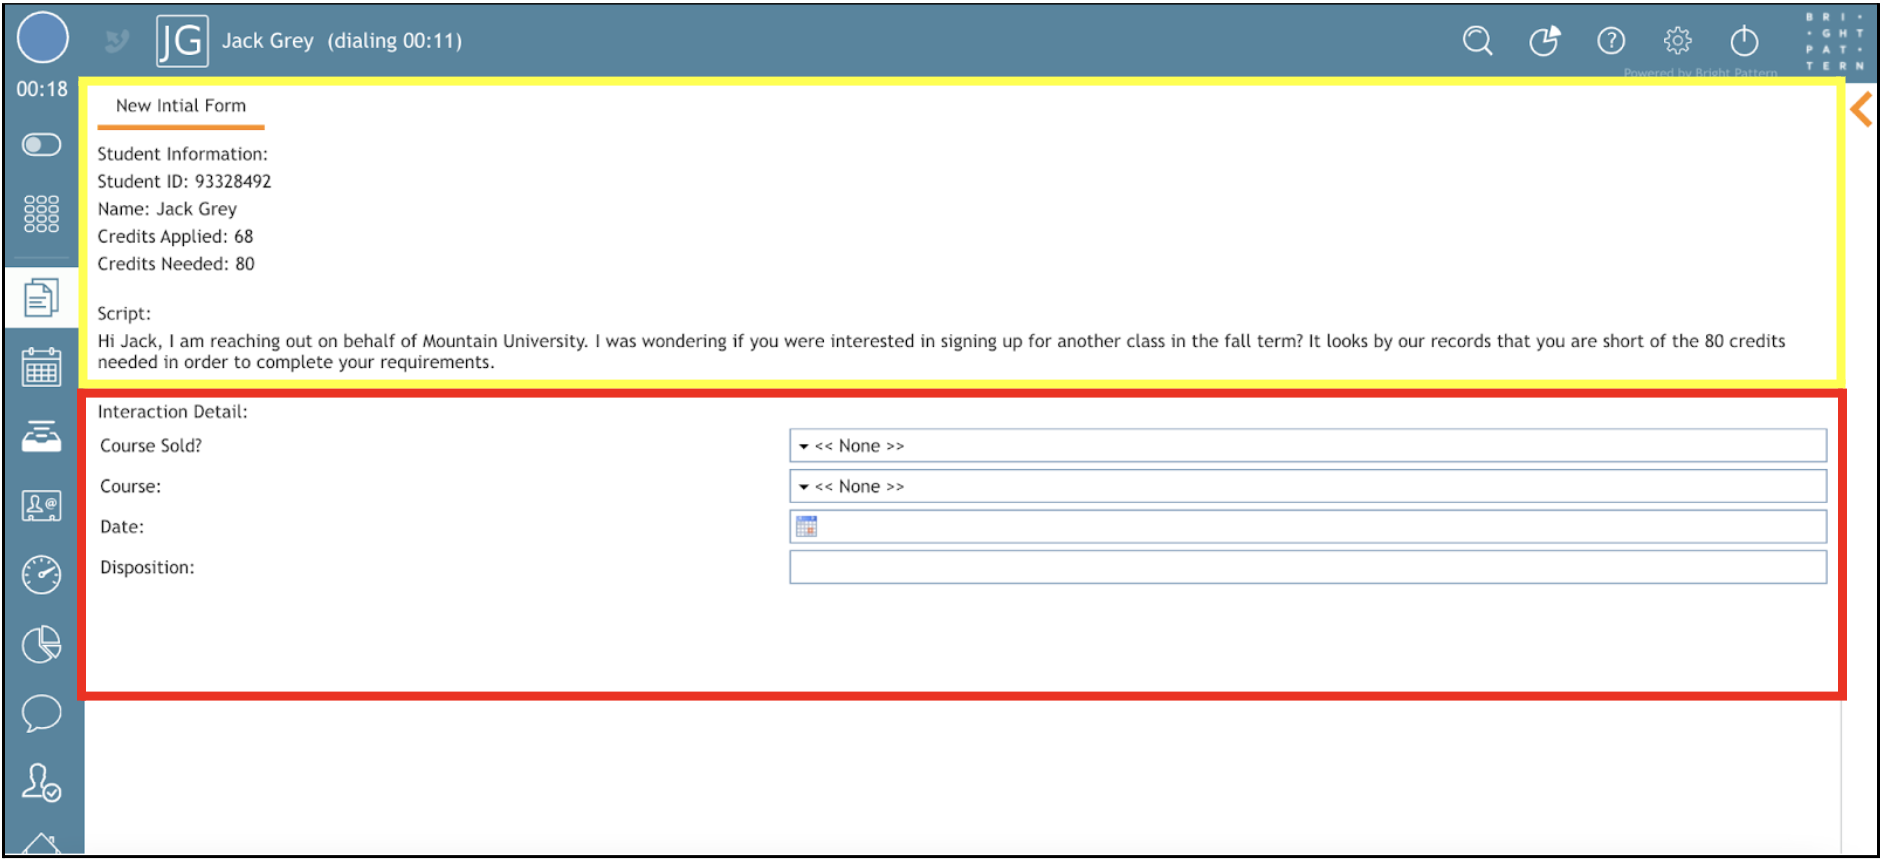
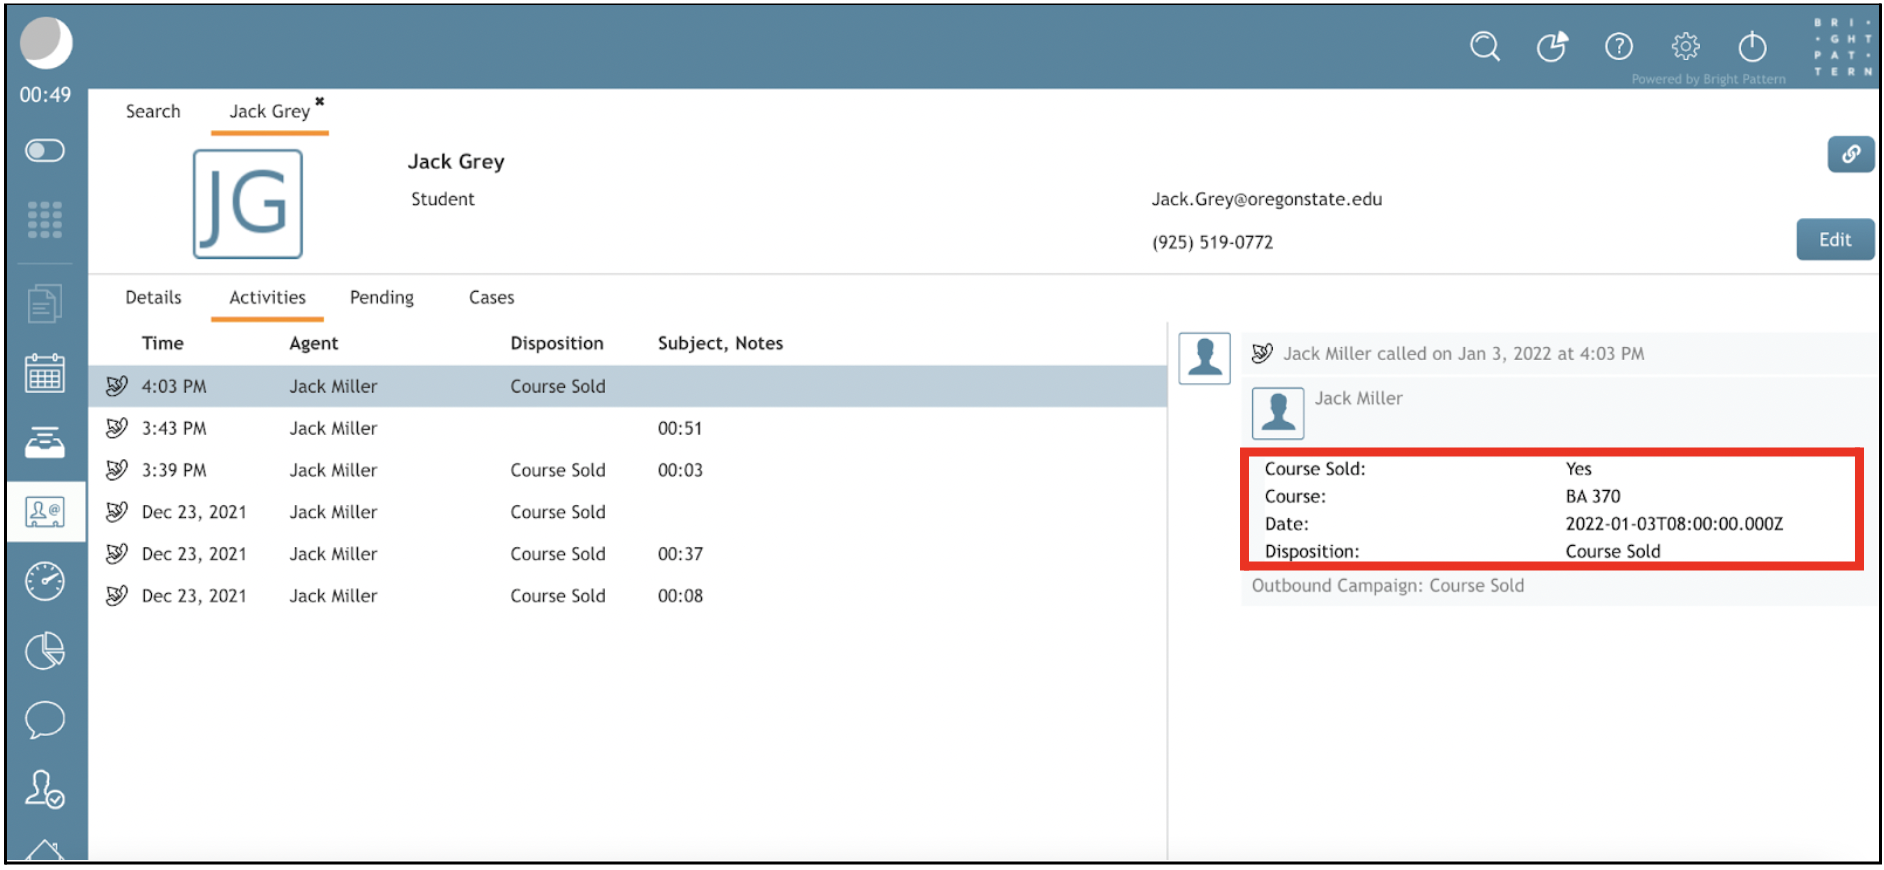
In this tutorial, you will go through the steps of configuring forms to capture outbound interaction data. The following images show how the forms look in the Agent Desktop application.
Procedure
Create an Outbound Campaign
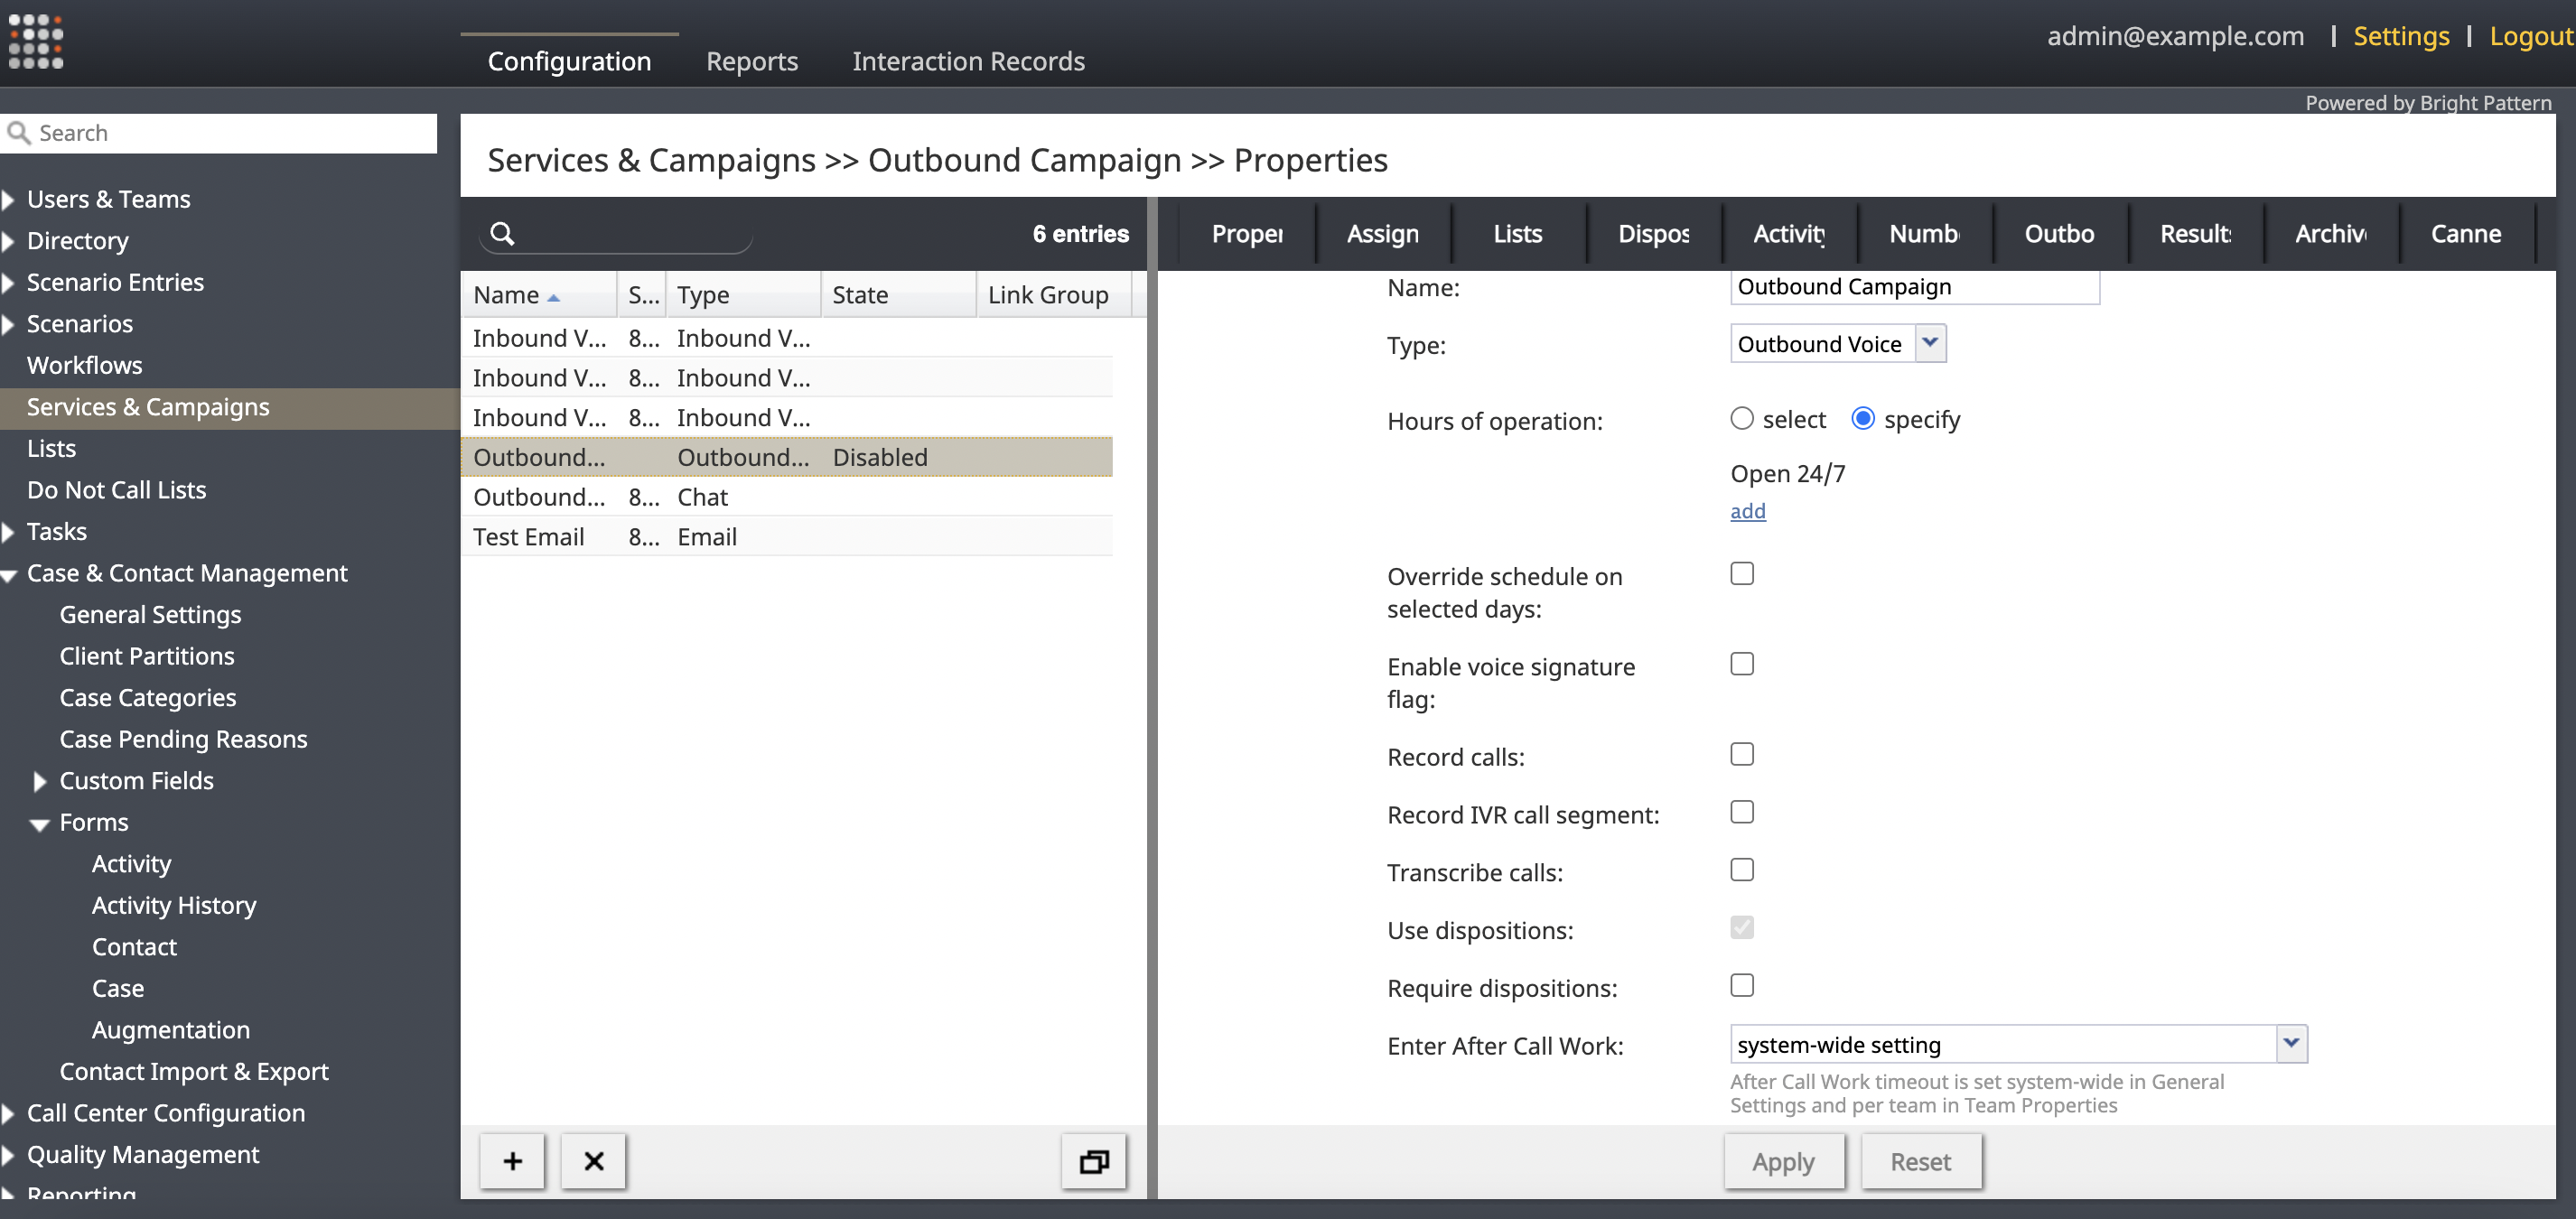
First, you will create an outbound voice campaign in the Contact Center Administrator application. This campaign will be used to connect your enrollment agents via phone call with potential and current students specified via an enabled list.
For more information about running campaigns, see the Supervisor Guide, section Campaigns.
Create an Activity Form
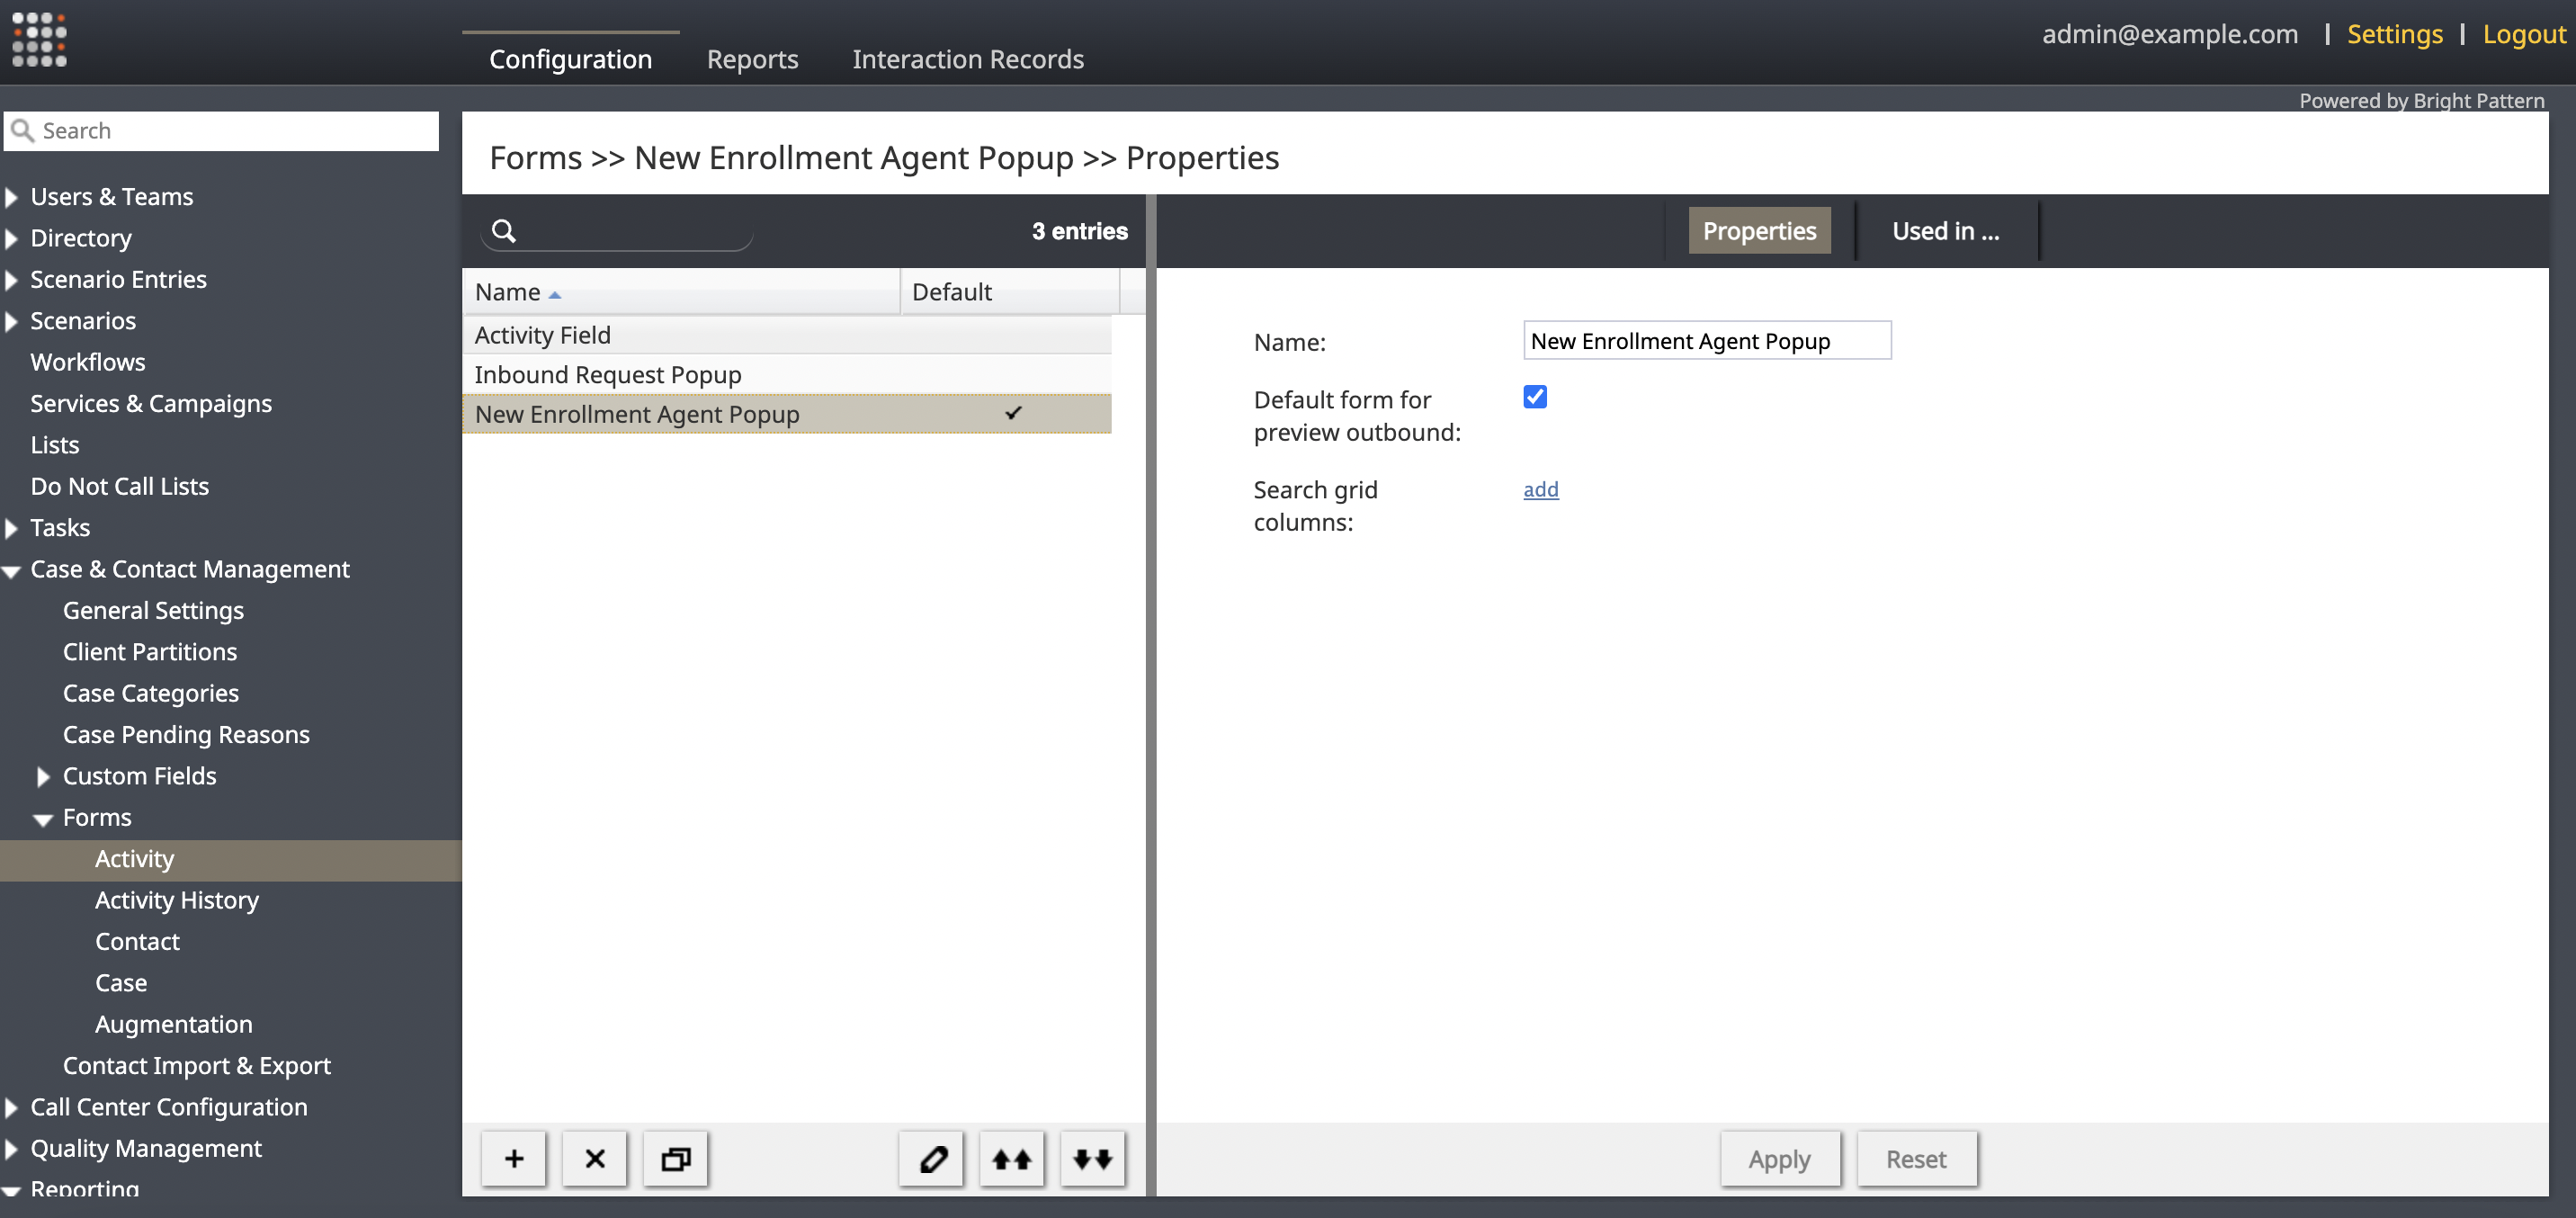
The next step is to create an activity form, this is done in the Contact Center Administrator application, section Case & Contact Management > Forms > Activity. Note that access to this section requires the privilege Configure Contact Forms and Fields.
Activity forms allow your agents to collect information and contact data during active interactions. Administrators can use these forms to set up standardized data-collection popups and prompts across all inbound and outbound contact center agents.
To create a new form, click the + button, and add the desired form name. Selecting the form will open the Form Builder application, where you can customize the information popped to the enrollment agent and prompts for data collection during the interaction. For more information, see the Form Builder Reference Guide, section Form Building Exercises > How to Configure Activity History Forms.
The selected form will be used to display specific information about the current student dialed and prompts for the enrollment agent about how the interaction went.
Connect the Activity Form to the Campaign
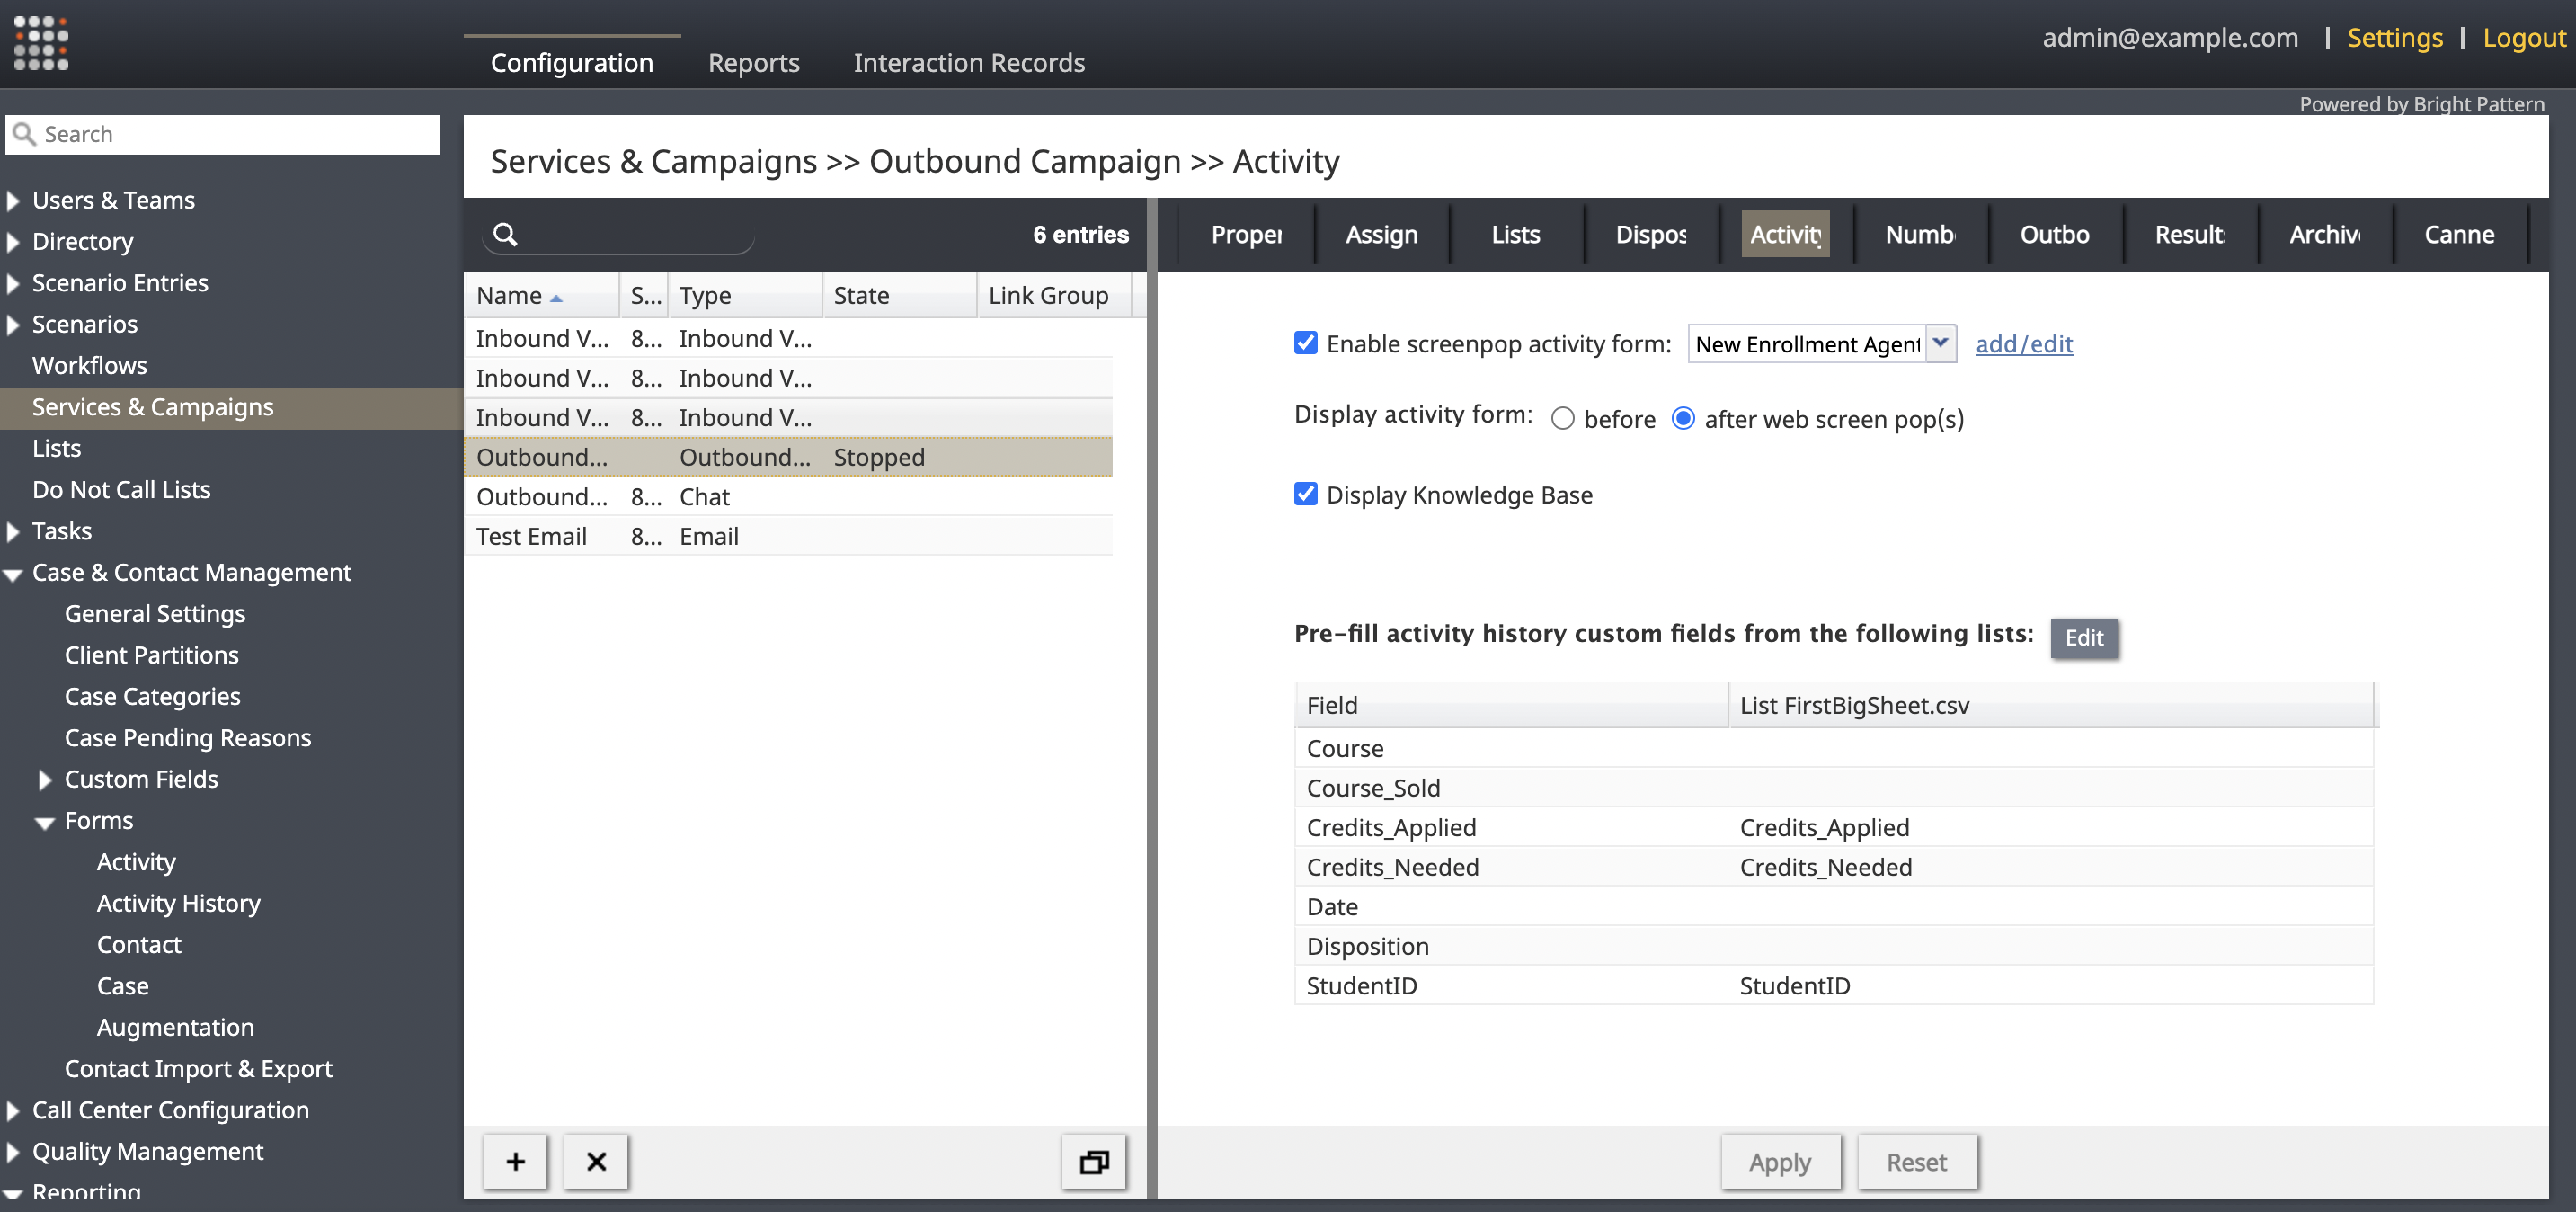
Next, you will connect the campaign to the new activity form. This is done in section Services & Campaigns > Activity tab of the given campaign. Select the Enable Screenpop Activity Form setting and then select the activity form from the drop-down menu.
Note: Custom field variables can be pre-filled from the student campaign list and thus popped to the agent for further preliminary information (e.g., Credits_Applied, Credits_Needed, and StudentID).
Create Activity History Form and Connect It to the Campaign
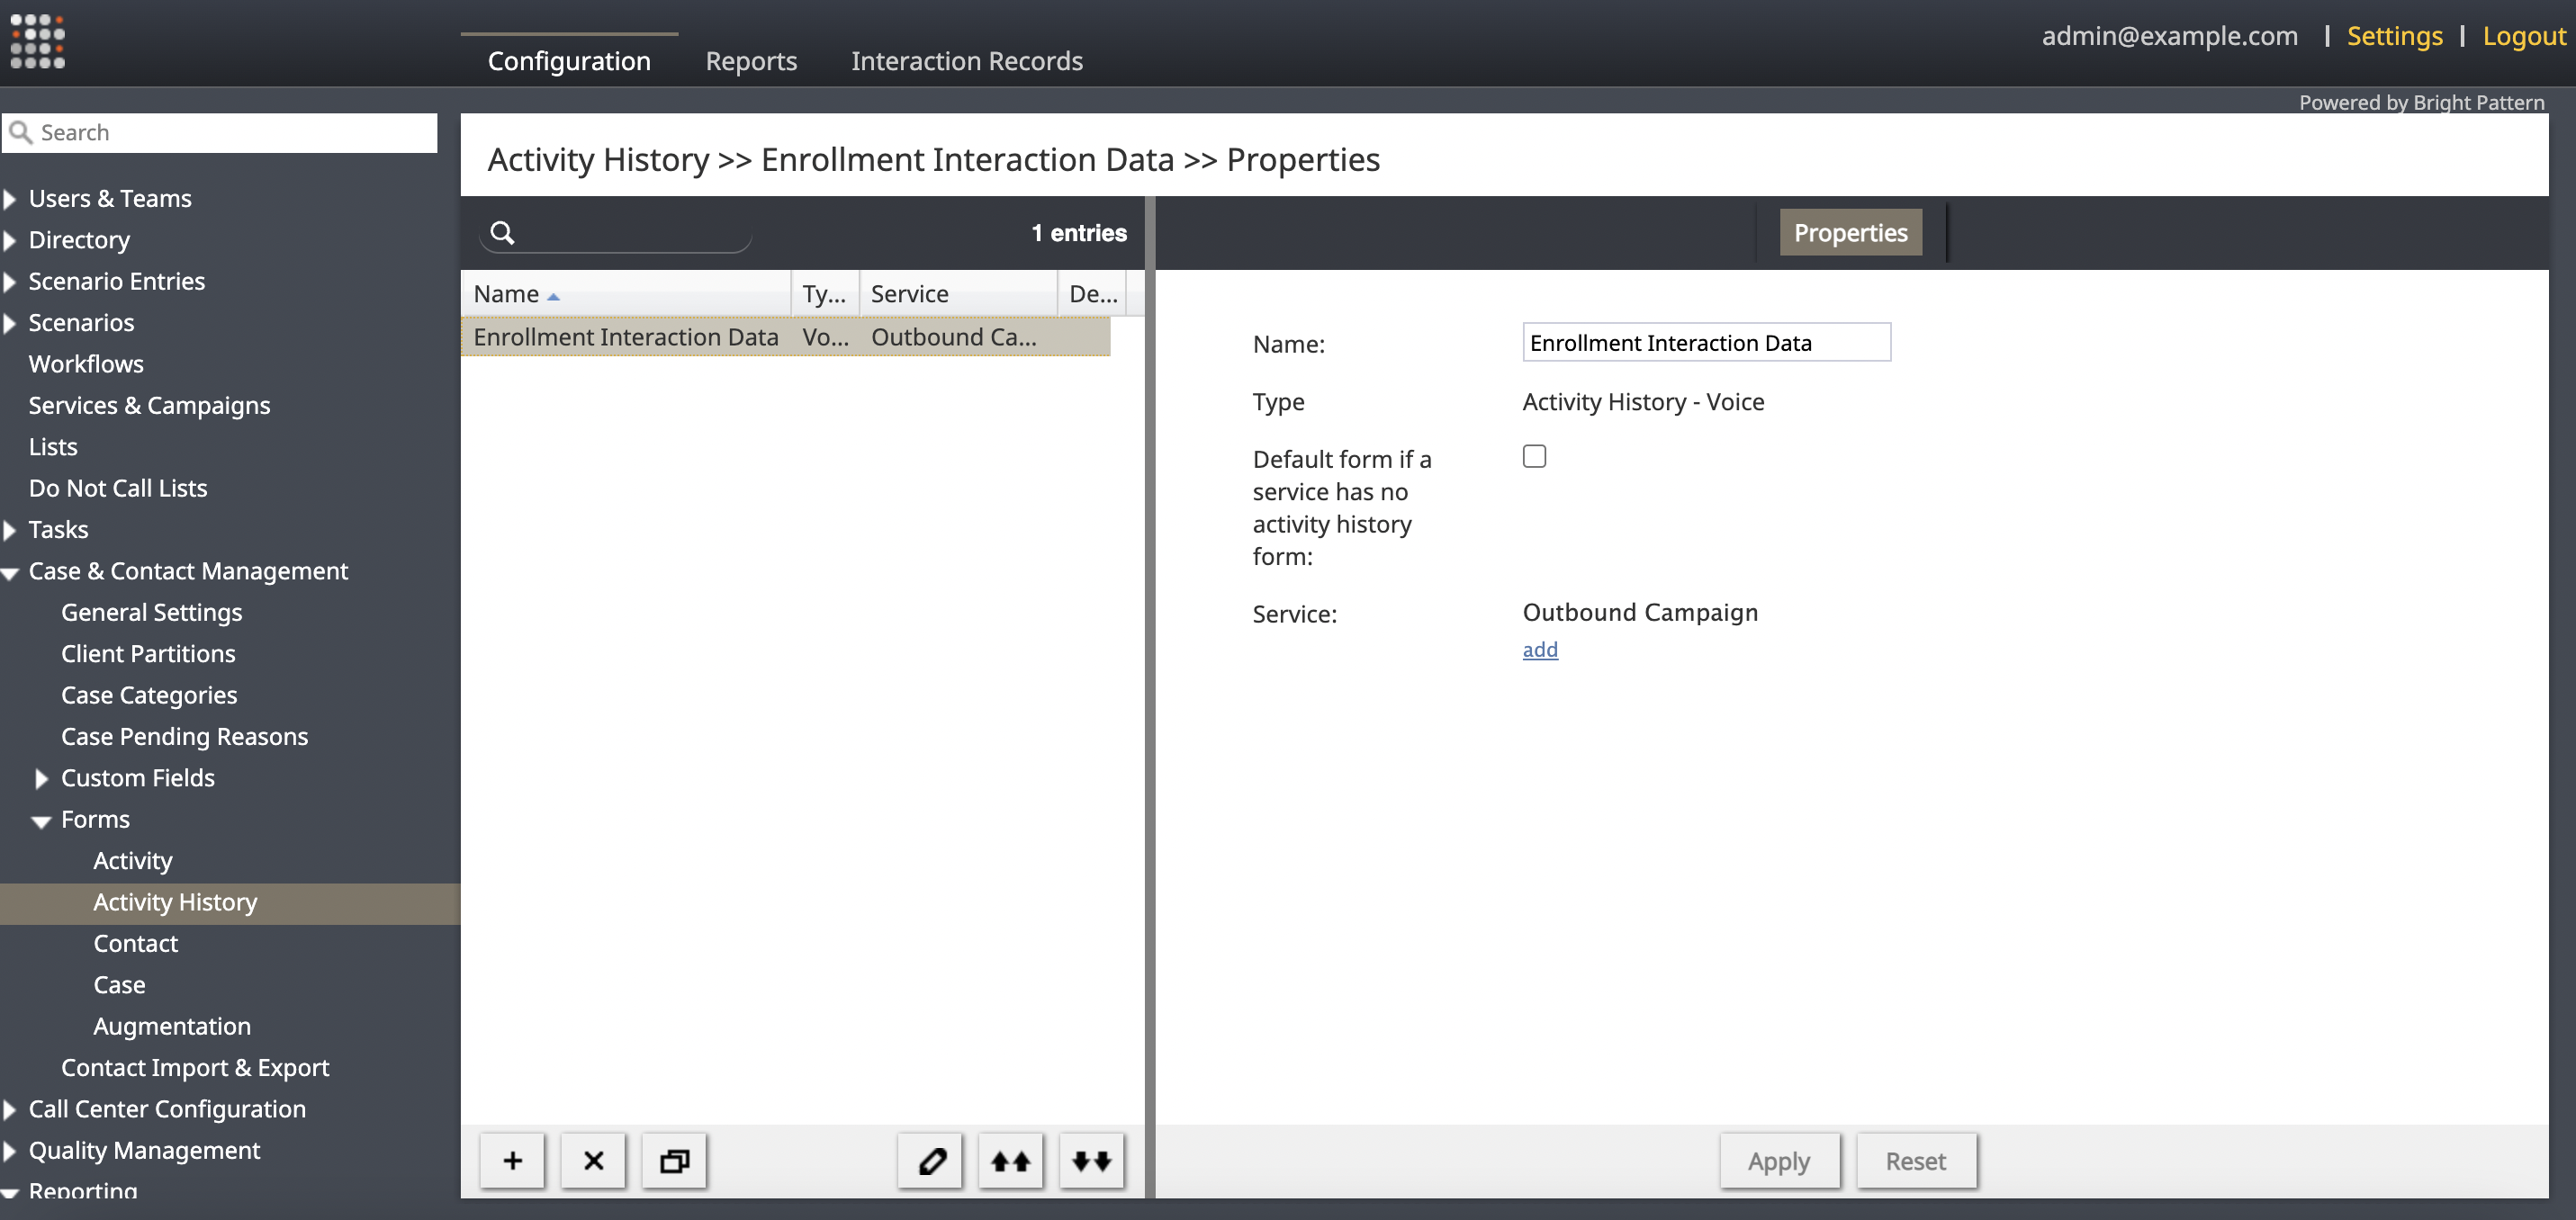
Next, you will create an activity history form. Activity history forms are displayed in an interaction's activity history and provide context to the details of the interaction and the disposition. The action of connecting forms to activity history gives a holistic view of the customer and specific interactions.
To create a new form, click the + button, which will open the Form Builder application. Here, you can specify the data and structure for insertion of the form within activity history. Custom fields that are either pre-filled by lists or entered by the agent can be displayed within activity history. When you are finished designing your form, you will assign it to the outbound voice campaign.
Note: Custom fields in the activity history form must connect to the same custom fields as the activity form. For more information about pulling custom fields into activity history, see the Form Builder Reference Guide, section Form Building Exercise > How to Configure Activity History Forms.
Test the Activity Form and the Activity History Form with the Outbound Campaign
Starting the outbound campaign with the connected activity form should prompt the agent with the activity form. The form will display contextual information about the student as well as prompts for the enrollment agent about interaction details. For information about campaign operation, see the Supervisor Guide.
After the test call has completed and the disposition has been assigned, check the activity history of the contact to make sure it’s been updated with the activity history form.
Exporting and Analyzing Campaign Data
Once the campaign has finished and all the students have been called, you can export the campaign data. Doing this will allow you to critically analyze quantitative data that will help improve future campaigns.
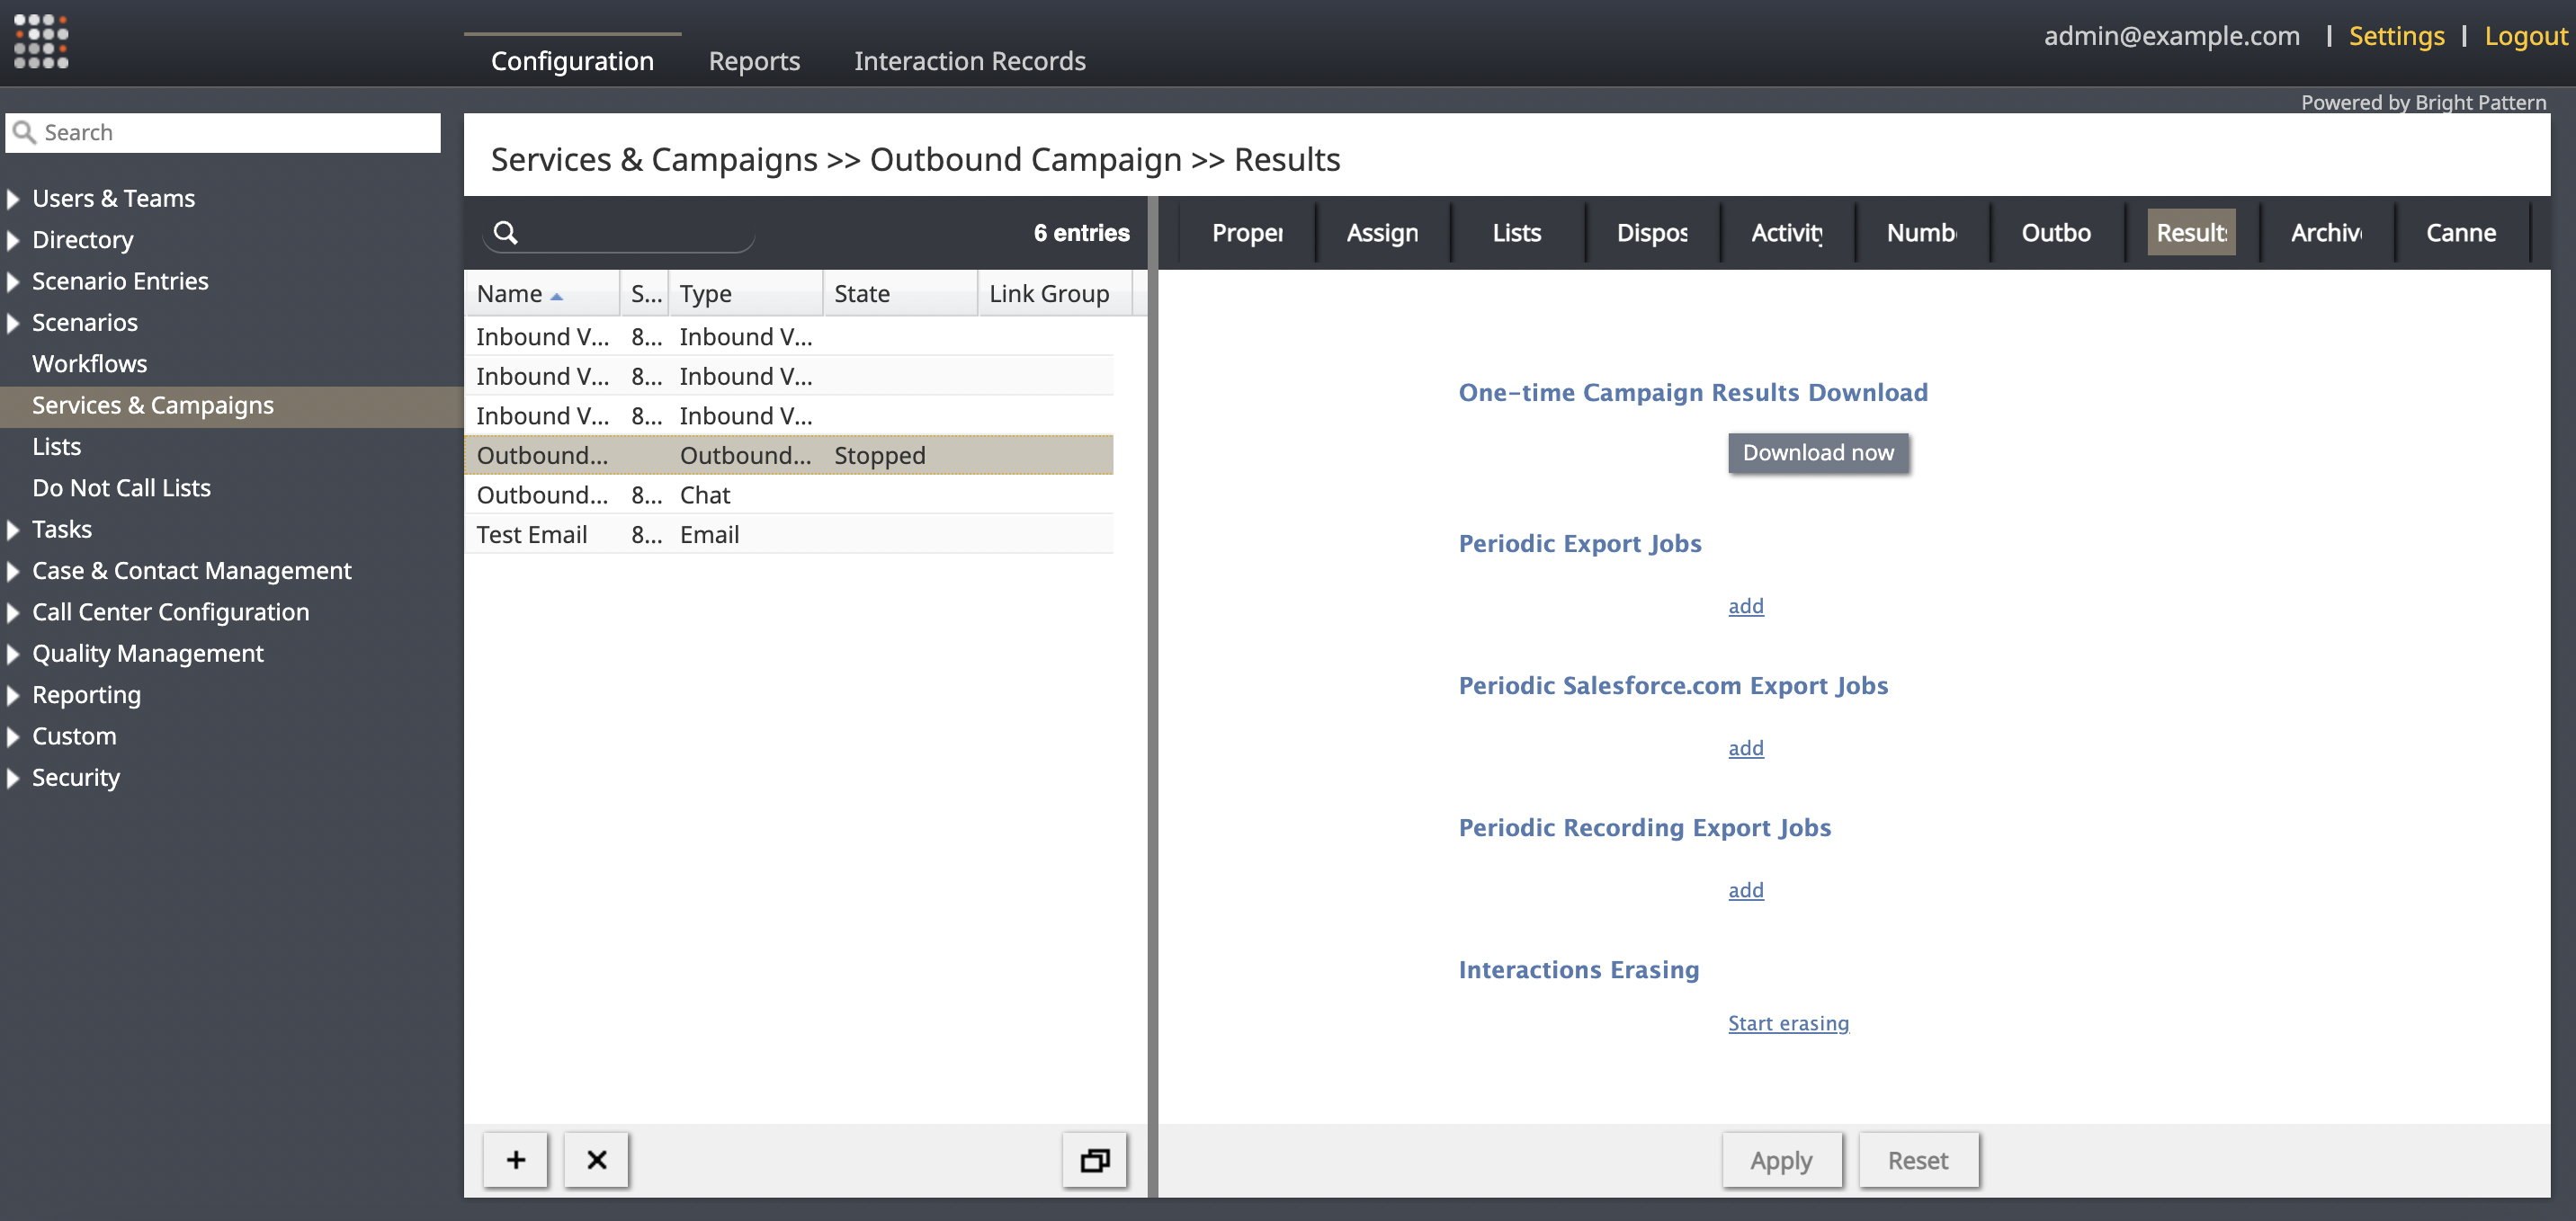
To export the data, navigate to the Contact Center Administrator application, section Services & Campaigns.
Under the selected campaign, navigate to the Results tab. You can select the One-time Campaign Results Download option for the campaign. Clicking this button will download the results to your computer as a .CSV file.
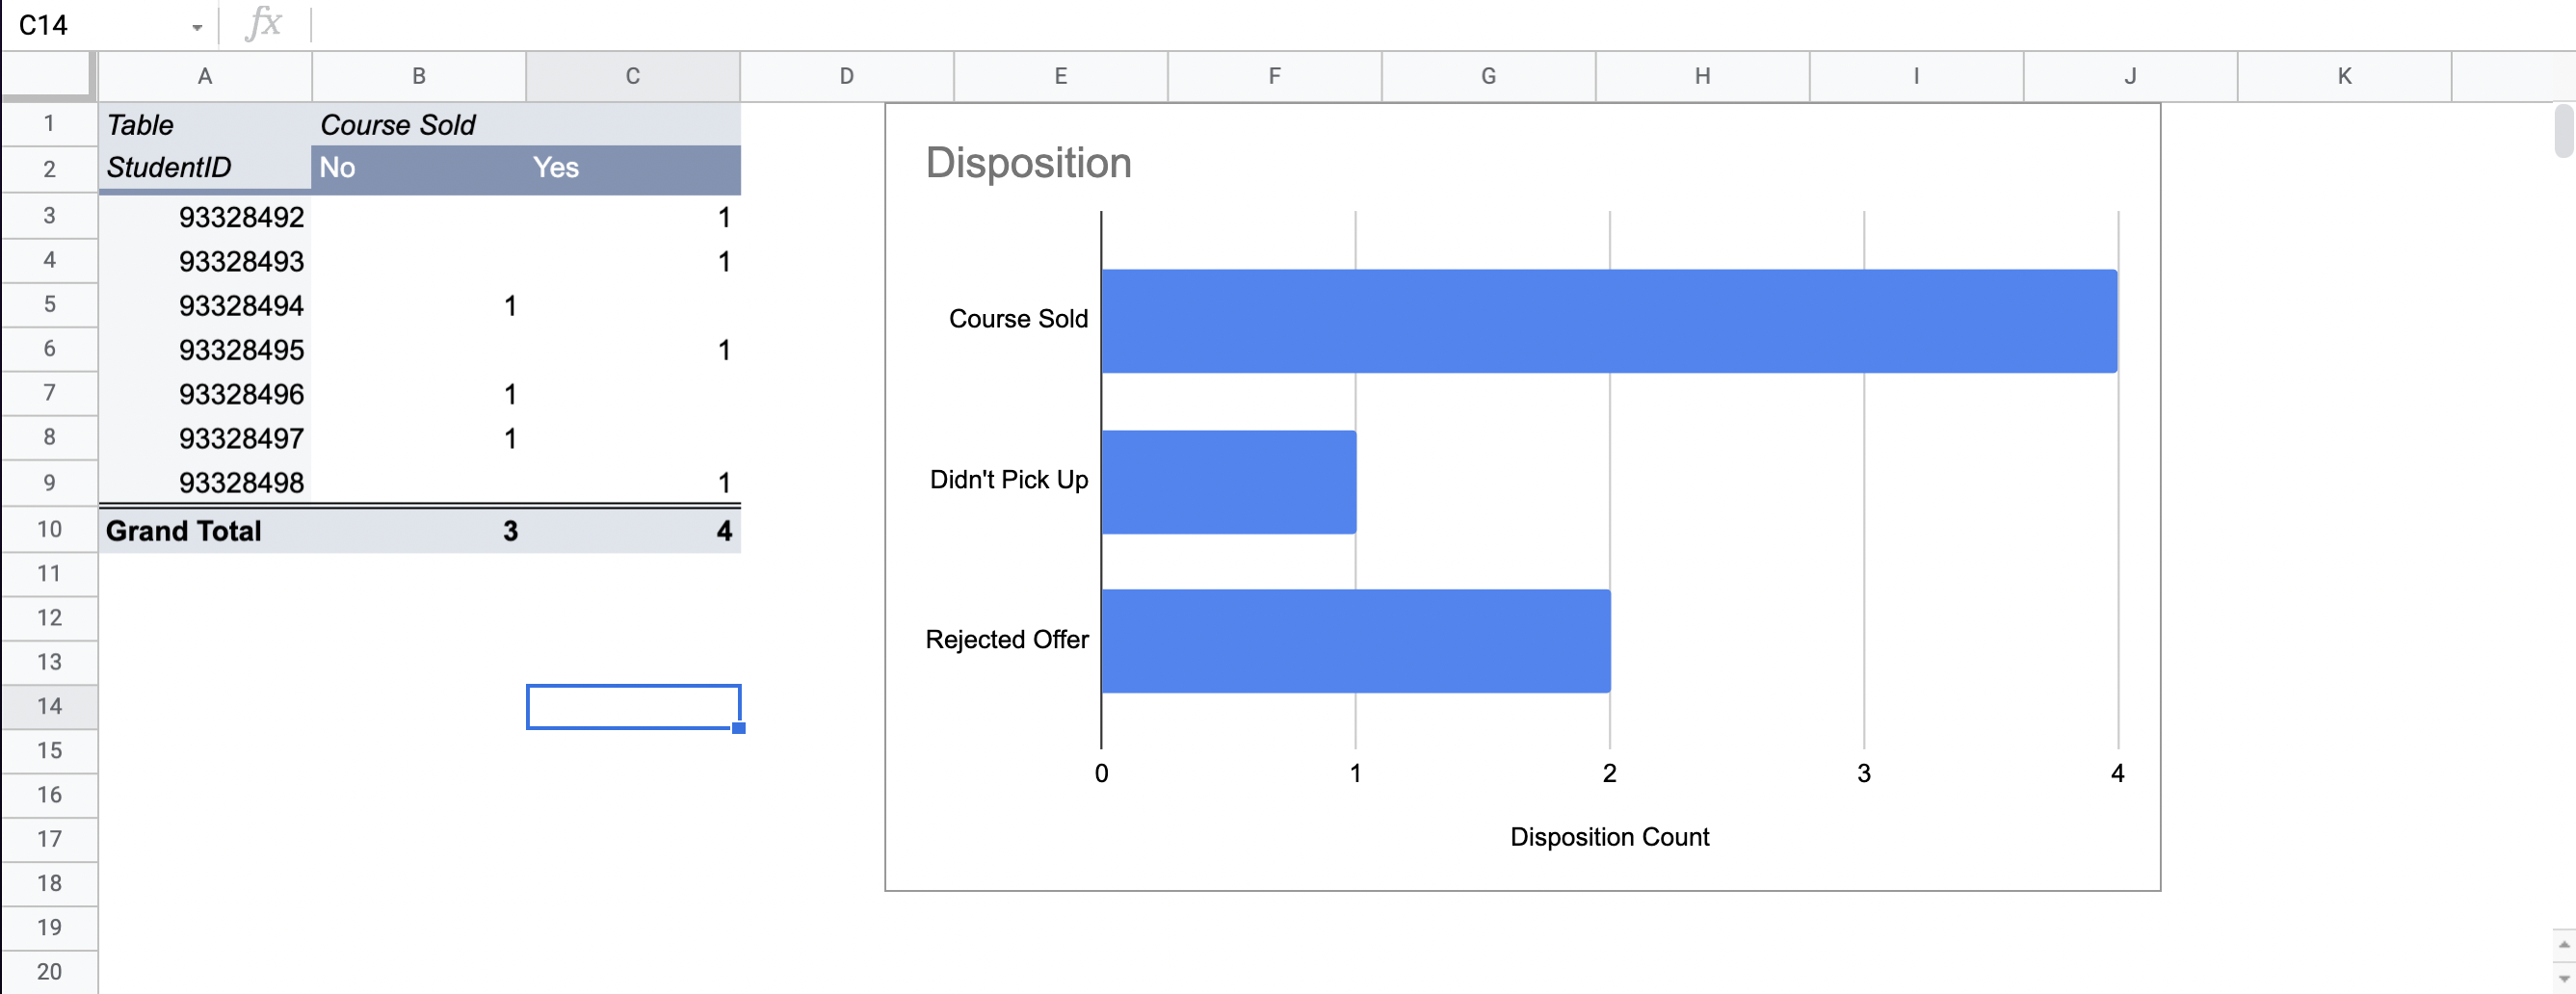
When you open the .CSV file, you will have information about each interaction with campaign metrics alongside your custom field variables.
This data allows you to analyze and visualize outbound interactions to see how the enrollment agent performed and how to improve enrollment pitches.
Building a Report
After extracting and analyzing the campaign data, you can build a report of the outbound campaign service that includes the key performance metrics.
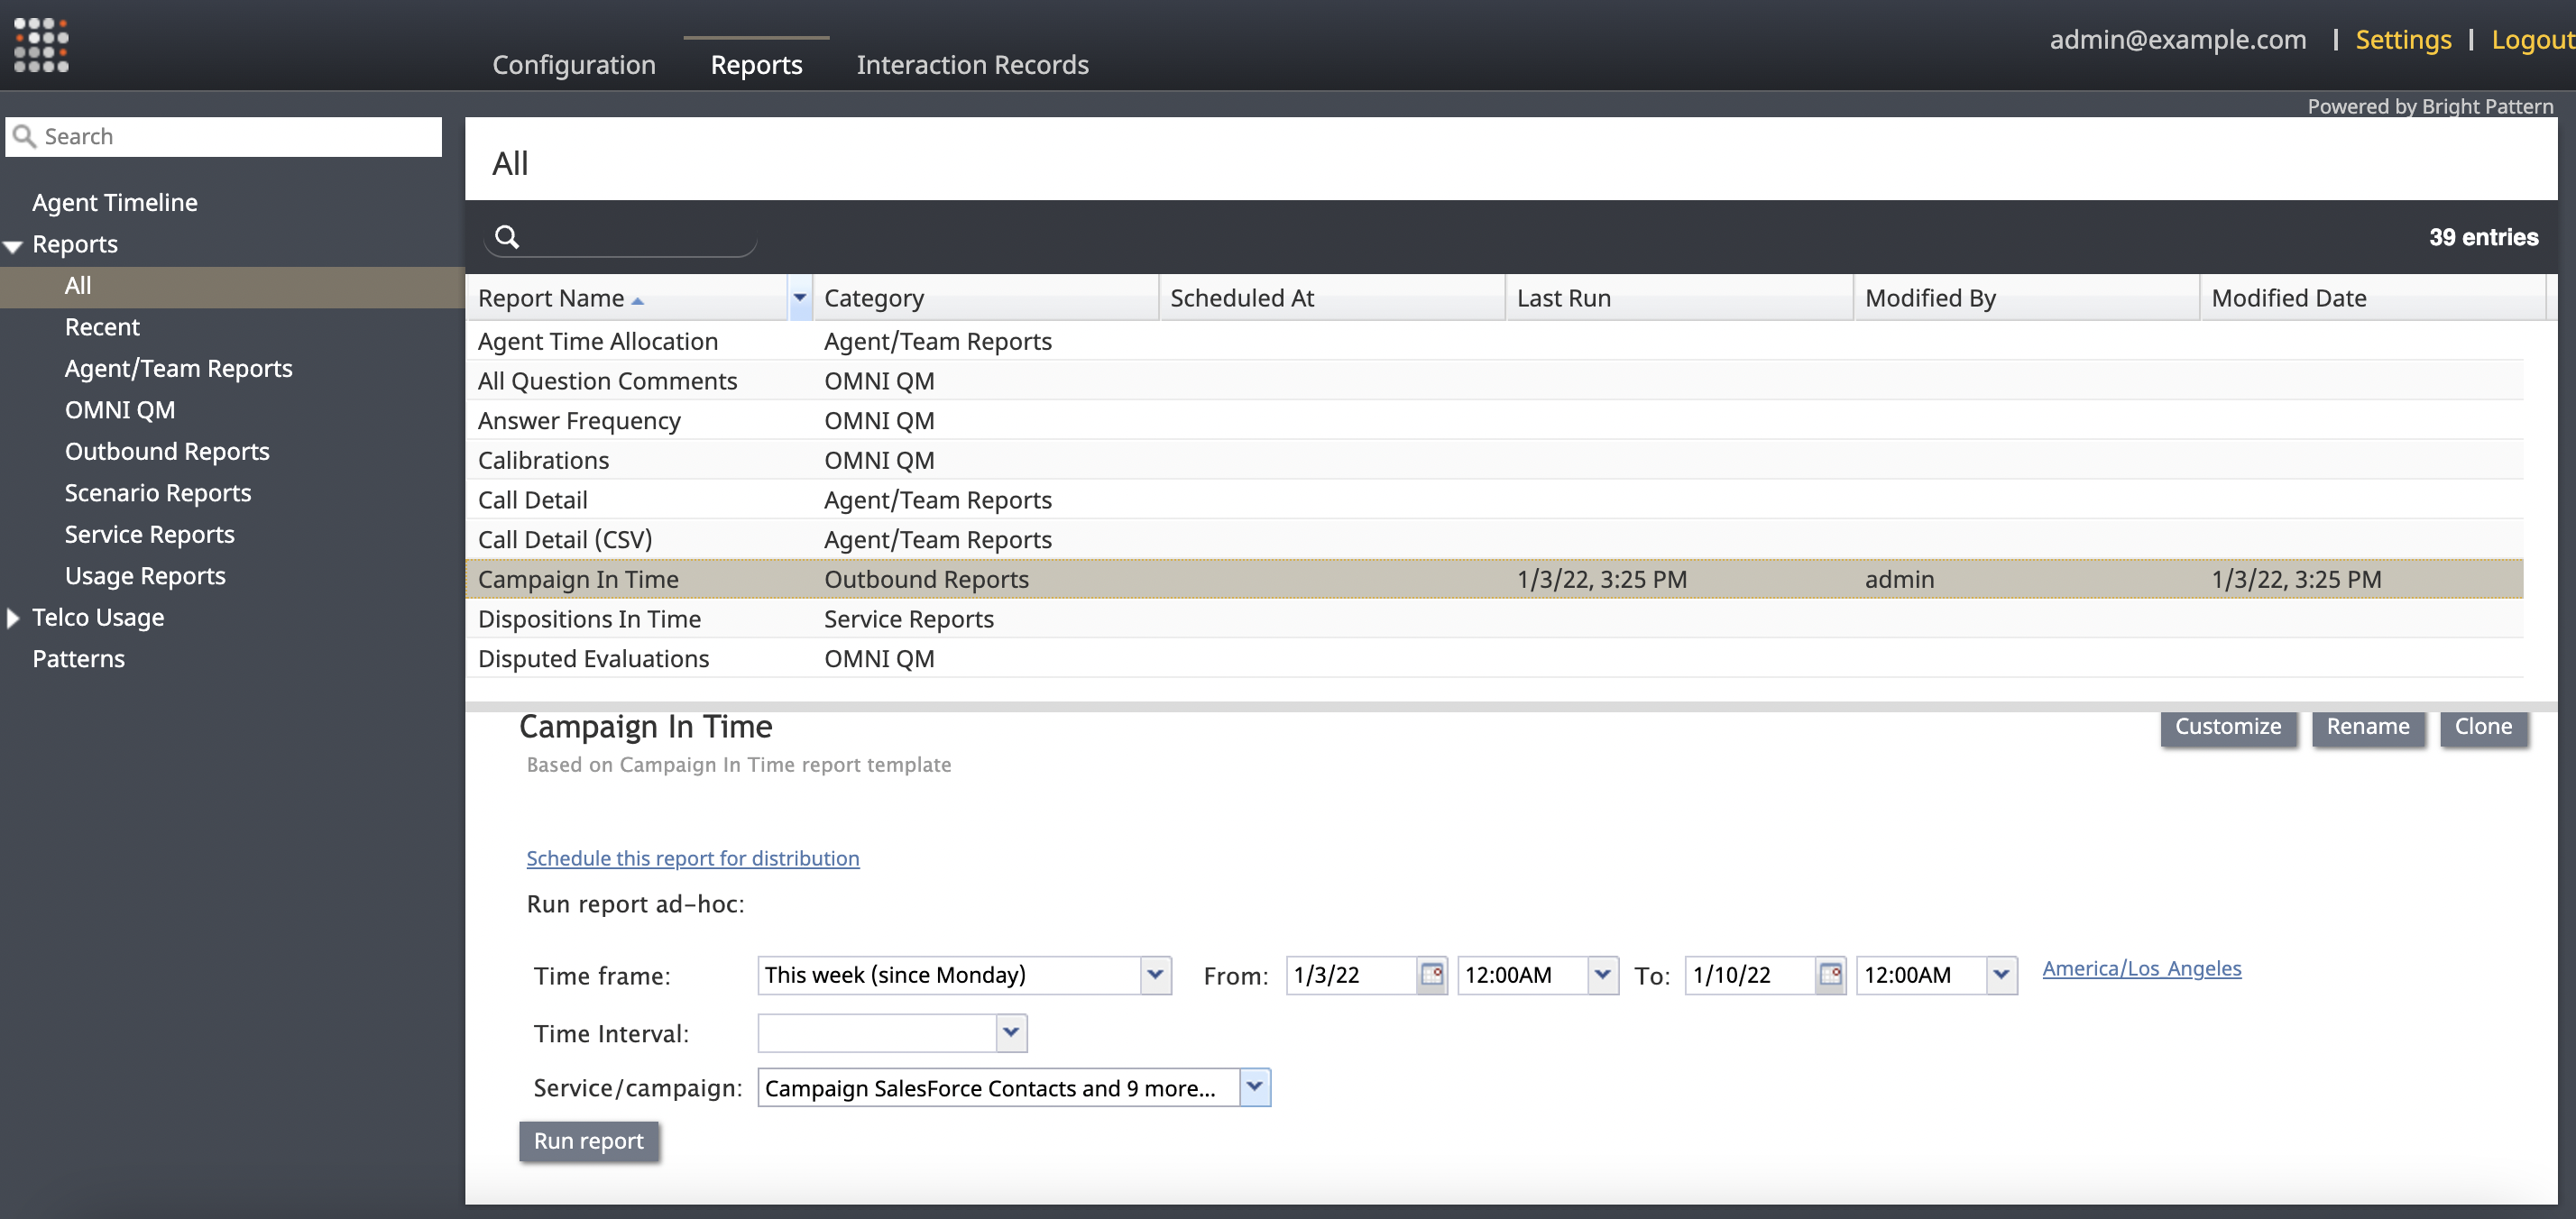
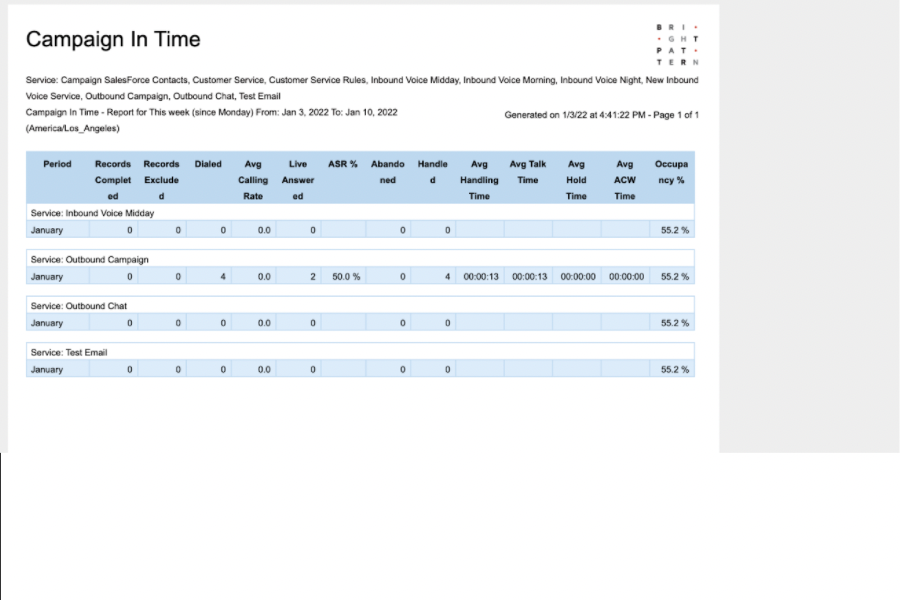
In the Contact Center Administrator application, navigate to the Reports tab. and select the given Outbound report to run. In this case, it is the Campaign In Time report that gives the crucial metrics within the success rate of an outbound campaign.
Customization options such as the time frame gives administrators and supervisors flexibility within the metrics and reports that are created.
After the report is generated it will immediately pop with a holistic view of performance metrics specified by the administrator. The report can be then exported and shared with the rest of the organization in the following file formats:
- .CSV
- .XLS
- .TXT

