提供: Bright Pattern Documentation
Created page with "== 手順 == === ステップ 1:コンタクトセンター管理者アプリケーションの統合アカウントプロパティへ進みます。 === # ''コンタクト..." |
Created page with "=== ステップ 2: Googleで承認手続きを行います。=== # https://developers.google.com/apis-explorer/?hl=en_US#search/voices/m/texttospeech/v1/texttospeech.voices.l..." |
||
| Line 12: | Line 12: | ||
# 音声のリストを表示するには、Google Explorerに移動し、ご利用の言語でのリストを承認する必要があります。<br /><br /> | # 音声のリストを表示するには、Google Explorerに移動し、ご利用の言語でのリストを承認する必要があります。<br /><br /> | ||
=== | === ステップ 2: Googleで承認手続きを行います。=== | ||
# | # https://developers.google.com/apis-explorer/?hl=en_US#search/voices/m/texttospeech/v1/texttospeech.voices.listへ移動します。<br /><br /> | ||
# | # ''languageCode'''に言語コードを入力します (例: "en-US")<br /><br />[[File:Google-TTS-7.PNG|800px|thumb|center|言語コードの入力]]<br /><br /> | ||
# | # '''fields'''に "voices"を入力します。<br /><br /> | ||
# | # '''承認と実行'''をクリックします。<br /><br />[[File:Google-TTS-8.PNG|800px|thumb|center|承認]]<br /><br /> | ||
# | #'''OAuth 2.0 Scopesの選択'''というダイアログで、使う予定の範囲を選択します。<br /><br /> | ||
# | # '''承認と実行'''を再度クリックします。<br /><br /> | ||
# | #次のダイヤログでは、 ご利用のGoogleアカウントへのアクセスを許可します。<br /><br /> | ||
# | #これによってリクエスト(GET list in languageCode)が開始され、応答コードとリストが表示されます。 (JSON)<br /><br />[[File:Google-TTS-9.PNG|800px|thumb|center|JSON応答]]<br /><br /> | ||
=== Step 3: Load Voices === | === Step 3: Load Voices === | ||
# In Contact Center Administrator, go back to your TTS integration account properties and click '''Load Voices'''. This may take a few minutes. When the voices are loaded, a message will display the date they were added: “Loaded on XX/XX/XX.”<br /><br /> | # In Contact Center Administrator, go back to your TTS integration account properties and click '''Load Voices'''. This may take a few minutes. When the voices are loaded, a message will display the date they were added: “Loaded on XX/XX/XX.”<br /><br /> | ||
#Click '''Apply''' to save your changes. | #Click '''Apply''' to save your changes. | ||
Revision as of 19:35, 6 April 2020
• English
Google Cloud 音声合成 APIの音声読み上げ方法
Google 音声合成統合アカウントはGoogle Cloud API 認証情報を使い、Bright PatternコンタクトセンターをGoogleのTTS エンジンに接続します。 統合を設定すると、サポートされている多数の言語で音声プロンプトを作成して、ボットの応答を自動化できます。
このような統合アカウントを設定するには、アクセス用の認証情報を提供するだけでなく、Google側で特定の言語の音声を承認する必要もあります。
この記事では、上記を行う方法と、Google 音声合成統合アカウントで音声読み上げ方法について説明します。
手順
ステップ 1:コンタクトセンター管理者アプリケーションの統合アカウントプロパティへ進みます。
- コンタクトセンター管理者アプリケーション > コールセンター設定 > 統合アカウントで新しい音声合成統合アカウントを追加します。 プロパティ詳細については、 コンタクトセンター管理者ガイドの 音声認識統合 (TTS)をご覧ください。
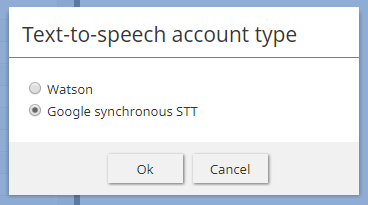
TTS 統合アカウントのタイプを選択します。 - 音声読み上げ プロパティをご覧ください。
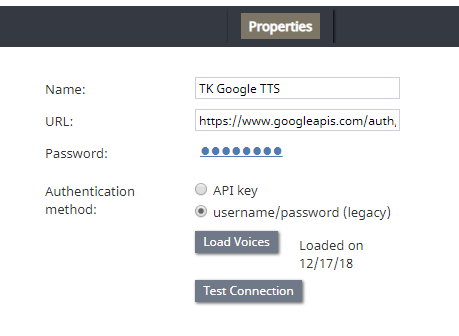
Google TTS 統合アカウントプロパティ - 音声のリストを表示するには、Google Explorerに移動し、ご利用の言語でのリストを承認する必要があります。


ステップ 2: Googleで承認手続きを行います。
- https://developers.google.com/apis-explorer/?hl=en_US#search/voices/m/texttospeech/v1/texttospeech.voices.listへ移動します。
- languageCode'に言語コードを入力します (例: "en-US")
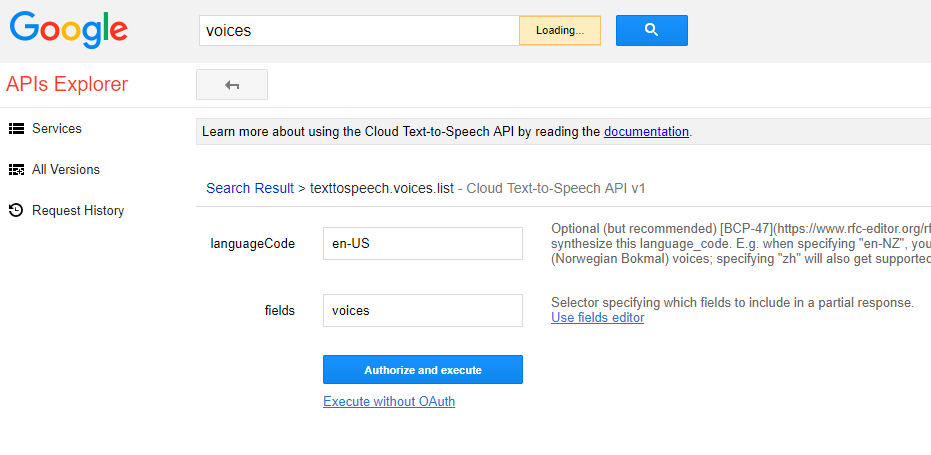
言語コードの入力 - fieldsに "voices"を入力します。
- 承認と実行をクリックします。
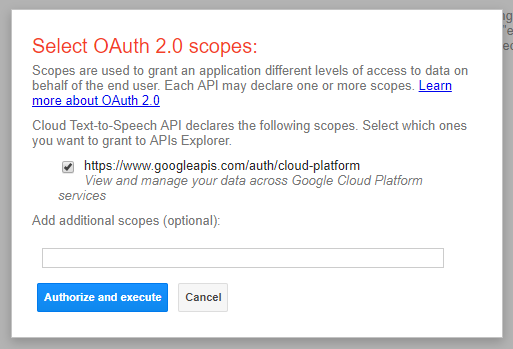
承認 - OAuth 2.0 Scopesの選択というダイアログで、使う予定の範囲を選択します。
- 承認と実行を再度クリックします。
- 次のダイヤログでは、 ご利用のGoogleアカウントへのアクセスを許可します。
- これによってリクエスト(GET list in languageCode)が開始され、応答コードとリストが表示されます。 (JSON)
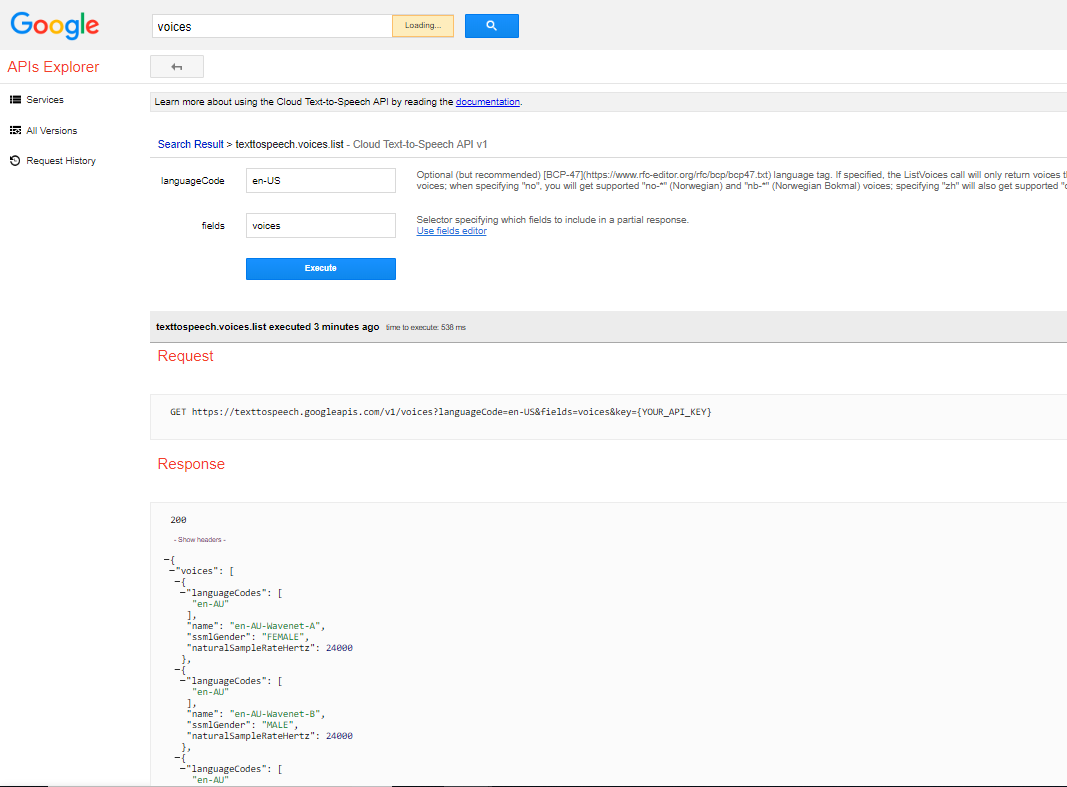
JSON応答


