How to Use Quick Reply Buttons and Show Chat History in the Chat Widget
The following tutorial explains how to configure a chat scenario that uses quick reply buttons and lets you view transcripts of all previous chat sessions related to a specific case. The chat transcripts will be visible for both the agent and the customer, which can be helpful for both parties.
Specifically, this tutorial explains how to do the following:
- Automatically identify the customer
- Use buttons to guide the customer's responses
- Create a simple flowchart using the Switch block
- Search for a matching case number and then add that case's chat history to the existing session
As a reminder, this scenario is an example for testing purposes only and is NOT intended for production use.
Scenario Example
Click the following link to download an annotated version of this chat scenario example.
Media: File:App Web Chat History.zip
For instructions on how to import this file into your contact center, see the Contact Center Administrator Guide, section Scenarios Overview > How to Export and Import Scenarios. For general information about scenarios, refer to section Scenario Builder Overview.
Procedure
1. Identify the Customer
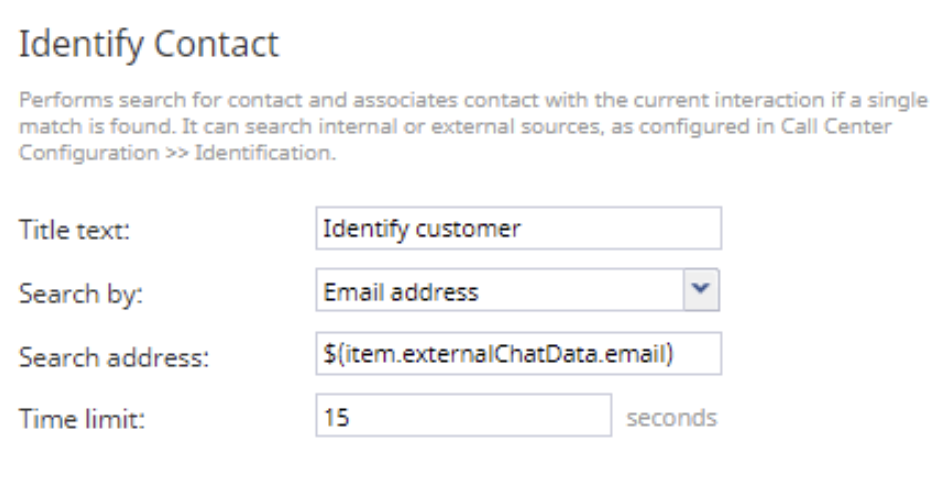
The first thing we want is to identify the customer using the web chat widget. Our example contact center uses a Pre-Chat Form in the chat widget, which includes a field for email by default. Using the Identify Contact block and the variable $(item.externalChatData.email), we are able to search the internal database by email address for a matching customer.
Adding this block to the scenario will pop a matching customer whether the customer enters a matching case number or not; however, this information may be obtained without using a Pre-Chat Form (e.g., use the Send Message+ block to ask the customer to enter an email address, use the Bright Pattern Search Object block to search for a match, and then configure the URL in a Web Screen Pop block to pop the contact.)
2. Gather Information
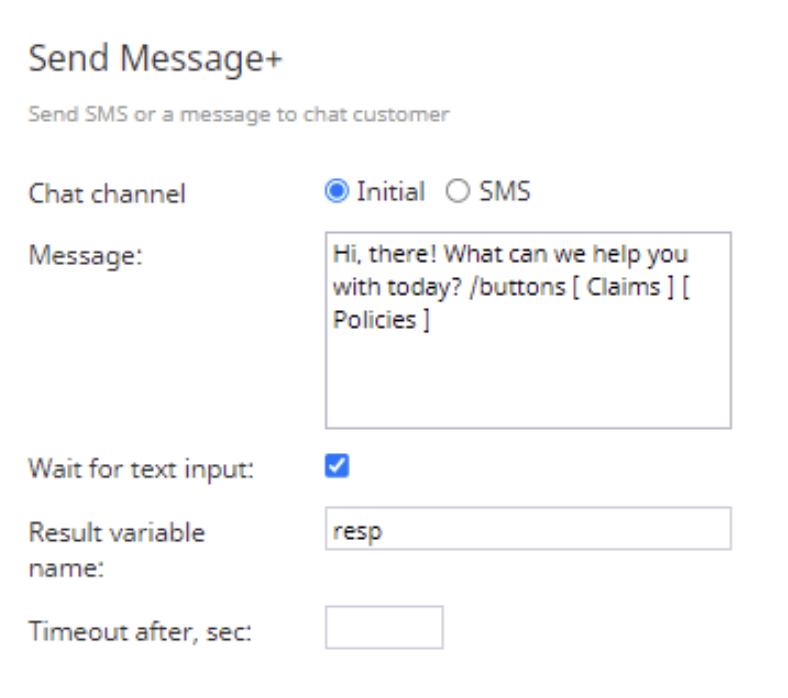
Next, using a Send Message+ block, we will use quick reply buttons to gather information from the customer and guide responses at the same time. This Send Message+ block uses two buttons which will be used as branches in the following Switch block. Specifically, the following:
Hi, there! What can we help you with today? /buttons [ Claims ] [ Policies ]
We configure this block to wait until the customer selects a button (i.e., inputs text) and then to carry the results in the variable resp.
Note: If you wish to test this scenario in your sandbox environment, note the following about the chat widget:
- The Phone call button is disabled.
- All Fields - chat are removed.
Removing chat fields is necessary in order to trigger the Switch block buttons.
3. Create a Flowchart
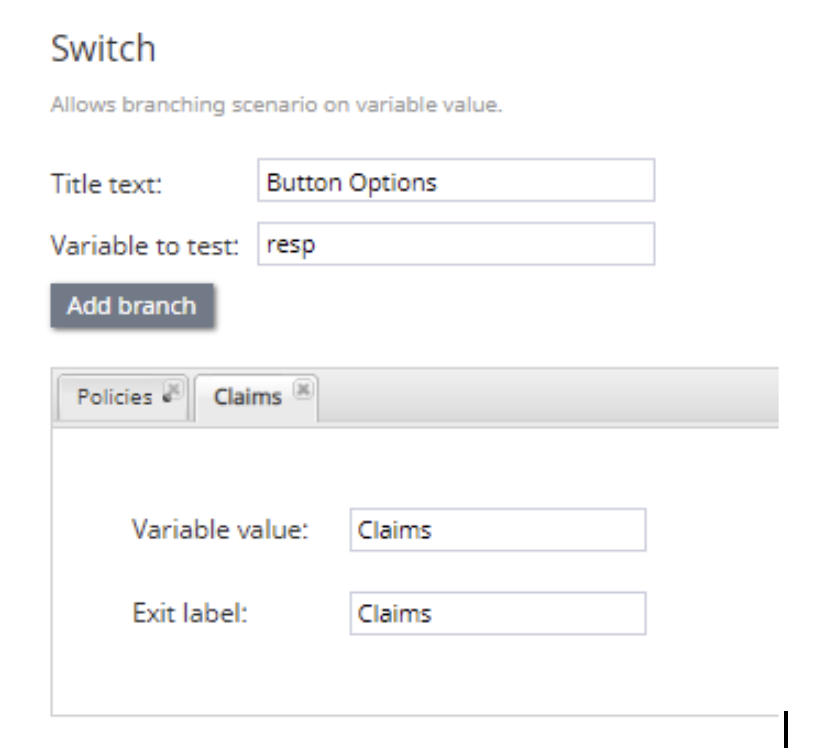
Next, we will use the Switch block to create branches for both quick reply button options from the previous Send Message+ block. When configuring the block, the Variable to test is resp and the Variable value for each branch should match the exact text of the button (i.e., "Policies" and "Claims").
Note: Selecting the option "Claims" will trigger chat history to appear in the chat widget (i.e., if a matching case number exists in your sandbox).
4. Trigger Chat History With the Case Number
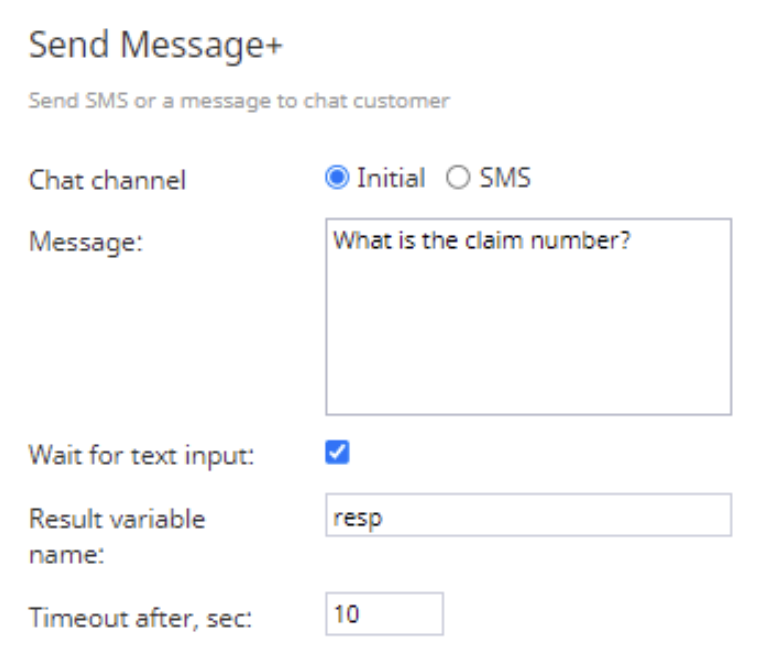
If the customer selects "Claims" from the initial Send Message+ block, we use the following Send Message+ block to ask the customer for the claim (i.e., case) number.
Again, we configure this block to wait until the customer enters a claim number (i.e., inputs text) and then to carry the results in the variable resp.
4a. Search for a Matching Case
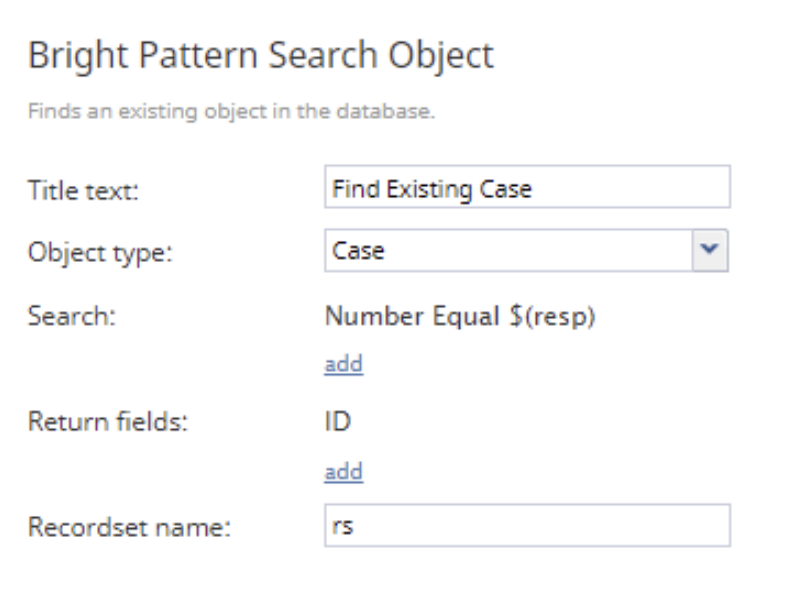
When the customer enters a claim (i.e., case) number, we want to search the internal database to see if there is a matching/existing case number. Using the Bright Pattern Search Object block, we configure the following search:
- Number
- Equal
- $(resp)
In order to get the case number, we configure the return field to ID, the results of which will be carried in the variable rs.
4b. Add the Existing Case History to the Current Interaction
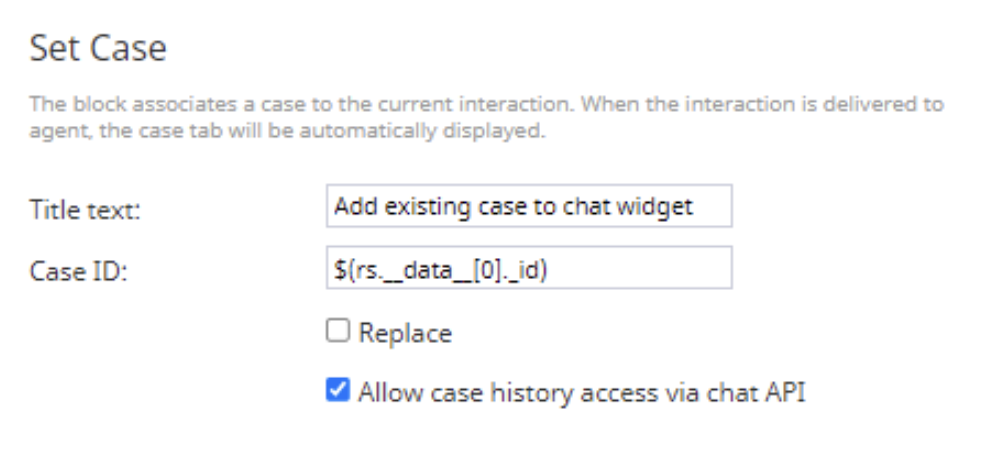
If a matching case (i.e., claim) number is located by the Bright Pattern Search Object block, the case number should match the value following variable: $(rs.__data__[0]._id)
In this variable, rs is the results of the search and __data__[0]._id points to the matching case number in the database. Most importantly, in order for any existing web chat history associated with the case to appear in the chat widget, we must select the checkbox Allow case history access via chat API.
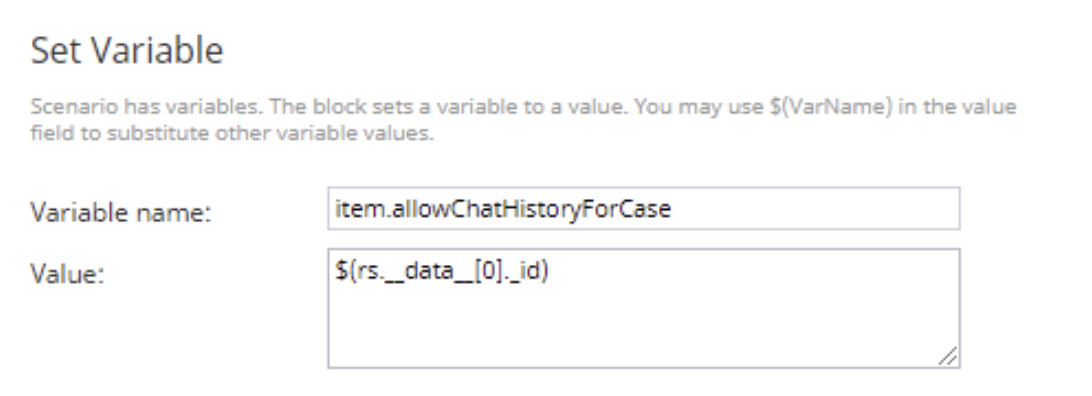
Alternatively, you may use the Set Variable block to set the variable $(item.allowChatHistoryForCase) to match the value of $(rs.__data__[0]._id). This does the exact same thing as selecting the checkbox Allow case history access via chat API in the Set Case block.
Note that you do not need to include both ways in your scenario (i.e., you may use one or another).
5. Connect the Interaction
Finally, we configure the scenario to connect the customer to an agent.
To do this, we add to the scenario the two most basic chat scenario blocks: Find Agent and Connect Chat.
As a reminder, please define all conditional exits in your real scenario.

