Importing Calling Lists and Exporting Campaign Results
You can import calling lists for your outbound campaigns directly from Salesforce.com (SFDC) and set up automated periodic updates of such lists to include changes made to the corresponding data in SFDC. You can also automatically create SFDC records based on campaign results.
In order to enable calling lists to be imported and campaign results to be exported, you must first enable access to SFDC data. See the integration steps of section Enabling SFDC Data Access from Scenarios.
For more information about list data, see the Contact Center Administrator Guide, section Lists.
How to Import List Data from SFDC
Step 1: Create a list
- In the Contact Center Administrator application, select Lists from the configuration menu, and click the Import list button. This will start the List Import Wizard.
- In the first wizard screen (List Type), select Create a list from Salesforce.com SOQL query.
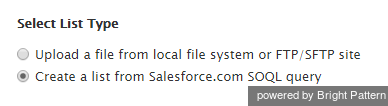
- Click Next.

Step 2: Name your list
- In the Name and Source dialog, assign a unique List Name.
- Select the Saleforce.com integration account.
- Specify the query for selecting Saleforce.com records for this calling list. The query must be written in the Salesforce Object Query Language (SOQL). Note that the selected records must contain object identifiers and must have at least one phone number field.
- Click Next.

Step 3: Review and Edit list fields if needed
- Edit the list fields as necessary. For more information, see the Contact Center Administration Guide, section Lists. Note that SFDC object identifiers will be used as keys for list record identification; therefore, field ID will be automatically marked as a required field.
- Click Next.

Step 4: Confirm import results
- Review the results of import, and click Ok.
- In the List Properties view, enable periodic updates of this list. (Note that for lists of Salesforce.com type, new records matching the original SOQL query will be added to the list during each update, while any records that may have been removed from Salesforce will be disabled in the list. If there are campaign results available for such disabled records, they will be preserved.)
- If necessary, edit other list properties and assign this list to your campaign.
- Click Apply.
Note: There is a 30 second timeout on the Bright Pattern side to begin receiving data from SFDC after the SOQL query is submitted. This timeout applies to both the initial list import and subsequent periodic updates.
How to Export Campaign Results to SFDC
Step 1: Select a campaign
- In the Contact Center Administrator application, in section Services and Campaigns, select a campaign.
- Open the Results tab.
- Click the add link under Periodic Salesforce.com Export Jobs. The Edit Salesforce.com Export Parameters dialog will open.
Note that there is no dependency between data export and import. Export to SFDC can be configured for any campaign regardless of the source of the data.
Step 2: Specify export job parameters and type of object to be created
- Define the general parameters of the export job.
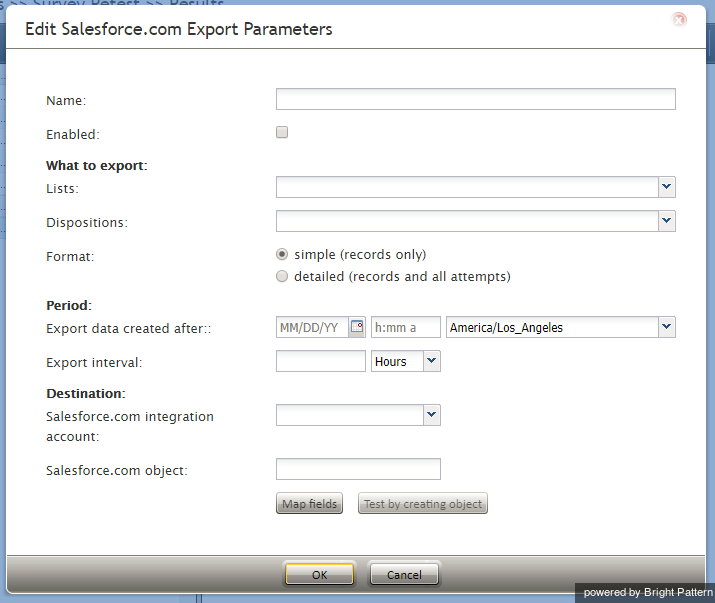
Edit Salesforce.com Export Parameters - Under Destination, select the Salesforce.com integration account.
- Then specify the type of Salesforce.com object that will be created using the results of this campaign.


Step 3: Enable field mapping
- Click the Map fields button and map properties of the specified Salesforce.com object to the corresponding campaign result fields.
- In the dialog that appears, for each object property that will be defined using the campaign data, click the $() link.
- Select the corresponding field of the campaign results, and, if necessary, edit it in the Value to set field.
- Note that object fields of type ID are generated automatically by SFDC and cannot be modified.

Step 4: Test the results of the export
- Click the Test by creating object button.
- Check that an object of the specified type is created in SFDC with the mapped properties filled with test data.
< Previous | Next >