Associating Calls with Relevant Microsoft Dynamics Records
If your contact center handles interactions via CRM integration, it is possible to automate post-interaction processing via workflows that use CRM variables. For instance, during a phone call, agents may view related cases, tasks, or contacts. Instead of requiring agents to manually enter phone call information and link the phone call record to those other related records, agents can simply mark the relevant records in the Communication Widget before triggering a workflow. The ensuing workflow can create a fully-populated phone call record in your CRM with links to all associated records selected by the agent.
Prerequisites
If you have not already done so, please configure your Microsoft Dynamics integration before proceeding.
Important: To enable agents to view and select associated records during an interaction, your integration must use the Communicator Widget, not the legacy Universal Repeater. As such, the Channel URL in the CIF app must be in the form
https://<tenantdomain>/agent/communicator/adapters/msdyn365.html?crmDomain=org<id>.crm.dynamics.com
For example:
https://example.brightpattern.com/agent/communicator/adapters/msdyn365.html?crmDomain=org12345678.crm.dynamics.com
Step 1. Configure an Inbound Voice Service
For an example of setting up an inbound voice service, scenario from template, and scenario entry, see Inbound Voice Service Configuration.
- Log in to Contact Center Administrator and navigate to Services and Campaigns.
- Set up the service for which you want to save CRM records; for example, a support hotline.
Important: Enable Use dispositions in the Properties tab to enable agents to trigger workflows during ACW.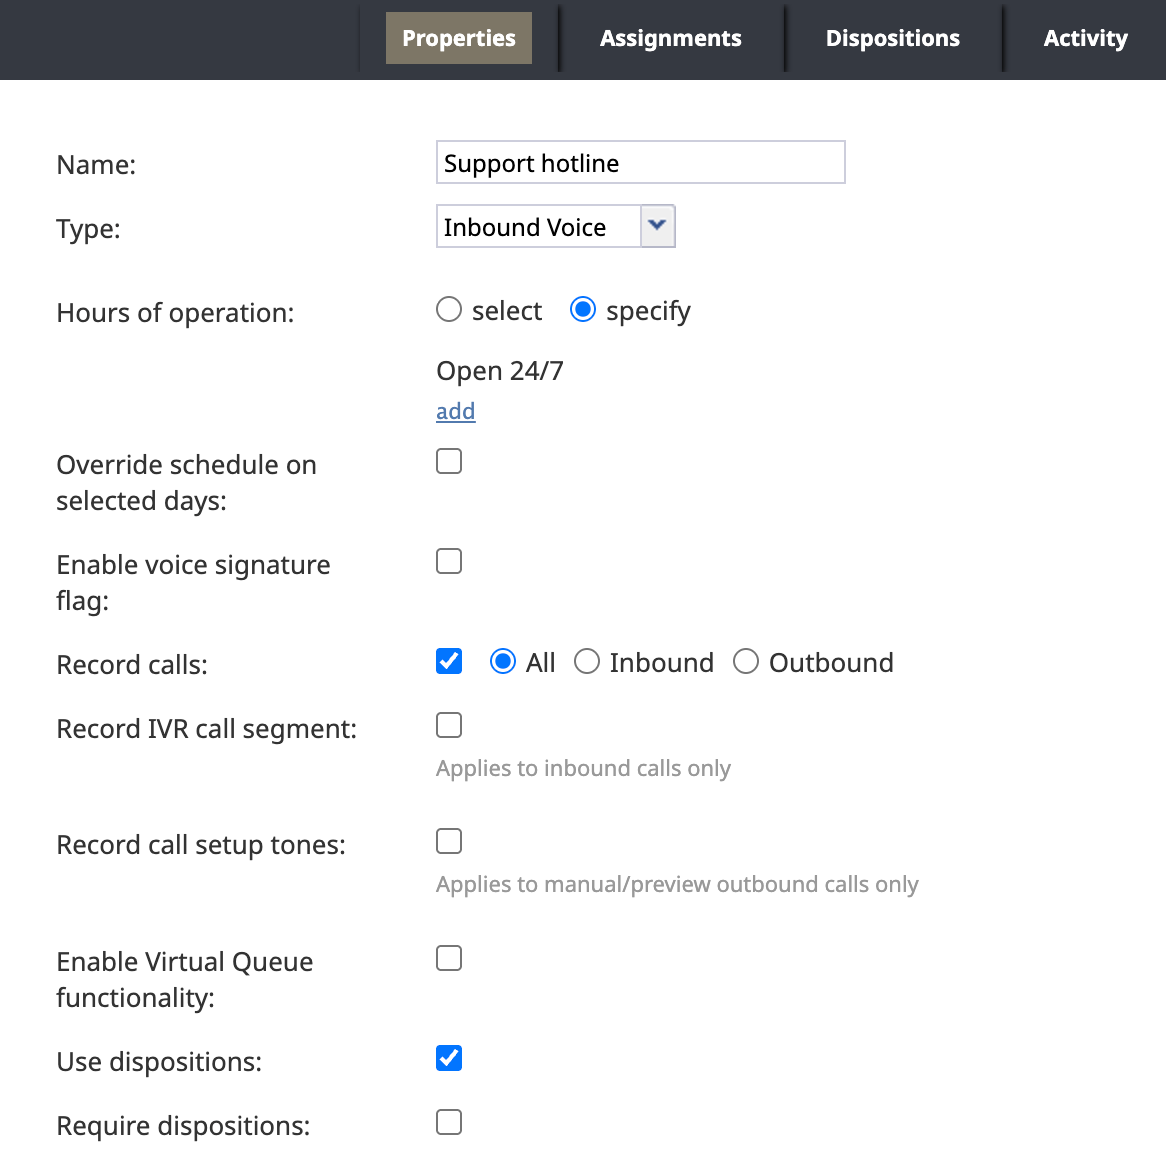
- Navigate to Scenarios > Voice to create or reuse a scenario that identifies the contact associated with the caller. See Scenario Overview below for an example scenario.
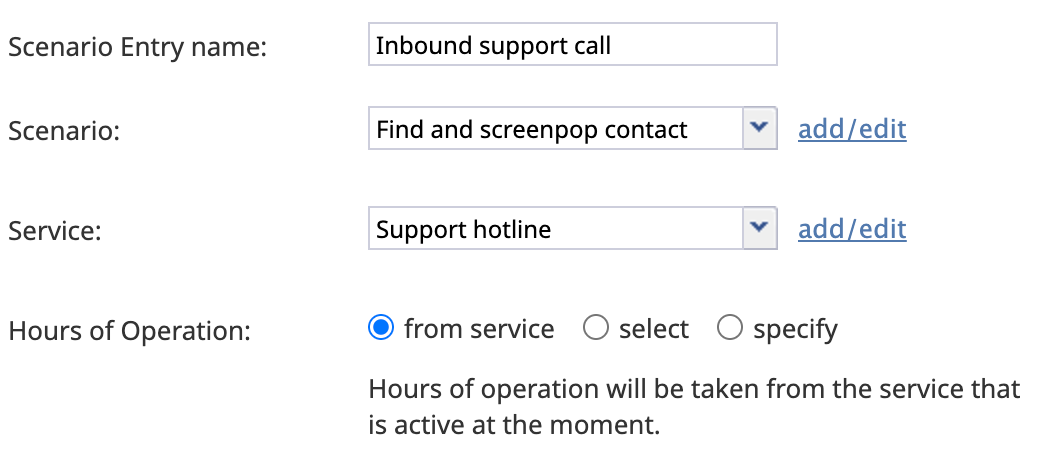
- Navigate to Scenario Entries > Dial-in to create a scenario entry linking the scenario and service. For more information, see Dial-in.


Scenario Overview

The following template serves as an example of a contact identification scenario: Find and Screenpop Contact Note that the $(D365.contactid) variable defined in this scenario is used in Step 2. Create a Workflow to Process Phone Call and Records below. The scenario logic is as follows:
- Accept the call.
- Wait a few seconds.
- Answer the call.
- Microsoft Dynamics Select Account: Select the desired Microsoft Dynamics integration.
- Set Variable: Set isNewCaller to
false. - Microsoft Dynamics Search Object: Attempt to locate the contact ID of the caller by searching the Contacts table in Microsoft Dynamics for the caller's phone number.
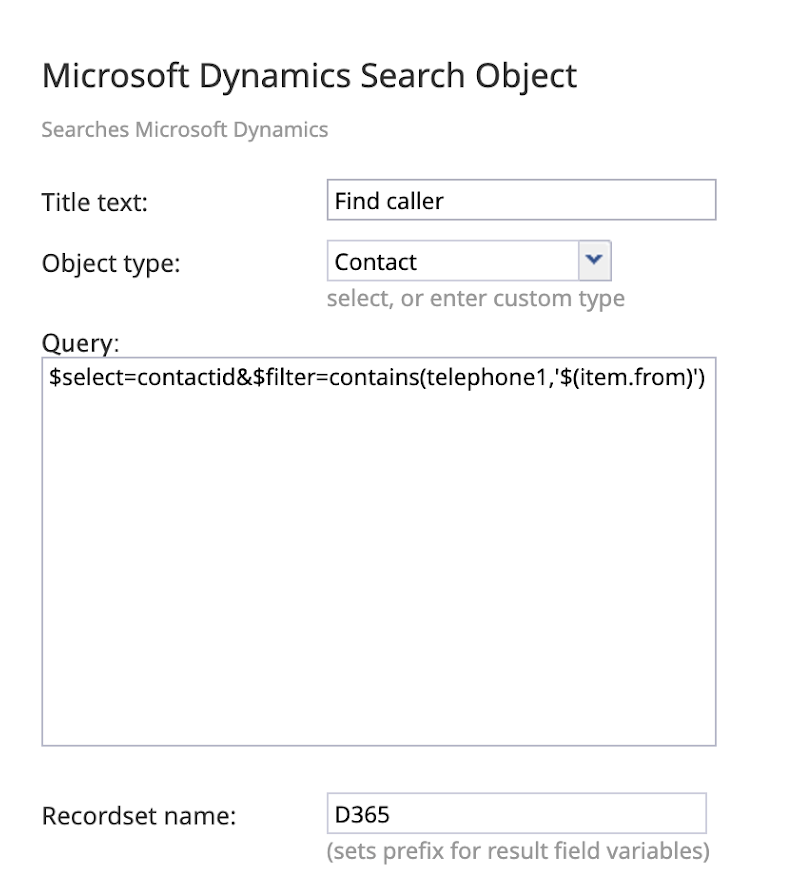
- Select Contact from the Object type drop-down menu to search the Contacts table.
- In the Query field, enter the following:
$select=contactid&$filter=contains(telephone1,'$(item.from)') - Name a variable to store the query result in the Recordset name field, such as D365. The contact ID is stored in $(D365.contactid).
- Select Contact from the Object type drop-down menu to search the Contacts table.
- If no contact with that phone number exists:
- Set Variable: Set isNewCaller to
true. - Microsoft Dynamics Create Object: Create a new contact with this phone number.
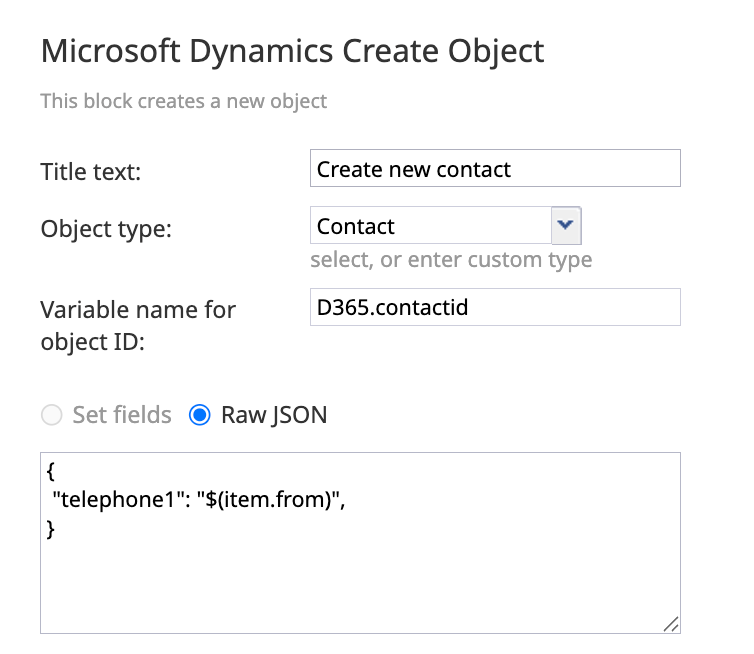
- Select Contact from the Object type drop-down menu.
- In the Variable name for Object ID field, enter D365.contactid. This ensures that the contact ID is stored in the same variable regardless of whether this is a new or pre-existing contact.
- Set the current caller's phone number as the contact's main phone number.
Note: The agent will be prompted to name the new contact later in the scenario.{ "telephone1": "$(item.from)" }
- Select Contact from the Object type drop-down menu.
- Set Variable: Set isNewCaller to
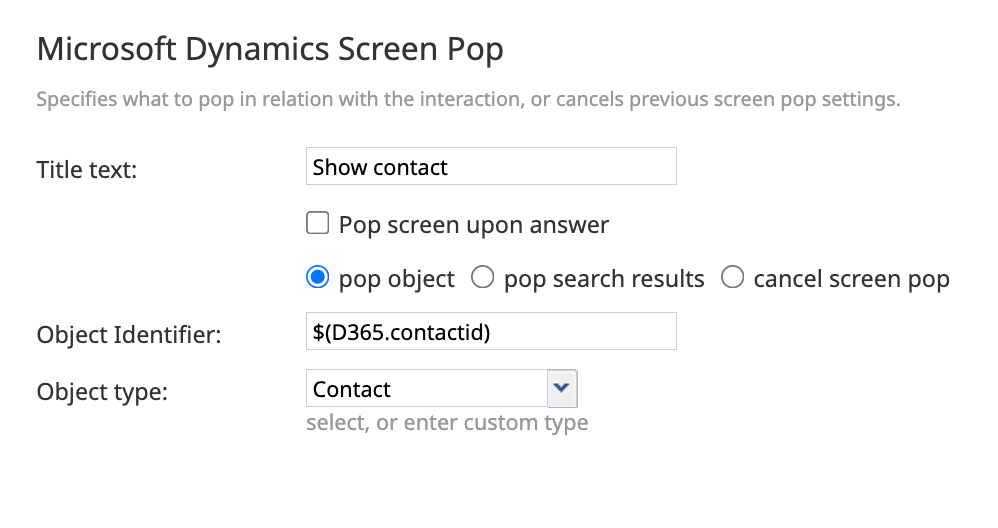
- Microsoft Dynamics Screenpop: Display the contact that was just found or created to the agent. In both cases, the contact ID is stored in the variable $(D365.contactid), which is referenced by the Object Identifier field.
- Find Agent
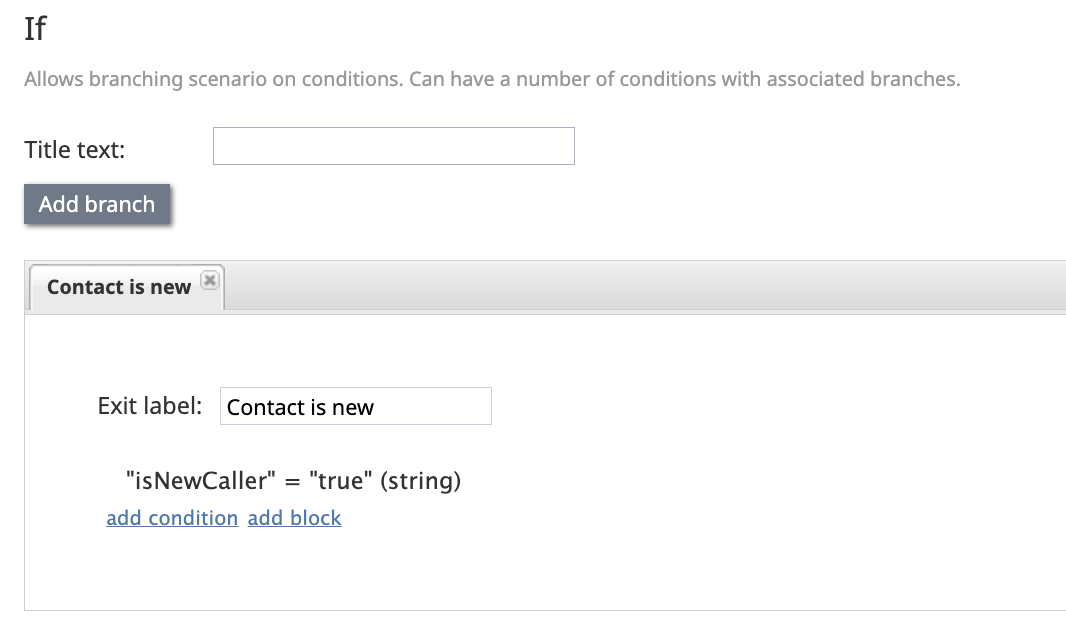
- If: Check whether isNewCaller has been set to true.
- Internal Message: If isNewCaller is true, prompt the agent to enter a name for the new contact during the call.
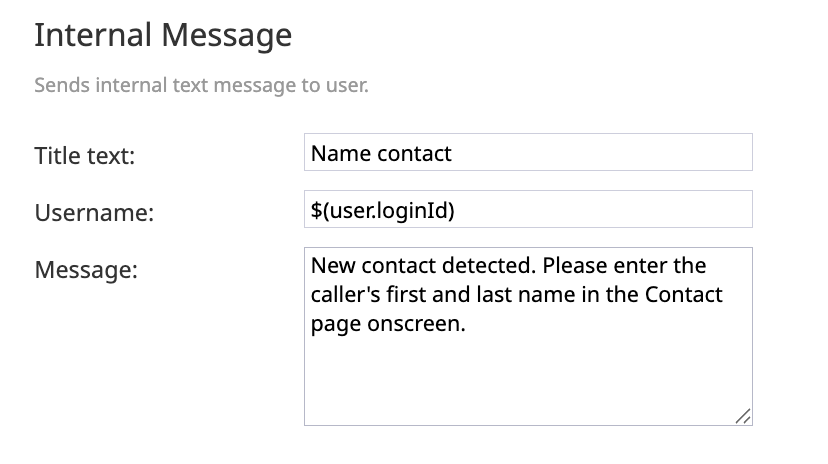
- Internal Message: If isNewCaller is true, prompt the agent to enter a name for the new contact during the call.
- Connect Call
- Exit


Step 2. Create a Workflow to Process Phone Call and Records
Next, we need to set up a workflow that creates and populates a new Phone Call object in your Microsoft Dynamics instance, then links that Phone Call to any records that the agent marked as relevant to the interaction. Since support hotline interactions are being handled via CRM integration, this workflow can use CRM variables such as $(associatedRecords). Click to download the Connect Records to Call example scenario, then import it into your contact center, or follow the steps below to create it from scratch.
- Navigate to Workflows, then click Add workflow in the bottom left to open the Workflow Builder.
- Name the new workflow in the top left of the Workflow Builder.
- Choose the desired integration account.
- Drag the Microsoft Dynamics Select Account block from the left sidebar to the center of the page to add it to the workflow.

- Select the CRM integration account in question from the dropdown in the rightmost panel.
- Drag the Microsoft Dynamics Select Account block from the left sidebar to the center of the page to add it to the workflow.
- Find the current agent's Microsoft Dynamics user ID.
- Add a Microsoft Dynamics Search Object block to the workflow.
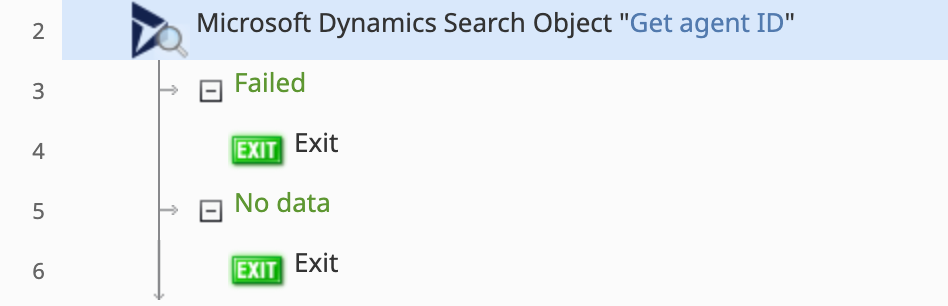
- In the Object type field, enter systemusers to search the User (SystemUser) table.
Note: systemusers is the EntitySetName for the User (SystemUser) table in Microsoft Dynamics. For more information, see User (SystemUser) table/entity reference (Microsoft Dataverse).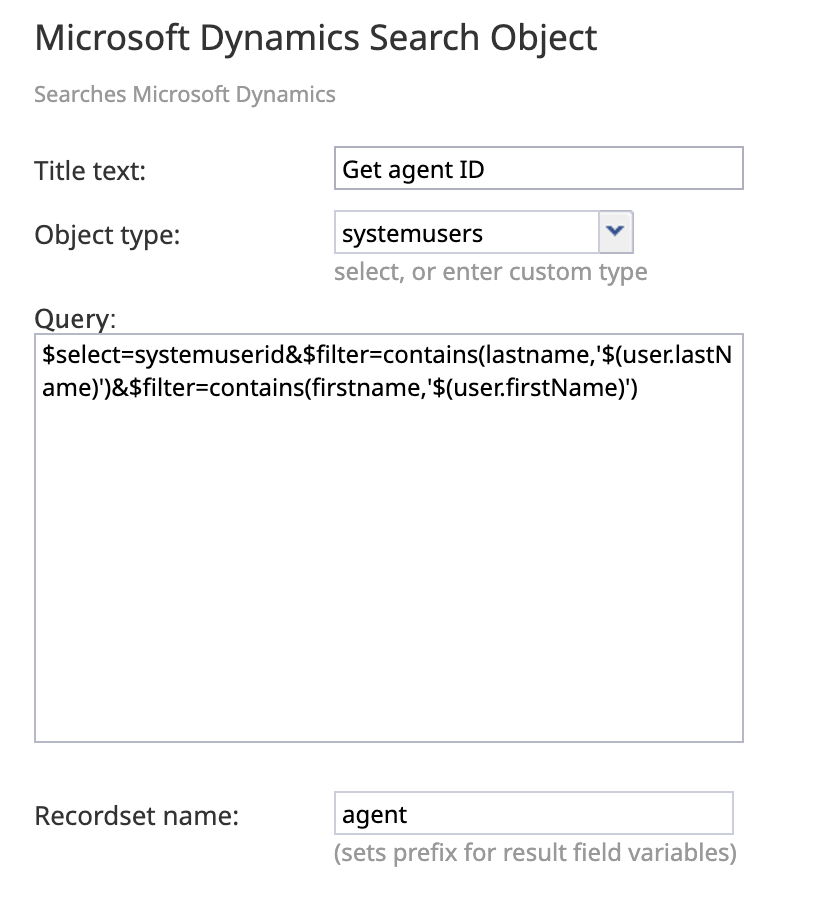
- Using the Query field, locate the current agent's user ID by searching the User (SystemUser) table for their first and last name, which are stored at $(user.firstName) and $(user.lastName), respectively.
$select=systemuserid&$filter=contains(lastname,'$(user.lastName)')&$filter=contains(firstname,'$(user.firstName)') - Enter a descriptive variable name in the Recordset name field, such as agent. The agent's user ID is stored in $(agent.systemuserid).
- Add a Microsoft Dynamics Search Object block to the workflow.
- Set variables that format the call time, date, and duration for access by Microsoft Dynamics. For more information, see the Bright Pattern documentation for Workflow Variables and Built-In Functions.
- Add a Set Variable block with variable name time_start and value
=formatdatetime(applytimezone((now()-$(duration)),"America/Los_Angeles"), "h:mm a"). This stores the time of day the call began in the call center's time zone, for use in the Phone Call object's Subject field.
Note: $(duration) captures the call duration in seconds. now(), applytimezone(), and formatdatetime() are built-in functions that get and configure time information. Replace "America/Los_Angeles" in your own workflow with the relevant time zone in the form "Area/Location".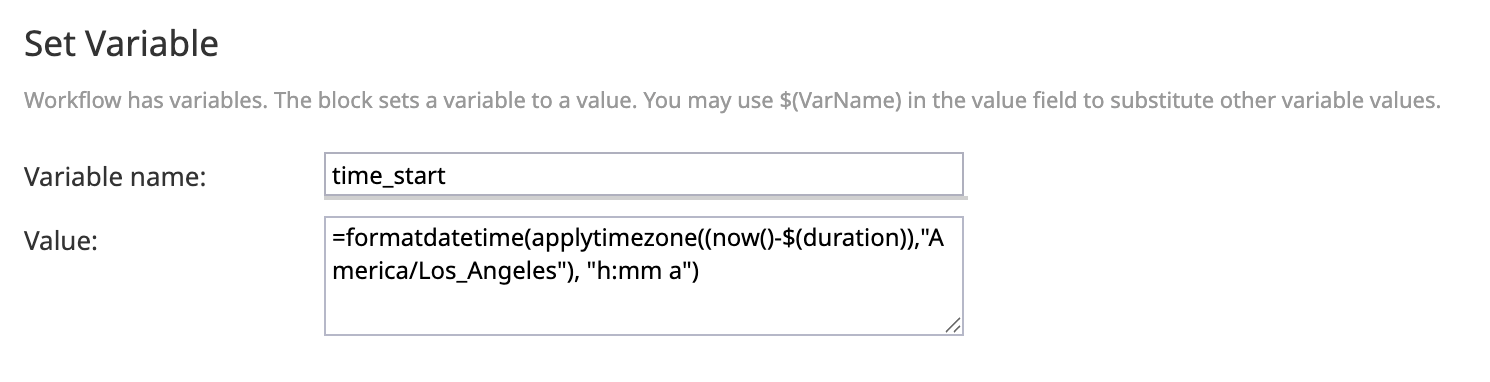
- Add a Set Variable block with variable name time_end and value
=formatdatetime(applytimezone(now(),"America/Los_Angeles"), "yyyy-MM-dd'T'HH:mm'Z'"). This stores the date and time the call ended in ISO 8601 format, as required by the Phone Call object's ActualEnd field.
Note: Replace "America/Los_Angeles" with the relevant time zone in the form "Area/Location".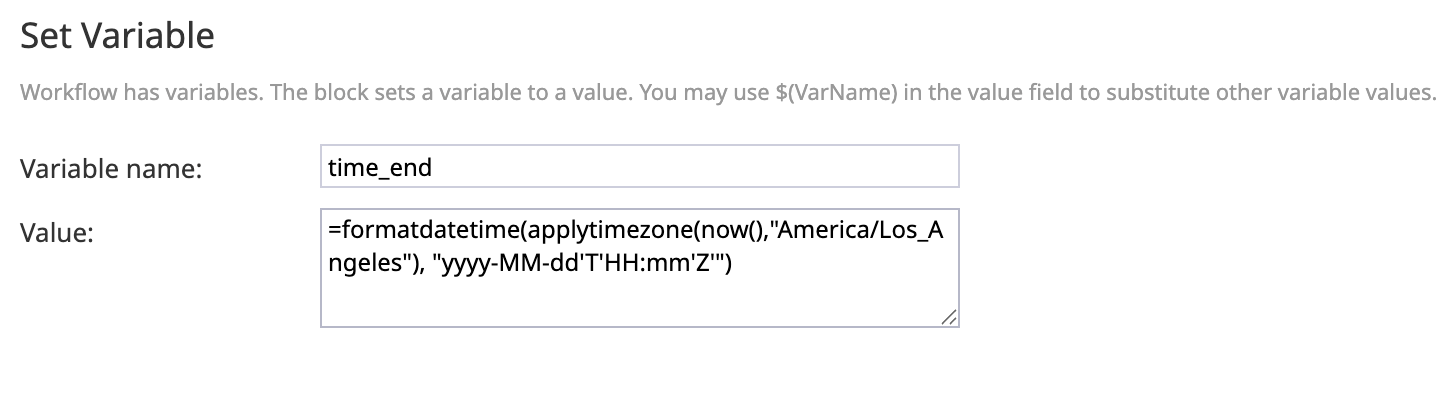
- Add a Set Variable block with variable name duration_min and value
=($(duration)/60). This calculates the call duration in minutes, as required by the Phone Call object's ActualDurationMinutes field.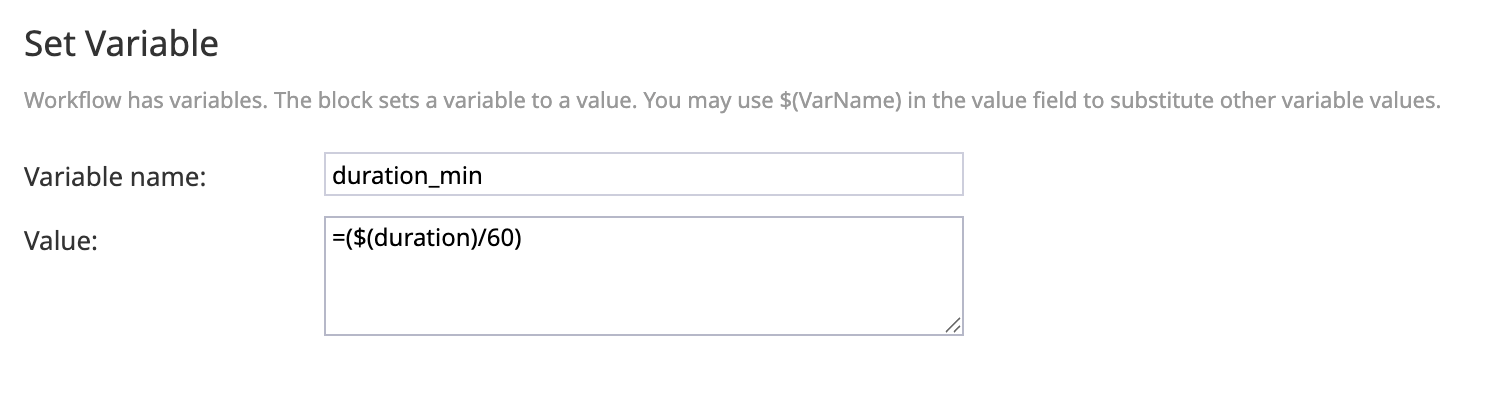
- Add a Set Variable block with variable name time_start and value
- Create a new Phone Call CRM object for this hotline call.
- Add a Microsoft Dynamics Create Object block.

- In the Object type field, enter phonecalls to create a new Phone Call object.
Note: phonecalls is the EntitySetName for the Phone Call (PhoneCall) table in Microsoft Dynamics. For more information, see Phone Call (PhoneCall) table/entity reference (Microsoft Dataverse).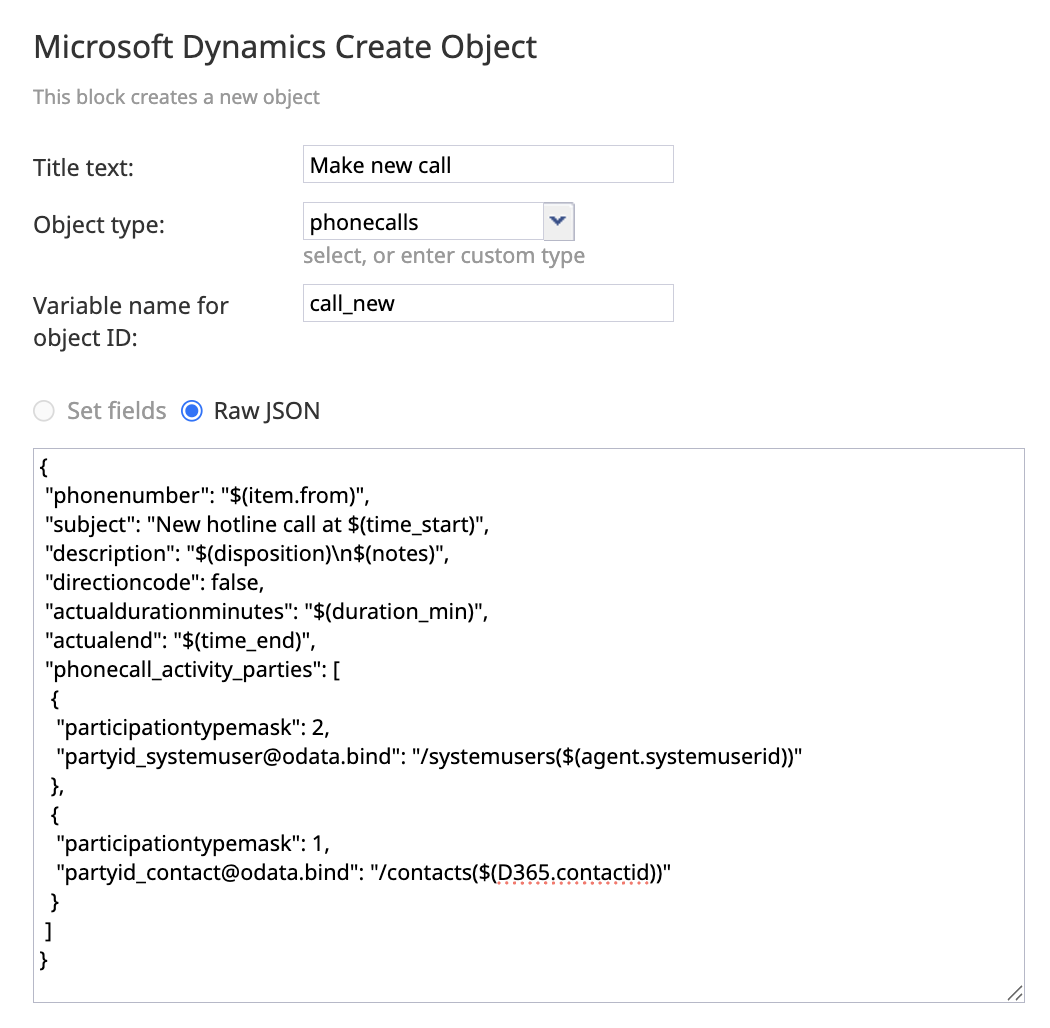
- Enter a descriptive name in the Variable name for Object ID field. In this example, we use call_new.
- In the JSON field, populate the Phone Call record with relevant data and bind it to the customer's contact ID and agent's user ID in the following format.
Note: This field uses the $(D365.contactid) variable from the scenario defined above. participationtypemask: 1 indicates the caller, while 2 indicates the recipient. directioncode: false means inbound, while true means outbound.{ "phonenumber": "$(item.from)", "subject": "New hotline call at $(time_start)", "description": "$(disposition)\n$(notes)", "directioncode": false, "actualdurationminutes": "$(duration_min)", "actualend": "$(time_end)", "phonecall_activity_parties": [ { "participationtypemask": 2, "partyid_systemuser@odata.bind": "/systemusers($(agent.systemuserid))" }, { "participationtypemask": 1, "partyid_contact@odata.bind": "/contacts($(D365.contactid))" } ] }
- Add a Microsoft Dynamics Create Object block.
- Mark the phone call as complete.
- Add a Microsoft Dynamics Update Object block.
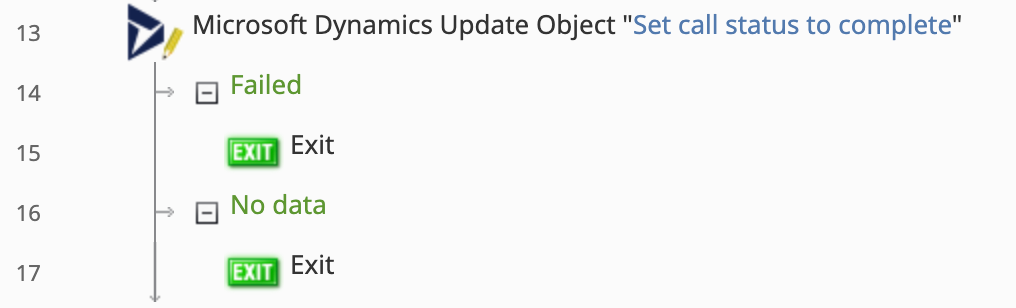
- In the Object type field, enter phonecalls.
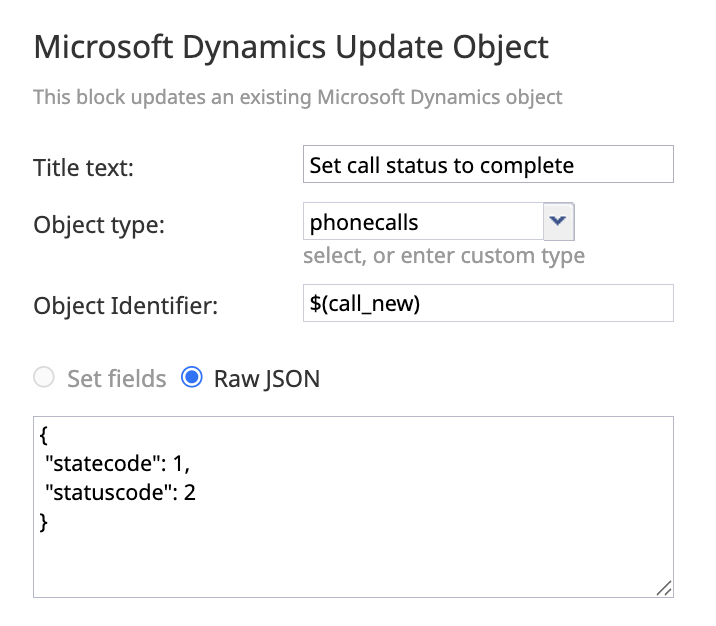
- In the Object Identifier field, enter $(call_new) to specify the object created in step 6 above.
- In the JSON field, update the state and status codes as follows:
{
 "statecode": 1,
 "statuscode": 2
}
- Add a Microsoft Dynamics Update Object block.
- Since the agent can select multiple records to associate with the call, we need to set up a loop that checks the number of records in the array and connects each one to the Phone Call object. If multiple records are selected, the workflow will run through the loop one time for each record in the array. If only one record is selected, the workflow will run through the loop once, then stop. If no records are selected, the workflow will skip the loop entirely.
- Add a Set Variable block with variable name i and value
0. This creates an index variable to step through the array, starting with the first record at index 0.
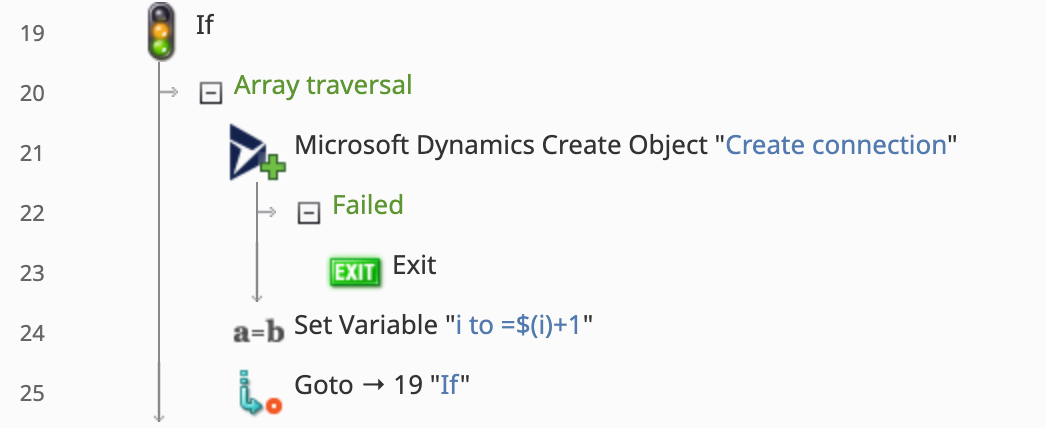
- Add an If block that checks that the current index at $(i) is less than the length of the $(associatedRecords) JSON array.
- Press the Add branch button.
- Name the branch via the Exit label field. In this example, we use the name Array traversal.
- Click Add condition.
- Configure the fields such that they read Workflow variable (number) i is < $(numberOfAssociatedRecords). Then, click the green checkmark.

- Press the Add branch button.
- Within the Array traversal branch, add a Microsoft Dynamics Create Object block. Leave it blank for now.
- Below the Create Object block, add another Set Variable block with variable name i and value
=$(i)+1. This increments the index variable by 1. - Below the Set Variable block, add a Goto block. In the rightmost panel, select the If block to return to the beginning of the loop.
- Add a Set Variable block with variable name i and value
- Return to the Microsoft Dynamics Create Object block you added in step 8c to create a Connection between the Phone Call and the current record in the array.
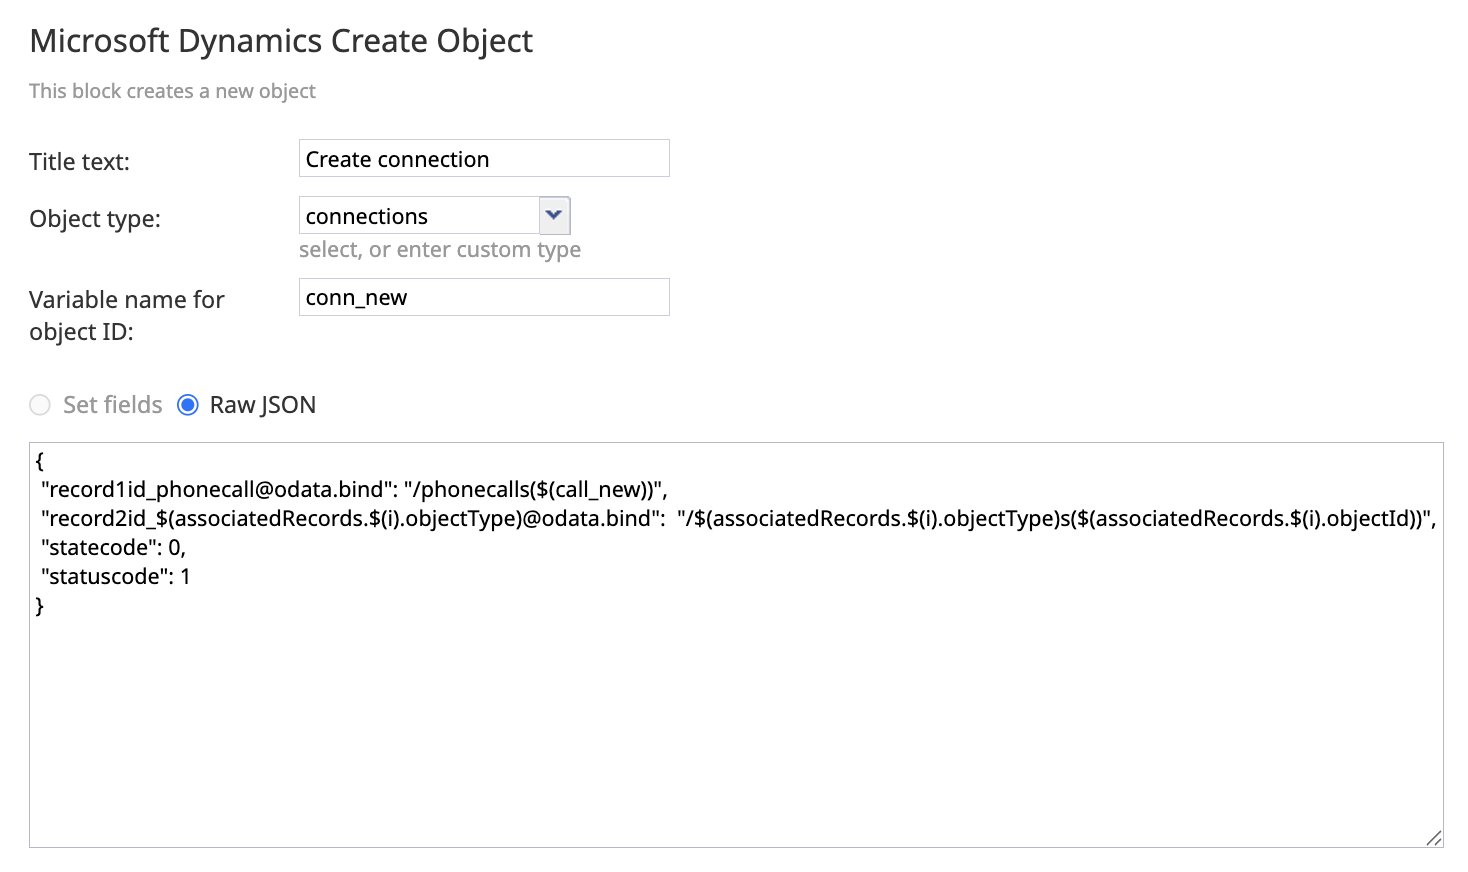
- In the Object type field, enter connections to create a new Connection record.
- Enter a descriptive name in the Variable name for Object ID field. In this example, we use conn_new.
- In the JSON field, bind record1 to the Phone Call and record2 to the current associated record, then mark the Connection status as active.
Note: For more information on Connection properties, see Connection table/entity reference (Microsoft Dataverse).{ "record1id_phonecall@odata.bind": "/phonecalls($(call_new))", "record2id_$(associatedRecords.$(i).objectType)@odata.bind": "/$(associatedRecords.$(i).objectType)s($(associatedRecords.$(i).objectId))", "statecode": 0, "statuscode": 1 }
- In the Object type field, enter connections to create a new Connection record.
- Add an Exit block below the If block and outside of the Array traversal branch to end the workflow.

- Press the Save button at the bottom of the page.


.png)


Step 3. Create a Workflow Entry
All that remains is to connect the workflow to the support hotline service via a Workflow Entry, and to set one or more triggers.
- Click the Workflow Entries tab for your new workflow.
- Give the workflow entry a descriptive name.
- Select the service that you created earlier from the drop-down menu.

- Set one or more workflow triggers. For more information, see Triggers in the Workflow Builder Overview.
- Select Agent completes interaction with disposition to run the workflow for each agent that participates in the call, which will create a call record per agent segment.
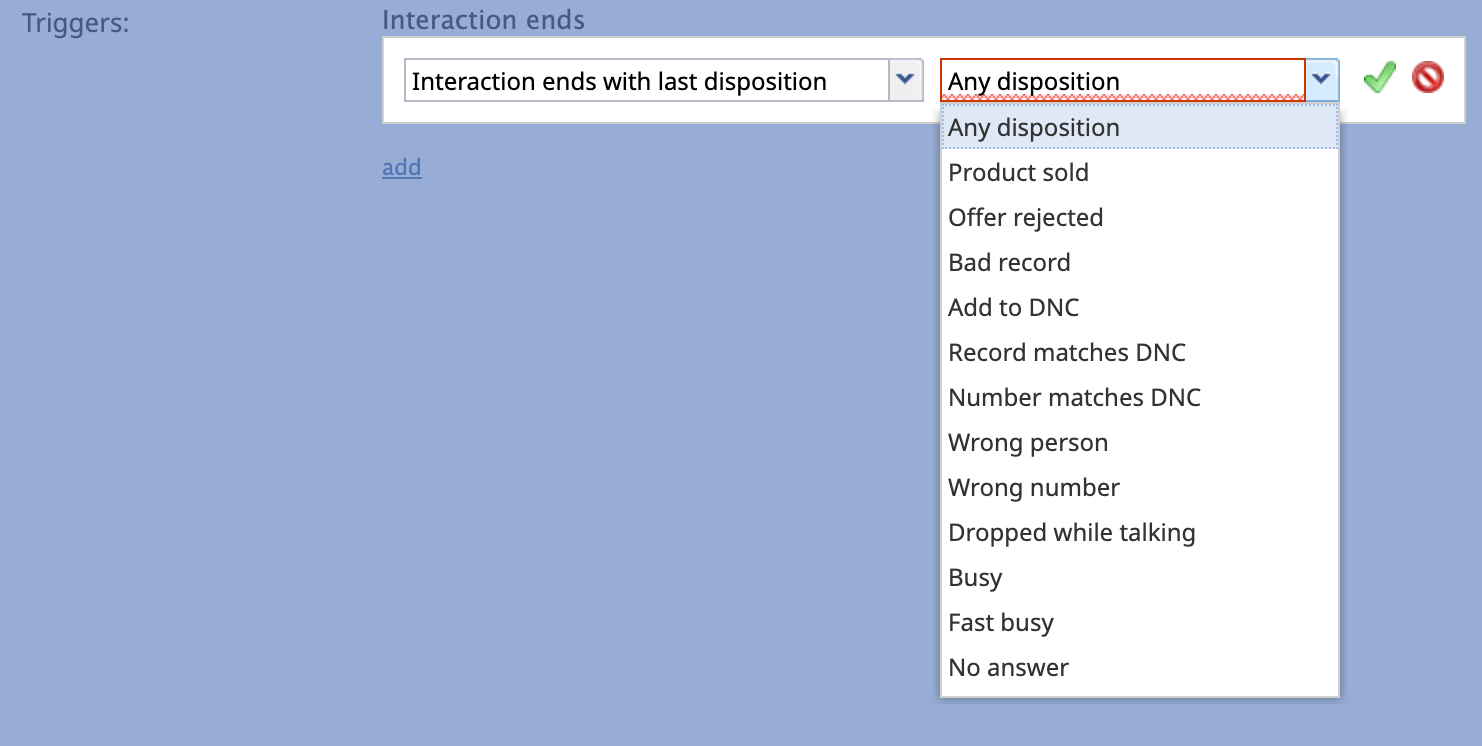
- Select Interaction ends with last disposition to run this workflow once the interaction is completed, creating a single call object for the entire interaction.
- Select the desired disposition from the second drop-down menu, or select Any disposition to run the workflow after any call to the Support hotline service.
- Select Agent completes interaction with disposition to run the workflow for each agent that participates in the call, which will create a call record per agent segment.
- Press Apply.


Step 4. Trigger the Workflow
- An agent who is assigned to the Support hotline service enters the Ready state.
- The agent accepts an incoming call. During the interaction, they may view related records, such as contacts, cases, tasks, or accounts. These records will appear in the widget under the Records tab.
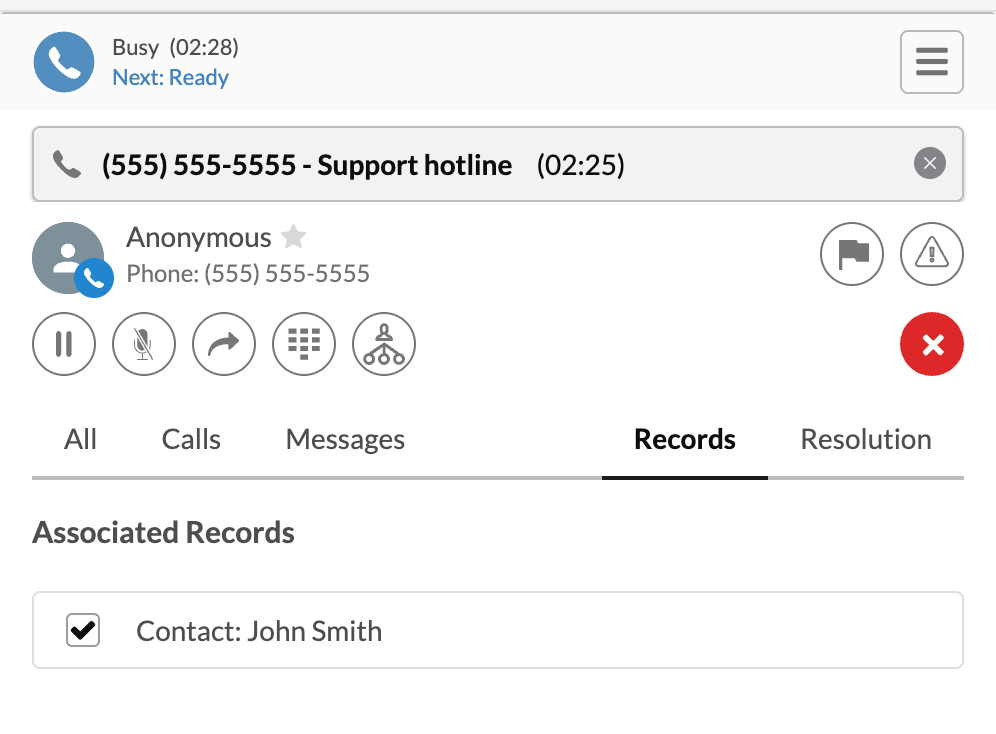
- After the interaction ends, the agent can do the following:
- Select a disposition from the drop-down menu.
- Select all records that are relevant to the call.

- Press Complete to submit.
- Select a disposition from the drop-down menu.
- If the selected disposition matches the trigger in the workflow entry, the workflow will begin, automatically creating a Phone Call record connected to the selected CRM records.


View Connections in Microsoft Dynamics
Connections created by this workflow can be viewed in the Phone Call record as well as the records selected by the agent.

- Open the Phone Call record in your Microsoft Dynamics instance.
Note: Since this Phone Call record is marked complete, it only appears on the Activities page under the following views: All Activities, Closed Activities, My Closed Activities, All Phone Calls, and My Completed Phone Calls.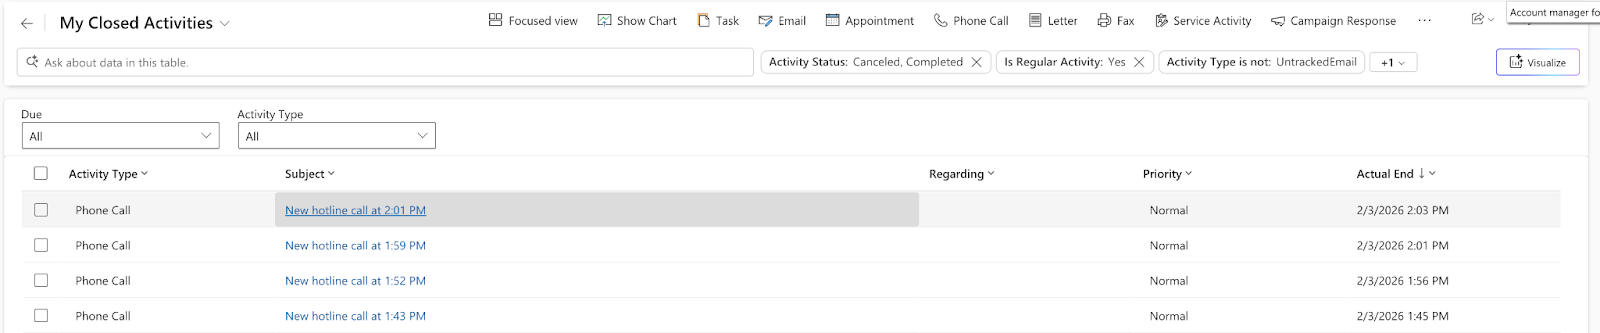
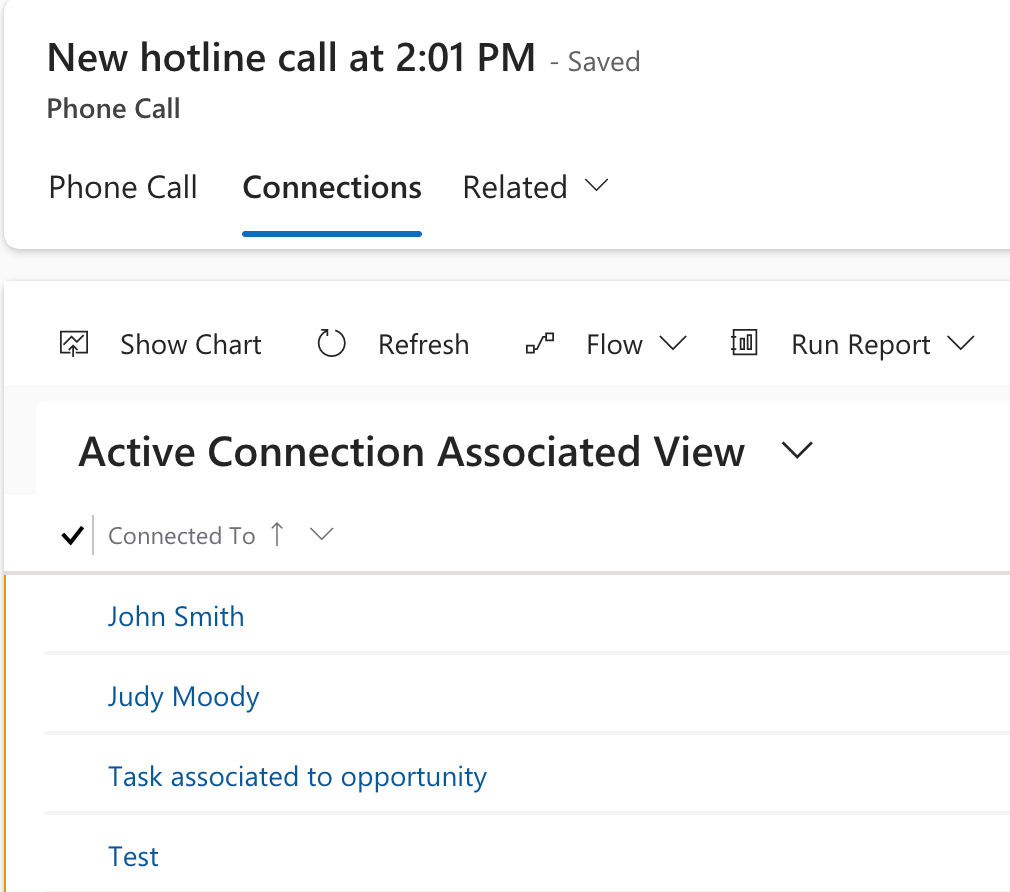
- Click on the Related tab, then select Connections from the drop-down menu.

- View all connections to this record in the Connections tab.
< Previous | Next >


