How to Configure Email Services
This article describes how to configure email services within Bright Pattern’s Contact Center Administrator application.
Prerequisites
This article assumes that you have already completed initial configuration for your contact center.
Procedure
Step 1: Create and configure an email service
In the email service Properties Tab, plan the categorization of email interactions arriving at a particular email address, create the corresponding email services, and configure their general settings.
- Log in to Contact Center Administrator, and go to Services and Campaigns.
- Click the Add service (+) button to create a new email service.
- Select Email as the type of service.
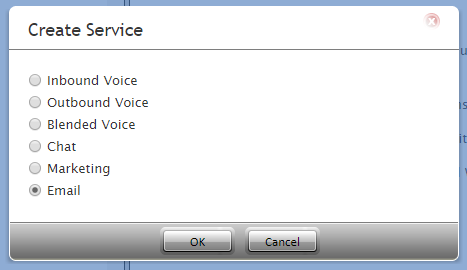
Choose from the available services - In the Properties tab that appears, update the service properties.
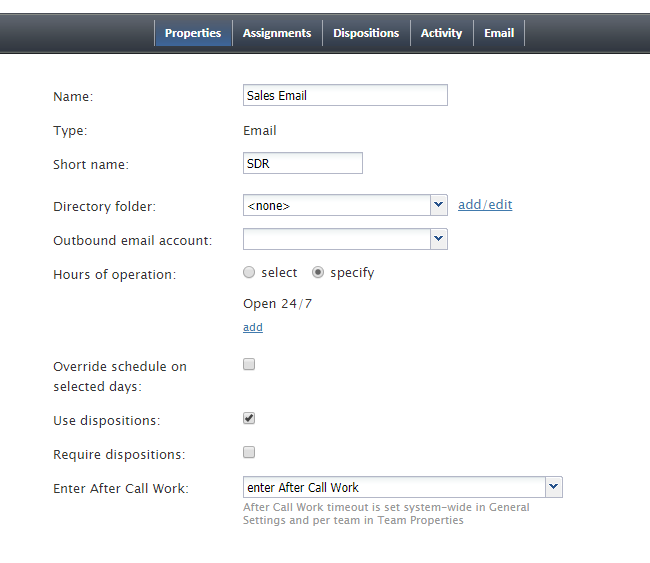
Email service properties - Click Apply to save your changes.


Step 2: Assign teams to the service
- In the Assignments tab, assign teams to this service. Note that the service will be created with a default service skill that can be assigned automatically to all members of the associated teams.
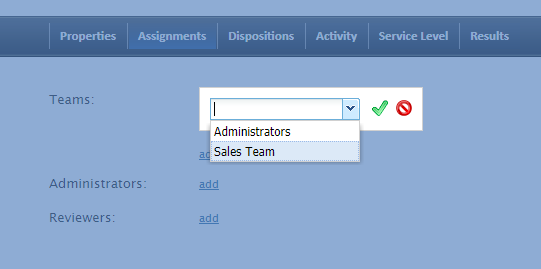
Assign users to teams - Optionally assign administrators and reviewers to this service.
- Click Apply to save your changes.

Step 3: Give agents the privilege to handle email
In Users & Teams > Roles, make sure the agents who will process email have the privilege Handle email granted to them.

Step 4: Create an email scenario entry and establish account for incoming email
- In Scenario Entries > Email, create an email scenario entry for your company's given email address. The scenario entry is the entry point for email service to and from customers.
- In the scenario entry's Account tab, configure incoming email account settings. By configuring account settings, you are enabling your company emails to be opened and used in Agent Desktop.
- If you do not know your POP/SMTP or Microsoft Exchange information, contact your service provider.

Step 5: Configure an outbound email account (optional)
If, within this service, you intend to send outbound emails that are not related to any existing cases, configure an outbound email account for this service.
Outbound email account settings appear in Scenario Entries > Email > Account tab.

Step 6: Create a standard acknowledgment message
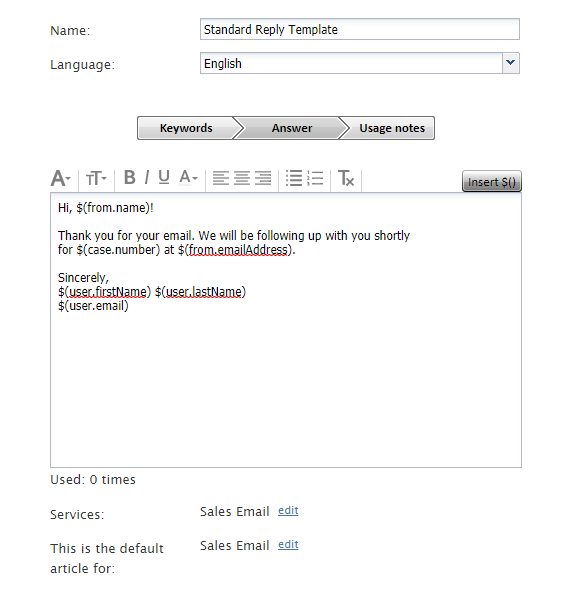
Using Knowledge Base, create the acknowledgment message that will be sent to customers automatically to confirm receipt of their email inquiries.
- Go to Call Center Configuration > Knowledge Base.
- Click the Add article (+) button to add a new Knowledge Base article.
- In the Answer tab, fill in the email message body as desired. You can use the variable button to insert data variables, as shown in the example.
Add a Knowledge Base article - Optionally create additional articles in the Knowledge Base that will help agents process emails more efficiently.

Step 7: Define service settings
- In the Services & Campaigns > Email > Email Tab, define all email-specific service settings.
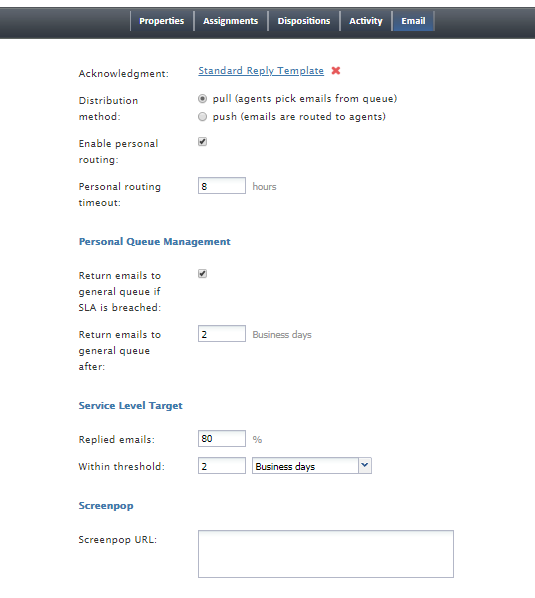
Email tab properties - Beside Acknowledgment, click <<None>>, which will bring up the acknowledgement message you just created in the Knowledge Base, in step 3.
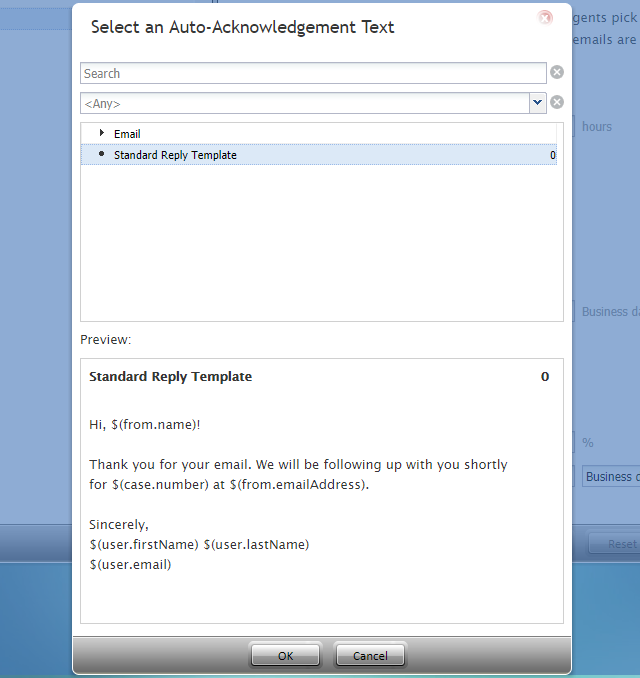
Select the email acknowledgment message from Knowledge Base


Go to Call Center Configuration > Email Settings and update the email header and footer.
This is the system-wide text that will be inserted automatically above and/or below the main text of every email that is sent to a customer. You can include variables to plug in names, email addresses, and so forth.

Step 9: Specify omnichannel settings for emails
Adjust Omnichannel routing settings, which let you specify the number of emails that agents can actively process on their Agent Desktop simultaneously.
