How to Add a Contact Tab
After you have edited all the properties for a chat scenario entry, there is one last step you must take for your web chat to work: You must add a contact tab for the chat widget.
A contact tab is the small tab that a customer browsing your website sees and clicks to initiate a chat interaction. If you do not add a contact tab to your chat scenario entry, your webpage will not display the chat widget at all.

Procedure
Step 1: Find the Chat widget tab
- In Contact Center Administrator, go to Configuration > Scenario Entries > Messaging/Chat.
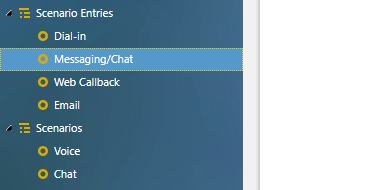
Configuration > Scenario Entries > Messaging/Chat - Select the desired chat scenario entry.
- Click on the Chat widget tab.

Step 2: Add a new contact tab
- Beneath Chat Initiation via Contact Tabs, click add.
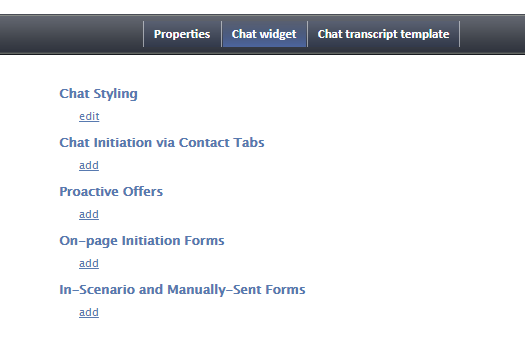
Add a new contact tab - The Chat Widget Configuration editor will open in a new browser tab or window.

Step 3: Edit contact tab properties
Edit the properties and fields as desired. You may revisit and edit your contact tab properties at any time.

At the most basic level, only two properties must be completed right now:
- Name - The unique name (any) for this new contact tab
- Enabled - Selecting this checkbox turns on the contact tab
Step 4: Save your changes
- Click Save to save your contact tab. Simply closing the browser window will not save your changes.
- Close the Chat Configuration Editor browser tab or window. You can only work on one such editor window open at a time.
Step 5: Add url
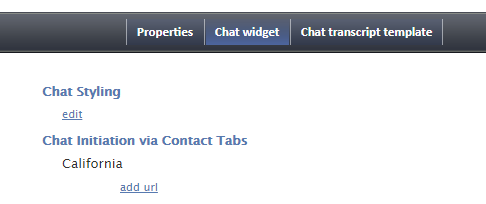
- Back in the scenario entry's Chat widget tab, go to Chat Initiation via Contact Tabs.
- Beneath the contact tab you just added, click add url.
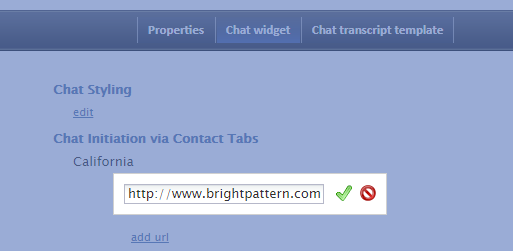
Make sure you add the URL of your webpage - Enter the URL of the website where the chat widget will be placed, and click the green checkmark to apply your changes. If you do not know the URL, you can simply enter backslash (/) in this field.
Apply changes or cancel


Step 6: Save
At this time, you may add or edit any of the other Chat widget tab sections. You can always come back to this for further changes.
At the bottom of the screen, click Apply to save your changes.