<translate>
Set up an Alterra Integration Account
Integrations with Alterra.ai's Answer Bot and NLP Engine are enabled through integration accounts, which store the credentials of third-party services so that Bright Pattern Contact Center can access and work with them.
In this article, you will learn how to set up your Alterra integration account and edit its properties.
Procedure
Step 1: Add integration account
Add a bot/chat suggestions engine integration account, and select type Alterra.
Step 2: Edit properties
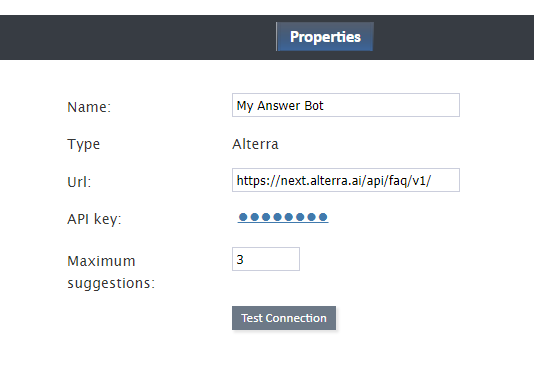
In the Properties dialog, enter the credentials of your Alterra bot instance as follows. This allows Bright Pattern to access your Alterra bot and use it in chat interactions.
Name
The unique name of this integration account (any). Because you can have multiple integration accounts of the same type, it is helpful to have a descriptive, memorable name.
Type
By default, the type is “Alterra” because you selected this type when adding the account.
Url
The endpoint of your Alterra instance. The default Url value is https://next.alterra.ai/api/faq/v1/.
API key
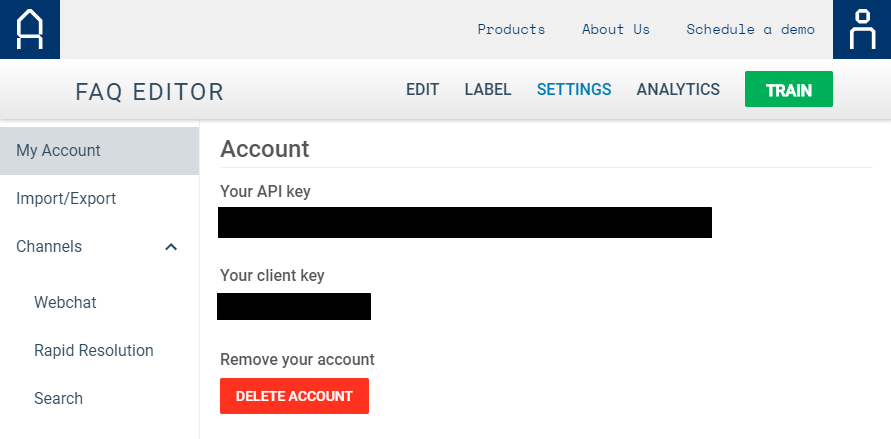
The API key (string) required to access the service. There is no default value.
You can find your API key in your Alterra account, in Settings > My Account.
Maximum suggestions
Maximum suggestions is the maximum number of suggestions (e.g., 1, 2, or 3) that can be delivered to the Agent Desktop for the agent to select and use in chat replies.
Test connection
Click to be sure Bright Pattern Contact Center can connect to your Alterra instance.
If the credentials are invalid, go back to the Url property and API key and make sure you’ve entered them correctly. Test until you see the success dialog: "Account credentials appear to be valid."
Step 3: Save properties
Click Apply at the bottom of the screen to save your account properties. Your Alterra integration configuration is now complete.
</translate>


