提供: Bright Pattern Documentation
新しいコンタクトの作成
エージェントデスクトップにおいて新しいコンタクトの作成(つまり、新しいレコードの追加)方法はいくつかあります。例えば、コンタクト検索結果を使うと、新しいコンタクトの詳細は手動で入力できます。また、コンタクト要約の複数のポップアップに基いて新しいコンタクトを容易に追加できます。新しいコンタクトの作成方法は以下の通りです。
検索結果
- コンタクト検索結果リストを開いて、画面の下にある作成ボタンをクリックします。
コンタクト詳細フォームの記入 - コンタクト詳細フォームが表示され、コンタクト情報の入力ができます。
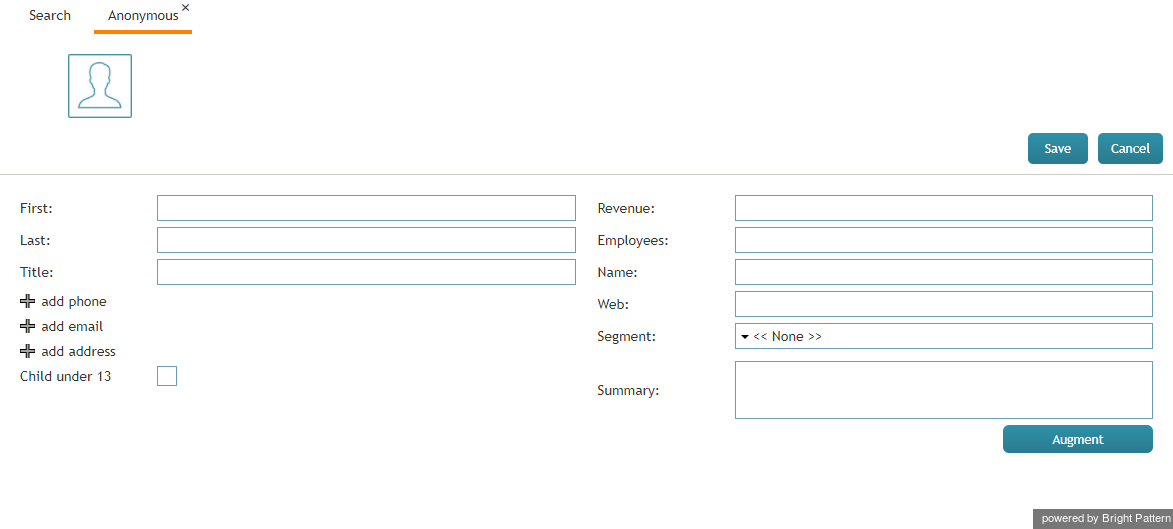
コンタクト詳細フォームの記入 - 保存をクリックします。


コンタクトのポップアップが提供する"追加"オプション
- アクティブな会話リストを開いて、最近の対話タブをクリックします。
- コンタクト名にマウスカーソルを合わせます。
- このコンタクトの詳細がまだ保存されていない場合、コンタクト要約のポップアップでは、 新しいコンタクトおよび既存コンタクトへ追加というリンクが表示されます。
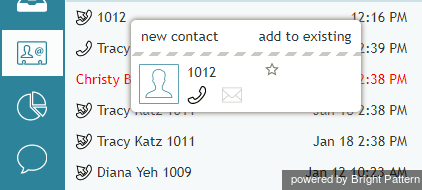
"新しいコンタクト"をクリックします。 - 新しいコンタクトをクリックします。
- 新しいレコードの追加ポップアップが表示し、その中の4つの基本フィールドに名前・内線電話番号 (事前入力可)、電子メールアドレス、写真といった情報を提供しなければなりません。

新しいレコードの追加 - 新しいコンタクトを作成するには、作成をクリックします。既存のコンタクトへ情報を追加をするには、追加と編集 をクリックします。


Calendar
- On your calendar, add a new event.
- Click the + sign at the bottom of the pane where you edit event details. The + sign allows you to assign a contact to the event.
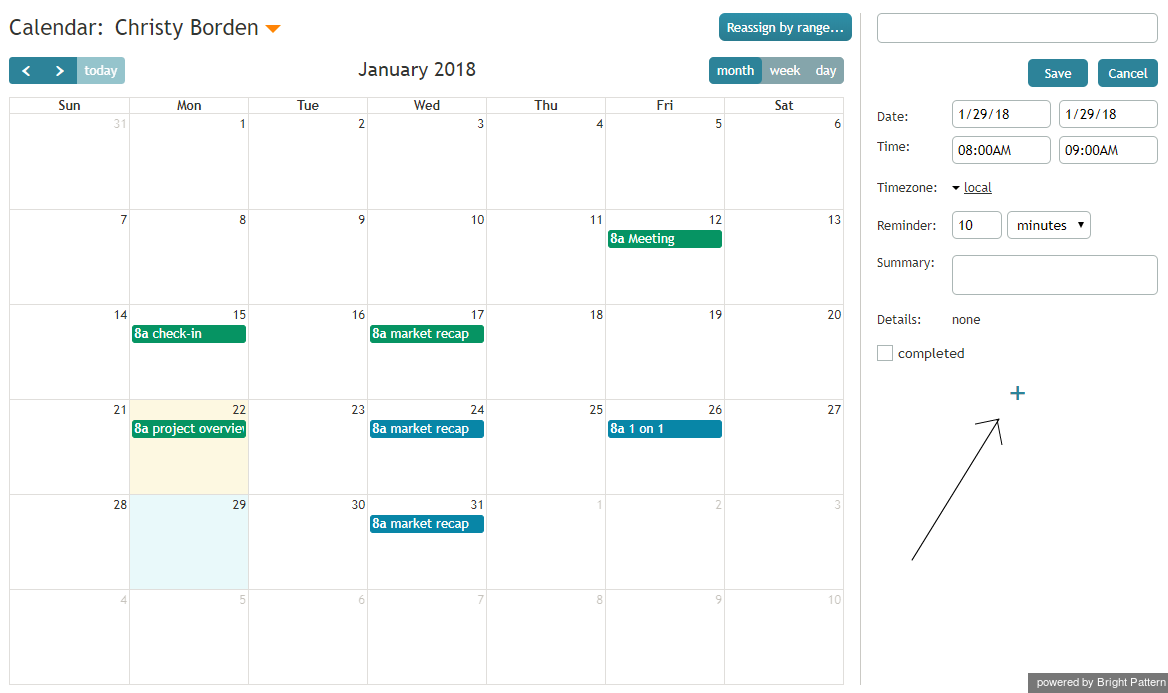
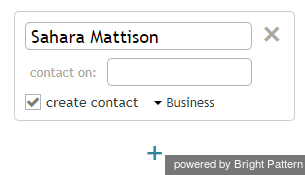
Assign a contact to a calendar event - Click Enter manually (or directory).
Assign a new contact by typing in the name - Enter the name of the new contact and select the checkbox for create contact.
Type in the name of your contact - At the top of the pane, click Save. If you do not save the event details, your new contact will not be created.
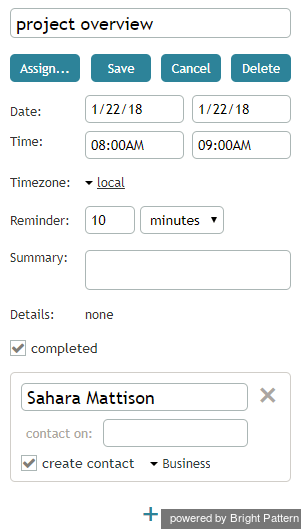
Save details < 前へ | 次へ >


