シナリオの概要
シナリオは、コンタクトセンターでの自動対話処理の流れを定義します。特定の対話に関連するシナリオは、特定のイベント(例えば、着信コールが特定のアクセス番号にかかること、チャットセッションが専用のウェブページから開始されることなど)をきっかけに実行されます。シナリオは、 シナリオエンジンによって実行されます。
シナリオでは、さまざまな自動操作が実行できます。例えば、受信コールに関して、シナリオでは、自動音声応答(IVR)を介して追加情報収集、リクエストされたサービスの識別、受付可能で必要な資格を持つエージェントへの割り当ての実行が可能です。さらに、シナリオフェールオーバーが発生した場合(シナリオエンジンでは 音声シナリオの処理中にエラーが発生した場合)、シナリオはバックアップシナリオエンジンに転送されます。これにより、最後に実行されたブロックからシナリオが再起動され、アクティブなコールが切断されることが防止されます。
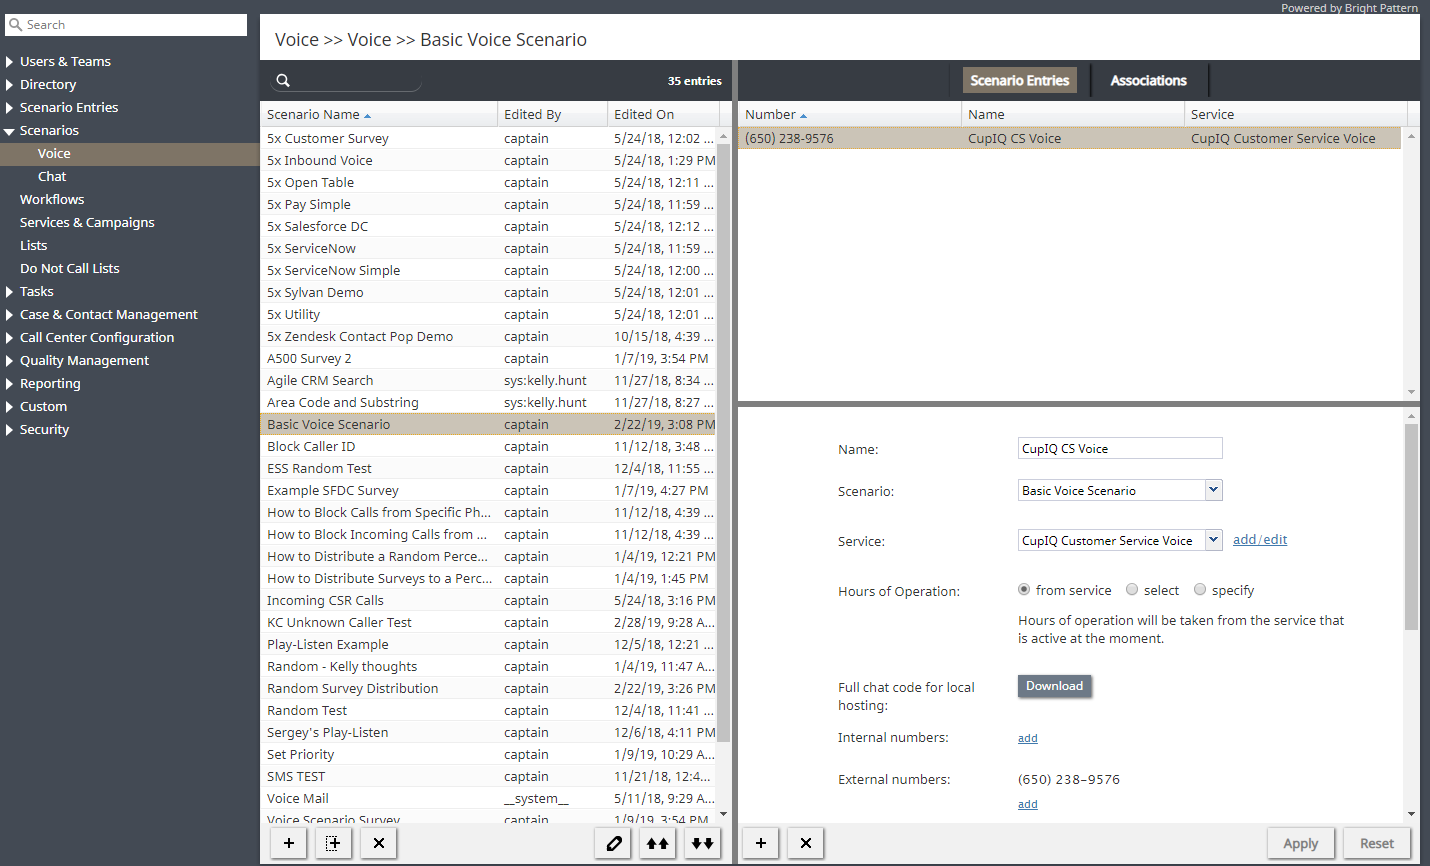
The list in the left pane of the scenario view displays the existing voice scenarios. If a scenario is being edited by someone else at the moment, the name of the editor will appear in the Currently Edited By column.
For further information, see Scenario Builder Overview in the Scenario Builder Reference Guide.
Sections
The following is a list of sections found in the Contact Center Administrator application, section Scenarios.
How to Create, Edit, and Delete Scenarios
To create a scenario:
- First select the media type of the interactions that this scenario will process (voice or chat).
- In the scenario list view, click the Add scenario
 button at the bottom of the list.
To edit a selected scenario:
To delete a scenario:
Clicking either the Add scenario button or the Edit scenario button will open the Scenario Builder application in a new browser window or tab. The Scenario Builder application includes all the control elements that may be used in automated interaction processing.
How to Use Scenario Templates
Bright Pattern Contact Center provides a number of scenario templates for some standard functions, such as virtual queue and compliant telemarketing calls. Depending on the type of scenario your are working on, it may be easier to select a corresponding template and customize it to the requirements of your contact center, as opposed to creating a scenario from scratch.
To create a scenario using a template:
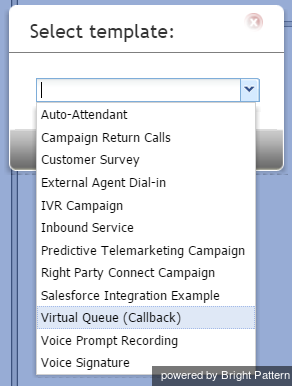
The Select template window will offer a drop-down menu with the following templates from which to choose:
- Auto-Attendant
- Campaign Return Calls
- External Agent Dial-in
- IVR Campaign
- Inbound Service
- Predictive Telemarketing Campaign
- Right Party Connect Campaign
- Salesforce Integration Example
- Virtual Queue (Callback)
- Voice Prompt Recording
- Voice Signature
These templates are described in section Voice of this guide.
Select the desired template, modify the content as needed, and save it as your new scenario.
How to Export and Import Scenarios
To export a scenario:
- First, select the media type of the scenario you will export (i.e., voice or chat).
- In the scenario list view, select/highlight the name of the scenario you wish to export.
- After selecting the desired scenario, click the Export scenario
button. Note that the file will download as soon as you select this button.
- The exported file will be in .ZIP format.
To import a scenario:
- Before importing a scenario, note that the file should be in .ZIP format (i.e., the same format as an exported scenario).
- Select the media type of the scenario you will import (i.e., voice or chat).
- In the scenario list view, click the Import scenario
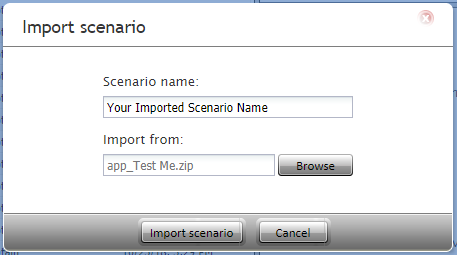
button, which will open the Import Scenario window.
- In the Scenario name field, enter the name you would like to give the imported scenario.
- In the Import from field, click the Browse button to find and select the file you would like to import.
- After naming and selecting the file, click the Import scenario button.


