Workflow Builder Overview
Workflows are a series of events configured to launch automatically after an interaction has been assigned a disposition. For example, setting a particular disposition for an interaction could trigger the following series of events to happen:
- Send a survey to the customer
- Wait a specified amount of time (e.g., 30 minutes, 1 day, 1 week, etc.)
- Send a follow-up email to the customer.
Workflows are designed and edited in the Workflow Builder application. This application is launched from the Contact Center Administrator application when you either add a new workflow or select an existing one for editing. Workflows handle any necessary follow-ups, depending on the interaction’s disposition type. Such follow-up actions include setting context variables, sending an email, sending a text message, scheduling an event, clearing a scheduled event, and making an external request (or internal API call). Workflows reduce the workload of agents while following up with customers and gathering data in a consistent way.
While similar to the Scenario Builder application, the Workflow Builder application only dictates the follow-up actions that happen after an interaction has ended.
Graphical User Interface
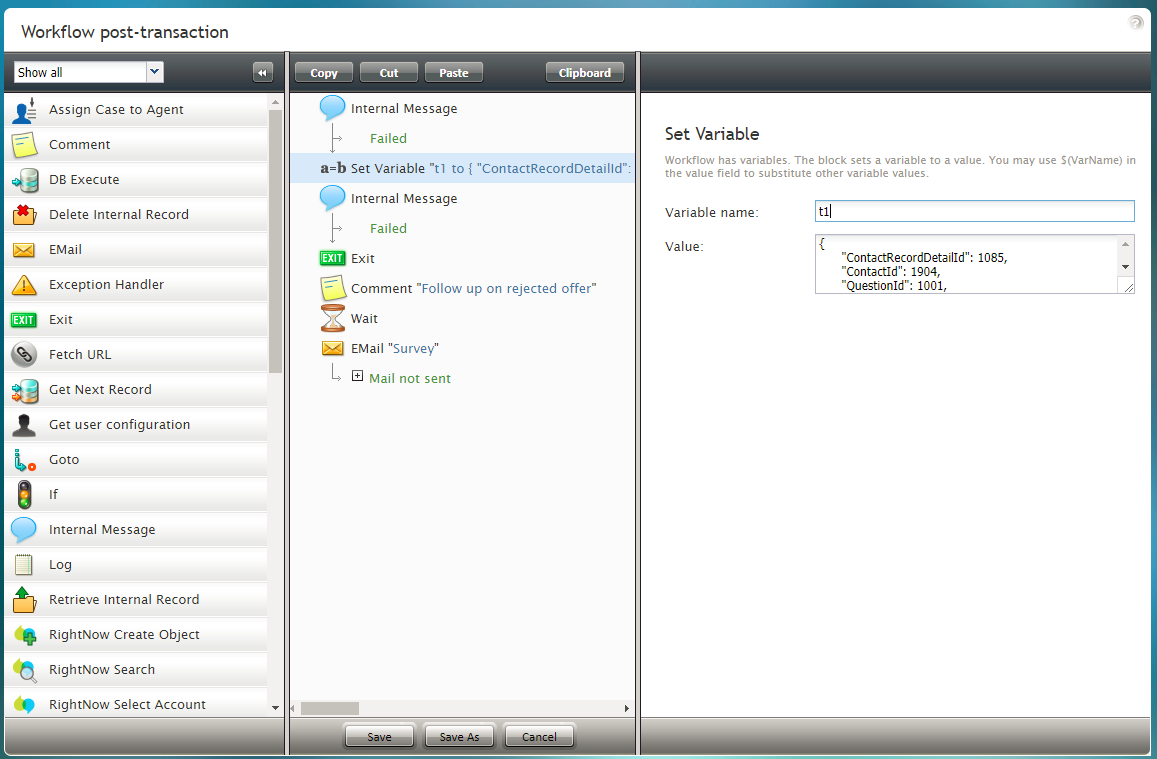
Workflow Builder incorporates a graphical user interface (GUI) with which you can visually connect a sequence of functional blocks, thus building your workflow. These blocks are known as workflow blocks. Workflows are created using a flowchart format that represents the sequence of interaction processing steps in the workflow. Different workflow blocks perform different functions, such as sending internal messages, waiting a period of time to take an action, or looking for available agents.
To add a block to the workflow, select it from the list on the left and drag it to the desired location within the flowchart. To remove a block from a workflow, select the block and drag it back to the list of blocks on the left.
Workflow Blocks
Each block has its own configuration attributes, which appear in the edit pane on the right when the block is added to the flowchart or selected within the flowchart. The attributes specify the function represented by the block. The scenario blocks described in this guide may have configuration attributes related to conditional exits, prompts, and/or settings.
Conditional Exits
The workflow typically processes blocks sequentially; however, some blocks have multiple paths that the scenario can take after processing the block. These paths are called conditional exits. Conditional exits enable you to determine how the voice scenario responds to certain conditions that may occur during the processing of an interaction, such as an agent not responding to a call. Each conditional exit appears in the flowchart as green text beneath the block to which it applies. A conditional exit may contain a flow of blocks to handle specific situations.
Settings
Settings, also known as configuration attributes, for workflow blocks appear in the edit pane on the right when a block is added to the flowchart or selected within the flowchart. These settings specify the function represented by the block. The subsequent sections of this guide describe specific workflow blocks, their attributes, and usage. The blocks are listed in alphabetical order.
Workflow Entries Screen Properties
Workflows are added to services as workflow entries. To add a workflow, navigate to Configuration > Workflows and select the + button. A new workflow will open in the Workflow Builder application, where you customize the workflow scenario by dragging and dropping blocks onto your scenario.
Name
Every workflow entry needs a name. This field is mandatory.
Service
Service is the name of the service with which the workflow entry should be associated.
Triggers
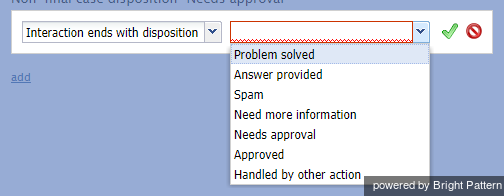
Triggers are the events that cause a configured workflow to be launched. To add triggers, click add, select the available triggers and their properties, and select the green check mark to apply your changes.
Trigger types include the following:
- Interaction ends with disposition
- Non-final case disposition
- Average sentiment
Interaction ends with disposition
If this trigger is selected, you must select a specific disposition from the drop-down list. Dispositions include the following:
- Problem solved
- Answer provided
- Spam
- Need more information
- Needs approval
- Approved
- Handled by other action
Non-final case disposition
If this trigger is selected, you must select a specific non-final case disposition from the drop-down list:
- Need more information
- Needs approval
- Approved
Average sentiment
If this trigger is selected, you must show the percentage of the average sentiment. This is done by selecting < or > and moving the percentage slider to the complete the following type of example statement: A workflow is triggered if the average sentiment is greater than 0.51.


