提供: Bright Pattern Documentation
Created page with "== 手順 == #コンタクトセンター管理者アプリケーションの''設定> https://help.brightpattern.com/5.4:Contact-center-administrator-guide/CallCenterConfig..." |
No edit summary |
||
| Line 6: | Line 6: | ||
== 手順 == | == 手順 == | ||
#コンタクトセンター管理者アプリケーションの''設定> [[https://help.brightpattern.com/5.4:Contact-center-administrator-guide/CallCenterConfiguration/IntegrationAccounts/SpeechToText | コールセンターの設定 > 統合アカウント]]''へ移動し、音声合成 (STT) | #コンタクトセンター管理者アプリケーションの''設定> [[https://help.brightpattern.com/5.4:Contact-center-administrator-guide/CallCenterConfiguration/IntegrationAccounts/SpeechToText | コールセンターの設定 > 統合アカウント]]''へ移動し、音声合成 (STT)オプションを選択します。アカウントの情報を入力します。新しい統合アカウントを追加するときにオプションとして音声合成が表示されないことは、そのオプションがコンタクトセンターで有効になっていないことを意味します。詳しい情報については、サービスプロバイダーにお問い合わせください。<br /><br /> | ||
# | #'''アカウントの追加''' (“'''+'''”) ボタンをクリックし、アカウントタイプとして'''音声合成 (STT)'''を選択します。<br /><br />[[File:STT-integration-5310.PNG|center|thumb|800px|統合アカウントの作成]]<br /><br /> | ||
# | #次に、音声合成アカウントタイプを以下から選択します: Watson, Google synchronous STT, GoVivace。<br /><br />[[File: STT-Provider-Type-5310.PNG|center|thumb|800px|音声合成アカウントタイプ]]<br /><br /> | ||
# | # ''プロパティ''では、必要な認証情報を入力します。プロパティ詳細については、''コンタクトセンター管理者ガイド''の[[Contact-center-administrator-guide/CallCenterConfiguration/IntegrationAccounts/SpeechToText | 音声合成統合 (STT)]]をご覧ください。<br /><br /> | ||
# | # '''適用'''をクリックし変更を保存します。<br /><br /> | ||
# | # STTは品質管理の目的で利用可能です。<br /><br /> | ||
Latest revision as of 10:54, 19 February 2020
• English
音声合成の設定方法
音声合成 (STT)統合アカウントを使って、評価の目的で通話をテキストに変換できます。 トランスクリプトは評価コンソールの トランスクリプトディスプレイで表示されます。
ここでは、 STT 統合アカウントの設定方法について説明します。
手順
- コンタクトセンター管理者アプリケーションの設定> []へ移動し、音声合成 (STT)オプションを選択します。アカウントの情報を入力します。新しい統合アカウントを追加するときにオプションとして音声合成が表示されないことは、そのオプションがコンタクトセンターで有効になっていないことを意味します。詳しい情報については、サービスプロバイダーにお問い合わせください。
- アカウントの追加 (“+”) ボタンをクリックし、アカウントタイプとして音声合成 (STT)を選択します。
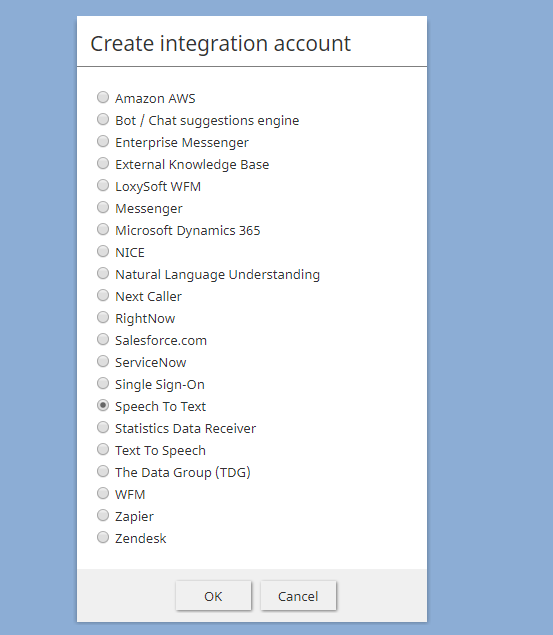
統合アカウントの作成 - 次に、音声合成アカウントタイプを以下から選択します: Watson, Google synchronous STT, GoVivace。
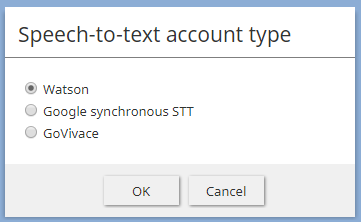
音声合成アカウントタイプ - プロパティでは、必要な認証情報を入力します。プロパティ詳細については、コンタクトセンター管理者ガイドの 音声合成統合 (STT)をご覧ください。
- 適用をクリックし変更を保存します。
- STTは品質管理の目的で利用可能です。
< 前へ | 次へ >

