Dynamic UI Overview
In the Dynamic Layout Editor view, the Form Builder user interface is divided into the following areas:
- Control Palette (the list of system controls and all other types of controls), shown on the left-hand side of the screen
- Form Canvas (where the form is built and edited), shown in the middle of the screen
- Properties Editor (after selecting a control to edit), shown as a pop-up dialog
To define a new UI element for your form, select the corresponding control from the control palette, drag it to the desired location on the canvas, and specify its properties in the properties editor.

Form Settings
You can change the overall look of the form (i.e., label width, padding, margins, background color, etc.) by clicking the Form-Wide Settings ![]() icon at the top of Form Builder.
icon at the top of Form Builder.

Upon clicking on the Form-Wide Settings ![]() icon, a properties dialog will open. There, you can edit the following settings:
icon, a properties dialog will open. There, you can edit the following settings:
- Label width (% of column)
- Column padding (px)
- Control padding (px)
- Margin around form (px)
- Background color
Pages
Form Builder allows you to create and edit multi-page forms. You can quickly add pages, remove pages, and browse all available pages using the thumbnail previews on the left-hand side of the UI.
The thumbnail column (and all the thumbnails within it) can be resized by holding and clicking on the vertical bar that divides the thumbnails and the Control Palette.
How to Add or Remove Pages
By default, each form begins with one page called "Main Page." To add a new page, hover your cursor over the Main Page thumbnail or any other available page thumbnail and click +.
Similarly, you may remove a page from the form by clicking x. Note that the last page of a form cannot be removed.

How to Edit Page Names
Once you have added a page to your form, you are free to edit the name of that page.
- Select the page thumbnail.
- In the Title bar of the UI, hover your cursor over the current page name (e.g., "New Page") and click the Pencil icon.
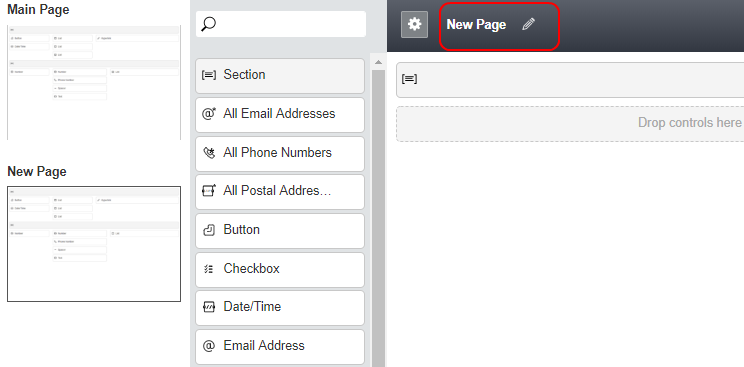
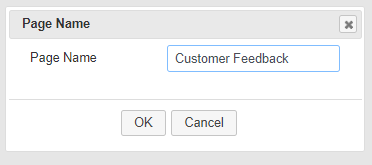
Click the Pencil icon to edit the page name - In the Page Name dialog that appears, enter the desired page name and click OK.
Give your page a new name - The new page name appears on the form page and its thumbnail preview.
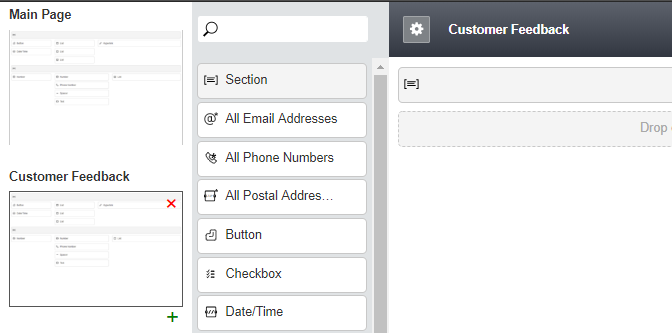
Renamed form page


Control Palette
The Control Palette lists each available type of control (previously called "form components") and each one has its own configuration attributes that specify the function performed by the control.

System Controls
System Controls are controls that can be present only once on each page of the form. When dragging a system control a second time, the current location is highlighted, and after dropping the new control, you will be asked, “Would you like to move the XXX control? [Move] [Cancel].”
Section is a system control that is always shown in the first position on the Control Palette list. The Section system control allows you to define the number of sections that appear on the form. To add or remove sections, select the checkbox beside each available column space in the section control bar (see the gray bar with the [=] symbol). The checkboxes appear upon mouse-over.

Other Control Types
All other controls can be placed on a form any number of times. It is forbidden to create controls with the same name on the same page of the form (an error dialog appears when applying property dialog or moving away from a docked property sheet). Controls with the same name on different pages must have the same type, in order to show the same field on different pages.
Controls that can be present in multiple instances include the following:
- Contact-email
- Contact-phone
- Contact-address
- Contact-messaging-app-account
When added, these controls will show all instances of the field associated with an object.