(Updated via BpDeleteTranslateTags script) |
|||
| (5 intermediate revisions by one other user not shown) | |||
| Line 1: | Line 1: | ||
| − | + | = User Interface Overview= | |
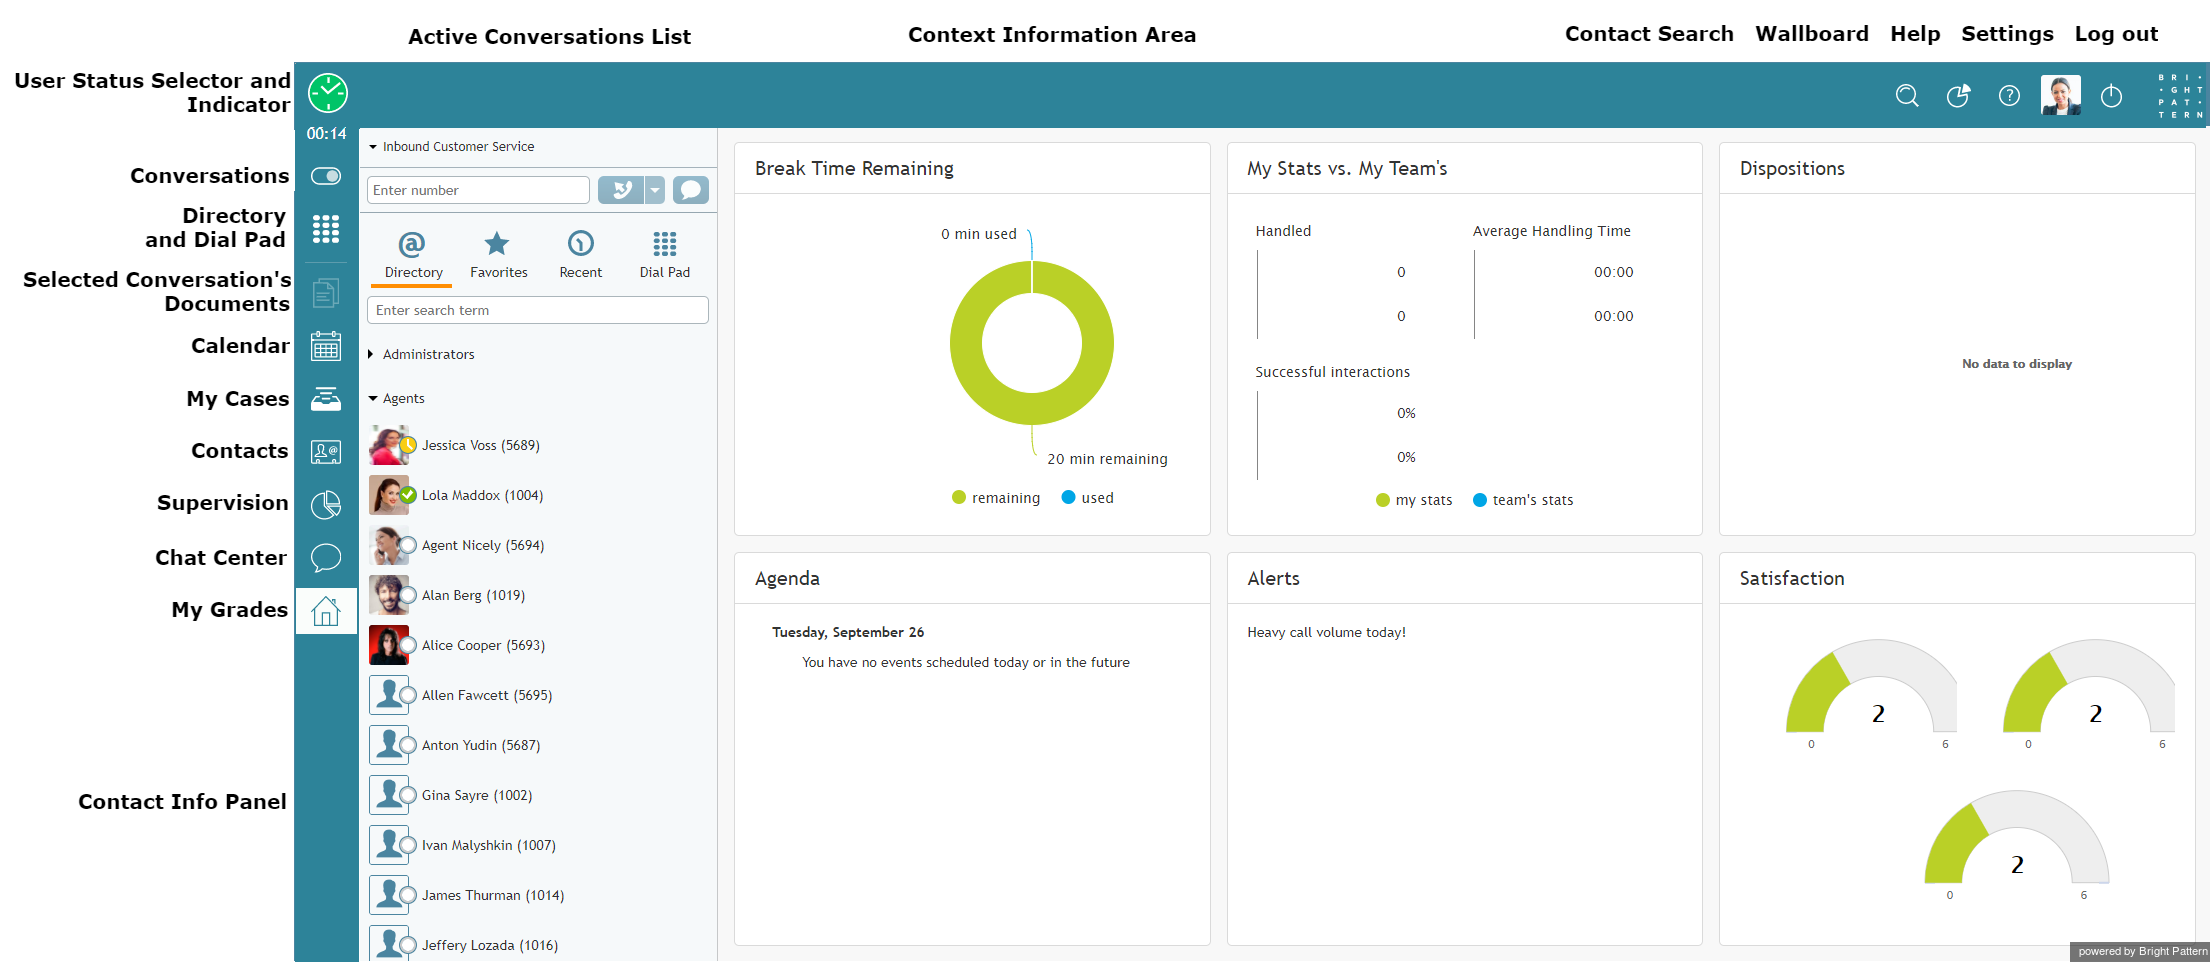
| − | + | The Agent Desktop application user interface is shown with an active call. Its main elements are shown, and these elements are often referred to in the subsequent sections of this guide. | |
| − | + | [[File:Agent-Desktop-UI-Overview2-50.png|thumb|800px|center|The elements of Agent Desktop]] | |
| − | [[File:Agent-Desktop-UI-Overview2-50.png|thumb|800px|center| | ||
| − | == | + | == Menu Elements and Functions (at left side of Agent Desktop) == |
| − | + | The elements of the Agent Desktop application screens perform the following functions. | |
| − | === | + | === Active Conversations List (ACL) === |
| − | '' | + | The ''Active Conversations List'' shows all your active interactions. For example, if you make a consultation call while holding a service call, this list will show them as two separate items. When you select a particular call or chat from this list, more information about this interaction and the related controls will appear in the ''Contact Info Panel''. When you select an email from this list, the email content and the related controls will appear in the ''Context Information Area''. For emails, the ''Active Conversations List'' also provides access to your team email queue, your personal email queue, and case history. |
| − | [[File:Active-Communications-Hold-50.png|450px|thumbnail|center| | + | [[File:Active-Communications-Hold-50.png|450px|thumbnail|center|Active Conversations List]] |
| + | === Contact Info Panel === | ||
| + | The Contact Info Panel provides information about and controls the interaction selected in the ''Active Conversations List''. This is the area of the application that you will use most often to handle your active (established) calls and chats. | ||
| − | + | The Contact Info Panel contains the following: | |
| − | + | * ''Service Selector'' for associating calls with the specific services your contact center provides | |
| + | * ''Number Input Field'' for entering phone numbers for outbound and internal calls | ||
| + | * ''Directory and Dial Pad'' for accessing your company's directory of users and accessing the standard phone dial pad | ||
| − | + | [[File:Contact-Info-Panel-50.png|450px|thumbnail|center|Contact Info Panel]] | |
| − | |||
| − | |||
| − | |||
| − | |||
| − | + | === User Status Indicator/Selector === | |
| − | |||
| − | |||
| − | |||
| − | === | ||
[[File:Agent-State-Icon-50.png|50px]] | [[File:Agent-State-Icon-50.png|50px]] | ||
| − | + | The ''User Status Selector and Indicator'' displays your current state and, when clicked, a drop-down list of other states to select. You can use the selector to change your state manually. | |
| − | '' | ||
| − | |||
| − | |||
| − | |||
| + | For more information, see section [[agent-guide/HowtoInterpretYourCurrentStateInformation|Understanding and Handling Your States]]. | ||
| − | + | [[File:Changing-Agent-State-50.png|450px|thumbnail|center|Changing your agent state]] | |
| − | [[File:Changing-Agent-State-50.png|450px|thumbnail|center| | ||
| − | === | + | === Timer === |
[[File:AD-Timer-50.png|50px]] | [[File:AD-Timer-50.png|50px]] | ||
| − | + | The timer indicates the time spent in the current agent state. | |
| − | |||
| − | === | + | === Conversations === |
[[File:AD-Conversations-50.png|50px]] | [[File:AD-Conversations-50.png|50px]] | ||
| − | + | To show or hide the Active Conversations List in the Context Information Area, click the ''Conversations'' icon. When the Active Conversations List appears, you can access the Directory, Favorites, Recents, and Dial Pad. | |
| − | |||
| + | The contents of your Context Information Area (at the center of the Agent Desktop) depend on what you are currently doing while logged in to Agent Desktop. For example, in the screenshots shown, the user is viewing the ''My Grades'' section of Agent Desktop while navigating to ''Conversations.'' | ||
| − | + | Notice the difference between the two Agent Desktop views shown. | |
| − | |||
| − | + | [[File:Conversations-In-AD-50.png|800px|thumbnail|center|Click the Conversations icon to display the Active Conversations List]] | |
| − | |||
| − | + | [[File:Conversations-2-AD-50.png|800px|thumbnail|center|The Active Conversations List appears on the Agent Desktop]] | |
| − | [[File:Conversations- | ||
| − | + | === Directory and Dial Pad === | |
| − | |||
| − | |||
| − | |||
| − | === | ||
[[File:AD-Dialpad-50.png|50px]] | [[File:AD-Dialpad-50.png|50px]] | ||
| − | + | The ''Directory and Dial Pad'' provides quick access to the following: | |
| − | + | * ''Directory'' for browsing users in your contact center | |
| − | + | * ''Favorites'' for creating your personal list of frequently called numbers | |
| − | '' | + | * ''Recent Contacts'' for viewing your previous call attempts |
| − | * '' | + | * ''Dial Pad'' for accessing the standard phone dial pad |
| − | * '' | + | * Numeric entry field for quickly initiating calls and conference calls |
| − | * '' | ||
| − | * '' | ||
| − | * | ||
| − | + | The Directory stores the names, numbers, profile photos, and user status (logged in or not logged in) of users in your contact center. Users are organized according to teams, and you can expand or collapse the full list of users within each team. | |
| − | |||
| − | + | Mousing over a user's name causes the phone icon and the chat icon to appear. Clicking on the phone icon will initiate a call to that user. Likewise, clicking on the chat icon will initiate a chat to that user. | |
| − | |||
| − | + | [[File:Internal-Call-50.png|450px|thumbnail|center|Making an internal call]] | |
| − | [[File:Internal-Call-50.png|450px|thumbnail|center| | ||
| − | + | During an active chat, clicking on the ''Directory and Dial Pad'' icon will cause the chat conversation to appear in the Contact Info Panel. Clicking on the icon again will switch your view back to the Directory and Dial Pad. | |
| − | |||
| − | === | + | === Text Input Field === |
| − | '' | + | The ''Text Input Field'' allows you to enter messages for real-time text-based interactions, such as service chat, SMS, and internal chat. |
| − | + | [[File:Type-Message-Here-50.png|450px|thumbnail|center|Type your message in the Text Input Field]] | |
| − | [[File:Type-Message-Here-50.png|450px|thumbnail|center| | ||
| − | === | + | === Selected Conversation's Documents === |
[[File:AD-Selected-Conversations-50.png|50px]] | [[File:AD-Selected-Conversations-50.png|50px]] | ||
| − | + | If a conversation or case has been selected on the Agent Desktop, the email messages, chat messages, or other documents associated with the conversation will be displayed in the Context Information Area. | |
| − | |||
| − | === | + | === Calendar === |
[[File:AD-Calendar-50.png|50px]] | [[File:AD-Calendar-50.png|50px]] | ||
| − | + | Click the ''Calendar'' icon to view and edit the user's calendar in the Context Information Area. For more information, see section [[agent-guide/HowtoOpentheCalendar|How to Open the Calendar]]. | |
| − | '' | ||
| − | + | [[File:Agent-Calendar-50.png|800px|thumbnail|center|The Agent Desktop Calendar]] | |
| − | [[File:Agent-Calendar-50.png|800px|thumbnail|center| | ||
| − | === | + | === My Cases === |
[[File:AD-My-Cases-50.png|50px]] | [[File:AD-My-Cases-50.png|50px]] | ||
| − | + | Click ''My Cases'' to work with email cases from your Team Queue, Personal Queue, or Follow-ups in the Context Information Area. For more information, see section [[agent-guide/GeneralInformationAboutHandlingEmail|General Information About Handling Email]]. | |
| − | '' | ||
| + | [[File:My-Cases-50.png|650px|thumbnail|center|My Cases contains your email cases]] | ||
| − | |||
| − | |||
| − | + | === Contacts === | |
| − | === | ||
[[File:AD-My-Cases-50.png|50px]] | [[File:AD-My-Cases-50.png|50px]] | ||
| − | + | Click ''Contacts'' to search and view contact information for the people in your directory, cases, and recent contacts list. | |
| − | '' | ||
| − | |||
| − | + | [[File:My-Cases-Search-50.png|800px|thumbnail|center|My Cases]] | |
| − | [[File:My-Cases-Search-50.png|800px|thumbnail|center| | ||
| − | === | + | === Supervision === |
[[File:Supervision-Icon-AD-50.png|50px]] | [[File:Supervision-Icon-AD-50.png|50px]] | ||
| − | + | The Supervision icon is shown only to supervisors logged in to Agent Desktop. | |
| − | |||
| − | === | + | === Chat Center === |
[[File:AD-Chat Center-50.png|50px]] | [[File:AD-Chat Center-50.png|50px]] | ||
| − | + | Click ''Chat Center'' to initiate chats with chat groups or personal chats with other users in your organization. | |
| − | '' | ||
| − | |||
| − | === | + | === My Grades === |
[[File:AD-My-Grades-50.png|50px]] | [[File:AD-My-Grades-50.png|50px]] | ||
| − | + | Click ''My Grades'' to view metrics related to your and your team's performance in the Context Information Area. For a more detailed explanation, see [[agent-guide/GeneralInformationAboutMyGrades|General Information About My Grades]]. | |
| − | '' | ||
| − | |||
| − | + | [[File:My-Grades-General-View-50.PNG|800px|thumbnail|center|My Grades]] | |
| − | [[File:My-Grades-General-View-50.PNG|800px|thumbnail|center| | ||
| − | == | + | == Controls Area (at top right of Agent Desktop)== |
| − | + | This area on the user interface provides access to help materials, application settings, and the log out function. | |
| − | === | + | === Contact Search === |
[[File:Contact-Search-Icon-50.png|50px]] | [[File:Contact-Search-Icon-50.png|50px]] | ||
| − | + | Click the ''Contact Search'' icon to display a text field for searching your contacts. | |
| − | '' | ||
| − | + | [[File:Contact-Search-Field-50.png|450px|thumbnail|center|Contact Search field]] | |
| − | [[File:Contact-Search-Field-50.png|450px|thumbnail|center| | ||
| − | === | + | === Wallboard === |
[[File:Wallboard-Icon-50.png|50px]] | [[File:Wallboard-Icon-50.png|50px]] | ||
| − | + | Clicking the ''Wallboard'' icon will direct you to the Wallboard Builder application in a new browser tab or window. Wallboards display statistics and informational widgets about your current performance and/or performance of your team. If you have the privilege to edit wallboards, you can customize them from the Wallboard Builder application. | |
| − | '' | ||
| − | === | + | === Help === |
[[File:Agent-Help-Icon-50.png|50px]] | [[File:Agent-Help-Icon-50.png|50px]] | ||
| − | + | Click the ''Help'' icon to access help materials, such as links to documentation, HR, and procedures. | |
| − | '' | ||
| − | + | [[File:AD-Help-Screen-50.png|650px|thumbnail|center|Agent Desktop Help]] | |
| − | [[File:AD-Help-Screen-50.png|650px|thumbnail|center| | ||
| − | === | + | === Settings === |
[[File:Settings-Profile-Icon-50.png|50px]] | [[File:Settings-Profile-Icon-50.png|50px]] | ||
| − | + | If you have not uploaded a user profile photo, Agent Desktop Settings is shown as a cog icon. If you have already uploaded a user profile photo, that same image is shown in place of the cog icon. Click either icon to update your settings. | |
| − | |||
| − | |||
| − | + | [[File:AD-Settings-Menu-50.png|450px|thumbnail|center|Settings]] | |
| − | [[File:AD-Settings-Menu-50.png|450px|thumbnail|center| | ||
| − | + | === Log out === | |
| − | === | ||
[[File:AD-Log-Out-Icon-50.png|50px]] | [[File:AD-Log-Out-Icon-50.png|50px]] | ||
| − | + | Click ''Log out'' to log out of your working session. | |
| − | '' | ||
| − | |||
| − | |||
| − | |||
| − | |||
| − | |||
| − | + | [[File:Log-Out-Dialog-50.png|450px|thumbnail|center|Logging out of Agent Desktop]] | |
| − | |||
| − | + | == Context Information Area (at center of screen) == | |
| − | + | The ''Context Information Area'' displays web pages and forms that can be used to provide the information you need in order to serve your customers (e.g., customer profile) and enter new information based on your conversation with the customer (e.g., a purchase order). The appearance of content in this area is often synchronized with the delivery of a customer interaction to your desktop (e.g., during call ringing). For more information, see section [[agent-guide/UnderstandingScreen-pop|Understanding Screen-pop]]. | |
| − | |||
| − | |||
| − | |||
| − | |||
| − | |||
| − | |||
| − | |||
| − | + | The Context Information Area is also used for the following: | |
| − | + | * Your grades and wallboards | |
| − | + | * Standard email processing functions such as message reviewing, reply editing, and case search | |
| + | * Knowledge Base | ||
| + | * Pop-out chat panels | ||
| + | * The display of data received from customers during chat sessions | ||
| + | * Teams and services dashboards | ||
| + | * Calendar display | ||
Latest revision as of 04:31, 29 May 2024
User Interface Overview
The Agent Desktop application user interface is shown with an active call. Its main elements are shown, and these elements are often referred to in the subsequent sections of this guide.
Menu Elements and Functions (at left side of Agent Desktop)
The elements of the Agent Desktop application screens perform the following functions.
Active Conversations List (ACL)
The Active Conversations List shows all your active interactions. For example, if you make a consultation call while holding a service call, this list will show them as two separate items. When you select a particular call or chat from this list, more information about this interaction and the related controls will appear in the Contact Info Panel. When you select an email from this list, the email content and the related controls will appear in the Context Information Area. For emails, the Active Conversations List also provides access to your team email queue, your personal email queue, and case history.
Contact Info Panel
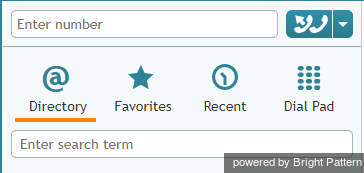
The Contact Info Panel provides information about and controls the interaction selected in the Active Conversations List. This is the area of the application that you will use most often to handle your active (established) calls and chats.
The Contact Info Panel contains the following:
- Service Selector for associating calls with the specific services your contact center provides
- Number Input Field for entering phone numbers for outbound and internal calls
- Directory and Dial Pad for accessing your company's directory of users and accessing the standard phone dial pad
User Status Indicator/Selector
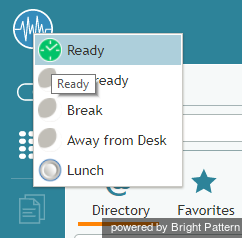
The User Status Selector and Indicator displays your current state and, when clicked, a drop-down list of other states to select. You can use the selector to change your state manually.
For more information, see section Understanding and Handling Your States.
Timer
The timer indicates the time spent in the current agent state.
Conversations
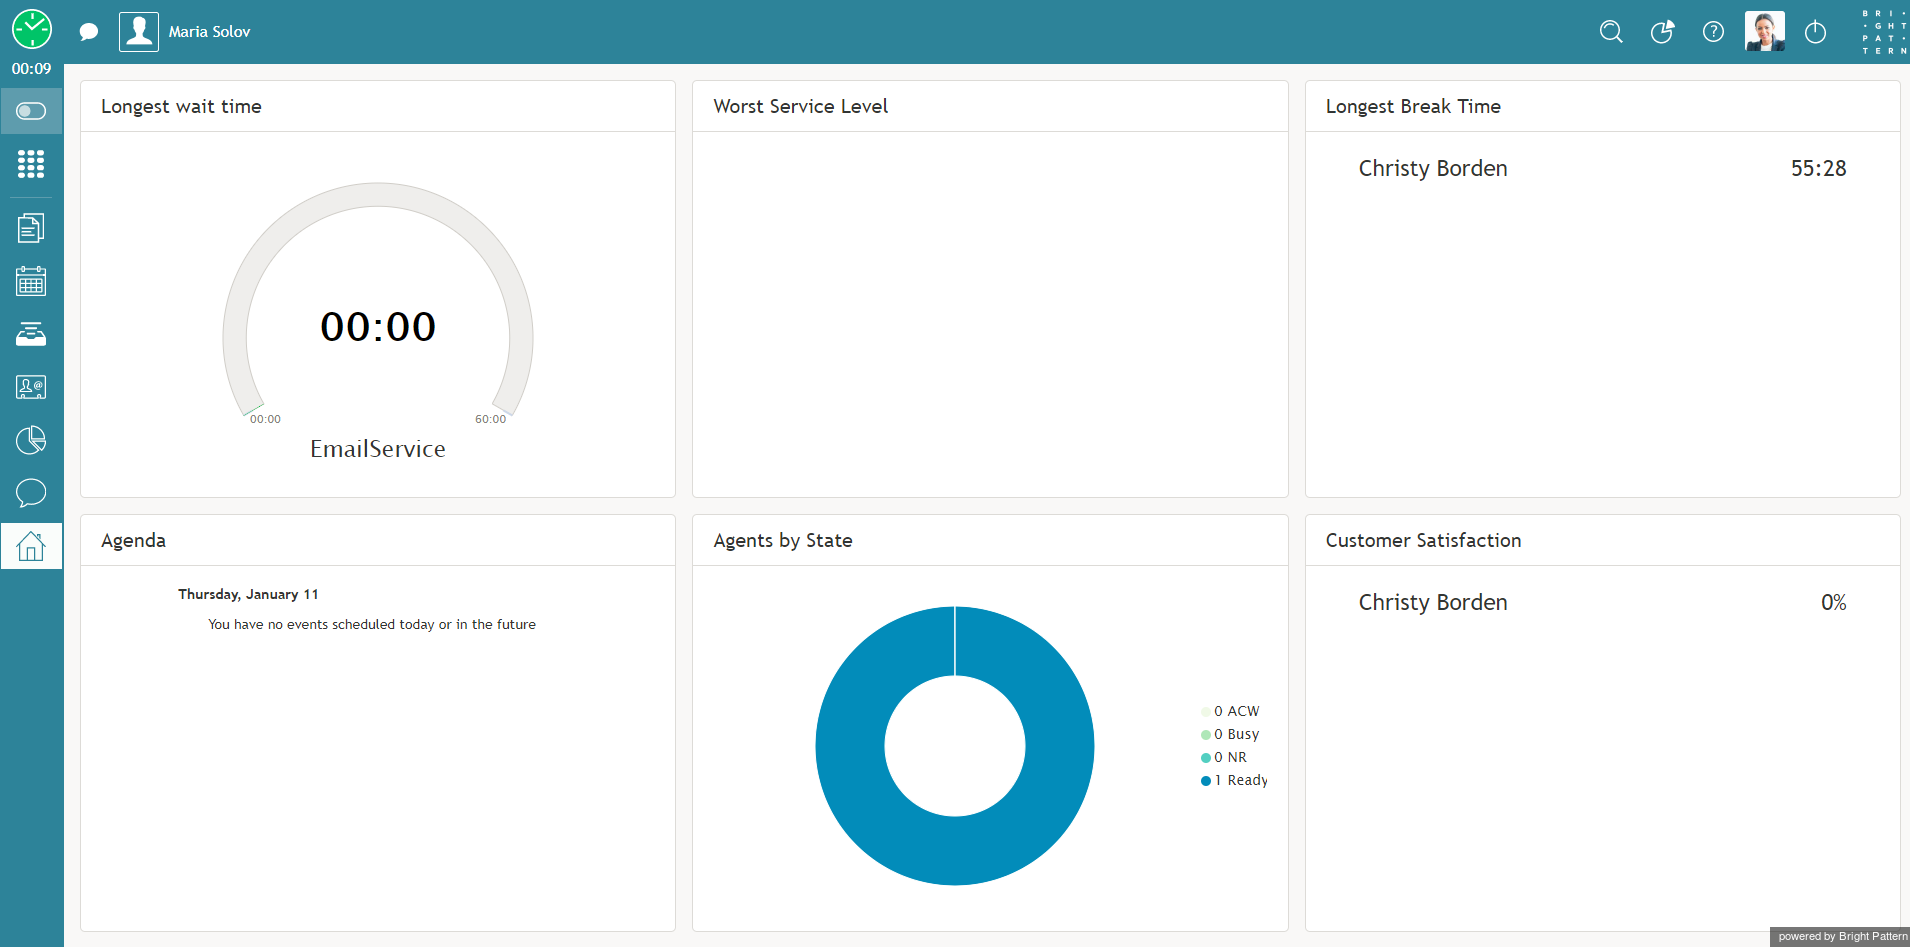
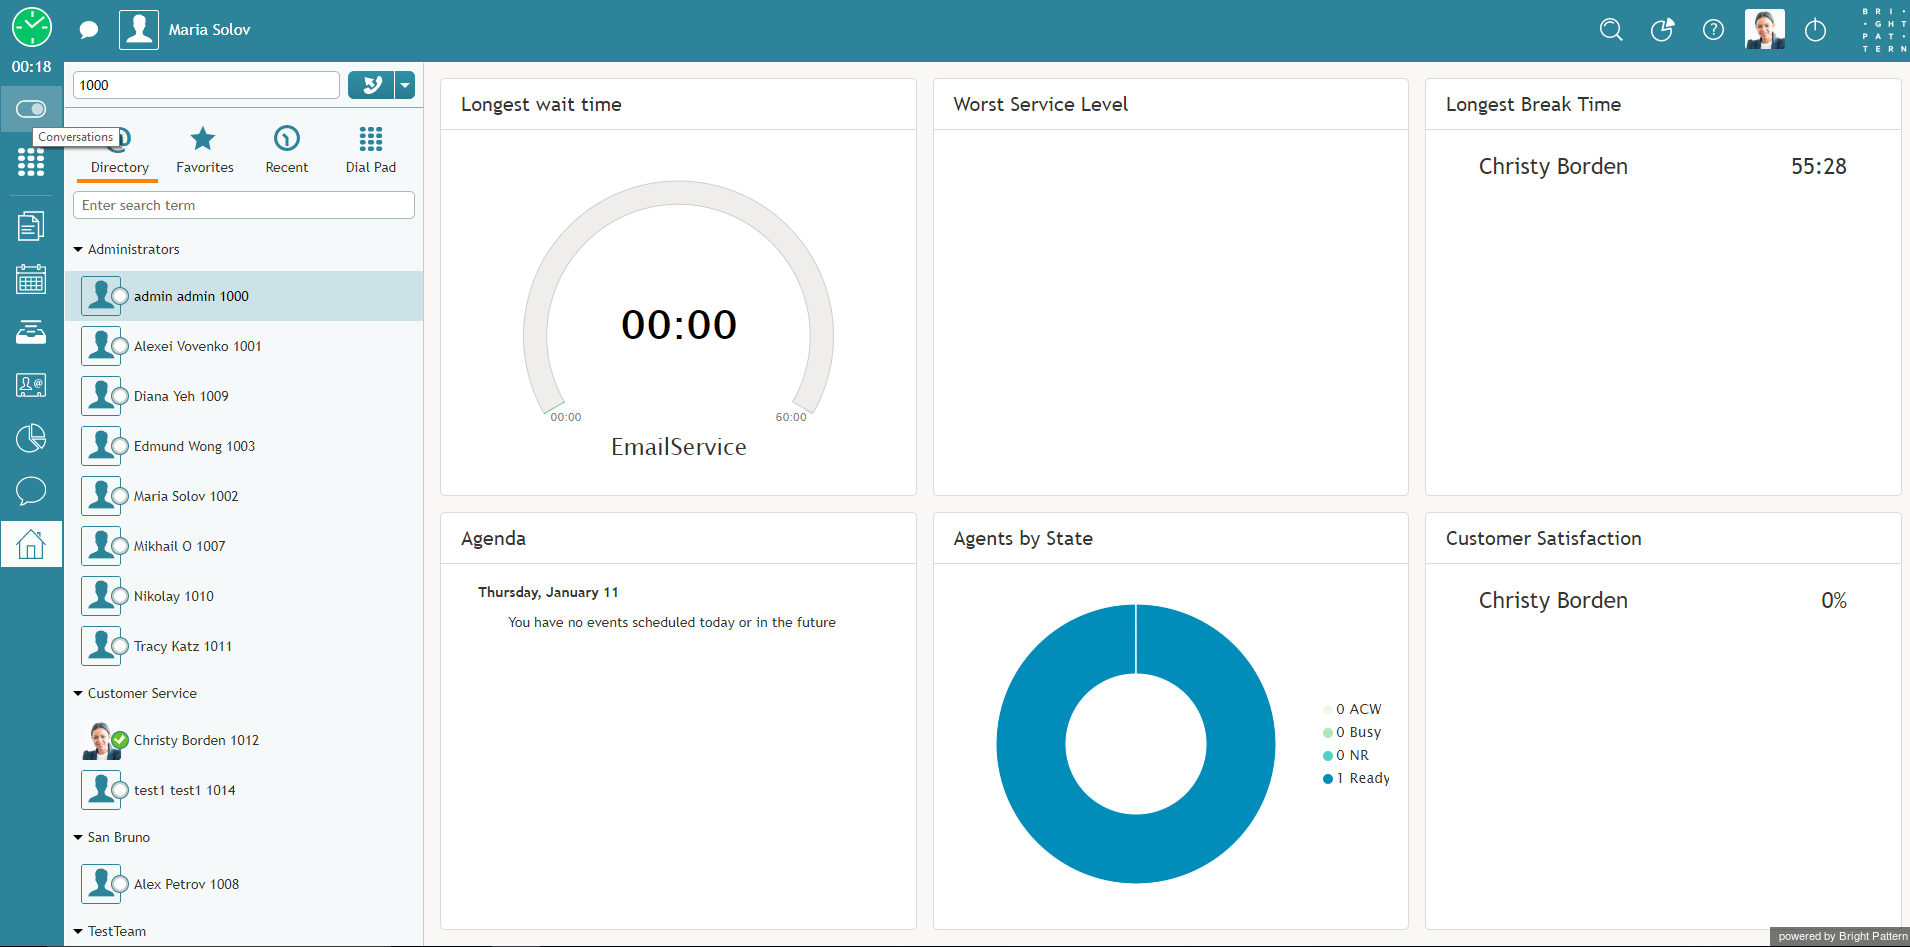
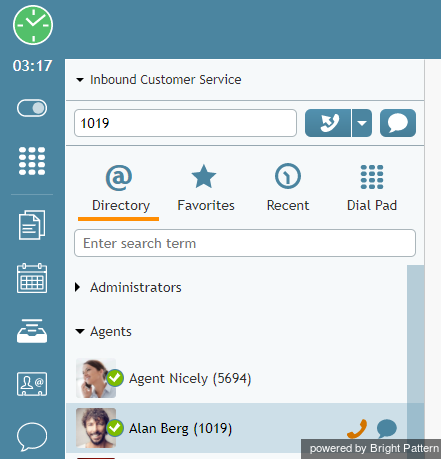
To show or hide the Active Conversations List in the Context Information Area, click the Conversations icon. When the Active Conversations List appears, you can access the Directory, Favorites, Recents, and Dial Pad.
The contents of your Context Information Area (at the center of the Agent Desktop) depend on what you are currently doing while logged in to Agent Desktop. For example, in the screenshots shown, the user is viewing the My Grades section of Agent Desktop while navigating to Conversations.
Notice the difference between the two Agent Desktop views shown.
Directory and Dial Pad
The Directory and Dial Pad provides quick access to the following:
- Directory for browsing users in your contact center
- Favorites for creating your personal list of frequently called numbers
- Recent Contacts for viewing your previous call attempts
- Dial Pad for accessing the standard phone dial pad
- Numeric entry field for quickly initiating calls and conference calls
The Directory stores the names, numbers, profile photos, and user status (logged in or not logged in) of users in your contact center. Users are organized according to teams, and you can expand or collapse the full list of users within each team.
Mousing over a user's name causes the phone icon and the chat icon to appear. Clicking on the phone icon will initiate a call to that user. Likewise, clicking on the chat icon will initiate a chat to that user.
During an active chat, clicking on the Directory and Dial Pad icon will cause the chat conversation to appear in the Contact Info Panel. Clicking on the icon again will switch your view back to the Directory and Dial Pad.
Text Input Field
The Text Input Field allows you to enter messages for real-time text-based interactions, such as service chat, SMS, and internal chat.
Selected Conversation's Documents
If a conversation or case has been selected on the Agent Desktop, the email messages, chat messages, or other documents associated with the conversation will be displayed in the Context Information Area.
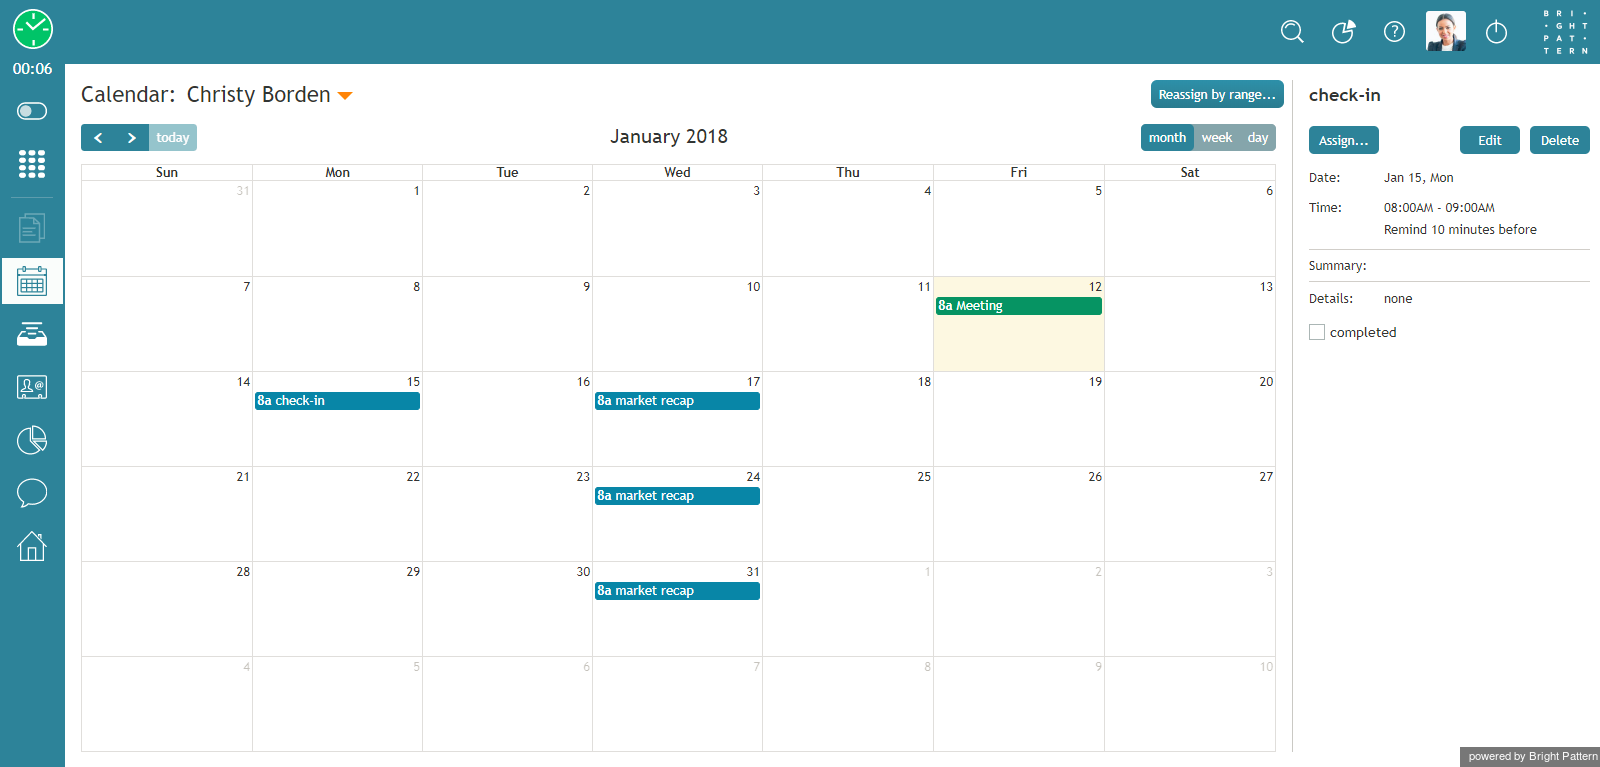
Calendar
Click the Calendar icon to view and edit the user's calendar in the Context Information Area. For more information, see section How to Open the Calendar.
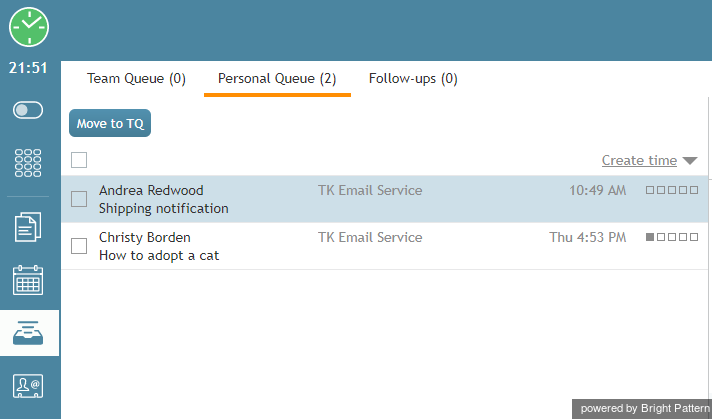
My Cases
Click My Cases to work with email cases from your Team Queue, Personal Queue, or Follow-ups in the Context Information Area. For more information, see section General Information About Handling Email.
Contacts
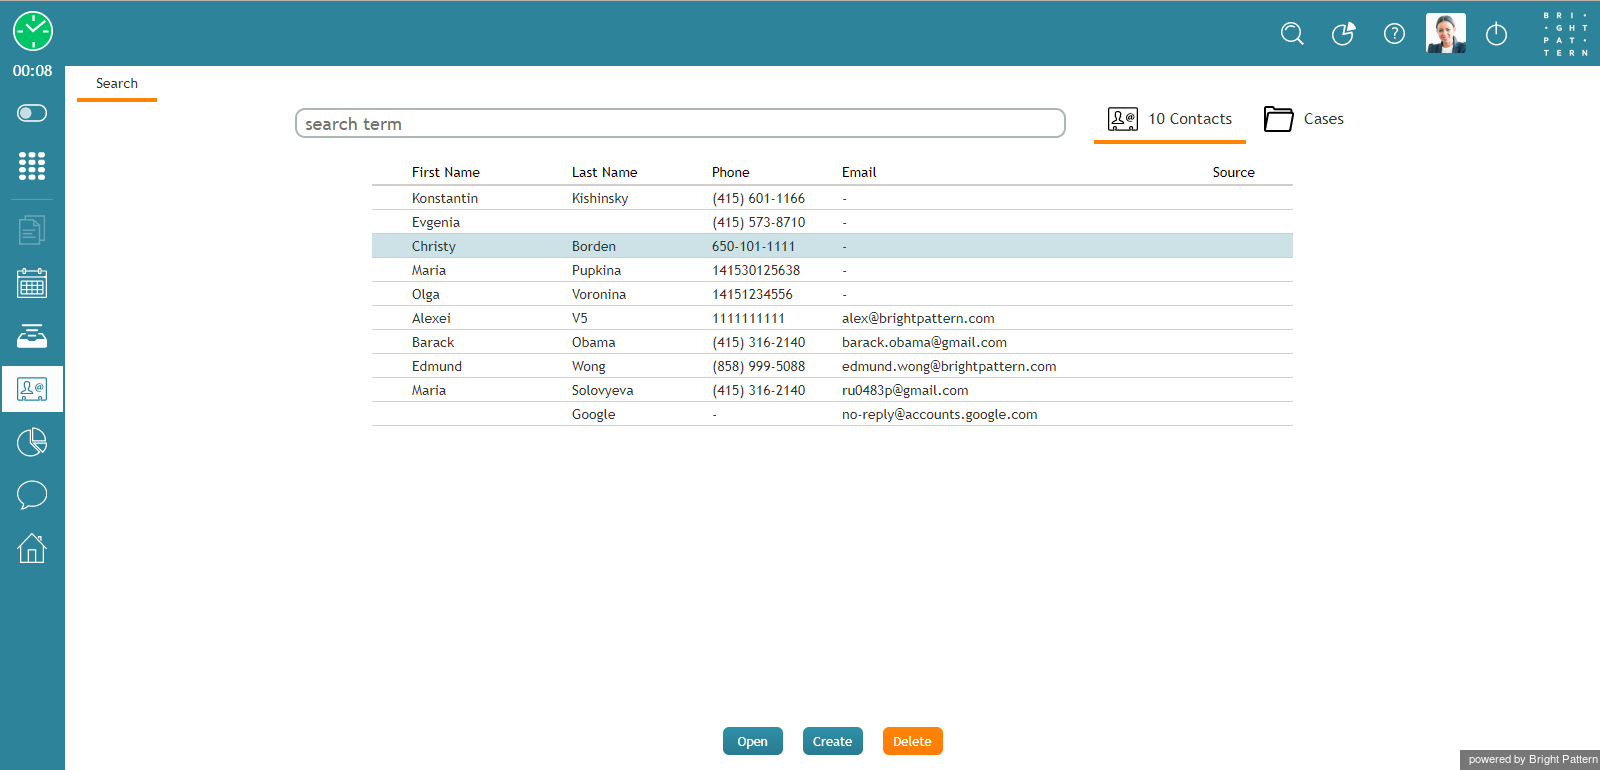
Click Contacts to search and view contact information for the people in your directory, cases, and recent contacts list.
Supervision
The Supervision icon is shown only to supervisors logged in to Agent Desktop.
Chat Center
Click Chat Center to initiate chats with chat groups or personal chats with other users in your organization.
My Grades
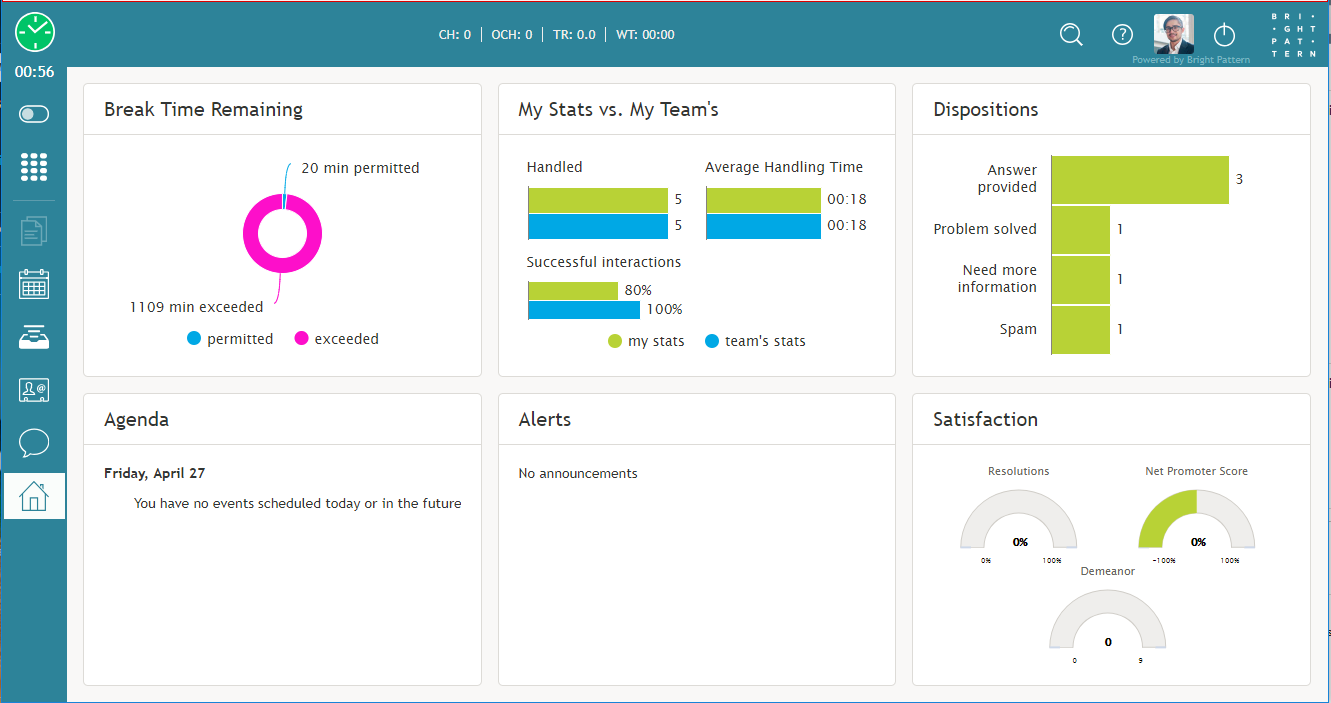
Click My Grades to view metrics related to your and your team's performance in the Context Information Area. For a more detailed explanation, see General Information About My Grades.
Controls Area (at top right of Agent Desktop)
This area on the user interface provides access to help materials, application settings, and the log out function.
Contact Search
Click the Contact Search icon to display a text field for searching your contacts.
Wallboard
Clicking the Wallboard icon will direct you to the Wallboard Builder application in a new browser tab or window. Wallboards display statistics and informational widgets about your current performance and/or performance of your team. If you have the privilege to edit wallboards, you can customize them from the Wallboard Builder application.
Help
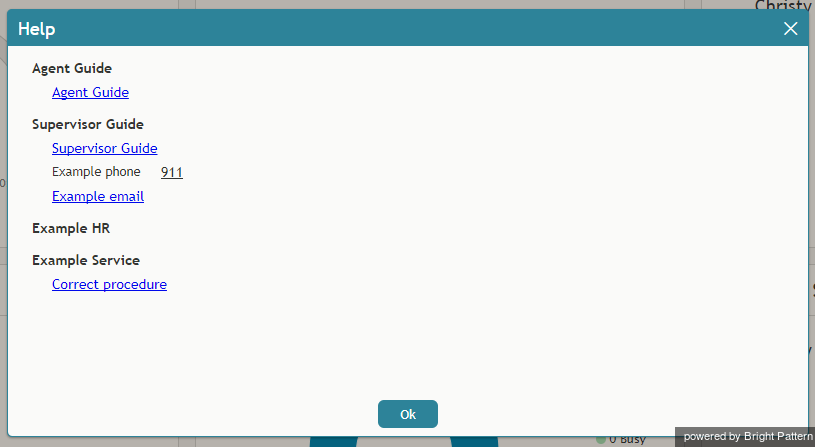
Click the Help icon to access help materials, such as links to documentation, HR, and procedures.
Settings
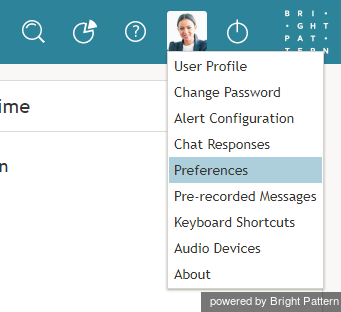
If you have not uploaded a user profile photo, Agent Desktop Settings is shown as a cog icon. If you have already uploaded a user profile photo, that same image is shown in place of the cog icon. Click either icon to update your settings.
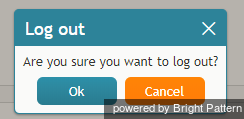
Log out
Click Log out to log out of your working session.
Context Information Area (at center of screen)
The Context Information Area displays web pages and forms that can be used to provide the information you need in order to serve your customers (e.g., customer profile) and enter new information based on your conversation with the customer (e.g., a purchase order). The appearance of content in this area is often synchronized with the delivery of a customer interaction to your desktop (e.g., during call ringing). For more information, see section Understanding Screen-pop.
The Context Information Area is also used for the following:
- Your grades and wallboards
- Standard email processing functions such as message reviewing, reply editing, and case search
- Knowledge Base
- Pop-out chat panels
- The display of data received from customers during chat sessions
- Teams and services dashboards
- Calendar display
< Previous | Next >

