How to Change Default Email Font
Agents may set their personal font style for email replies and drafts. Settings for font face, size, and text color can be changed in Agent Desktop Settings.
Step 1: Update your Settings
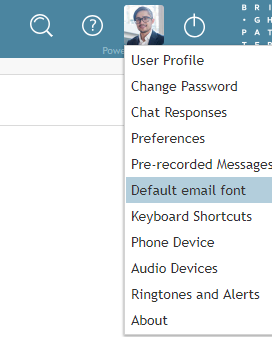
To customize your email font, navigate to Settings and select Default email font.
Step 2: Select desired font style
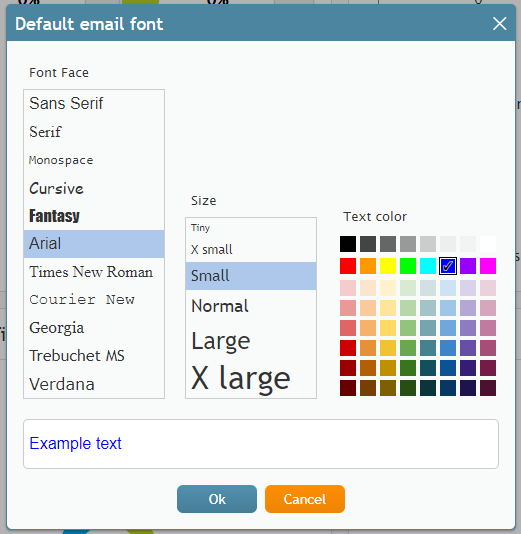
The following dialog box will pop up, offering a selection of font face, size and face color. Select and preview the desired font face, size, and color. Then click Ok to save your changes. Your default email font settings will be saved and applied to all new drafts and replies.
Step 3: View new font settings in email drafts and replies
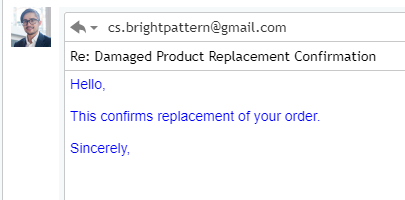
To check that your new email font settings have been applied, open a new draft or a reply to a message. When a new draft is opened or when a reply is started, the font in draft is automatically set to your default font.
If you remove font formatting from a selection of pasted text, the font will return to the user default as specified in Settings. When you receive an email as a transfer from queue with the existing draft in place, the font in the draft does not change unless you remove font formatting manually.


