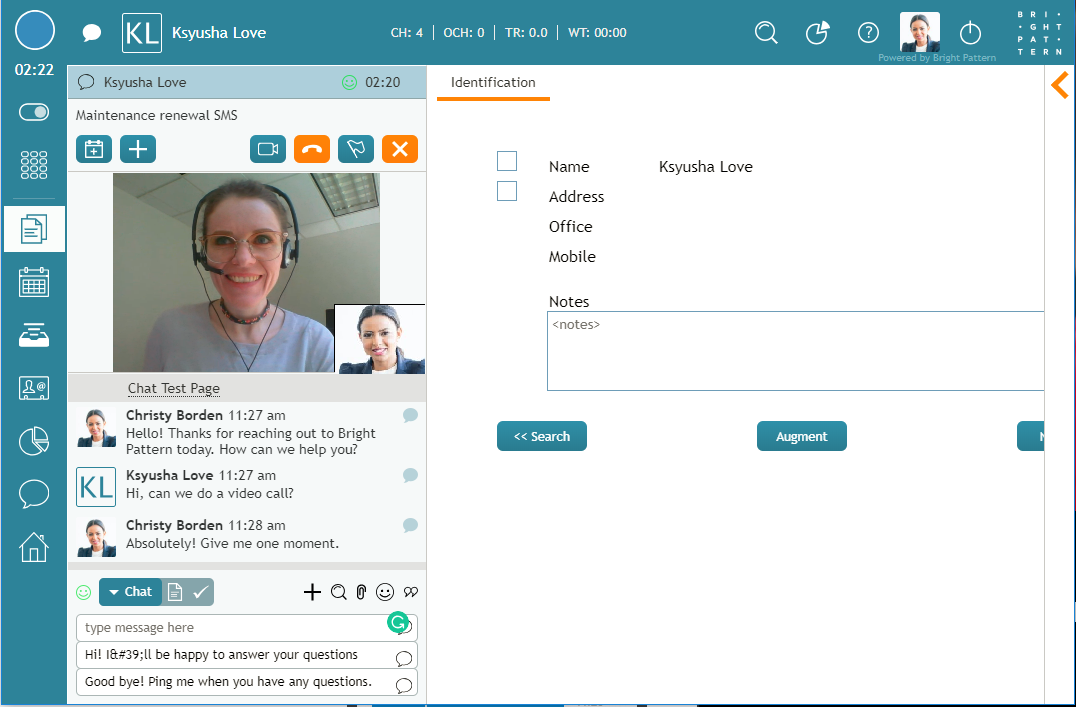
How to Have a Video Chat
During an active chat session, both you and your customers have the ability to initiate video chat, allowing you to easily switch between chat and video.
Note: Video chat must always start as an audio chat, with the option to upgrade to video. Additionally, in order to have video calls via chat, both this and the VoIP call settings must be enabled by your contact center administrator.
To initiate a video chat with your customer, follow these steps:
- First, you must first initiate an audio chat. To initiate an audio chat, click the headset icon
.
- Next, click the video on
button. When your video is being sent, a small video of you is shown in the bottom right corner of the video area. If there is no video from the visitor, and you are still sending video, the main video screen will be black.
- If your customer wants to initiate a video chat, they must first click the headset icon
, then the video on
button. Note: The background color of the button your customers see will vary depending on how your chat widget is configured.
- To end both video and audio chats, click on the telephone icon
.
Switching from Video to Audio-Only Chat
Because both video and VoIP settings must be enabled for video chat to work, either you or your customer may turn off your camera but continue having an audio-only chat.
To switch from video to audio, turn off your camera by clicking the video off button. If your customer wants to turn off their camera, they may click their video off
button. If there is no video from the visitor, and you are still sending video, the main video screen will be black.

