How to Transfer Your Chat Session
For any number of reasons, you may wish to transfer a chat interaction to another agent or supervisor, or you may wish to conference the chat (i.e., invite another agent or supervisor to join the chat) for a group conversation.
Transferring and Conferencing with Another Agent
You can connect another agent to your chat session for a consultation and/or completely transfer the session to that agent for handling. Before connecting another agent, consider contacting this agent via internal chat or internal call to check the agent's availability to participate in your conference and/or accept the transferred session.
To set up a chat conference, follow these steps:
- In the chat session pane, click the add icon
 .
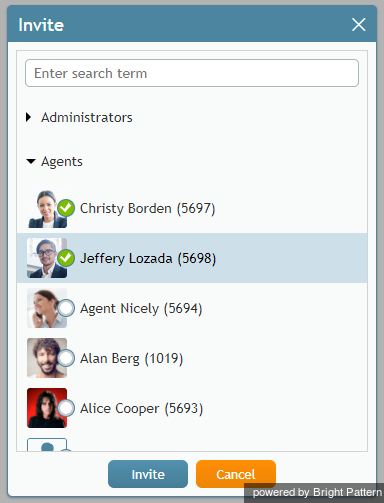
. - In the Invite window that appears, select the agent you wish to connect to your chat.
- Click Invite. The agent will be added to the chat and will be able communicate with both you and the customer.
To transfer the chat session completely to another agent, follow these steps:
- Set up a chat conference as explained in the previous set of steps.
- Upon confirmation that the new agent is connected to the chat, click the End Chat button in the Contact Info Panel to leave the chat session.
- The other agent will continue the chat conversation with the customer.
Transferring a Chat Using the Directory
You can transfer your chat session using the chat directory in a similar way:
- In the chat session pane, click the add icon
 .
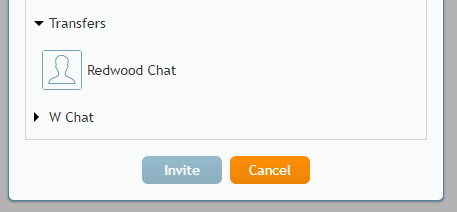
. - In the window that appears, select the desired chat directory and click Invite.
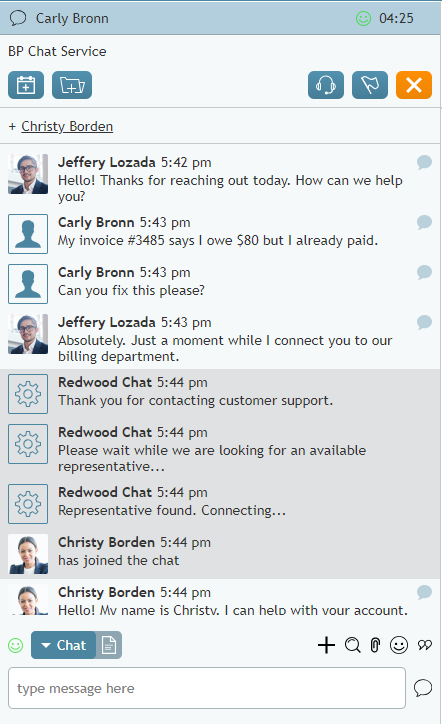
- At this point, you will still be connected to the chat session and you will see when the other user or agent has connected to the chat. Depending on the chat configuration, you may see an automated message sent from a user or agent in that chat directory to the customer.
- Click the End Chat button in the Contact Info Panel to leave the chat session. The session will remain in the chat directory to be connected to another agent.
< Previous | Next >


