Setting up Private S3 Storage
Bright Pattern Contact Center allows you to export audio recordings and screen recordings to external storage servers, such as Amazon Web Services (AWS) S3 or Minio for storage or playback.
This article explains how to 1) set up Minio as S3-compatible local storage, 2) get the access credentials to integrate Bright Pattern Contact Center with Minio, and 3) use those credentials to configure an Amazon AWS integration account.
You can learn more about integration accounts in section Amazon AWS Integration of this guide.
Procedure
Step 1: Install Minio
You can install Minio on either a Linux- or Windows-based system. After installing the app, you will have the Minio credentials needed for integrating Minio with your contact center as a private S3 storage option.
If Using a Linux-Based System
Docker container:
docker run -p 9000:9000 -v /mnt/data:/data -v /mnt/config:/root/.minio minio/minio server /data

Linux x86 (CentOS6 or CentOS7):
wget https://dl.minio.io/server/minio/release/linux-amd64/minio
chmod +x minio
./minio server /mnt/data</no wiki>
Get credentials
After the app is installed, the console will show these credentials:
- Endpoint: http://<hostname>:9000 (e.g., http://127.0.0.1:9000)
- AccessKey: <generated accesskey>
- SecretKey: <generated secretkey>
Copy the Endpoint, AccessKey, and SecretKey. You will be using these credentials next to set up your Amazon AWS integration account in Contact Center Administrator.
If Using a Windows-Based System
- Download the Minio application.
- Run:
minio.exe server F:\Data
Get credentials
After the app is installed, the console will show these credentials:
- Endpoint: http://<hostname>:9000 (e.g., http://127.0.0.1:9000)
- AccessKey: <generated accesskey>
- SecretKey: <generated secretkey>
Copy the Endpoint, AccessKey, and SecretKey. You will be using these credentials later to set up your Amazon AWS integration account in Contact Center Administrator.
Step 2: Create a bucket
A bucket is a container for stored objects. Before you can export recordings to your private S3 storage, you first have to create a bucket to store them.
- Go to the Minio web interface. Note that by default, Minio uses port 9000 for access.
- Log in to Minio using your AccessKey and SecretKey.
- Create a new bucket and name it (e.g., "test").
Step 3: Integrate with Minio
After Minio is installed and you have a bucket, you can configure your contact center to work in an integrated manner with Minio. This is done in the Contact Center Administrator application.
Add integration account
- In the Contact Center Administrator application, go to Call Center Configuration > Integration Accounts.
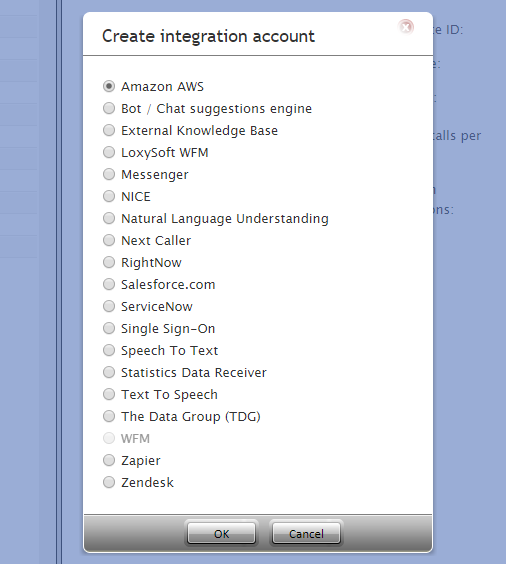
- Click the Add button (+) to add a new integration account of type Amazon AWS. (Note that in order to add this account type, the AWS feature must first be enabled for your contact center by your system administrator.)
Edit integration account properties
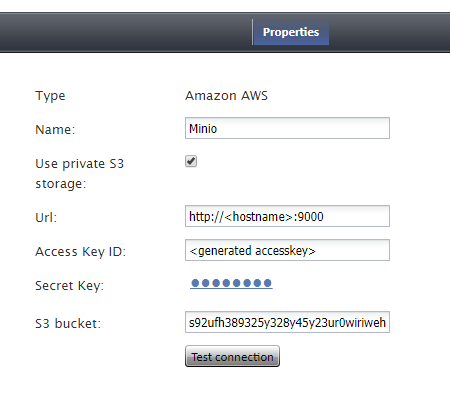
- Name the integration account (any name).
- Select the Use private S3 storage checkbox.
- In field Url, paste the Minio endpoint that you copied earlier.
- In field Access Key ID, paste the Minio AccessKey.
- In field Secret Key, paste the Minio SecretKey.
- In field S3 bucket, add the name of the bucket you created.
- Click Apply to save your changes.
Your S3-compatible private storage option is now set up and ready to be used for storing screen recordings, call recordings, and so forth.
For more information about integration account properties, see the Contact Center Administrator Guide, section Amazon AWS Integration.


