(Redirected from latest:Contact-center-administrator-guide/WebChatConfiguration)
How to Configure Web Chat
This procedure explains how to configure a chat scenario, chat service, and chat scenario entry point to work together to display a chat widget on your website. By the end of this procedure, you should have a working chat widget on a webpage that connects customers to your contact center.
Step 1: Create or Select a Chat Scenario
- Go to Configuration > Scenarios > Chat.
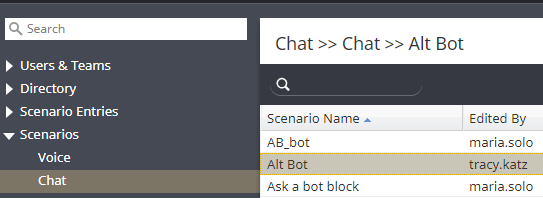
Configuration > Scenarios > Chat - Either select an existing Chat Scenario from the list, or click the Add from template
 button at the bottom of the screen to create a new chat scenario from the “Mobile Chat” template.
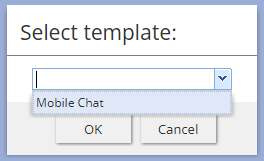
Select the "Mobile Chat" template - Creating a new chat scenario from a template will open the Scenario Builder application in a new browser tab or window. For the purpose of this simple setup, leave the scenario as-is and click Save.

Name the scenario - Give the scenario a unique name (e.g., "Super Chat") and click Save. Your new scenario will appear in the list of scenarios.


Step 2: Create or Select a Chat Service
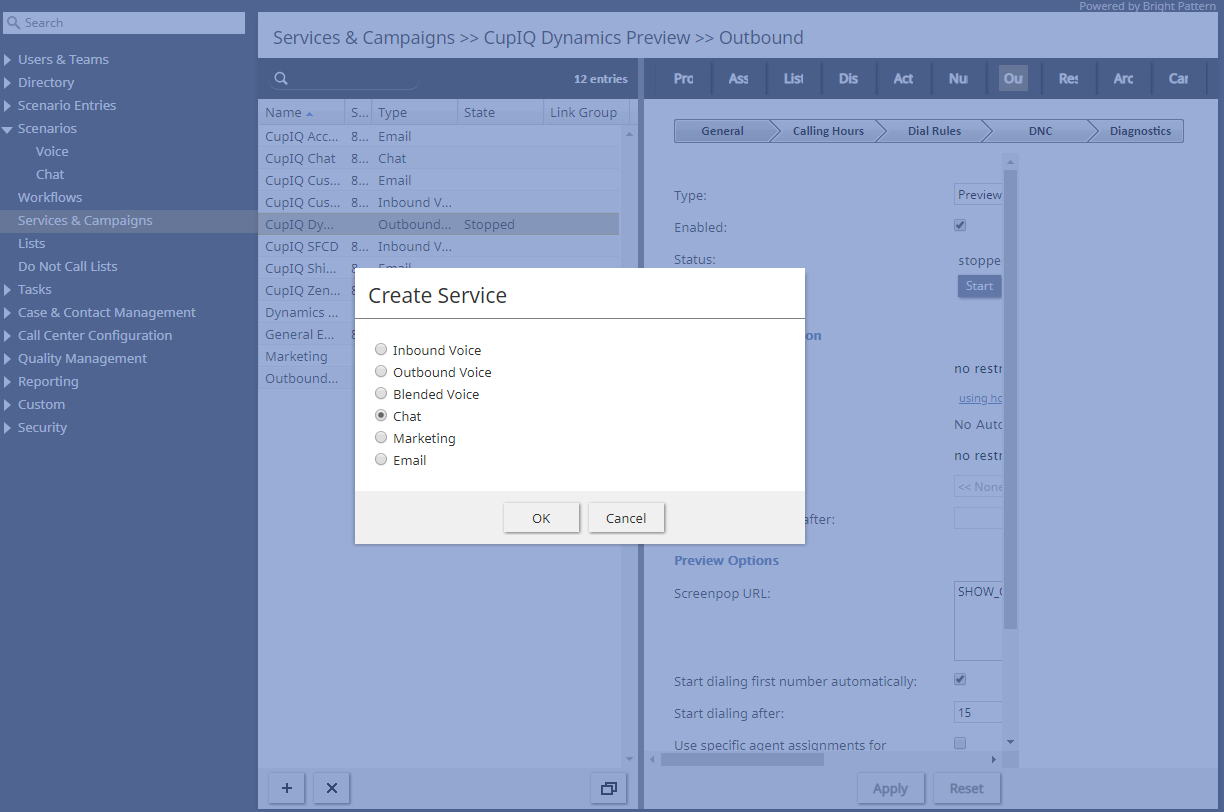
- Go to Configuration > Services & Campaigns and choose a chat service to use with your chat scenario.
- If there are no existing services of type “Chat,” you have to create one.
How to Add a New Chat Service
- Click the Add service button and select Chat.
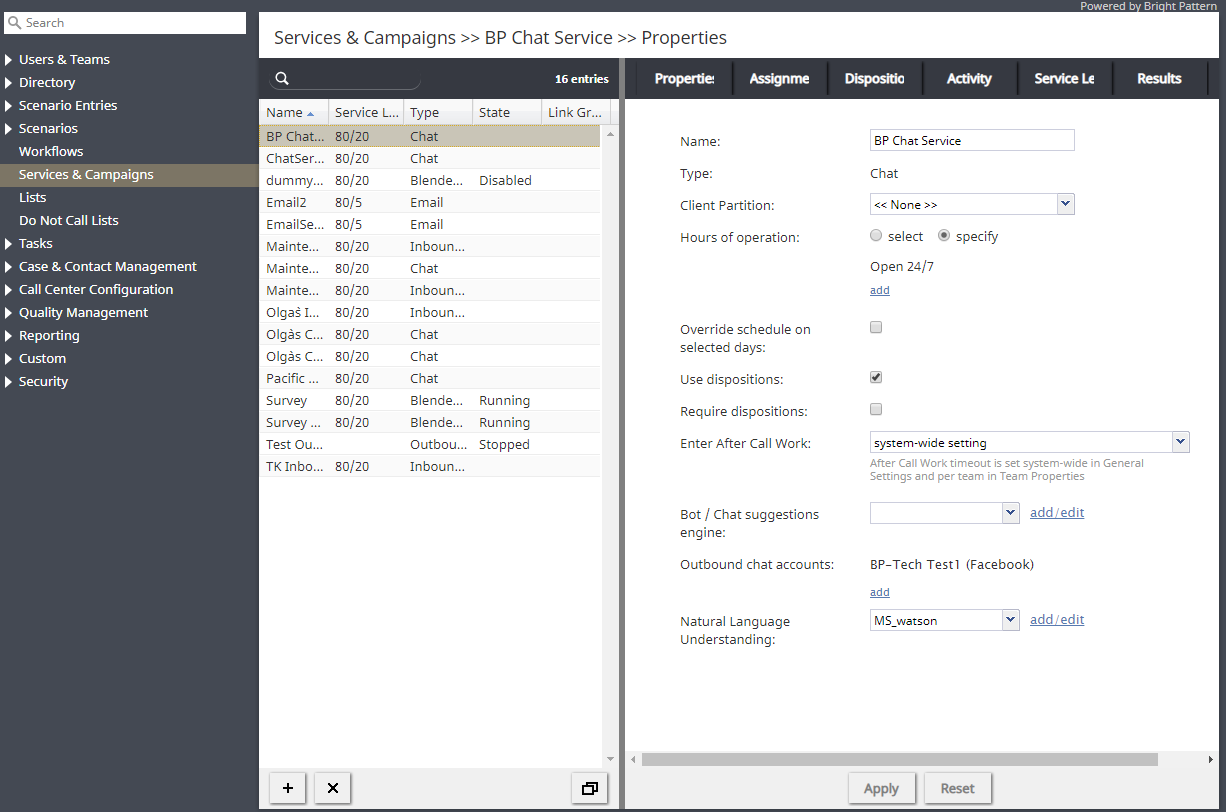
Select the service called "Chat" - In the Properties tab, fill out the service properties as appropriate, and click Apply.
- At the most basic level, give the new chat service a name (e.g., "Pacific Chat"). For definitions of each property, see the Contact Center Administrator Guide, section Properties Tab.
Services & Campaigns > Properties - Next, you need to assign a team, an administrator, and a reviewer (optional) to the service. This is done in the Assignments tab.
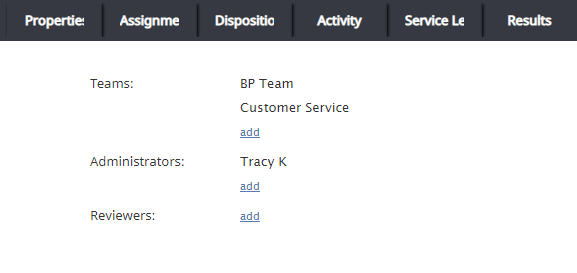
Assign a team and administrator to the service


Step 3: Create or Choose a Chat Scenario Entry
- Go to Configuration > Scenario Entries > Messaging/Chat and select a scenario entry point to use with your chat scenario. The entry point is what starts the scenario.
Messaging/Chat scenario entries list - If there are no existing chat scenario entries shown, you have to create one.

How to Add a New Chat Scenario Entry
- Click the Add chat scenario entry button.
- In the Properties tab, fill in the properties as appropriate (see below for required and optional properties). For definitions, see the Contact Center Administrator Guide, section Messaging/Chat.
Required Properties
In the Properties tab, make sure to address the following fields right now. These are critical to chat configuration.

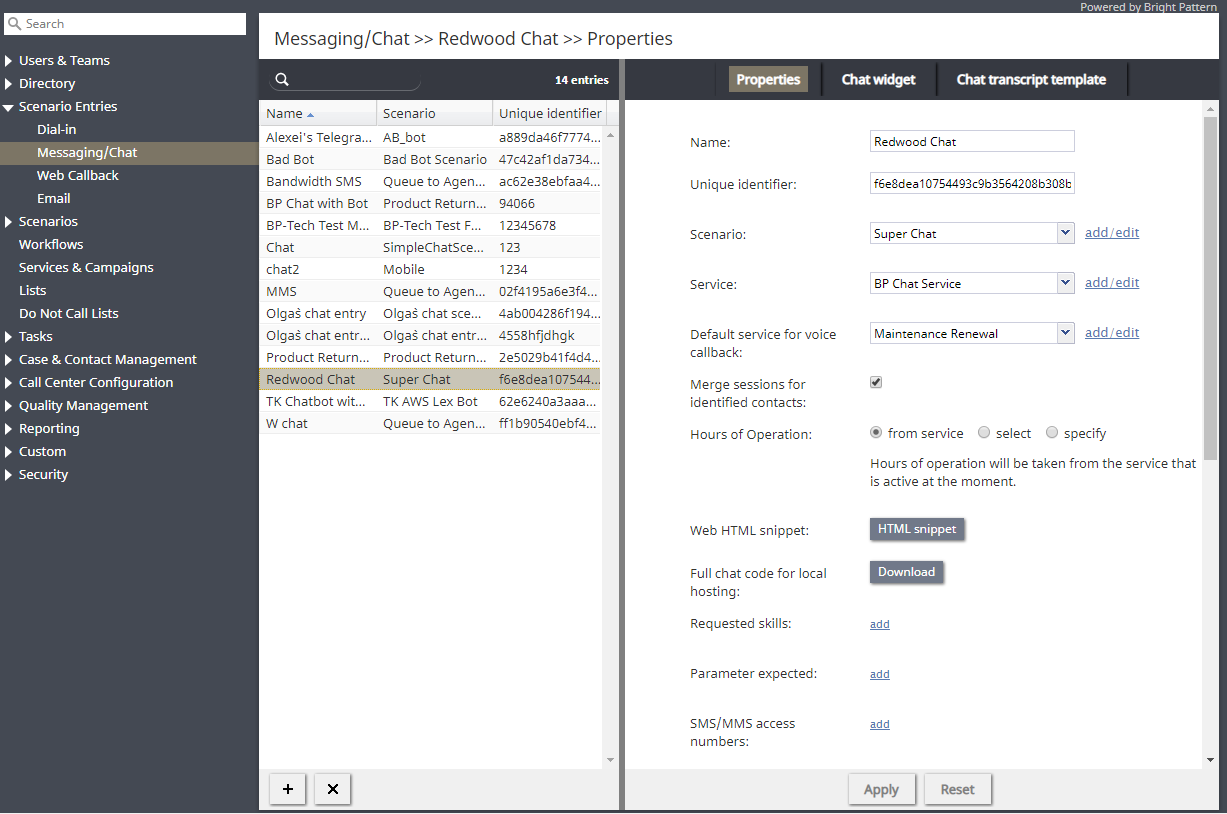
- Name - The unique name (any) of the chat scenario entry (e.g., "Redwood Chat")
- Unique identifier - An automatically generated, long string of characters that identifies the chat entry (e.g., "1f03f4090e4b4ffe8bb55365812e7a06")
- Scenario - Choose the Chat Scenario you selected or created in step 1 of this procedure (e.g., "Super Chat"). This is where the parts come together to make chat possible.
- Service - Choose the Chat Service you selected or created in step 2 of this procedure (e.g., "Pacific Chat"). This is where the parts come together to make chat possible.
Other Properties
The remaining properties are optional at this time. You can come back to them later.
- Default service for voice callback - Select a voice service if your agents will need to make a call (note: it needs to be a voice service).
- Merge sessions for identified contacts - This checkbox is what makes omnichannel possible (i.e., a recognized Facebook Messenger chat session or a recognized phone number can be merged together).
- Web HTML snippet - Come back to this button after you have completed and saved all your properties options. The HTML snippet is what you will be embedding into your webpages in order to make chat functional
- Full chat code for local hosting - Click this if you will be customizing chat and hosting it on your own website. Bright Pattern provides this code for customers whose websites do not accommodate integration with Bright Pattern chat.
- Requested skills - The auxiliary skills that agents need in order to accept a chat
- SMS/MMS access numbers - Phone numbers that will be used for receiving/sending SMS/MMS messages from/to customers. All incoming messages to this account will start the chat scenario. If no such accounts are not selected here, your scenario is strictly web chat.
- Messenger Accounts - The social messenger accounts that will be used for receiving/sending messages from/to customers. All incoming messages to this account will start the chat scenario. Note that in order to use messenger accounts, messenger integration accounts must be configured for your contact center. If no such accounts are not selected here, your scenario is strictly web chat.
- Bot / Chat suggestions engine - The engine that will provide suggested replies to the agent during chat. Note that in order to use a bot/chat suggestions engine, you must have an integration account configured for your contact center.
- Connect agent by phone automatically - When selected, this option enables automatic connection of an agent to a phone number that a customer sends. If not selected, the agent must take the additional step to dial a number manually.
- Connect after delay of - If Connect agent by phone automatically is selected, you may configure a delay (in seconds) for the connection between agent and customer.
- Queueing priority - The priority level of the customer in the queue (e.g., “1” is high priority, “3” is low, etc.). Leave the queuing priority as-is unless you want to de-prioritize the caller.
- Chat nick for system messages - The name for this scenario entry that will be shown with system messages sent to customers in the chat (e.g., “Redwood Customer Service has joined the chat!”)
- How long an agent could wait for reply before chat times out - The amount of time (in minutes) between replies for the session to timeout
- How long a client browser may stay unresponsive before chat times out - The amount of time (in minutes) that the browser has been idle for the session to timeout. Note: If you are in an area where service is bad, you may want to increase the timeout.
- Visible to agents - When this checkbox is selected, this scenario entry will appear as an entry for all new chat sessions and chat transfers (e.g., agents can receive the chat from a different service). Note that services are added in the Directory folder.
- Scenario parameters - This section will be deprecated.
- Chat session icon - Allows you to set an image to this scenario entry (i.e., in chat, will override the agent’s image in the chat widget). This property will be deprecated. The chat session icon can be added in Chat Widget configuration. See section Chat Widget tab > Chat Styling > Show agent pic.
Step 4: Edit Chat Widget Style
You can edit the appearance (i.e., color, font size, location, etc.) of the chat widget in the Chat Styling section. This step is important to complete; if you don't do this, your contact tab (see Step 5 of this procedure) will not appear in preview.
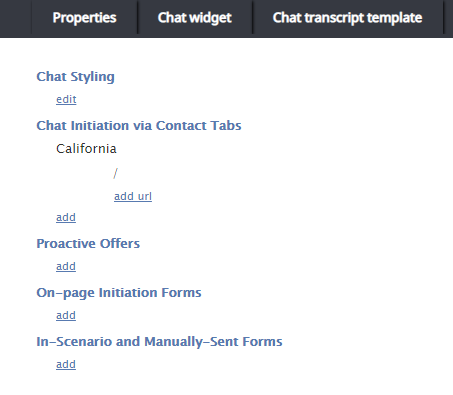
- Click on the Chat widget tab.
- Beneath Chat Styling, click edit.
Chat Styling > edit - The Chat Widget Configuration editor will open in a new browser tab or window. Edit the Chat Widget Styling properties and fields as desired. At the most basic level, you can leave everything as-is at this point and save your changes. You can come back to this later.
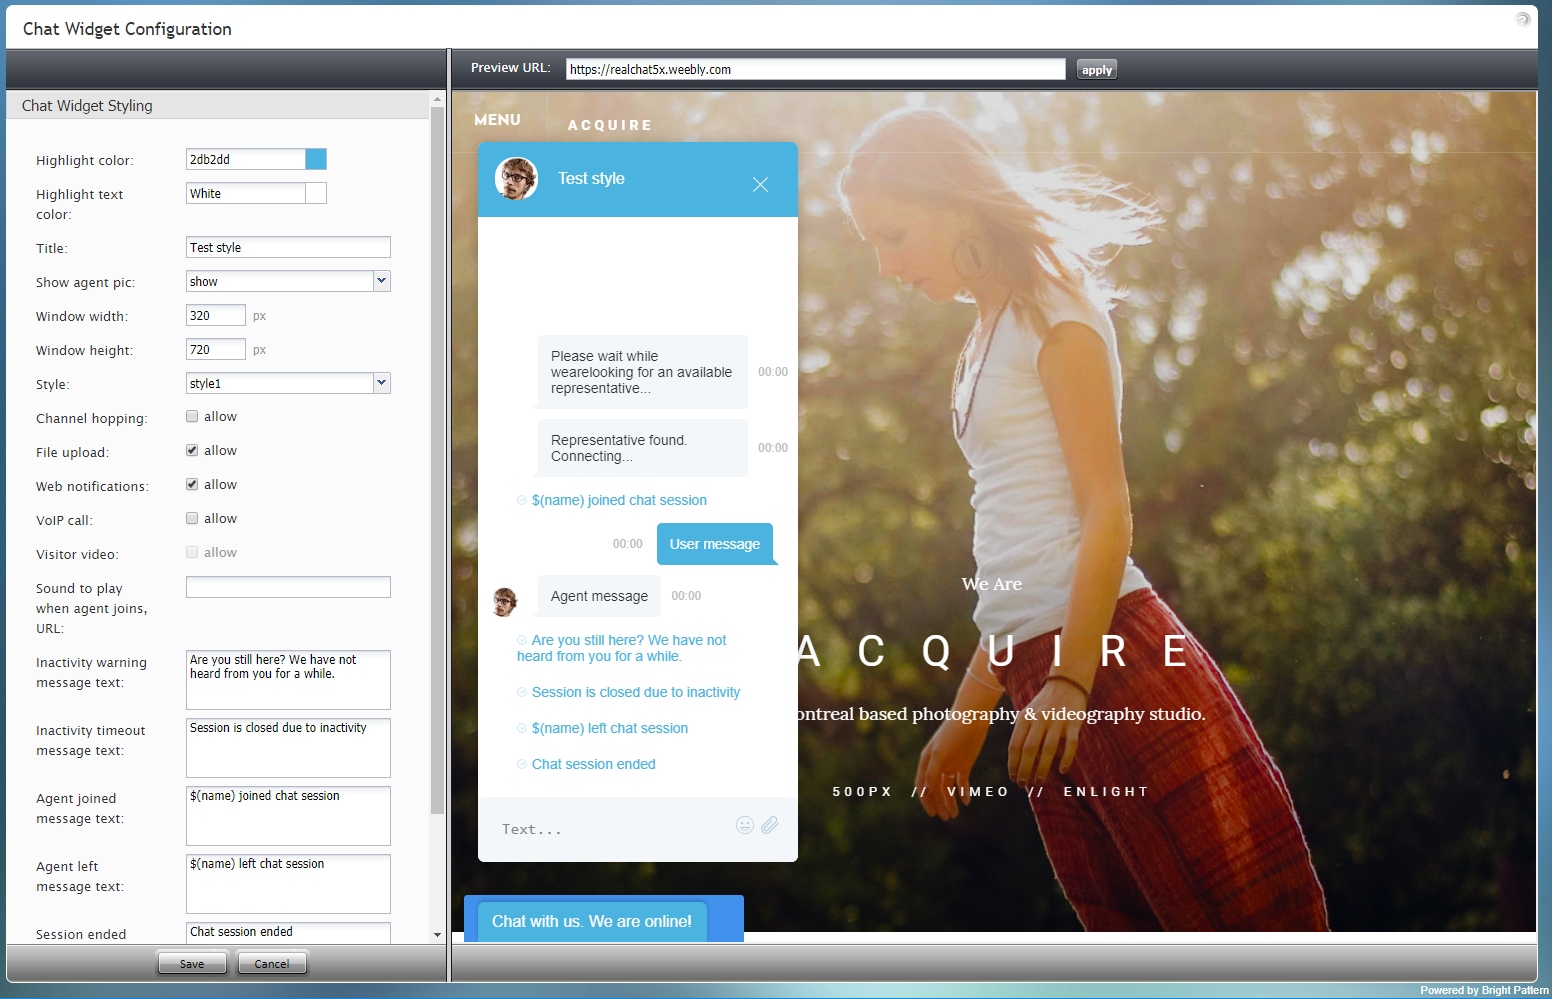
Chat Widget Configuration editor in new browser tab/window - At the bottom of the screen, click Save.


Step 5: Add a Contact Tab
In order for this chat scenario entry to work, you must add a contact tab for the chat widget. If you don’t do this, your webpage will not display the chat widget!
- Click on the Chat widget tab.
- Beneath Chat Initiation via Contact Tabs, click add.
Add a new contact tab - The Chat Widget Configuration editor will open in a new browser tab or window. Edit the properties and fields as desired.
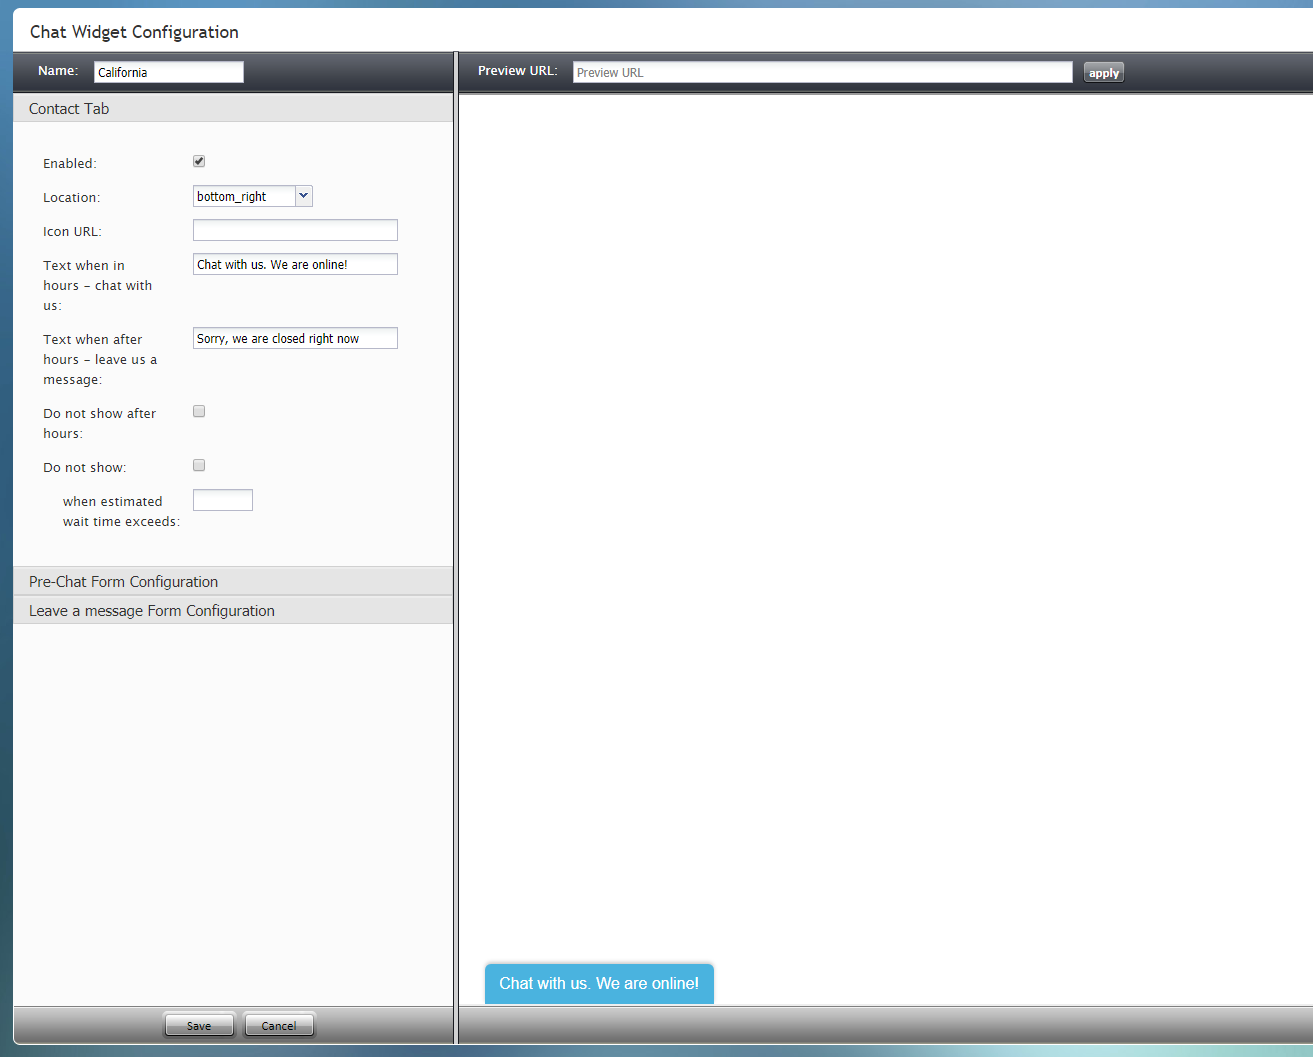
Chat Widget Configuration editor in new browser tab/window - Optional: To preview how the contact tab will look on your webpage, enter your URL in the Preview URL field and click Apply. Your webpage will load on the screen with the contact tab on it, and you will be asked to confirm whether you see the content.
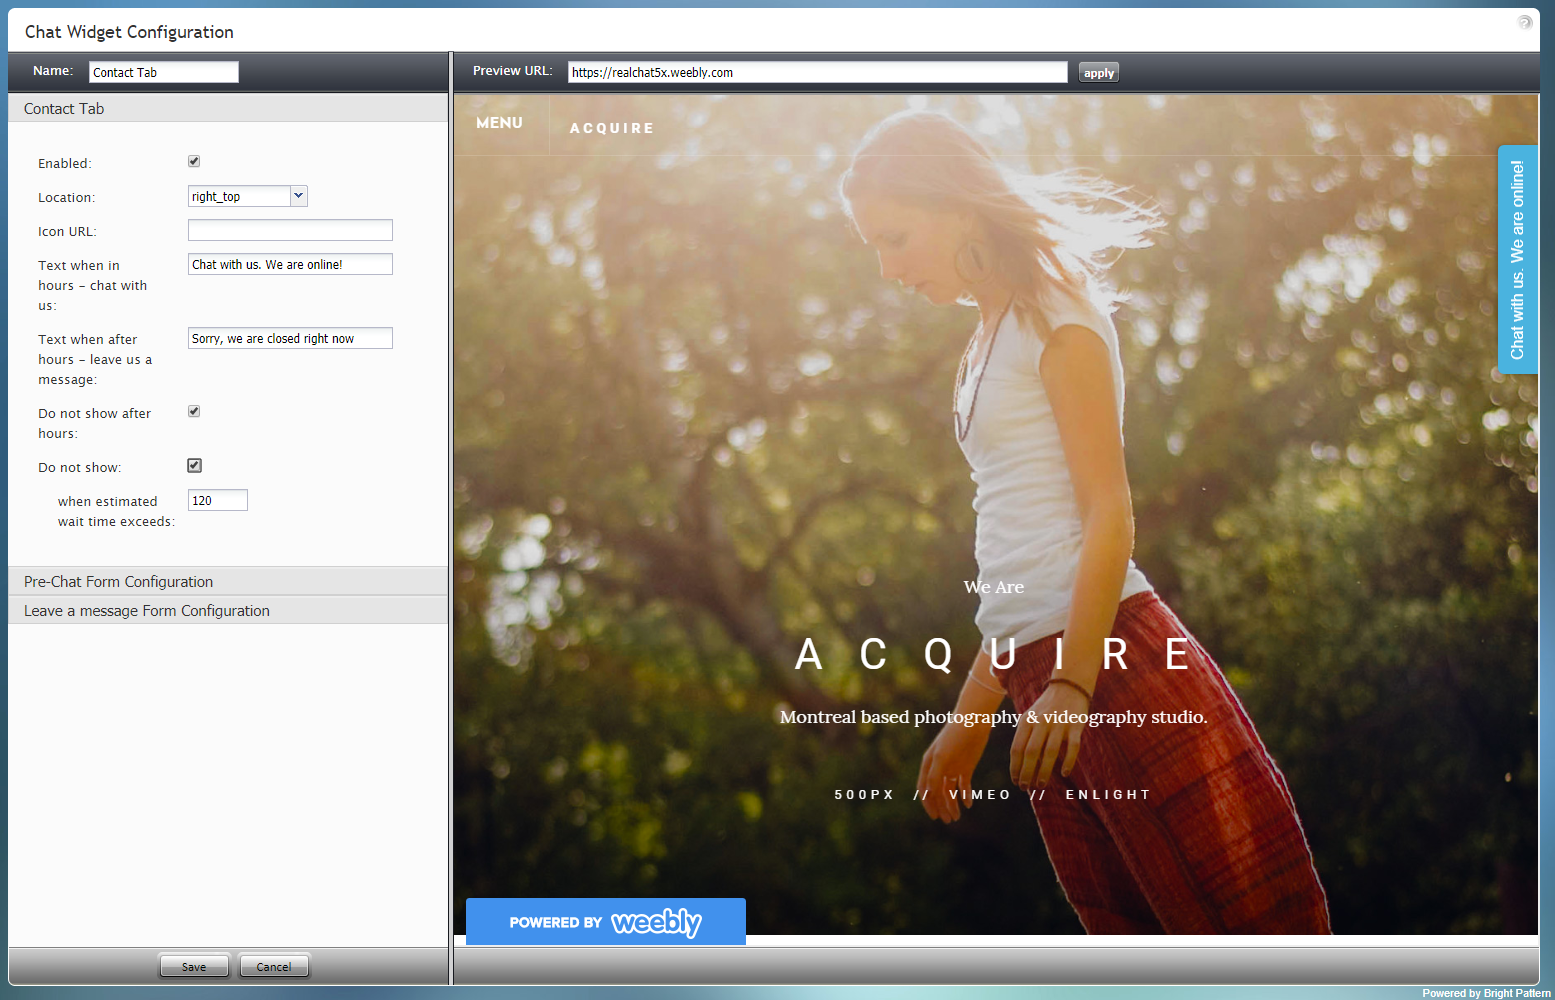
Example preview URL shows the webpage but not the chat widget
Some websites are protected from being embedded into third-party websites; if this is the case, you will see the message “Chat widget not found!” in red. To preview the contact tab without your webpage displayed, leave the Preview URL field empty.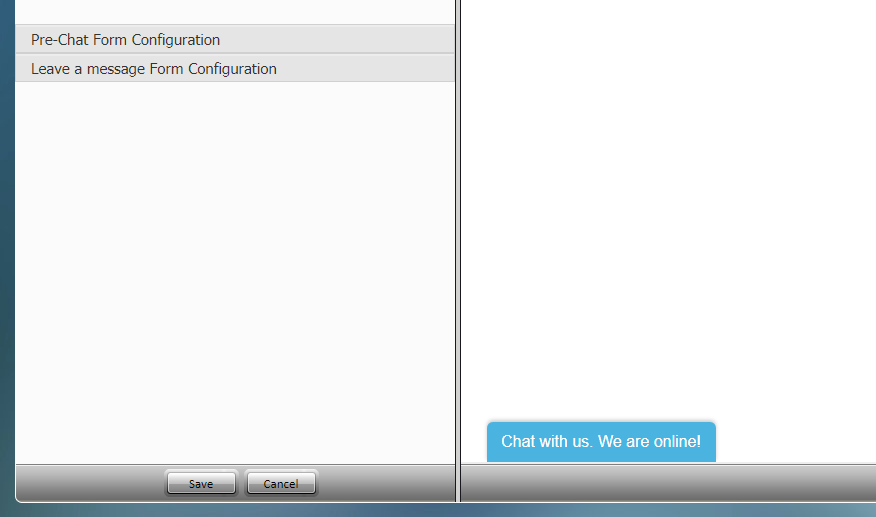
When left empty, Preview URL shows no webpage content - Required: At the most basic level, these actions are required right now:
* Name - The unique name (any) for this new contact tab
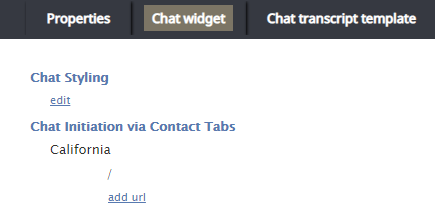
* Save - Click to save changes - Back in the Chat widget tab, go to Chat Initiation via Contact Tabs.
- Beneath the contact tab you just added, click add url.
Make sure you add the URL of your webpage - Enter the path relative to your root, being sure to exclude port, domain, protocol. For example, for https://mysite.com:8443/folder/folder/page.html, you could enter /folder or /folder/folder or /folder/folder/page.html. Click the green checkmark to apply your changes.
- Optional: At this time, you may add or edit any of the other Chat widget tab sections. You can always come back to this for further changes.
- At the bottom of the screen, click Apply to save your changes.


Step 6: Get the HTML
- Go back to Properties tab > Web HTML snippet.
- Click the HTML snippet button. The HTML snippet is the code for the chat widget you just configured.

In the Properties tab, click "HTML snippet" - The HTML Snippet for Web Page dialog will open.
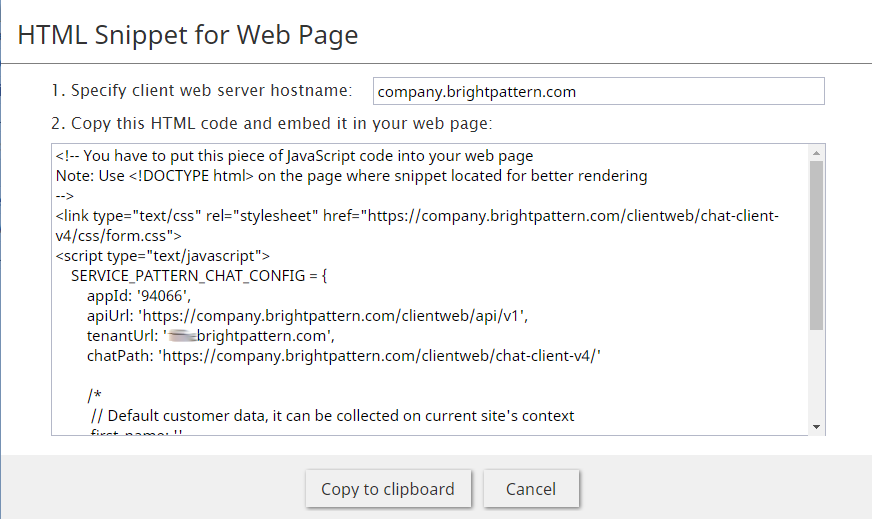
HTML Snippet for Web Page dialog - In the field Specify client web server hostname, enter your contact center’s name (i.e., “company.brightpattern.com”). If you don’t know what it is, look at the URL of your Contact Center Administrator application in the web browser. The hostname is the name that appears before “/admin”.

Example of client web server hostname in browser address field - Click Copy to clipboard to copy the HTML. This is the code of the chat widget.
- Paste the HTML onto the appropriate place on your webpage and publish. The chat widget contact tab (and any other chat widget elements that you added in chat widget configuration) will appear on the page.
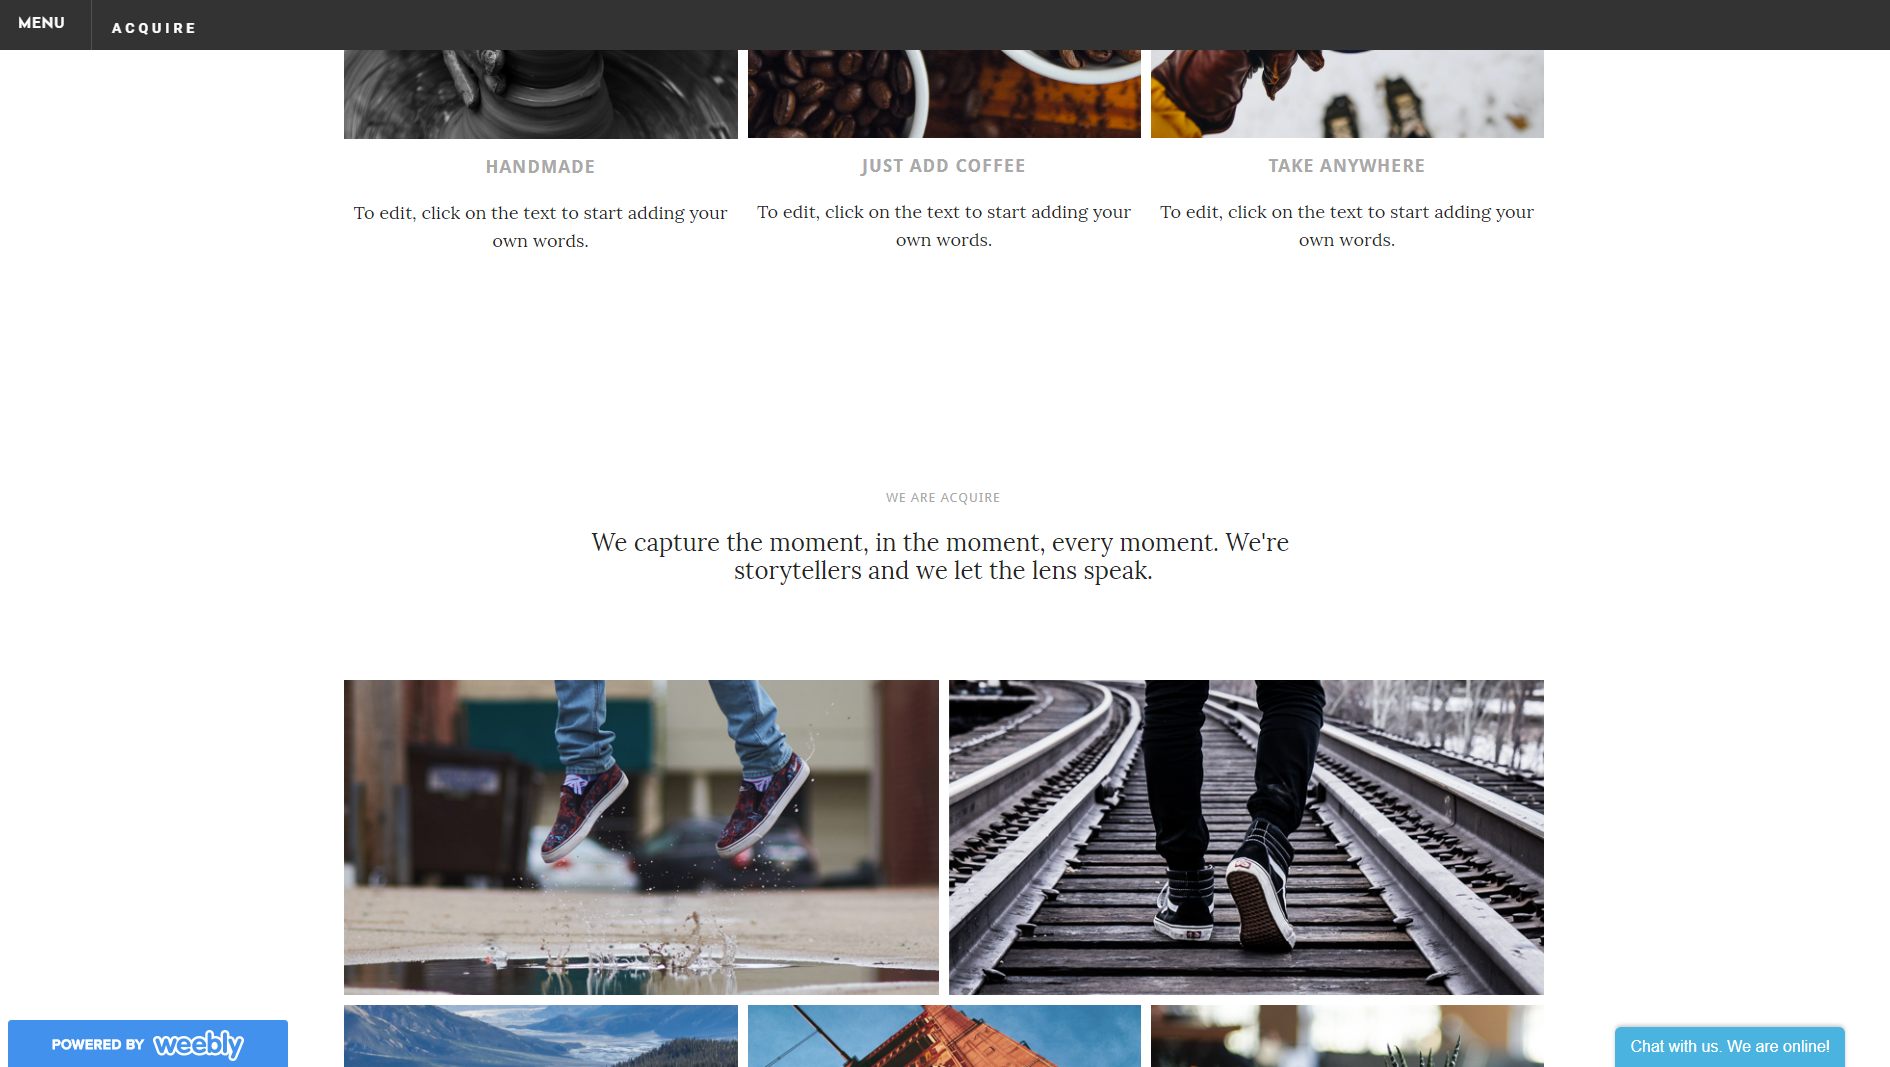
Chat widget on an example webpage


On the webpage, clicking on the contact tab will expand the widget.

If you do not see the chat widget on your page, revisit the previous steps of this procedure and try again.
For more information on chat widget configuration, see the Chat Widget Configuration Guide.
Chat Widget Auto-Start
You may configure the chat widget to initiate a chat session automatically upon a webpage loading. With this configuration, no customer action is required to launch the widget and, when the webpage is loaded, the chat automatically connects to an agent or the queue.
To do this, follow these steps:
- Open the HTML Snippet for Web Page.
- Paste the copied HTML into a text editing application (e.g., Notepad++) to edit it.
- In the "Service Pattern Chat Config" object, add the attribute autostartChat with the value true. Note that the default value is false.
- Copy all and paste the edited HTML onto your web page.
- Publish the webpage and refresh any active chats.
The following is an example of how this looks in the HTML Snippet for Web Page.
SERVICE_PATTERN_CHAT_CONFIG = {
        ...
        autostartChat: true,
        ...
};