提供: Bright Pattern Documentation
(Created page with "グループチャットを行うには、以下の手順に従ってください:") |
(Created page with "#チャットセッションパネルの追加アイコン 26pxをクリックします。 # 表示される'''招待'''ウィンドウで...") |
||
| Line 7: | Line 7: | ||
グループチャットを行うには、以下の手順に従ってください: | グループチャットを行うには、以下の手順に従ってください: | ||
| − | # | + | #チャットセッションパネルの追加アイコン [[File:Invite-Button.png|26px|Add icon]]をクリックします。 |
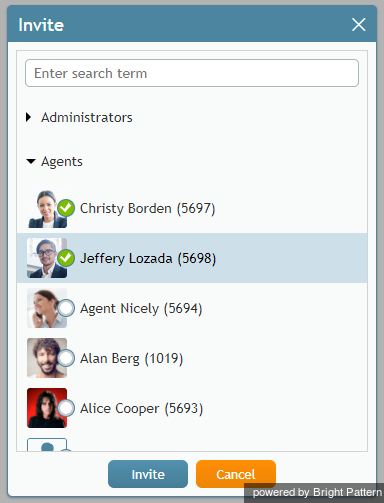
| − | # | + | # 表示される'''招待'''ウィンドウで、チャットに招待するエージェントを指定します。 |
| − | # | + | #'''Ok'''をクリックします。エージェントはチャットに追加され、三者間でチャットできます。 |
Revision as of 14:59, 13 September 2018
• English
• 5.19 • 5.2
チャットセッションの転送
あらゆる理由で、チャットのやりとりを他のエージェントまたはスーパバイザに転送したい場合や、グループチャットに切り替えたい(他のエージェントやスーパーバイザをチャットに招待するなど)場合があります。
他のエージェントへのチャット転送、グループチャットの実行
エージェントは、処理中のチャットセッションに他のエージェントを招待すること及び/またはセッションを他のエージェントに転送することができます。他のエージェントを招待する前に、社内チャットまたは社内電話を通じてこのエージェントに連絡し、招待または転送の可否を確認しなければなりません。
グループチャットを行うには、以下の手順に従ってください:
- チャットセッションパネルの追加アイコン
 をクリックします。
 - 表示される招待ウィンドウで、チャットに招待するエージェントを指定します。
- Okをクリックします。エージェントはチャットに追加され、三者間でチャットできます。
To transfer the chat session completely to another agent, follow these steps:
- Set up a chat conference as explained in the previous set of steps.
- Upon confirmation that the new agent is connected to the chat, click the End Chat button in the Contact Info Panel to leave the chat session.
- The other agent will continue the chat conversation with the customer.
Transferring to a Service Queue
You can transfer your chat session to a service queue in a similar way.
To transfer your chat to a queue, follow these steps:
- In the chat session pane, click the add icon
 .
. - In the window that appears, select the desired service queue and click Ok. At this point, you will still be connected to the chat session and, depending on the queue configuration, you may see an automated message sent from that queue to the customer.
- Click the End Chat button in the Contact Info Panel to leave the chat session. The session will remain in the service queue to be connected to another agent.
< 前へ | 次へ >

