電子メールの既定のフォントの変更
エージェントは、電子メールの返信及び下書きに使われるフォントを任意で設定できます。フォントのタイプ・サイズ・テキスト色は、エージェントデスクトップの 設定で変更できます。
ステップ 1:設定を更新します。
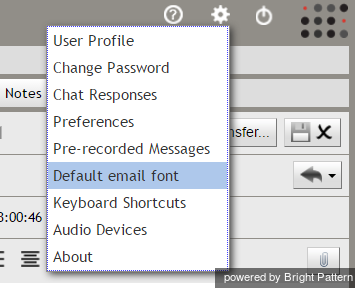
To customize your email font, navigate to Settings and select Default email font.
Step 2: Select desired font style.
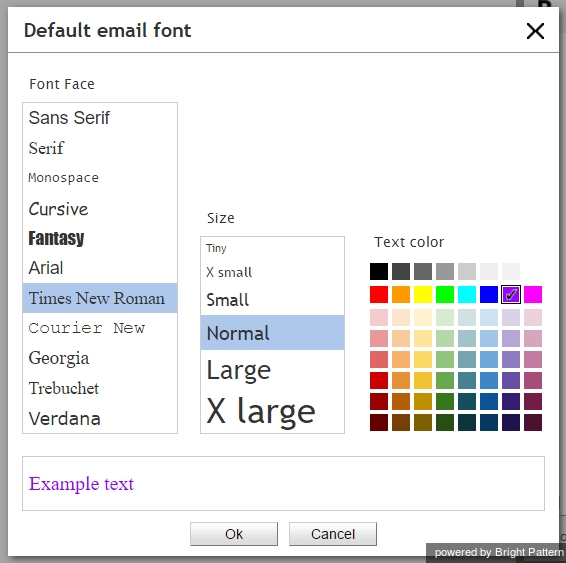
The following dialog box will pop up, offering a selection of font face, size and face color. Select and preview the desired font face, size, and color. Then click Ok to save your changes. Your default email font settings will be saved and applied to all new drafts and replies.
Step 3: View new font settings in email drafts and replies.
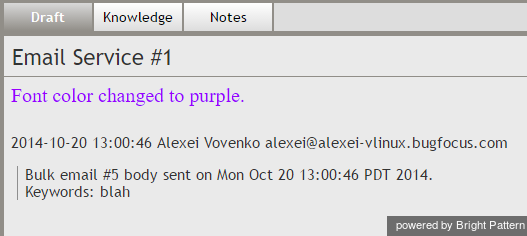
To check that your new email font settings have been applied, open a new draft or a reply to a message. When a new draft is opened or when a reply is started, the font in draft is automatically set to your default font.
If you remove font formatting from a selection of pasted text, the font will return to the user default as specified in Settings. When you receive an email as a transfer from queue with the existing draft in place, the font in the draft does not change unless you remove font formatting manually.


